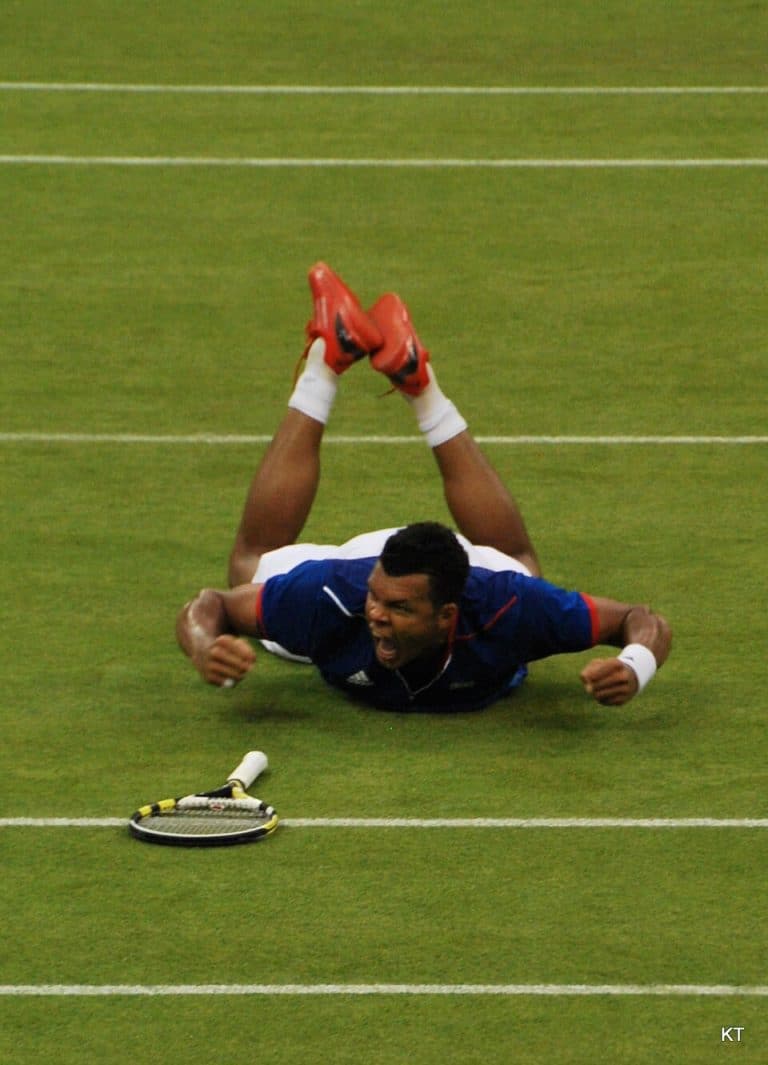
BH Slice → Approach → BH Volley · Court-level-front
Jo-Wilfried Tsonga's backhand slice approach shot from the center of the court, filmed from a court-level front angle. After the slice, he continues moving forward with his weight driving into the court and his hands coming back up into a compact ready position as he prepares for the backhand volley.
|
|
8s |
FH Approach → BH Volley · Court-level-front #1
Jo-Wilfried Tsonga's forehand approach shot from a central position, filmed from a court-level front angle. His shoulders rotate aggressively ahead of the hips on the forward swing, with a pronounced trunk uncoil that continues through the shot into his movement toward the net.
|
|
6.5s |
FH Approach → BH Volley · Court-level-front #2
Jo-Wilfried Tsonga's forehand approach and backhand volley from the center of the court, filmed from a court-level front angle. The racket face on both shots is clearly visible, with the forehand contact made slightly in front of his body and the backhand volley struck with a firm, slightly open face to keep the ball low and controlled.
|
|
7.3s |
FH Approach → OH · Court-level-front #1
Jo-Wilfried Tsonga's forehand approach shot followed by an overhead from the center of the court, filmed from a court-level front angle. At contact on the forehand, his racket face is slightly closed with the ball meeting the strings around waist height before the swing accelerates upward into the court.
|
|
6.9s |
FH Approach → OH · Court-level-front #2
Jo-Wilfried Tsonga's forehand approach shot followed by an overhead from the center of the court, filmed from a front court-level angle. At contact on the forehand, his racket face is slightly closed with the ball struck around waist height before he accelerates the racket head upward into position for the overhead.
|
|
7.6s |
FH Approach → OH → FH Volley · Court-level-front
Jo-Wilfried Tsonga's forehand approach and overhead into a forehand volley from the center of the court, filmed from a court-level front angle. After contact he drives his weight forward through the court, with his non-hitting hand tucking in as he quickly resets the racquet in front of his body to recover for the next ball.
|
|
10.5s |
BH Slice → Approach → FH Volley · Court-level-rear
Jo-Wilfried Tsonga's backhand slice approach followed by a forehand volley from the center of the court, filmed from a court-level rear angle. His footwork features a quick adjustment shuffle into the slice from a neutral stance, then a forward crossover step pattern as he transitions to net position for the volley.
|
|
10s |
FH Approach → FH Volley · Court-level-rear
Jo-Wilfried Tsonga's forehand approach shot followed by a forehand volley from the center of the court, filmed from a court-level rear angle. His semi-western forehand grip sets up clear wrist lag on the approach, while the volley shifts to a firm continental grip with a stable wrist and minimal post-contact movement.
|
|
8.4s |
BH Slice → Approach → FH Volley · Front
Jo-Wilfried Tsonga's backhand slice approach and forehand volley from the front. The racket face stays slightly open at contact on the slice, with the ball struck around waist height before the forehand volley is taken in front of his body with a compact, firm racket position.
|
|
5.1s |
FH Approach → FH Volley · Front #1
Jo-Wilfried Tsonga's forehand approach shot from the center of the court, filmed from a front angle. His strong knee bend into the loading phase and aggressive push off the right leg create noticeable upward drive through the hips as he moves forward into the court.
|
|
6.6s |
FH Approach → FH Volley · Front #2
Jo-Wilfried Tsonga's forehand approach shot from a central position, filmed from the front. His aggressive hip turn into the court is supported by a strong knee bend and forward-driving right leg that propels him toward the net after contact.
|
|
6.5s |
FH Approach → BH Volley → FH Volley · Rear
Jo-Wilfried Tsonga's forehand approach followed by a backhand volley and forehand volley from a central position, filmed from the rear. He uses a quick split step into aggressive forward crossover steps, setting up in a slightly open stance on the approach before adjusting with small recovery steps to close in tight to the net.
|
|
9.6s |
FH Approach → BH Volley · Rear
Jo-Wilfried Tsonga's forehand approach followed by a backhand volley from a central position, filmed from the rear. His quick adjustment steps into an open stance on the forehand and immediate crossover recovery toward the net are clearly visible from this angle.
|
|
12.2s |
FH Approach → OH · Rear
Jo-Wilfried Tsonga's forehand approach shot followed by an overhead from the center of the court, filmed from a rear angle. His semi-western forehand grip is evident with pronounced wrist lag on the approach, followed by a relaxed continental grip and firm wrist set as he transitions into the overhead.
|
|
7.4s |
FH Approach → BH Drop Volley · Side
Jo-Wilfried Tsonga's forehand approach followed by a backhand drop volley from mid-court, filmed from the side. His semi-western forehand grip sets up visible wrist lag through the forward swing, while on the backhand drop volley his continental grip keeps the wrist relatively firm with a subtle softening right at contact.
|
|
5.4s |
FH Approach → BH Volley · Side #1
Jo-Wilfried Tsonga's forehand approach shot followed by a backhand volley from the side, filmed from a side angle. After contact on the forehand, he drives his weight forward into the court and quickly brings both hands back up in front of his body to reset for the backhand volley.
|
|
5.4s |
FH Approach → BH Volley · Side #2
Jo-Wilfried Tsonga's forehand approach and backhand volley from the side, filmed from a side angle. His shoulders load with a pronounced coil before the forehand, then uncoil into contact as the trunk continues rotating forward into the backhand volley, showing a clear sequential transfer from torso to arms.
|
|
6.7s |
FH Approach → BH Volley · Side #3
Jo-Wilfried Tsonga's forehand approach and backhand volley sequence from mid-court, filmed from the side. His hips stay low with a pronounced knee bend on the forehand load, then drive forward as his legs extend into the court to support an aggressive move toward the net.
|
|
7s |
FH Approach → FH Short → FH Volley · Side
Jo-Wilfried Tsonga's forehand approach shot from a neutral court position, filmed from the side. His deep knee bend and aggressive forward leg drive into the court are clearly visible as his hips open toward the net during the approach.
|
|
8.5s |
FH Approach → FH Volley → BH Slice Moves Back · Side
Jo-Wilfried Tsonga's forehand approach shot followed by a forehand volley and backhand slice while moving back from the center of the court, filmed from the side. His follow-through carries his momentum forward into the court before he quickly regroups with his non-hitting hand helping the racquet return to a neutral ready position as he recovers.
|
|
10.7s |
FH Approach → FH Volley · Side #1
Jo-Wilfried Tsonga's forehand approach shot from a neutral court position, filmed from the side. His follow-through finishes high with the hitting arm extending forward as his weight drives into the court, and he quickly brings both hands back toward the racket to transition into a compact ready position for the next volley.
|
|
7.5s |
FH Approach → FH Volley · Side #2
Jo-Wilfried Tsonga's forehand approach shot from a neutral court position, filmed from a side angle. His shoulders load with a pronounced turn relative to his hips before uncoiling in sequence, with the trunk rotation clearly leading the arm swing into contact.
|
|
7.7s |
FH Approach → OH → FH Volley · Side
Jo-Wilfried Tsonga's forehand approach and overhead from the center of the court, filmed from the side. His shoulders load with a pronounced trunk coil on the approach forehand, then uncoil upward and forward into the overhead, showing a clear sequential rotation from hips to shoulders.
|
|
12.7s |
FH Approach → OH · Side #1
Jo-Wilfried Tsonga's forehand approach shot and overhead from the center of the court, filmed from the side. He uses a quick adjustment hop into an open stance on the approach, then takes a few explosive forward steps to position for the overhead before landing with a balanced recovery step toward the baseline.
|
|
10.3s |
FH Approach → OH · Side #2
Jo-Wilfried Tsonga's forehand approach shot transitioning into an overhead from the side. His semi-western forehand grip is visible with pronounced wrist lag on the approach, followed by a firm continental grip and strong wrist pronation as he strikes the overhead.
|
|
8.8s |
FH Approach → OH · Side #3
Jo-Wilfried Tsonga's forehand approach and overhead from the center of the court, filmed from the side. The side view makes the steep upward swing path and slightly closed racket face on the forehand approach, followed by the fully extended racket at overhead contact well above his head, very clear.
|
|
8.1s |
BH Center · Court-level-front · Closed
Jo-Wilfried Tsonga's backhand from the center of the court in a closed stance, filmed from a court-level front angle. His racket contacts the ball slightly in front of his body with a relatively square face and a steep upward swing path, producing strong racket head acceleration through contact.
|
|
2.5s |
BH Center · Court-level-front · Neutral #1
Jo-Wilfried Tsonga's backhand from the center of the court in a neutral stance, filmed from a front court-level angle. His hips stay relatively square to the net with a pronounced knee bend on the loading leg, and he drives upward through both legs to extend fully into contact.
|
|
2.8s |
BH Center · Court-level-front · Neutral #2
Jo-Wilfried Tsonga's backhand from the center of the court in a neutral stance, filmed from a front court-level angle. His hips stay relatively square to the net with a strong knee bend that loads both legs evenly before driving up and through the shot.
|
|
2.4s |
BH Moves Back · Court-level-front #1
Jo-Wilfried Tsonga's backhand while moving back from a neutral position, filmed from a court-level front angle. His hips stay relatively closed as he retreats, with a pronounced knee bend on the outside leg that loads before he drives upward and slightly forward into the shot.
|
|
3.3s |
BH Moves Back · Court-level-front #2
Jo-Wilfried Tsonga's backhand while moving back from a neutral position, filmed from a court-level front angle. His hips stay relatively closed to the net as he retreats, with a pronounced knee bend and strong push off the outside leg to stabilize before swinging.
|
|
3.7s |
BH Moves Back · Court-level-front #3
Jo-Wilfried Tsonga's backhand while moving back from a neutral position, filmed from a court_level front angle. His shoulders rotate as a unit with the trunk on the unit turn, then uncoil together through contact with limited independent shoulder rotation relative to the torso.
|
|
3.1s |
BH Running · Court-level-front · Closed #1
Jo-Wilfried Tsonga's running two-handed backhand from a closed stance on the run, filmed from a court-level front angle. His shoulders and trunk show a pronounced coil against the direction of movement, then uncoil in sequence with the hips to drive the racket through contact despite his forward momentum.
|
|
3s |
BH Running · Court-level-front · Closed #2
Jo-Wilfried Tsonga's running two-handed backhand from a closed stance on the run, filmed from a court-level front angle. His contact point is slightly in front of his body with the racket face relatively square to the ball, and the racket head accelerates sharply upward along a steep low-to-high path.
|
|
2.9s |
BH Running · Court-level-front · Closed #3
Jo-Wilfried Tsonga's running two-handed backhand from a closed stance on the run, filmed from a court-level front angle. His relatively relaxed top hand grip with a firm supporting bottom hand creates noticeable wrist lag on the dominant hand before a sharp, late wrist release into contact.
|
|
2.6s |
BH Running · Court-level-front #1
Jo-Wilfried Tsonga's running backhand from the center of the court, filmed from a court-level front angle. His two-handed backhand contact is struck around waist height with a slightly closed racket face and a steep upward swing path to add heavy topspin.
|
|
3s |
BH Running · Court-level-front #2
Jo-Wilfried Tsonga's running backhand from a central court position, filmed from a court-level front angle. After contact he extends his two-handed follow-through high across his body while his weight continues moving forward into the court, bringing his feet back toward a neutral ready position.
|
|
2.8s |
BH Running · Court-level-front · Open #1
Jo-Wilfried Tsonga's running two-handed backhand from an open stance on the ad side, filmed from a court-level front angle. His semi-western left-hand grip and firm right-hand support create a pronounced wrist lag on the takeback that unwinds into a strong, synchronized wrist release through contact.
|
|
2.9s |
BH Running · Court-level-front · Open #2
Jo-Wilfried Tsonga's running backhand from the center of the court, filmed from a court-level front angle. His feet land in a wide open stance as he moves laterally, with a pronounced last adjustment step before planting and then a quick crossover recovery back toward the middle.
|
|
2.7s |
BH Running · Court-level-front · Open #3
Jo-Wilfried Tsonga's running backhand from the center of the court, filmed from a court-level front angle. His open stance is clear as he plants his outside foot wide while moving laterally, then uses a quick crossover recovery step to get back toward the middle after contact.
|
|
2.8s |
BH Running · Court-level-front · Open #4
Jo-Wilfried Tsonga's running backhand from the front court level angle. His open stance is clear as he plants his outside foot wide while moving laterally, then uses quick recovery steps to push back toward the center after contact.
|
|
2.3s |
BH Short · Court-level-front #1
Jo-Wilfried Tsonga's backhand from the short court, filmed from a front court-level angle. His shoulders and trunk load together into a compact coil, then uncoil in sequence with a noticeable chest rotation toward the net as the racquet drives through contact.
|
|
4.2s |
BH Short · Court-level-front #2
Jo-Wilfried Tsonga's backhand from the short court, filmed from a front court-level angle. His compact split step into a neutral stance is followed by a quick weight transfer onto the front foot, with small adjustment steps used to line up the ball in the mid-court position.
|
|
2.3s |
BH Wide · Court-level-front · Closed
Jo-Wilfried Tsonga's backhand from a wide ball in a closed stance, filmed from a court-level front angle. His hips stay relatively closed to the net while his knees sink into a deep bend, giving a strong base for pushing off the outside leg into the shot.
|
|
3s |
BH Wide · Court-level-front · Closed #1
Jo-Wilfried Tsonga's wide backhand from a closed stance on the baseline, filmed from a court-level front angle. His shoulders rotate significantly past his hips on the unit turn, then the trunk uncoils ahead of the arms to drive the racquet through contact.
|
|
2.6s |
BH Wide · Court-level-front · Closed #2
Jo-Wilfried Tsonga's wide backhand from a closed stance on the baseline, filmed from a court-level front angle. His shoulders rotate well past perpendicular to the net on the unit turn, then the trunk uncoils ahead of the arms to drive the racquet through contact.
|
|
2.9s |
BH Wide · Court-level-front · Closed #3
Jo-Wilfried Tsonga's backhand from a wide position in a closed stance, filmed from a court-level front angle. His hips stay closed to the net as his knees flex deeply on the outside leg, loading before driving laterally into the shot.
|
|
3s |
BH Wide · Court-level-front · Closed #4
Jo-Wilfried Tsonga's wide backhand from a closed stance on the baseline, filmed from a front court-level angle. His shoulders rotate well past perpendicular to the net on the unit turn, then his trunk uncoils aggressively ahead of the arms, creating a clear sequence from hip and torso rotation into the two-handed swing.
|
|
2.7s |
BH Wide · Court-level-front #1
Jo-Wilfried Tsonga's wide backhand from a neutral court position, filmed from a court-level front angle. His shoulders turn early as his trunk coils against the hips, then uncoil in sequence so the chest squares to the net only at contact.
|
|
2.6s |
BH Wide · Court-level-front #2
Jo-Wilfried Tsonga's wide backhand from the center of the court, filmed from a front court-level angle. His two-handed grip is clearly visible, with a firm left-hand dominance and a laid-back wrist position that straightens through contact for added racket-head speed.
|
|
3.3s |
BH Wide · Court-level-front #3
Jo-Wilfried Tsonga's wide backhand from a central position, filmed from a court-level front angle. His two-handed grip is clearly visible, with the non-dominant (left) hand driving the stroke as his wrists stay firm through contact before relaxing slightly in the follow-through.
|
|
3.2s |
BH Wide · Court-level-front · Neutral #1
Jo-Wilfried Tsonga's backhand from a wide neutral-stance position, filmed from a court-level front angle. His hips stay relatively closed as he loads, with a deep knee bend on the outside leg providing a strong base before he drives upward and across into the shot.
|
|
2.3s |
BH Wide · Court-level-front · Neutral #2
Jo-Wilfried Tsonga's backhand from a wide neutral-stance position, filmed from a court-level front angle. His two-handed backhand grip shows a firm top hand with noticeable wrist lag on the dominant (right) hand that straightens through contact.
|
|
2.4s |
BH Wide · Court-level-front · Open
Jo-Wilfried Tsonga's wide backhand from an open stance, filmed from a court-level front angle. His hips stay relatively open to the net while his knees sink into a deep bend, and he drives upward strongly off his outside leg to reach and stabilize for the wide ball.
|
|
3.3s |
BH Center · Court-level-rear
Jo-Wilfried Tsonga's backhand from the center of the court, filmed from a rear court-level angle. His two-handed grip stays compact with a noticeable laid-back wrist position on the racquet-hand side that firms up into a strong, stable wrist at contact.
|
|
2.7s |
BH Center · Court-level-rear · Open
Jo-Wilfried Tsonga's backhand from the center of the court in an open stance, filmed from a court-level rear angle. His feet stay wider than shoulder-width with a clear open base as he loads on the outside leg, then uses a small recovery hop to re-center after contact.
|
|
2.4s |
BH Moves Back · Court-level-rear · Closed
Jo-Wilfried Tsonga's backhand from a neutral position moving back in a closed stance, filmed from a court-level rear angle. His shoulders rotate well past perpendicular to the baseline on the unit turn, then the trunk uncoils sequentially from hips to shoulders through contact, making the degree of upper-body rotation easy to compare between preparation and follow-through.
|
|
2.9s |
BH Moves Back · Court-level-rear #1
Jo-Wilfried Tsonga's backhand while moving back from a neutral position, filmed from a court-level rear angle. At contact his racket face stays relatively square to the baseline with the ball struck around waist height, and the racket head accelerates steeply upward along the target line.
|
|
2.2s |
BH Moves Back · Court-level-rear #2
Jo-Wilfried Tsonga's backhand while moving back from a neutral position, filmed from a court-level rear angle. His shoulders and trunk load with a pronounced coil on the unit turn, then uncoil in sequence from hips to shoulders, with the rear shoulder clearly rotating through toward the contact zone.
|
|
2.5s |
BH Moves Back · Court-level-rear · Open #1
Jo-Wilfried Tsonga's backhand from an open stance while moving back, filmed from a rear court-level angle. From this view, his two-handed backhand grip shows the non-dominant (left) hand taking control at the top of the handle while the dominant (right) wrist stays laid back and firm through contact with minimal post-impact wrist roll.
|
|
3.1s |
BH Moves Back · Court-level-rear · Open #2
Jo-Wilfried Tsonga's backhand while moving back from a neutral position, filmed from a court-level rear angle. His open stance is clear as he retreats with small adjustment steps, plants both feet wide apart, and then uses a strong push off the outside leg to stabilize before and during the swing.
|
|
2.8s |
BH Running · Arm-action · Court-level-rear #1
Jo-Wilfried Tsonga's running backhand from the center of the court, filmed from a court-level rear angle. His quick adjustment steps into the shot lead into a slightly open stance, with his feet still moving through contact as he continues his lateral recovery.
|
|
2.4s |
BH Running · Arm-action · Court-level-rear #2
Jo-Wilfried Tsonga's running two-handed backhand from a neutral court position, filmed from a court-level rear angle. His shoulders stay closed longer than his hips during the run-up, then the trunk uncoils sharply through contact with the non-dominant shoulder driving the rotation.
|
|
2.5s |
BH Running · Court-level-rear
Jo-Wilfried Tsonga's running backhand from a neutral court position, filmed from a court-level rear angle. His shoulders and trunk coil strongly against his hip line during the sprint, then uncoil in a pronounced sequence where the torso rotation clearly leads the racquet release through contact.
|
|
2.8s |
BH Running · Court-level-rear · Open
Jo-Wilfried Tsonga's running backhand from a neutral court position, filmed from a court-level rear angle. He plants in an open stance with his outside foot bracing as he moves laterally, then uses quick recovery steps to push back toward the center after contact.
|
|
2.8s |
BH Running · Court-level-rear · Open #1
Jo-Wilfried Tsonga's running two-handed backhand from an open stance on the deuce side, filmed from a court-level rear angle. His contact point is taken slightly in front of his body with the racket face relatively square to the baseline, and the racket head accelerates upward on a steep path for heavy topspin.
|
|
2.5s |
BH Running · Court-level-rear · Open #2
Jo-Wilfried Tsonga's running two-handed backhand in open stance from the deuce side, filmed from a court-level rear angle. His racket contacts the ball slightly above net height with a closed racket face and a steep low-to-high swing path, producing noticeable racket head acceleration through contact.
|
|
2.5s |
BH Running · Court-level-rear · Open #3
Jo-Wilfried Tsonga's running two-handed backhand from a neutral position, filmed from a court-level rear angle. After contact he lets the racquet wrap high over his right shoulder while his weight lands on the outside leg, then quickly drops the racquet and brings both hands back toward a ready position as he recovers to the center.
|
|
3s |
BH Running · Court-level-rear · Open #4
Jo-Wilfried Tsonga's running two-handed backhand from an open stance on the ad side, filmed from a court-level rear angle. His dominant right hand appears to guide the racquet with a relatively relaxed grip while the left wrist stays firm and stable through contact, limiting excessive wrist snap.
|
|
2.5s |
BH Short · Court-level-rear #1
Jo-Wilfried Tsonga's backhand from the short court, filmed from a rear court-level angle. His hips stay relatively closed with a pronounced knee bend on the outside leg, then drive upward as both legs extend through contact to push his body into the court.
|
|
2.9s |
BH Short · Court-level-rear #2
Jo-Wilfried Tsonga's backhand from the short court, filmed from a court-level rear angle. His shoulders turn as a single unit with the trunk on the unit turn, then uncoil aggressively through contact with the chest rotating toward the net while the non-dominant arm helps control trunk rotation.
|
|
3.6s |
BH Wide · Arm-action · Court-level-rear #1
Jo-Wilfried Tsonga's backhand from the Deuce side, filmed from a court-level rear angle. His footwork features a quick crossover step to reach the wide ball, setting into a semi-open stance before using a strong outside leg push to recover back toward the center.
|
|
2.4s |
BH Wide · Arm-action · Court-level-rear #2
Jo-Wilfried Tsonga's wide backhand from the rear court, filmed from a court-level rear angle. From this view, his two-handed grip stays firm with a noticeable laid-back wrist position on the dominant hand that straightens through contact for added racket-head speed.
|
|
2.8s |
BH Wide · Court-level-rear · Closed #1
Jo-Wilfried Tsonga's backhand from a wide position, filmed from a court-level rear angle. His footwork features a strong lateral push out to the wide ball followed by a clearly closed stance, with his outside foot planting firmly before he drives into the shot.
|
|
4.3s |
BH Wide · Court-level-rear · Closed #2
Jo-Wilfried Tsonga's wide backhand from a closed stance, filmed from a court-level rear angle. His racket face is slightly closed at contact with the ball struck around waist height, and the rear view makes the upward, accelerating swing path and strong racket head speed very clear.
|
|
2.6s |
BH Wide · Court-level-rear #1
Jo-Wilfried Tsonga's backhand wide from the rear, filmed from a court_level angle. After contact his follow-through finishes high with the racquet over his right shoulder as he pushes off his outside leg and quickly brings both hands back toward a neutral ready position.
|
|
2.9s |
BH Wide · Court-level-rear #2
Jo-Wilfried Tsonga's wide backhand from the rear court level angle. After contact he finishes with the racquet wrapping high across his body while his weight drives back toward the center, bringing both hands quickly down into a compact ready position.
|
|
2.9s |
BH Wide · Court-level-rear · Neutral
Jo-Wilfried Tsonga's wide backhand from a neutral stance, filmed from a court-level rear angle. His two-handed grip is clearly visible, with the non-dominant (left) hand driving the racket and a firm but relaxed wrist structure that stays stable through contact before a subtle upward release.
|
|
2.3s |
BH Wide · Arm-action · Court-level-rear · Open #1
Jo-Wilfried Tsonga's wide backhand from an open stance, filmed from a court-level rear angle. His two-handed grip stays compact with the bottom hand driving the racquet while the top hand guides a firm but relaxed wrist that releases slightly through contact.
|
|
2.7s |
BH Wide · Arm-action · Court-level-rear · Open #2
Jo-Wilfried Tsonga's wide two-handed backhand from an open stance on the deuce side, filmed from a court-level rear angle. After contact his follow-through wraps high over his lead shoulder while his weight lands on the outside leg, and he quickly lets both hands drop back toward a neutral ready position as he recovers to the court.
|
|
2.3s |
BH Center · Arm-action · Front · 500fps
Jo-Wilfried Tsonga's backhand from the center of the court, filmed from the front. At contact his racket face is nearly square to the incoming ball with the contact point around waist height, and the racket head accelerates steeply upward along the swing path.
|
500 |
3.3s |
BH Center · Front · Neutral · 500fps #1
Jo-Wilfried Tsonga's backhand from the center of the court in a neutral stance, filmed from the front at 500 fps. His hips stay relatively closed through the load with a pronounced knee bend, then drive upward as both legs extend aggressively into the court during the forward swing.
|
500 |
2.7s |
BH Center · Front · Neutral · 500fps #2
Jo-Wilfried Tsonga's two-handed backhand from the center in a neutral stance, filmed from a front angle at 500 fps. After contact his follow-through finishes high with the racquet toward his target as his weight transfers onto his front foot and his non-hitting hand helps him quickly recover toward a ready position.
|
500 |
2.5s |
BH Center · Front · Open · 240fps
Jo-Wilfried Tsonga's two-handed backhand from the center of the court in an open stance, filmed from the front at 240 fps. At contact his racket face is slightly closed with the ball struck around waist height, and the slow motion makes the upward acceleration of the racket head along the swing path clearly visible.
|
240 |
1.8s |
BH Moves Back · Front · Open · 500fps #1
Jo-Wilfried Tsonga's two-handed backhand from an open stance, filmed from a front angle at 500 fps. From this view, you can clearly see his relatively relaxed bottom-hand grip combined with a firm top-hand hold, creating pronounced wrist lag that straightens through contact.
|
500 |
2.8s |
BH Moves Back · Front · Open · 500fps #2
Jo-Wilfried Tsonga's backhand from a central position, filmed from a front angle. His open stance shows strong knee flexion and a wide base as he loads, with the hips staying relatively square before uncoiling through contact.
|
500 |
1.3s |
BH Running · Front · Closed · 500fps #1
Jo-Wilfried Tsonga's running two-handed backhand from a closed stance, filmed from the front at 500 fps. His hips stay relatively closed to the net as his outside leg plants and drives, with a pronounced knee bend that loads the legs before extending through contact.
|
500 |
2.8s |
BH Running · Front · Closed · 500fps #2
Jo-Wilfried Tsonga's running two-handed backhand from a closed stance, filmed from the front at 500 fps. His shoulders rotate well past perpendicular to the net on the unit turn, then uncoil in sync with his trunk so the chest squares to the ball just before contact.
|
500 |
2.9s |
BH Running · Front · Closed · 500fps #3
Jo-Wilfried Tsonga's running two-handed backhand from a closed stance, filmed from the front at 500 fps. After contact his follow-through finishes high across his body while his weight continues moving forward into the court, and he quickly brings both hands back toward a neutral ready position.
|
500 |
2.3s |
BH Running · Front · Closed · 500fps #4
Jo-Wilfried Tsonga's running two-handed backhand from a closed stance, filmed from the front at 500 fps. His shoulders rotate aggressively past perpendicular to the net on the unit turn, then uncoil in sync with a rapid trunk rotation that clearly precedes the arm swing in the kinetic chain.
|
500 |
2.7s |
BH Running · Front · Closed · 240fps #5
Jo-Wilfried Tsonga's running two-handed backhand from a closed stance, filmed from the front at 240 fps. His hips stay closed to the net as his outside leg plants and drives, with a deep knee bend providing a strong base before he transfers weight through the shot.
|
240 |
2.7s |
BH Running · Front · Closed · 240fps #6
Jo-Wilfried Tsonga's running two-handed backhand from a closed stance, filmed from a front angle at 240 fps. His shoulders rotate well past perpendicular to the net on the unit turn, then the trunk uncoils ahead of the arms, showing clear separation between hip and shoulder rotation through contact.
|
240 |
2.7s |
BH Running · Front · Closed · 240fps #7
Jo-Wilfried Tsonga's running two-handed backhand from a closed stance, filmed from the front at 240 fps. His shoulders rotate well past perpendicular to the net on the unit turn, then uncoil in sync with a strong trunk rotation that clearly sequences from hips to torso before the arms release through contact.
|
240 |
2.8s |
BH Running · Front · Closed · 240fps #8
Jo-Wilfried Tsonga's running backhand from a closed stance, filmed from the front at 240 fps. His footwork includes a long crossover step into the ball before planting the front foot across his body, creating a distinctly closed alignment as he strikes.
|
240 |
2.5s |
BH Running · Front · Closed · 240fps #9
Jo-Wilfried Tsonga's running two-handed backhand from a closed stance, filmed from the front at 240 fps. The contact point is slightly in front of his body with the racket face close to vertical, and the slow motion angle makes the upward swing path and rapid acceleration of the racket head clearly visible.
|
240 |
1.9s |
BH Running · Front · Open · 500fps #1
Jo-Wilfried Tsonga's running two-handed backhand from an open stance, filmed from the front at 500 fps. His shoulders and trunk show a pronounced coil against the direction of movement, then uncoil aggressively through contact with the chest rotating square to the net as the racquet accelerates.
|
500 |
2.5s |
BH Running · Front · Open · 500fps #2
Jo-Wilfried Tsonga's running two-handed backhand from an open stance, filmed from the front at 500 fps. The racket face stays relatively square to the incoming ball at contact, with the contact point around waist height and the racket head accelerating steeply upward along the swing path.
|
500 |
2.3s |
BH Running · Front · Open · 500fps #3
Jo-Wilfried Tsonga's running two-handed backhand from a neutral central position, filmed from the front at 500 fps. After contact he finishes with the racquet wrapping high across his body while his weight continues moving laterally, then quickly releases his non-hitting hand to reset into a balanced ready position.
|
500 |
2.8s |
BH Running · Front · Open · 500fps #4
Jo-Wilfried Tsonga's running two-handed backhand from a neutral position, filmed from the front at 500 fps. After contact he unwinds his torso with the racquet finishing high across his body while his weight continues moving laterally, then quickly brings both hands back toward the center to recover into a ready position.
|
500 |
1.4s |
BH Running · Front · Open · 500fps #5
Jo-Wilfried Tsonga's running backhand from a neutral court position, filmed from the front in 500 fps slow motion. His feet land in a wide open stance as he plants the outside leg first, then uses a small adjustment step with the inside foot to stabilize before and during the swing.
|
500 |
2.3s |
BH Running · Front · Open · 500fps #6
Jo-Wilfried Tsonga's running backhand from a central position, filmed from a front angle. His open stance is clear as he plants his outside foot wide while on the run, then uses quick recovery steps to push back toward the center after contact.
|
500 |
2.7s |
BH Wide · Front · Closed · 500fps #1
Jo-Wilfried Tsonga's wide two-handed backhand from a closed stance, filmed from the front. His follow-through finishes high across his body with the non-hitting hand releasing the racquet early as he steps back toward a neutral ready position.
|
500 |
2.8s |
BH Wide · Front · Closed · 500fps #2
Jo-Wilfried Tsonga's wide two-handed backhand from a closed stance, filmed from the front at 500 fps. After contact his follow-through finishes high across his body while his weight shifts onto the front foot, and his non-hitting hand quickly separates to begin resetting into a neutral ready position.
|
500 |
2.6s |
BH Wide · Front · Closed · 500fps #3
Jo-Wilfried Tsonga's backhand from a wide position, filmed from a front angle. His closed stance is clear as his front foot steps across his body while his feet plant early, with a small adjustment hop used to set spacing before the swing.
|
500 |
2.9s |
BH Wide · Front · Closed · 500fps #4
Jo-Wilfried Tsonga's wide backhand from a closed stance, filmed from the front at 500 fps slow motion. After contact his follow-through finishes high across his body while his weight continues moving toward the court, and his non-hitting hand quickly returns to help him re-establish a neutral ready position.
|
500 |
3s |
BH Wide · Front · Closed · 500fps #5
Jo-Wilfried Tsonga's two-handed backhand to a wide ball from a closed stance, filmed from a front angle. His semi-continental top hand grip is clearly visible, with noticeable wrist lag on the dominant hand that firms up into a stable, slightly laid-back position at contact.
|
500 |
3.1s |
BH Wide · Front · Closed · 500fps #6
Jo-Wilfried Tsonga's wide backhand from a closed stance, filmed from the front at 500 fps. His hips stay relatively closed to the net while his knees sink into a deep bend, loading the legs before driving up and across into the shot.
|
500 |
2.7s |
BH Wide · Front · Closed · 240fps #7
Jo-Wilfried Tsonga's two-handed backhand to a wide ball from a closed stance, filmed from the front at 240 fps. His hips stay closed to the net as he loads, with a deep knee bend on the outside leg providing a strong base before he drives up and into the shot.
|
240 |
2.4s |
BH Wide · Front · Closed · 240fps #8
Jo-Wilfried Tsonga's backhand from a wide position, filmed from the front at 240 fps. His closed stance is clear as his front foot steps across the baseline angle while his weight loads on the back leg before driving into the shot.
|
240 |
2.8s |
BH Wide · Leg-kick · Front · 240fps
Jo-Wilfried Tsonga's wide backhand from the front, filmed from a front angle. His shoulders rotate as a unit with strong trunk coil, then uncoil aggressively into contact, with the upper body clearly leading the kinetic chain before the leg kick finishes the motion.
|
240 |
2.7s |
BH Wide · Front · Neutral · 500fps #1
Jo-Wilfried Tsonga's two-handed backhand to a wide ball from a neutral stance, filmed from the front at 500 fps. His racket face is slightly closed at contact with the ball struck around waist height, and the racket head accelerates steeply upward along the swing path after impact.
|
500 |
2.8s |
BH Wide · Front · Neutral · 240fps #2
Jo-Wilfried Tsonga's two-handed backhand to a wide ball from a neutral stance, filmed from the front at 240 fps. His hips stay relatively closed as he loads, with a deep knee bend and strong push off the outside leg to drive laterally into the shot.
|
240 |
2.8s |
BH Wide · Front · Neutral · 240fps #3
Jo-Wilfried Tsonga's wide backhand from a neutral stance, filmed from the front at 240 fps. His hips stay relatively closed as he sets up, with a pronounced knee bend and strong push off the outside leg to drive laterally toward the wide ball.
|
240 |
2.8s |
BH Wide · Front · Neutral · 240fps #4
Jo-Wilfried Tsonga's wide two-handed backhand from a neutral stance, filmed from the front at 240 fps. After contact he extends his follow-through out toward the target while his weight transfers onto his front foot and his hands return together toward a ready position.
|
240 |
2.4s |
BH Wide · Front · Neutral · 240fps #5
Jo-Wilfried Tsonga's backhand from a wide position, filmed from a front angle at 240 fps. His neutral stance is clear as he plants both feet on the baseline before using small adjustment steps to reach the wide ball.
|
240 |
2s |
BH Wide · Front · Open · 500fps #1
Jo-Wilfried Tsonga's wide backhand from an open stance, filmed from the front. His shoulders and trunk load with a pronounced upper-body coil against a relatively stable lower body, then uncoil in sequence as the lead shoulder drives forward through contact.
|
500 |
2.9s |
BH Wide · Front · Open · 240fps #2
Jo-Wilfried Tsonga's wide two-handed backhand from an open stance, filmed from the front at 240 fps. His contact point is slightly in front of his body with the racket face nearly square to the net and the racket head accelerating steeply upward through the ball.
|
240 |
3.2s |
BH Wide · Front · Open · 240fps #3
Jo-Wilfried Tsonga's wide two-handed backhand from an open stance, filmed from a front angle at 240 fps. His shoulders and trunk show a pronounced closed rotation on the unit turn, then unwind aggressively toward the ball with the chest finishing square to slightly open relative to the baseline.
|
240 |
2.8s |
BH Wide · Front · Open · 500fps #4
Jo-Wilfried Tsonga's backhand from a wide ball in an open stance, filmed from the front. His hips stay relatively open to the court while his knees are deeply flexed, showing strong leg loading before driving up and into the shot.
|
500 |
1.3s |
BH Center · Front
Jo-Wilfried Tsonga's backhand from the center of the court, filmed from the front. His footwork features a quick split-step into a small adjustment hop before setting a solid neutral stance, with a clear cross-step recovery back to his ready position.
|
|
2.8s |
BH Center · Front · Neutral #1
Jo-Wilfried Tsonga's backhand from the center in a neutral stance, filmed from the front. His two-handed backhand contact is made around waist to mid-torso height with a slightly closed racket face and a compact, upward swing path through the ball.
|
|
2.9s |
BH Center · Front · Neutral #2
Jo-Wilfried Tsonga's backhand from the center of the court in a neutral stance, filmed from the front. His follow-through finishes high with the racquet pointing toward the target while his weight transfers onto the front foot and his non-hitting hand quickly returns toward a ready position.
|
|
2.3s |
BH Lob · Front
Jo-Wilfried Tsonga's backhand lob from the center of the court, filmed from the front. His shoulders and trunk coil early as he tracks the ball, then uncoil in a smooth, upward arc that sends the racquet path steeply under and up the back of the ball.
|
|
4.1s |
BH Moves Back · Front
Jo-Wilfried Tsonga's backhand while moving back from a central position, filmed from the front. At contact his racket face is nearly square to the net with the ball struck around waist-to-chest height, and the two-handed swing drives up and through the ball with noticeable racket head acceleration.
|
|
2.5s |
BH Moves Back · Front · Open
Jo-Wilfried Tsonga's backhand from an open stance, filmed from the front. His two-handed grip is clearly visible with a firm, laid-in bottom hand and a relaxed top hand, allowing noticeable wrist lag before he drives the racquet through contact.
|
|
2.9s |
BH Running · Front · Open
Jo-Wilfried Tsonga's running backhand from the center of the court, filmed from the front. His open stance is clear as he plants his outside foot wide while moving laterally, then uses small adjustment steps to recover back toward the middle after contact.
|
|
2.6s |
BH Short · Front #1
Jo-Wilfried Tsonga's backhand from the short court, filmed from the front. From this angle, you can clearly see his two-handed backhand grip with the left hand driving the racket and the right wrist staying firm with a slight laid-back position through contact.
|
|
2.7s |
BH Short · Front #2
Jo-Wilfried Tsonga's backhand from the short court position, filmed from the front. His shoulders and trunk coil noticeably early, then uncoil in a tight, connected sequence that keeps his chest facing the incoming ball for a long time before rotating through contact.
|
|
4.3s |
BH Wide · Front · Closed #1
Jo-Wilfried Tsonga's backhand from a wide position, filmed from the front. His follow-through finishes high across his body with the non-hitting arm counterbalancing in front as he recovers back toward a neutral ready position.
|
|
3.7s |
BH Wide · Front · Closed #2
Jo-Wilfried Tsonga's wide backhand from a closed stance on the baseline, filmed from the front. After contact he lets the racquet finish high across his body while his weight continues moving back toward the center, bringing both hands in front as he resets into a ready position.
|
|
2.7s |
BH Wide · Front · Closed #3
Jo-Wilfried Tsonga's wide backhand from a closed stance, filmed from the front. His shoulders rotate significantly past his hips on the unit turn, then the trunk uncoils ahead of the arms so the racquet lags and whips through contact.
|
|
2.6s |
BH Wide · Front
Jo-Wilfried Tsonga's backhand from a wide position, filmed from the front. His split-step leads into a strong push-off off the outside leg, creating a wide base in a mostly open stance before he recovers back toward the center with quick adjustment steps.
|
|
2.9s |
BH Wide · Front · Open #1
Jo-Wilfried Tsonga's wide backhand from the front in an open stance, filmed from a front angle. His shoulders stay relatively closed at the start, then his trunk uncoils aggressively toward the ball, with the upper body rotation clearly leading the racquet through contact.
|
|
2.9s |
BH Wide · Front · Open #2
Jo-Wilfried Tsonga's wide two-handed backhand from an open stance, filmed from the front. His semi-westernish bottom-hand grip and firm top-hand support create a clear wrist lag on the takeback that straightens into a solid, stable wrist position through contact.
|
|
2.6s |
BH Center · Rear · Neutral · 500fps #1
Jo-Wilfried Tsonga's backhand from the center of the court in a neutral stance, filmed from a rear angle. The contact point shows a slightly closed racket face with the ball struck around waist height, and the racket head accelerating upward along a steep, vertical swing path.
|
500 |
2.6s |
BH Moves Back · Arm-action · Rear · 500fps #1
Jo-Wilfried Tsonga's backhand while moving back from a neutral court position, filmed from a rear angle. His follow-through finishes high with the hitting-side shoulder rotating through as his non-hitting arm extends back for counterbalance before he regroups into a ready stance.
|
500 |
2.4s |
BH Moves Back · Arm-action · Rear · 240fps #2
Jo-Wilfried Tsonga's backhand while moving back from a neutral position, filmed from a rear angle in 240 fps slow motion. His hips stay relatively closed as he retreats, with a pronounced knee bend and strong push off the outside leg to stabilize before and through contact.
|
240 |
2.6s |
BH Moves Back · Arm-action · Rear · 240fps #3
Jo-Wilfried Tsonga's backhand while moving back from a neutral position, filmed from a rear angle at 240 fps. The high-speed rear view makes the separation of his hitting-side elbow from the torso and the upward acceleration of the racket head through contact clearly visible.
|
240 |
2.6s |
BH Moves Back · Rear · Open · 240fps
Jo-Wilfried Tsonga's one-handed backhand moving back in open stance from the center of the court, filmed from a rear angle at 240 fps. After contact he lets the hitting arm wrap high across his body while his weight continues drifting backward, then quickly drops both hands toward the racket handle to re-form a neutral ready position.
|
240 |
2.5s |
BH Moves Back · Rear · Open · 500fps
Jo-Wilfried Tsonga's backhand from a central baseline position, filmed from a rear angle in 500 fps slow motion. As he moves back, he plants into an open stance with a pronounced split-step followed by quick adjustment steps to line up the ball before rotating into contact.
|
500 |
2.7s |
BH Moves Back · Rear · Open · 500fps #1
Jo-Wilfried Tsonga's two-handed backhand from a neutral baseline position in an open stance, filmed from a rear angle. His shoulders and trunk show a pronounced coil against the hips on the unit turn, followed by a sharp uncoiling sequence where the torso leads the racquet through contact in clearly visible slow motion.
|
500 |
2.2s |
BH Moves Back · Rear · Open · 500fps #2
Jo-Wilfried Tsonga's backhand from a central court position while moving back in an open stance, filmed from a rear angle at 500 fps. His shoulders rotate well past perpendicular to the baseline on the unit turn, then uncoil in sync with the hips so the trunk unwinds progressively through contact.
|
500 |
2.6s |
BH Moves Back · Rear · Open · 500fps #3
Jo-Wilfried Tsonga's backhand from a central baseline position in an open stance, filmed from a rear angle at 500 fps. The high-speed view makes the slightly closed racket face at contact and the upward, accelerating racket head path through the ball clearly visible.
|
500 |
2.2s |
BH Moves Back · Rear · Open · 500fps #4
Jo-Wilfried Tsonga's two-handed backhand while moving back in an open stance from the rear, filmed at 500 fps. The high-speed rear view makes the slightly closed racket face at contact and the steep upward swing path through the ball clearly visible.
|
500 |
2.7s |
BH Moves Back · Rear · Open · 500fps #5
Jo-Wilfried Tsonga's backhand from a neutral position moving back in open stance, filmed from a rear angle at 500 fps. His hips stay relatively open to the baseline as he retreats, with a pronounced knee bend and strong leg drive upward to stabilize the stroke despite moving backward.
|
500 |
2.6s |
BH Moves Back · Rear · Open · 240fps #6
Jo-Wilfried Tsonga's backhand from a central position, filmed from a rear angle at 240 fps. After contact he finishes with the racquet wrapping high across his body while his weight settles onto his outside leg before he recovers back toward a neutral ready position.
|
240 |
2.4s |
BH Running · Arm-action · Rear · 240fps
Jo-Wilfried Tsonga's running backhand from a neutral court position, filmed from the rear at 240 fps slow motion. His follow-through finishes high with both hands, and he quickly re-centers his stance with the non-hitting arm helping to stabilize his upper body as he recovers.
|
240 |
2.9s |
BH Running · Rear · Closed · 500fps #1
Jo-Wilfried Tsonga's running two-handed backhand from a closed stance, filmed from a rear angle. After contact he drives his weight through the shot with a long across-the-body follow-through, quickly bringing both hands back toward his torso as he recovers toward a neutral ready position.
|
500 |
2.8s |
BH Running · Rear · Closed · 500fps #2
Jo-Wilfried Tsonga's running two-handed backhand from a closed stance, filmed from a rear angle at 500 fps. His dominant hand maintains a firm semi-western backhand grip while the non-dominant hand drives the stroke, with a pronounced wrist lag that unwinds into a sharp, late wrist release through contact.
|
500 |
2.6s |
BH Running · Rear · Open · 500fps #1
Jo-Wilfried Tsonga's running two-handed backhand from an open stance, filmed from a rear angle in 500 fps slow motion. At contact his racket face is slightly closed with the ball struck around waist height, and the high-speed view makes the upward, accelerating racket head path very clear.
|
500 |
2.4s |
BH Running · Rear · Open · 240fps #2
Jo-Wilfried Tsonga's running backhand from a neutral court position, filmed from a rear angle in 240 fps slow motion. His footwork features quick adjustment steps into an open stance, with his outside leg planting firmly before contact and a pronounced recovery step driving him back toward the center.
|
240 |
2.8s |
BH Wide · Arm-action · Rear · 240fps #1
Jo-Wilfried Tsonga's wide backhand from the center of the court, filmed from a rear angle. His shoulders rotate deeply with a pronounced trunk coil on the unit turn, then uncoil in sequence from hips through torso to shoulders, making the separation between upper and lower body especially clear in this slow-motion view.
|
240 |
2.4s |
BH Wide · Arm-action · Rear · 240fps #2
Jo-Wilfried Tsonga's wide two-handed backhand from a central baseline position, filmed from a rear angle at 240 fps. His shoulders rotate well past perpendicular to the net on the unit turn, then uncoil in sync with the hips so the trunk unwinds progressively through contact.
|
240 |
2.8s |
BH Wide · Arm-action · Rear · 240fps #3
Jo-Wilfried Tsonga's wide two-handed backhand from a central baseline position, filmed from a rear angle at 240 fps. His semi-western left-hand grip and relatively relaxed right hand create noticeable wrist lag on the takeback, followed by a sharp, synchronized wrist release from both hands just before and through contact.
|
240 |
2.6s |
BH Wide · Arm-action · Rear · 240fps #4
Jo-Wilfried Tsonga's wide two-handed backhand from a central position, filmed from a rear angle at 240 fps. His hips stay relatively closed as he drives out to the wide ball, with a pronounced knee bend and strong lateral push off the outside leg to reach and stabilize for the shot.
|
240 |
2.6s |
BH Wide · Arm-action · Rear · 240fps #5
Jo-Wilfried Tsonga's wide two-handed backhand from the center of the court, filmed from a rear angle. His semi-western left-hand grip and firm right-hand support create a pronounced wrist lag on the take-back that smoothly unwinds into a strong, stable wrist position through contact.
|
240 |
2.8s |
BH Wide · Arm-action · Rear · 240fps #6
Jo-Wilfried Tsonga's wide two-handed backhand from the center of the court, filmed from a rear angle at 240 fps. His contact point is slightly in front of his body with the racket face relatively square to the baseline and the racket head accelerating upward along a steep, modern topspin path.
|
240 |
3s |
BH Wide · Arm-action · Rear · 240fps #7
Jo-Wilfried Tsonga's wide backhand from the center of the court, filmed from a rear angle at 240 fps. After contact his follow-through finishes high with the racquet wrapping around his body while his non-hitting arm extends back slightly as he recovers toward a neutral ready position.
|
240 |
2.5s |
BH Wide · Leg-action · Rear · Closed · 500fps
Jo-Wilfried Tsonga's wide backhand from a closed stance, filmed from a rear angle at 500 fps. His footwork includes a strong crossover step out to the wide ball before planting the front foot across the body into a distinctly closed stance.
|
500 |
2.8s |
BH Wide · Rear · Closed · 500fps #1
Jo-Wilfried Tsonga's two-handed backhand to a wide ball from a closed stance, filmed from a rear angle at 500 fps. From this view, his dominant hand maintains a firm semi-western-like grip while the off-hand drives the racket, with noticeable wrist lag in the takeback that unwinds into a strong, synchronized wrist release through contact.
|
500 |
2.5s |
BH Wide · Rear · Closed · 500fps #2
Jo-Wilfried Tsonga's two-handed backhand on a wide ball from a closed stance, filmed from a rear angle in 500 fps slow motion. His racket contacts the ball slightly in front of his body with a relatively square face and a steep upward swing path, producing noticeable racket head acceleration through contact.
|
500 |
2.9s |
BH Wide · Rear · Closed · 240fps #3
Jo-Wilfried Tsonga's two-handed backhand to a wide ball from a closed stance, filmed from a rear angle at 240 fps. His semi-western bottom hand and continental top hand grips stay firm while the wrists remain relaxed, creating noticeable wrist lag before contact and a strong upward wrist release through the ball.
|
240 |
2.6s |
BH Wide · Rear · Closed · 240fps #4
Jo-Wilfried Tsonga's wide backhand from a closed stance, filmed from a rear angle at 240 fps. The racket face is slightly closed at contact with the ball taken around waist height, and the rear view makes the upward, accelerating swing path and racket head speed through the hitting zone clearly visible.
|
240 |
2.8s |
BH Wide · Rear · Closed · 240fps #5
Jo-Wilfried Tsonga's wide two-handed backhand from a closed stance, filmed from a rear angle at 240 fps. The high-speed rear view makes it easy to see the slightly closed racket face at contact and the steep upward swing path driving up and across the ball.
|
240 |
2.5s |
BH Wide · Rear · Closed · 240fps #6
Jo-Wilfried Tsonga's backhand from a wide position in a closed stance, filmed from a rear angle at 240 fps. After contact his follow-through finishes high across his body while his outside leg plants and pushes him back toward the center, bringing both hands quickly into a compact ready position.
|
240 |
2.6s |
BH Wide · Rear · Closed · 240fps #7
Jo-Wilfried Tsonga's two-handed backhand to a wide ball from a closed stance, filmed from a rear angle at 240 fps. His relatively relaxed top hand grip lets the wrists stay loose into a pronounced lag, then firm up just before contact for a sharp, synchronized wrist release through the ball.
|
240 |
2.7s |
BH Wide · Rear · Closed · 500fps #8
Jo-Wilfried Tsonga's wide two-handed backhand from a closed stance, filmed from a rear angle. His hips stay relatively closed to the baseline as he plants the outside leg, with a pronounced knee bend and strong push off that leg to drive laterally out to the wide ball.
|
500 |
2.7s |
BH Wide · Rear · Neutral · 500fps #1
Jo-Wilfried Tsonga's wide backhand from a neutral stance, filmed from a rear angle. After contact his two-handed follow-through finishes high across his body while his weight transfers toward the outside of the court and his feet quickly recover back toward a ready position.
|
500 |
2.7s |
BH Wide · Rear · Neutral · 500fps #2
Jo-Wilfried Tsonga's two-handed backhand hit to a wide ball from a neutral stance, filmed from a rear angle at 500 fps. His footwork includes a quick adjustment shuffle outward before planting in a neutral stance, with a clear recovery step back toward the center after contact.
|
500 |
2.6s |
BH Wide · Rear · Neutral · 500fps #3
Jo-Wilfried Tsonga's two-handed backhand to a wide ball from a neutral stance, filmed from a rear angle at 500 fps. From this view, his semi-closed bottom-hand grip and relaxed top-hand wrist lag are clear before contact, with the wrists firming up only at impact to stabilize the racquet face.
|
500 |
2.4s |
BH Wide · Rear · Neutral · 500fps #4
Jo-Wilfried Tsonga's wide two-handed backhand from a neutral stance, filmed from a rear angle. His hips stay relatively closed as he sets the neutral base, with a pronounced knee bend and strong push off the outside leg to drive into the wide ball.
|
500 |
2.7s |
BH Wide · Rear · Open · 240fps
Jo-Wilfried Tsonga's wide one-handed backhand from an open stance, filmed from a rear angle at 240 fps. His feet plant in a wide base with the outside foot loading first, and he uses a small lateral recovery step back toward the center after contact.
|
240 |
2.2s |
BH Wide · Rear · Open · 500fps #1
Jo-Wilfried Tsonga's wide two-handed backhand from an open stance, filmed from a rear angle at 500 fps. The racket face is slightly closed at a contact point around waist height, with the racket head accelerating upward along a steep, modern topspin swing path.
|
500 |
2.4s |
BH Wide · Rear · Open · 500fps #2
Jo-Wilfried Tsonga's wide two-handed backhand from an open stance, filmed from a rear angle at 500 fps. His shoulders rotate well past perpendicular to the baseline on the unit turn, then uncoil in sync with the hips so the trunk leads the racquet through contact.
|
500 |
2.5s |
BH Wide · Rear · Open · 500fps #3
Jo-Wilfried Tsonga's wide two-handed backhand from an open stance, filmed from a rear angle at 500 fps. His follow-through finishes high with the racquet wrapping around his left shoulder as his weight transfers onto his outside (right) leg before he recovers back toward a neutral ready position.
|
500 |
2.5s |
BH Center · Arm-action · Rear
Jo-Wilfried Tsonga's backhand from the center of the court, filmed from a rear angle. The racket face stays relatively closed at contact with the ball struck around waist height, and the swing path shows the racket accelerating steeply upward through the hitting zone.
|
|
2.4s |
BH Center · Arm-action · Rear #1
Jo-Wilfried Tsonga's backhand from the center of the court, filmed from a rear angle. His hips stay relatively closed at the start of the swing before unwinding as his legs drive up from a deep knee bend to push him through the shot.
|
|
2.9s |
BH Center · Arm-action · Rear #2
Jo-Wilfried Tsonga's backhand from the center of the court, filmed from a rear angle. His two-handed grip stays compact with the wrists relaxed and slightly laid back on the takeback, then firms up into a strong, unified wrist position right through contact.
|
|
3.3s |
BH Moves Back · Rear · Open
Jo-Wilfried Tsonga's backhand from a moving-back position in open stance, filmed from the rear. His hips stay relatively open to the baseline while his legs show a deep, staggered knee bend that loads the outside leg before driving upward into the shot.
|
|
2.6s |
BH Moves Back · Rear
Jo-Wilfried Tsonga's backhand while moving back from a neutral position, filmed from the rear. The contact point is taken around waist height with the racket face slightly closed and the racket head accelerating steeply up the back of the ball.
|
|
3.2s |
BH Running · Leg-kick · Rear
Jo-Wilfried Tsonga's running two-handed backhand from a neutral court position, filmed from the rear. His shoulders rotate as a unit with strong trunk coil, then uncoil aggressively through contact, with the rear view making the degree of upper-body rotation and sequencing into the leg kick easy to see.
|
|
3.3s |
BH Running · Rear
Jo-Wilfried Tsonga's running one-handed backhand from a neutral court position, filmed from the rear. His shoulders rotate as a single unit with the trunk, with a pronounced coil on the takeback and a rapid uncoiling through contact that keeps the hitting shoulder driving through the ball path.
|
|
5.3s |
BH Running · Rear · Open #1
Jo-Wilfried Tsonga's running two-handed backhand from an open stance, filmed from a rear angle. His hips stay relatively open to the baseline as his outside leg plants and drives, with a noticeable knee bend to load before pushing up into the shot.
|
|
2.7s |
BH Running · Rear · Open #2
Jo-Wilfried Tsonga's running two-handed backhand from an open stance, filmed from a rear angle. His hips stay relatively open to the baseline while his outside leg plants and drives upward, with a noticeable knee bend that loads before he pushes off into recovery.
|
|
2.7s |
BH Running · Rear
Jo-Wilfried Tsonga's running two-handed backhand from a neutral court position, filmed from the rear. His semi-western left-hand grip and firm right-hand support create noticeable wrist lag on the takeback that straightens into a strong, stable wrist position through contact.
|
|
3.4s |
BH Short · Rear
Jo-Wilfried Tsonga's backhand from a central position, filmed from a rear angle. His two-handed backhand contact is made around waist to hip height with a slightly closed racket face and an aggressive upward swing path accelerating through the ball.
|
|
3.2s |
BH Wide · Arm-action · Rear
Jo-Wilfried Tsonga's wide backhand from the center of the court, filmed from a rear angle. His racket contacts the ball slightly in front of his body with a closed racket face and a steep upward swing path, emphasizing strong racket head acceleration through contact.
|
|
3.7s |
BH Wide · Rear · Closed
Jo-Wilfried Tsonga's wide backhand from a closed stance, filmed from the rear. After contact he unwinds his shoulders with the racquet finishing high over his right shoulder while his weight continues moving back toward the center of the court into a ready position.
|
|
3.3s |
BH · Rear · Neutral #1
Jo-Wilfried Tsonga's wide backhand from a neutral stance, filmed from the rear. His racket contacts the ball slightly in front of his body with a closed racket face and an upward swing path that accelerates the racket head through contact.
|
|
2.5s |
BH Wide · Rear · Neutral #2
Jo-Wilfried Tsonga's wide backhand from a neutral stance, filmed from a rear angle. The racket face stays relatively square to the baseline at contact, with the ball struck around waist height and the racket head accelerating steeply up the back of the ball.
|
|
2.5s |
BH Wide · Rear
Jo-Wilfried Tsonga's backhand from a wide position, filmed from a rear angle. His follow-through finishes high with the racket traveling across his body while his weight shifts back toward the center of the court to recover.
|
|
3.2s |
BH Center · Arm-action · Side · 240fps
Jo-Wilfried Tsonga's backhand from the center of the court, filmed from the side. His footwork shows a small adjustment hop into a neutral stance followed by a firm plant of the outside leg before the swing, with a clear recovery step back toward ready position after contact.
|
240 |
2.7s |
BH Center · Side · Neutral · 120fps
Jo-Wilfried Tsonga's two-handed backhand from the center of the court in a neutral stance, filmed from the side at 120 fps. His shoulders rotate well past perpendicular to the net on the unit turn, then the trunk uncoils ahead of the arms, making the sequencing of torso rotation into contact easy to distinguish in slow motion.
|
120 |
2.4s |
BH Center · Side · Neutral · 120fps #1
Jo-Wilfried Tsonga's two-handed backhand from a central neutral stance, filmed from the side at 120 fps. From this angle, you can clearly see his firm, semi-closed top-hand grip and the pronounced wrist lag that unwinds into a sharp, coordinated wrist release through contact.
|
120 |
2.5s |
BH Center · Side · Neutral · 240fps #2
Jo-Wilfried Tsonga's two-handed backhand from the center of the court in a neutral stance, filmed from a side angle at 240 fps. His follow-through finishes high with the racquet wrapping around his lead shoulder as his weight transfers onto his front foot, bringing him quickly back toward a ready position.
|
240 |
2.6s |
BH Center · Side · Neutral · 240fps #3
Jo-Wilfried Tsonga's backhand from the center of the court in a neutral stance, filmed from a side angle at 240 fps. His footwork features a compact adjustment step into a neutral stance before contact, followed by a clear cross-step recovery back toward his ready position.
|
240 |
2.6s |
BH Moves Back · Side · Open · 240fps #1
Jo-Wilfried Tsonga's backhand from an open stance while moving back, filmed from a side angle at 240 fps. His two-handed grip shows the dominant hand in a strong continental position with the wrists laid back and then unhinging together through contact.
|
240 |
2.9s |
BH Moves Back · Side · Open · 120fps #2
Jo-Wilfried Tsonga's backhand from a neutral position while moving back in open stance, filmed from the side at 120 fps. His hips stay relatively open to the baseline as he loads, with a deep knee bend and strong rear-leg drive visible as he pushes up through the shot.
|
120 |
2.9s |
BH Moves Back · Side · Open · 240fps #3
Jo-Wilfried Tsonga's two-handed backhand from an open stance while moving back, filmed from a side angle at 240 fps. His shoulders rotate well past perpendicular to the net in the unit turn, then uncoil in sync with the trunk so that the chest squares to the ball just before contact, clearly showing the sequencing of torso rotation ahead of arm extension.
|
240 |
2.1s |
BH Moves Back · Side · Open · 240fps #4
Jo-Wilfried Tsonga's backhand from a neutral court position, filmed from a side angle at 240 fps. His open stance is clear as he moves back with quick adjustment steps, keeping his outside foot anchored while his inside foot pivots to load into the shot.
|
240 |
2.8s |
BH Moves Back · Side · Open · 240fps #5
Jo-Wilfried Tsonga's backhand from a neutral court position, filmed from the side at 240 fps. As he moves back, he plants into an open stance with a wide base and uses small adjustment steps before and after contact to manage his spacing behind the ball.
|
240 |
2.4s |
BH Running · Side · Closed · 120fps #1
Jo-Wilfried Tsonga's running two-handed backhand from a closed stance, filmed from the side at 120 fps. From this angle, his semi-western bottom hand grip and laid-back wrist position are clearly visible as the racket lags behind before uncoiling through contact.
|
120 |
2.8s |
BH Running · Side · Closed · 240fps #2
Jo-Wilfried Tsonga's running two-handed backhand from a closed stance, filmed from the side at 240 fps. From this angle, you can clearly see his semi-western bottom-hand grip setting up early wrist lag, with the top hand driving through and pronating the wrists aggressively through contact.
|
240 |
3.5s |
BH Running · Side · Closed · 240fps #3
Jo-Wilfried Tsonga's running two-handed backhand from a closed stance, filmed from the side at 240 fps. His hips stay relatively closed to the baseline as his outside leg plants and drives, with a deep knee bend clearly visible before extending through the shot.
|
240 |
3s |
BH Running · Side · Open · 240fps #1
Jo-Wilfried Tsonga's running two-handed backhand in open stance from the side, filmed from a side angle at 240 fps. His racket contacts the ball slightly in front of his body with a closed racket face and a steep low-to-high swing path, making the upward acceleration of the racket head clearly visible in slow motion.
|
240 |
2.8s |
BH Running · Side · Open · 240fps #2
Jo-Wilfried Tsonga's running two-handed backhand in open stance from the side, filmed from a side camera angle at 240 fps. His hips stay relatively open to the net while his outside leg plants with a deep knee bend, loading to push his body through the shot despite moving laterally.
|
240 |
2s |
BH Running · Side · Open · 240fps #3
Jo-Wilfried Tsonga's running two-handed backhand from an open stance, filmed from a side angle at 240 fps. His semi-western top hand and continental bottom hand grips are clearly visible, with a pronounced wrist lag on the takeback that unwinds into a firm, stable wrist position through contact.
|
240 |
2.5s |
BH Wide · Arm-action · Side · 240fps #1
Jo-Wilfried Tsonga's wide backhand from the side, filmed from a side angle at 240 fps slow motion. His footwork shows a quick lateral push-off into a wide base with a neutral-to-slightly-open stance, followed by a small recovery step back toward the court after contact.
|
240 |
2s |
BH Wide · Arm-action · Side · 240fps #2
Jo-Wilfried Tsonga's wide backhand from the side, filmed from a side court angle at 240 fps. His hips stay relatively closed as he loads, with a deep knee bend and strong push off the outside leg to drive laterally toward the wide ball.
|
240 |
2.7s |
BH Wide · Arm-action · Side · 240fps #3
Jo-Wilfried Tsonga's wide two-handed backhand from a neutral court position, filmed from the side. His semi-western left hand grip and continental right hand grip create a pronounced wrist lag in the forward swing, with the wrists releasing together into a firm, stable position at contact.
|
240 |
2.7s |
BH Wide · Arm-action · Side · 240fps #4
Jo-Wilfried Tsonga's wide two-handed backhand from a neutral court position, filmed from the side at 240 fps. His shoulders load with a pronounced upper-body turn before contact, then the trunk uncoils in sequence from hips to shoulders, making the separation and re-alignment of his torso easy to see in slow motion.
|
240 |
2.6s |
BH Wide · Side · Closed · 240fps #1
Jo-Wilfried Tsonga's two-handed backhand from a wide ball in a closed stance, filmed from a side angle. His semi-western bottom hand and continental top hand stay firm while the wrists maintain a pronounced lag that unloads into a sharp, synchronized wrist snap through contact.
|
240 |
3.1s |
BH Wide · Side · Closed · 240fps #2
Jo-Wilfried Tsonga's wide backhand from a closed stance, filmed from a side angle at 240 fps. His shoulders rotate well past perpendicular to the net on the unit turn, then the trunk uncoils ahead of the arms, making the sequential opening of hips, torso, and shoulders easy to distinguish in slow motion.
|
240 |
2.9s |
BH Wide · Side · Closed · 240fps #3
Jo-Wilfried Tsonga's wide two-handed backhand from a closed stance, filmed from the side at 240 fps. The racket face is slightly closed at contact with the ball struck around waist height, and the side angle makes the upward, accelerating swing path and rapid racket head speed clearly visible.
|
240 |
2.9s |
BH Wide · Side · Closed · 240fps #4
Jo-Wilfried Tsonga's wide two-handed backhand from a closed stance, filmed from the side at 240 fps. His shoulders rotate well past perpendicular to the net on the unit turn, then uncoil in sync with the hips so the trunk drives the racquet through contact.
|
240 |
3.4s |
BH Wide · Side · Closed · 120fps #5
Jo-Wilfried Tsonga's wide two-handed backhand from a closed stance, filmed from a side angle at 120 fps. The side view makes it easy to see his contact point slightly in front of the lead hip with the racket face nearly square to the ball and the racket head accelerating steeply up the back of the ball.
|
120 |
2.6s |
BH Wide · Side · Closed · 240fps #6
Jo-Wilfried Tsonga's wide backhand from a closed stance, filmed from the side at 240 fps. His follow-through finishes high with the racquet wrapping around his lead shoulder as his weight transfers onto the front foot, quickly bringing both hands back toward a neutral ready position.
|
240 |
2.7s |
BH Wide · Side · Closed · 240fps #7
Jo-Wilfried Tsonga's wide backhand from a closed stance, filmed from a side angle. His feet cross over into the wide ball with a strong unit turn, then he plants the front foot on a closed line to the baseline before driving through and taking a small recovery step back toward center.
|
240 |
2.7s |
BH Wide · Side · Open · 240fps #1
Jo-Wilfried Tsonga's wide two-handed backhand from an open stance, filmed from the side at 240 fps. His shoulders rotate early to load against the hips, then the trunk uncoils aggressively through contact with the chest finishing fully rotated toward the target.
|
240 |
2.8s |
BH Wide · Side · Open · 120fps #2
Jo-Wilfried Tsonga's backhand wide from an open stance, filmed from the side at 120 fps slow motion. His feet stay staggered in an open base as he plants the outside leg, then uses a small recovery step with the inside foot to push back toward the court after contact.
|
120 |
2.8s |
BH Wide · Side · Open · 120fps #3
Jo-Wilfried Tsonga's wide two-handed backhand from an open stance, filmed from the side at 120 fps. His shoulders load into a pronounced trunk coil with the chest turning well past the net post before uncoiling in sequence from hips to shoulders through contact.
|
120 |
2.8s |
BH Wide · Side · Open · 240fps #4
Jo-Wilfried Tsonga's two-handed backhand from a wide position in an open stance, filmed from the side at 240 fps. His relatively relaxed bottom-hand grip and firm top hand let his wrists stay laid back through the takeback before uncoiling into a pronounced wrist release through contact.
|
240 |
2.9s |
BH Wide · Side · Open · 240fps #5
Jo-Wilfried Tsonga's backhand from an open stance on a wide ball, filmed from the side at 240 fps. His two-handed grip shows the bottom hand in a strong semi-western position while the top hand controls a firm wrist set, with noticeable lag maintained until just before contact.
|
240 |
2.6s |
BH Center · Arm-action · Side
Jo-Wilfried Tsonga's backhand from the center of the court, filmed from the side. His feet set in a neutral stance with a clear split-step into a small adjustment hop before planting and rotating into the swing.
|
|
2s |
BH Center · Side · Neutral #1
Jo-Wilfried Tsonga's backhand from the center of the court in a neutral stance, filmed from the side. His shoulders and trunk load with a pronounced coil on the unit turn, then uncoil in sequence so the torso leads the racquet through contact.
|
|
2.3s |
BH Center · Side · Neutral #2
Jo-Wilfried Tsonga's backhand from the center of the court in a neutral stance, filmed from the side. His two-handed grip is firm with the dominant hand driving and the non-dominant hand guiding, and there is a noticeable wrist lag that unwinds into a compact, controlled snap through contact.
|
|
2.6s |
BH Center · Side · Neutral #3
Jo-Wilfried Tsonga's backhand from the center in a neutral stance, filmed from the side. His shoulders and trunk load with a pronounced coil on the unit turn, then uncoil in sync with his hip rotation to drive the racquet through contact.
|
|
2.5s |
BH Center · Side · Neutral #4
Jo-Wilfried Tsonga's backhand from the center of the court in a neutral stance, filmed from the side. His two-handed grip shows the dominant hand in a strong continental position with noticeable wrist lag that straightens into a firm, stable wrist at contact.
|
|
2.4s |
BH Center · Side · Neutral #5
Jo-Wilfried Tsonga's backhand from the center of the court in a neutral stance, filmed from the side. His footwork shows a quick adjustment step into a stable neutral base before contact, followed by a small recovery step back toward the middle.
|
|
2.3s |
BH Center · Side · Open
Jo-Wilfried Tsonga's backhand from the center of the court in an open stance, filmed from the side. His follow-through finishes high with the racket wrapping around his non-dominant shoulder while his weight transfers forward into a balanced, ready position for the next shot.
|
|
2.8s |
BH Center · Side #1
Jo-Wilfried Tsonga's backhand from the center of the court, filmed from the side. His two-handed backhand contact is made slightly in front of his body with a relatively closed racket face and a compact, upward swing path through the ball.
|
|
3s |
BH Center · Side #2
Jo-Wilfried Tsonga's backhand from the center of the court, filmed from the side. His knees load deeply before contact and his hips stay relatively closed, then unwind aggressively as his legs drive up and into the court.
|
|
3.4s |
BH Lob · Side #1
Jo-Wilfried Tsonga's backhand lob from the side, filmed from a side angle. His hips stay relatively closed with a noticeable knee bend on the loading leg before he extends upward to lift the ball over his opponent.
|
|
3.2s |
BH Lob · Side #2
Jo-Wilfried Tsonga's backhand lob from the side, filmed from a side angle. His stance shifts from a slightly open base into a more neutral alignment as he loads on the back leg, with a small adjustment step forward after contact to recover his court position.
|
|
3.2s |
BH Lob · Side #3
Jo-Wilfried Tsonga's backhand lob from the side, filmed from a side angle. At contact his racket face is clearly open with the ball struck well above net height, and his upward swing path accelerates the racket head steeply to lift the ball over the opponent.
|
|
3.9s |
BH Lob · Side #4
Jo-Wilfried Tsonga's backhand lob from the side, filmed from a side angle. After contact he extends his arms upward with the racket finishing high while his weight continues drifting slightly backward before he regathers into a neutral ready position.
|
|
3.3s |
BH Moves Back · Arm-action · Side #1
Jo-Wilfried Tsonga's backhand while moving back from a neutral position, filmed from the side. His hips stay relatively closed as he retreats, with a noticeable knee bend and backward-driving rear leg that load his lower body before he uncoils into the shot.
|
|
2.3s |
BH Moves Back · Arm-action · Side #2
Jo-Wilfried Tsonga's backhand while moving back from a neutral court position, filmed from the side. His shoulders load with a pronounced upper-body coil before contact, then uncoil in sequence from hips to trunk to shoulders, making the timing of his torso rotation easy to distinguish.
|
|
2s |
BH Moves Back · Side · Closed
Jo-Wilfried Tsonga's backhand while moving back in a closed stance from a neutral court position, filmed from the side. His follow-through finishes high with the racket traveling toward his non-dominant side as his weight shifts onto the back foot before he resets the hands in front for the next shot.
|
|
4.1s |
BH Moves Back · Side · Open #1
Jo-Wilfried Tsonga's backhand while moving back from a neutral position, filmed from the side. His open stance is clear as he retreats with small adjustment steps before planting his outside foot and rotating his hips into the shot.
|
|
3s |
BH Moves Back · Side · Open #2
Jo-Wilfried Tsonga's backhand while moving back in an open stance from a neutral court position, filmed from the side. His hips stay relatively open to the net as he loads on his outside leg, with a deep knee bend and strong upward leg drive clearly visible through contact.
|
|
2.4s |
BH Moves Back · Side · Open #3
Jo-Wilfried Tsonga's backhand from a moving-back open stance on the side of the court, filmed from a side angle. His follow-through finishes high with the racket traveling slightly forward while his weight continues drifting backward, and he quickly brings both hands back toward his torso to re-establish a neutral ready position.
|
|
3.2s |
BH Moves Back · Side · Open #4
Jo-Wilfried Tsonga's backhand from the side, moving back in an open stance, filmed from a side angle. His hips stay relatively open to the baseline while his knees bend deeply as he loads, with a noticeable upward leg drive as he swings through the ball.
|
|
3.2s |
BH Moves Back · Side
Jo-Wilfried Tsonga's backhand while moving back from a neutral position, filmed from the side. At contact his racket face is slightly closed with the ball struck around waist height, and the racket head accelerates steeply upward along the baseline-to-net path.
|
|
2.4s |
BH Running · Arm-action · Side
Jo-Wilfried Tsonga's running two-handed backhand from a neutral court position, filmed from the side. His racket contacts the ball slightly in front of his body with a closed racket face and a steep upward swing path that accelerates quickly through contact.
|
|
2.8s |
BH Running · Side · Open
Jo-Wilfried Tsonga's running backhand from an open stance, filmed from the side. His hips stay relatively open to the court while a strong knee bend and aggressive push off the outside leg drive his body through the shot.
|
|
3s |
BH Running · Side · Open #1
Jo-Wilfried Tsonga's running backhand from an open stance, filmed from the side. His hips stay relatively open to the court while his outside leg plants and drives upward with a deep knee bend to stabilize the stroke on the move.
|
|
2.6s |
BH Running · Side · Open #10
Jo-Wilfried Tsonga's running backhand from the side in an open stance, filmed from a side angle. After contact he lets the racquet wrap high across his body while his outside leg plants and he quickly pushes back toward a neutral ready position.
|
|
3.3s |
BH Running · Side · Open #2
Jo-Wilfried Tsonga's running two-handed backhand from an open stance, filmed from the side. His shoulders rotate well past perpendicular to the net on the unit turn, then uncoil aggressively with the trunk leading the racquet through contact in a clear kinetic chain sequence.
|
|
2.9s |
BH Running · Side · Open #3
Jo-Wilfried Tsonga's running two-handed backhand from an open stance, filmed from the side. His contact point is slightly in front of his lead hip with the racket face relatively square to the ball and the racket head accelerating steeply up the back of the ball.
|
|
2.3s |
BH Running · Side · Open #5
Jo-Wilfried Tsonga's running two-handed backhand from an open stance, filmed from the side. From this angle, his relatively relaxed top-hand grip and delayed wrist release are visible as the racket lags behind his hands and then uncoils through contact.
|
|
3.1s |
BH Running · Side · Open #6
Jo-Wilfried Tsonga's running two-handed backhand from an open stance, filmed from the side. From this angle, you can clearly see his relatively relaxed grip setting up pronounced wrist lag before contact and a firm, stable wrist position through the strike.
|
|
2.8s |
BH Running · Side · Open #7
Jo-Wilfried Tsonga's running two-handed backhand from an open stance, filmed from the side. His follow-through finishes high with the racket wrapping across his body while his weight continues moving laterally, and he quickly brings both hands back toward a neutral ready position after contact.
|
|
2.3s |
BH Running · Side · Open #8
Jo-Wilfried Tsonga's running two-handed backhand in open stance from the side. His hips stay relatively open to the court as he loads on the outside leg, with a pronounced knee bend and strong lateral push-off driving his weight through the shot.
|
|
2.7s |
BH Running · Side · Open #9
Jo-Wilfried Tsonga's running backhand from the side, hit in an open stance, filmed from a side angle. His follow-through finishes high with the torso unwinding toward the court while his weight continues to move laterally, and he quickly brings both hands back toward the racket to recover into a ready position.
|
|
2.7s |
BH Running · Side #1
Jo-Wilfried Tsonga's running backhand from the side, filmed from a side angle. His footwork features a quick adjustment hop into a semi-open stance followed by strong lateral recovery steps that keep his upper body aligned through contact.
|
|
2.4s |
BH Running · Side #2
Jo-Wilfried Tsonga's running backhand from the side, filmed from a side angle. After contact he lets his momentum carry him through the court while his non-hitting hand releases the racquet and his upper body unwinds into a balanced, ready position for the next shot.
|
|
3.1s |
BH Running · Side #3
Jo-Wilfried Tsonga's running backhand from the side, filmed from a side angle. His shoulders and trunk load with a pronounced upper-body rotation against his hips, then uncoil in sequence so the torso leads the racquet through contact.
|
|
3.6s |
BH Short · Arm-action · Side
Jo-Wilfried Tsonga's backhand from the center of the court, filmed from the side. His compact arm action leads into a tight, chest-high follow-through with the racket finishing in front of his body, and he quickly lets both hands drop back toward a neutral ready position as his weight settles on his front leg.
|
|
4.1s |
BH Short · Side #1
Jo-Wilfried Tsonga's backhand from the middle of the court, filmed from the side. His split step leads into a quick pivot and semi-open stance, with a strong push off his outside leg to drive into the shot before a compact recovery step back to center.
|
|
2s |
BH Short · Side #2
Jo-Wilfried Tsonga's backhand from the short court position, filmed from the side. His two-handed grip is firm with the bottom hand driving the stroke while the top hand guides, and there is a noticeable wrist lag that straightens through contact for a solid strike.
|
|
3.2s |
BH Short · Side #3
Jo-Wilfried Tsonga's backhand from the side, filmed from a side angle. His hips stay relatively closed at the start, with a deep knee bend and strong leg drive forward that uncoils his lower body into the shot.
|
|
2.6s |
BH Short · Side #4
Jo-Wilfried Tsonga's backhand from the middle of the court, filmed from the side. At contact his racket face is slightly closed with the ball struck around waist height, and the racket head accelerates steeply upward along a pronounced low-to-high swing path.
|
|
3.6s |
BH Short · Side #5
Jo-Wilfried Tsonga's backhand from the middle of the court, filmed from the side. His feet set into a neutral stance with a small adjustment step before contact, followed by a quick recovery step that readies him to move back to center.
|
|
3.2s |
BH Short · Side #6
Jo-Wilfried Tsonga's backhand from the short court position, filmed from the side. His follow-through finishes high with the racket wrapping across his body as his weight transfers onto his front foot, quickly bringing both hands back toward a neutral ready position.
|
|
2.8s |
BH Short · Side #7
Jo-Wilfried Tsonga's backhand from the side, filmed from a side angle. After contact his two-handed follow-through finishes high with his weight driving forward, and he quickly brings both hands back toward his center to re-establish a ready position for the next shot.
|
|
2.2s |
BH Wide · Arm-action · Side
Jo-Wilfried Tsonga's wide backhand from the side. His shoulders rotate early to load, then his trunk uncoils aggressively through contact with noticeable separation between hip and shoulder turn.
|
|
2.5s |
BH Wide · Side · Closed
Jo-Wilfried Tsonga's backhand from a wide position, filmed from the side. His closed stance is clear as his front foot steps across his body while he uses small adjustment steps to load on the outside leg before swinging.
|
|
3s |
BH Wide · Side · Closed #1
Jo-Wilfried Tsonga's backhand from a wide position on the backhand side, filmed from the side. He plants in a closed stance with his outside leg loading first, then uses a strong cross-step recovery to move back toward the center after contact.
|
|
2.8s |
BH Wide · Side · Closed #2
Jo-Wilfried Tsonga's wide backhand from the side, filmed from a side angle. He plants in a distinctly closed stance with his front foot stepping across his body as he pushes off laterally to reach the wide ball, then uses a strong recovery step to come back toward the center.
|
|
3.3s |
BH Wide · Side · Closed #3
Jo-Wilfried Tsonga's backhand from a wide position, filmed from the side. He plants in a distinctly closed stance with his front foot stepping across the baseline direction, and you can see a strong push off the outside leg as he drives laterally into the shot.
|
|
2.9s |
BH Wide · Side · Closed #4
Jo-Wilfried Tsonga's wide backhand from a closed stance, filmed from the side. The racket face is slightly closed at contact with the ball struck around hip to waist height, and the racket head accelerates forward and upward along a steep, driving swing path.
|
|
3s |
BH Wide · Side · Closed #5
Jo-Wilfried Tsonga's wide backhand from a closed stance on the side of the court, filmed from a side angle. After contact he drives his weight through the shot with his back foot coming forward, and his hands finish high before he quickly returns the racquet to a neutral ready position.
|
|
2.5s |
BH Wide · Side · Closed #6
Jo-Wilfried Tsonga's backhand from a wide ball on the deuce side in a closed stance, filmed from the side. His hips stay closed to the net as he loads with a deep knee bend on the outside leg, then drives up and forward off that leg to reach the wide ball.
|
|
3.7s |
BH Wide · Side · Closed #7
Jo-Wilfried Tsonga's backhand from a wide ball on the deuce side in a closed stance, filmed from the side. His hips stay closed longer with a deep knee bend on the outside leg, then drive up and forward as he pushes off the outside foot to recover.
|
|
3.3s |
BH Wide · Side · Neutral #1
Jo-Wilfried Tsonga's backhand from a wide neutral-stance position, filmed from the side. His follow-through finishes high with the racket wrapping around his left shoulder as his weight transfers onto his front foot before he resets into a ready position.
|
|
2.8s |
BH Wide · Side · Neutral #2
Jo-Wilfried Tsonga's wide backhand from a neutral stance, filmed from the side. The side angle makes it easy to see his contact point slightly in front of his body with the racket face almost square to the ball and the racket head accelerating upward along a steep, modern topspin path.
|
|
2.6s |
BH Wide · Side · Neutral #3
Jo-Wilfried Tsonga's backhand from a wide neutral-stance position, filmed from the side. His follow-through finishes high with the racket wrapping around his lead shoulder as his weight transfers into the court and he quickly begins to recover toward a ready position.
|
|
3.1s |
BH Wide · Side · Open #1
Jo-Wilfried Tsonga's wide backhand from the side, filmed from a side angle. His open stance is clear as his outside leg plants wide for balance while his hips rotate through the shot before he uses small recovery steps to come out of the corner.
|
|
3s |
BH Wide · Side · Open #2
Jo-Wilfried Tsonga's wide backhand from an open stance, filmed from the side. From this angle, you can see his relatively relaxed two-handed grip with the top hand driving the racket and a delayed wrist release that snaps forward through contact.
|
|
2.7s |
BH Wide · Side · Open #3
Jo-Wilfried Tsonga's wide backhand from an open stance, filmed from the side. The side view makes it easy to see his slightly closed racket face at contact and how he strikes the ball around waist height with the racket accelerating steeply up the back of the ball.
|
|
2.6s |
BH Wide · Side · Open #4
Jo-Wilfried Tsonga's wide backhand from the side, filmed from a side angle. He plants in an open stance with his outside leg bracing wide, then uses quick recovery steps to push back toward the center after contact.
|
|
2.8s |
BH Wide · Side · Open #5
Jo-Wilfried Tsonga's wide backhand from an open stance, filmed from the side. His follow-through brings the racquet up and across his body while his weight transfers into the court, finishing in a balanced position ready to recover for the next shot.
|
|
3s |
BH Wide · Side #1
Jo-Wilfried Tsonga's backhand from a wide position, filmed from the side. The side angle makes it easy to see his slightly closed racket face at contact with the ball struck around waist height in front of his body.
|
|
2.8s |
BH Wide · Side #2
Jo-Wilfried Tsonga's wide backhand from the side. His follow-through finishes high with the racquet wrapping across his body as his weight transfers into the court and his non-hitting hand moves back toward a ready position.
|
|
2.8s |
BH Wide · Side #3
Jo-Wilfried Tsonga's backhand from a wide position, filmed from the side. The side view makes it easy to see his relatively closed racket face at contact and how his hands drive up through the ball with rising racket head speed.
|
|
2.6s |
BH Wide · Side #4
Jo-Wilfried Tsonga's backhand from a wide position, filmed from the side. His two-handed grip is clearly visible, with a firm bottom hand and relaxed top hand that lets the wrist lay back and then uncoil through contact.
|
|
3.1s |
BH Wide · Side #5
Jo-Wilfried Tsonga's wide backhand from the side, filmed from a side angle. His two-handed grip stays compact with the non-dominant hand driving the racquet while the hitting wrist maintains a firm but slightly laid-back position through contact.
|
|
2.5s |
BH Running · Side · Open #4
Jo-Wilfried Tsonga's running two-handed backhand from an open stance on the side of the court, filmed from a side angle. His shoulders and trunk load with a pronounced upper-body coil against a more open lower body, then uncoil in sequence as the hips initiate rotation before the shoulders complete the swing through contact.
|
|
2s |
BH Drop Shot · Court-level-front
Jo-Wilfried Tsonga's backhand drop shot from a neutral court position, filmed from a court-level front angle. His shoulders stay relatively closed through the takeback before a compact trunk uncoil guides the racquet softly under the ball with minimal upper-body rotation forward.
|
|
5.8s |
BH Drop Shot · Court-level-rear #1
Jo-Wilfried Tsonga's backhand drop shot from the center of the court, filmed from a court-level rear angle. His two-handed grip stays relatively relaxed with a noticeable softening of the wrists just before contact, allowing the racket face to open and gently decelerate through the ball.
|
|
7.8s |
BH Drop Shot · Court-level-rear #2
Jo-Wilfried Tsonga's backhand drop shot from the center of the court, filmed from a court-level rear angle. His two-handed grip stays compact with a noticeably softening of the dominant hand and a slight loosening of the wrist just before contact to take pace off the ball.
|
|
2.7s |
FH Drop Shot · Court-level-rear
Jo-Wilfried Tsonga's forehand drop shot from the center of the court, filmed from a court-level rear angle. His shoulders stay relatively closed through the compact backswing, with a subtle trunk uncoil initiating the soft forward swing before the arm and hand take over for touch.
|
|
3.1s |
BH Slice → Drop Shot · Front · 240fps
Jo-Wilfried Tsonga's backhand slice drop shot from a central position, filmed from the front. His knees stay flexed with a subtle forward weight shift as his hips remain relatively closed, creating a stable base for the soft, cutting motion of the slice.
|
240 |
3.4s |
BH Drop Shot · Front
Jo-Wilfried Tsonga's backhand drop shot from a central position, filmed from the front. His compact split step into a slightly closed stance and short adjustment steps toward the ball are clearly visible before he softens his weight onto the front foot for the touch shot.
|
|
7.1s |
BH Slice → Drop Shot Short · Rear · 500fps
Jo-Wilfried Tsonga's backhand slice drop shot from a central position, filmed from a rear angle. His footwork includes small adjustment steps into the ball and a slightly open stance that lets him stay light on his feet as he softens the slice for the short drop.
|
500 |
2.6s |
BH Drop Shot · Rear
Jo-Wilfried Tsonga's backhand drop shot from a central baseline position, filmed from a rear angle. At contact his racket face is slightly open with the ball taken around waist height, and the compact, decelerating swing path creates a soft touch with minimal racket head speed through impact.
|
|
2.9s |
FH Slice → Drop Shot · Side · 240fps
Jo-Wilfried Tsonga's forehand slice drop shot from a neutral court position, filmed from the side. His hips stay relatively closed with a pronounced knee bend on the loading leg, and he uses a subtle upward leg drive to soften the ball while keeping a low center of gravity through the shot.
|
240 |
2.8s |
BH Drop Shot · Side #1
Jo-Wilfried Tsonga's backhand drop shot from the center of the court, filmed from the side. His hips stay relatively closed with a pronounced knee bend, and he uses a subtle upward leg drive to soften the shot and control his lower body through contact.
|
|
2.7s |
BH Drop Shot · Side #2
Jo-Wilfried Tsonga's backhand drop shot from the middle of the court, filmed from the side. After contact his racquet finishes softly in front of his body as he keeps his non-hitting arm back for counterbalance and quickly brings his feet together to recover toward a compact ready position.
|
|
4.4s |
FH Drop Shot · Side
Jo-Wilfried Tsonga's forehand drop shot from a neutral position, filmed from the side. From this angle, his semi-western forehand grip and softening of the wrist are evident as he slightly releases tension just before contact to take pace off the ball.
|
|
3.2s |
First Serve · Ad · Court-level-front #1
Jo-Wilfried Tsonga's first serve from the Ad side, filmed from a court-level front angle. His shoulders load into a pronounced coil with the tossing arm fully extended upward, then the trunk uncoils aggressively upward and into the court in a clear sequence from hips to shoulders.
|
|
9.1s |
First Serve · Ad · Court-level-front #2
Jo-Wilfried Tsonga's first serve from the Ad court, filmed from a court-level front angle. At contact his racket face is slightly tilted up with the ball struck well above his head, and the racket head whips up and across the ball on a steep upward swing path.
|
|
3.1s |
First Serve · Ad · Court-level-front #1
Jo-Wilfried Tsonga's first serve from the Ad side toward the middle, filmed from a court-level front angle. His continental grip is firm with a relaxed wrist that pronates aggressively through contact, creating a pronounced wrist snap just after impact.
|
|
3.3s |
First Serve · Ad · Toss · Court-level-front #1
Jo-Wilfried Tsonga's first serve from the ad court, filmed from a court-level front angle. His continental grip is clearly visible on the racquet handle, with a firm but relaxed wrist that stays neutral through the toss and then pronates aggressively just after contact.
|
|
3.3s |
First Serve · Ad · Toss · Court-level-front #2
Jo-Wilfried Tsonga's first serve from the Ad court toss position, filmed from a court-level front angle. After contact his weight drives into the court with his back leg kicking up behind and his tossing arm dropping quickly as he lands in a balanced stance ready for the next shot.
|
|
2.9s |
First Serve · Deuce · Court-level-front #1
Jo-Wilfried Tsonga's first serve from the deuce court, filmed from a court-level front angle. His footwork includes a small adjustment hop into a pinpoint stance before driving up, with a clear front-foot landing that sets up his recovery toward the baseline.
|
|
3.7s |
First Serve · Deuce · Court-level-front #2
Jo-Wilfried Tsonga's first serve from the deuce court, filmed from a court-level front angle. His shoulders rotate deeply away from the court during the toss, creating a pronounced trunk coil that uncoils in sequence from hips to shoulders as he drives up to contact.
|
|
3.3s |
First Serve → FH Short → FH Volley · Deuce · Court-level-front #1
Jo-Wilfried Tsonga's forehand volley from the deuce side, filmed from a court-level front angle. At contact his racket face is slightly open with the ball meeting the strings just in front of his body, and the compact forward punch produces a crisp, accelerating racket head through the volley.
|
|
8.1s |
First Serve → FH Volley → BH Volley · Deuce · Court-level-front #1
Jo-Wilfried Tsonga's forehand volley from the deuce side, filmed from a court-level front angle. After contact he drives his weight forward into the court and quickly resets his hands in front of his body, preparing for the next volley.
|
|
8s |
First Serve · Deuce · Toss · Court-level-front #1
Jo-Wilfried Tsonga's first serve from the deuce side, filmed from a court-level front angle. His footwork shows a rhythmic rocking motion into a pinpoint stance, with a small front-foot adjustment just before the toss to set his base before driving up into the serve.
|
|
3.2s |
First Serve Wide · Deuce · Court-level-front #1
Jo-Wilfried Tsonga's first serve out wide from the Deuce side, filmed from a court-level front angle. His continental grip is firm with a relaxed wrist that pronates aggressively through contact, making the racket edge-on before snapping into a fully squared position toward the target.
|
|
3s |
First Serve Wide · Deuce · Court-level-front #2
Jo-Wilfried Tsonga's first serve from the Deuce court, hit wide, filmed from a court-level front angle. His feet set in a closed stance with a pronounced knee bend before driving up, and he lands well inside the court with a strong forward recovery step toward the baseline.
|
|
2.7s |
First Serve → BH Volley · Ad · Court-level-rear #1
Jo-Wilfried Tsonga's backhand volley from the ad court, filmed from a court-level rear angle. He sets up with a compact split-step before pushing off his outside leg into a slightly open stance, taking a small adjustment step forward to meet the ball in front of his body.
|
|
7.7s |
First Serve · Ad · Body-rotation · Court-level-rear #1
Jo-Wilfried Tsonga's first serve from the ad side, filmed from a court-level rear angle. His shoulders rotate well past perpendicular to the baseline on the trophy phase, then uncoil in sync with his trunk so that his chest opens toward the target just before arm extension.
|
|
3.3s |
First Serve · Ad · Court-level-rear #1
Jo-Wilfried Tsonga's first serve from the Ad court, filmed from a court-level rear angle. At contact his racket face is slightly tilted up with a steep upward swing path, striking the ball at full extension well above his head to maximize racket head speed.
|
|
3s |
First Serve Down The Middle · Ad · Court-level-rear #1
Jo-Wilfried Tsonga's first serve from the Ad court down the middle, filmed from a court-level rear angle. His continental grip is clearly visible on the racquet handle, and the rear view makes the pronounced wrist pronation through and after contact easy to see.
|
|
3s |
First Serve → FH Swinging Volley → OH · Ad · Court-level-rear #1
Jo-Wilfried Tsonga's first serve from the Ad court, filmed from a court-level rear angle. At contact his racket face is slightly tilted forward with the ball struck at full extension well above head height, and the racket head accelerates steeply up and across the ball on a pronounced swing path.
|
|
12.4s |
First Serve → FH Volley · Ad · Court-level-rear #1
Jo-Wilfried Tsonga's forehand volley from the Ad side, filmed from a court-level rear angle. His continental grip stays firm with a slightly laid-back wrist, and the wrist remains stable through contact with only a compact, controlled snap forward into the ball.
|
|
7.2s |
First Serve · Ad · Toss · Court-level-rear #1
Jo-Wilfried Tsonga's first serve from the Ad court, filmed from a court-level rear angle. His continental grip is firm with a relaxed wrist that pronates aggressively through contact, making the wrist snap especially visible from behind.
|
|
3.2s |
First Serve · Ad · Toss · Court-level-rear #2
Jo-Wilfried Tsonga's first serve from the ad side, filmed from a court-level rear angle. His shoulders rotate well past perpendicular to the baseline during the toss, creating a pronounced trunk coil that uncoils in sequence from hips to shoulders as he drives up to the ball.
|
|
3s |
First Serve Wide · Ad · Court-level-rear #1
Jo-Wilfried Tsonga's first serve from the Ad side, hit wide and filmed from a court-level rear angle. His deep knee bend and explosive leg drive upward are clearly visible as his hips uncoil aggressively toward the target.
|
|
3s |
First Serve Wide · Ad · Court-level-rear #2
Jo-Wilfried Tsonga's first serve from the Ad side, hit wide, filmed from a court-level rear angle. His shoulders rotate deeply away from the court during the toss, creating a pronounced trunk coil that uncoils sequentially from hips to shoulders into contact.
|
|
4.4s |
First Serve · Deuce · Body-rotation · Court-level-rear #1
Jo-Wilfried Tsonga's first_serve from the deuce side, filmed from a court_level rear angle. His hips load into a strong coil with a deep knee bend, then uncoil aggressively as his legs drive upward into the court during the serve.
|
|
3.3s |
First Serve · Deuce · Court-level-rear #1
Jo-Wilfried Tsonga's first serve from the deuce side, filmed from a court-level rear angle. After contact he lands well inside the court with his weight driving forward, and his hitting arm and non-hitting arm both drop quickly into a compact, athletic ready position for the next shot.
|
|
3s |
First Serve · Deuce · Court-level-rear #2
Jo-Wilfried Tsonga's first serve from the deuce court, filmed from a court-level rear angle. At contact his racket face is slightly tilted up with the ball struck just above full extension, and the racket head accelerates steeply up and through the ball along a pronounced upward swing path.
|
|
4.2s |
First Serve Down The Middle · Deuce · Court-level-rear #1
Jo-Wilfried Tsonga's first serve from the deuce side, filmed from a court-level rear angle. His hips load deeply with a pronounced knee bend before driving upward, and his back leg extends explosively into the court as his hips uncoil toward the target.
|
|
4.2s |
First Serve Down The Middle · Deuce · Court-level-rear #2
Jo-Wilfried Tsonga's first serve from the deuce court, filmed from a court-level rear angle. His continental grip is firm with a relaxed wrist that pronates aggressively through contact, creating a pronounced wrist snap up and over the ball.
|
|
2.8s |
First Serve → FH Short → BH Volley · Deuce · Court-level-rear #1
Jo-Wilfried Tsonga's backhand volley from the deuce side, filmed from a court-level rear angle. His continental grip is clearly visible on the backhand side, with a firm but relaxed wrist that stays stable through contact rather than breaking or rolling.
|
|
11s |
First Serve · Deuce · Toss · Court-level-rear #1
Jo-Wilfried Tsonga's first serve from the deuce side, filmed from a court-level rear angle. From this view, you can see his relatively relaxed continental grip and the way his wrist stays loose through the toss and into a pronounced pronation just after contact.
|
|
3.1s |
First Serve · Deuce · Toss · Court-level-rear #2
Jo-Wilfried Tsonga's first serve from the deuce side, filmed from a court-level rear angle. The racket climbs on edge into a fully pronated contact with the ball struck slightly in front of his head at a high contact point, creating a steep upward swing path and visible racket head acceleration through the hit.
|
|
4.4s |
First Serve Wide · Deuce · Court-level-rear #1
Jo-Wilfried Tsonga's first serve from the deuce side out wide, filmed from a court-level rear angle. His footwork includes a small adjustment hop into a pinpoint stance before the toss, with a pronounced drive off his back leg into the court during the serve motion.
|
|
3s |
First Serve · Ad · Arm-action · Front · 500fps #1
Jo-Wilfried Tsonga's first serve from the Ad court, filmed from a front angle. From this view, you can clearly see his shoulders fully rotate away from the target during the trophy phase before the trunk powerfully unwinds in sequence from hips to shoulders into the hitting arm.
|
500 |
3.1s |
First Serve · Ad · Arm-action · Front · 500fps #2
Jo-Wilfried Tsonga's first serve from the ad court, filmed from a front angle. His deep knee bend and aggressive leg drive into the court are easy to see, with the hips uncoiling upward as he explodes off the ground.
|
500 |
3.4s |
First Serve · Ad · Arm-action · Front · 500fps #3
Jo-Wilfried Tsonga's first serve from the Ad side, filmed from a front angle. His hips stay relatively closed through the knee bend before driving upward, with a strong push off the back leg that initiates an explosive uncoiling into the court.
|
500 |
3.5s |
First Serve · Ad · Arm-action · Front · 500fps #4
Jo-Wilfried Tsonga's first serve from the ad court, filmed from a front angle. His continental grip and relaxed hand position make the wrist lag clearly visible before a pronounced pronation and snap through contact.
|
500 |
2.9s |
First Serve · Ad · Arm-action · Front · 500fps #5
Jo-Wilfried Tsonga's first serve from the ad court, filmed from a front angle. His hips stay relatively closed through the knee bend before driving upward, with an explosive leg push that straightens both knees as the hips rotate into the court.
|
500 |
3s |
First Serve · Ad · Body-rotation · Front · 500fps
Jo-Wilfried Tsonga's first serve from the ad court, filmed from the front. His shoulders rotate from a deep coil with the tossing arm high and chest angled sideways into a rapid uncoiling of the trunk that pulls the hitting arm up and through in a clear kinetic chain sequence.
|
500 |
3s |
First Serve Down The Line · Ad · Front · 500fps
Jo-Wilfried Tsonga's first serve from the ad court, filmed from the front. After contact his follow-through finishes across his body while his weight drives into the court, bringing him quickly back toward a balanced, ready position.
|
500 |
3.4s |
First Serve · Ad · Front · 500fps #1
Jo-Wilfried Tsonga's first serve from the ad court, filmed from a front angle. His shoulders and trunk coil deeply away from the target during the trophy phase, then uncoil in a pronounced sequence where the torso rotation clearly precedes the arm whipping up to contact.
|
500 |
3.1s |
First Serve · Ad · Front · 500fps #2
Jo-Wilfried Tsonga's first serve from the ad court, filmed from a front camera angle. His shoulders and trunk coil deeply away from the target before uncoiling in a pronounced rotational sequence that brings the hitting shoulder through ahead of the hips at contact.
|
500 |
3.5s |
First Serve · Ad · Front · 500fps #3
Jo-Wilfried Tsonga's first serve from the ad court, filmed from a front angle. His feet load in a slightly closed stance with a pronounced knee bend, and you can see his back foot drive up and into the court as he lands on his front leg.
|
500 |
2.7s |
First Serve · Ad · Front · 500fps #4
Jo-Wilfried Tsonga's first serve from the ad court, filmed from a front angle. His deep knee bend and aggressive leg drive are clearly visible as his hips stay closed toward the net before powerfully uncoiling into the court.
|
500 |
4s |
First Serve · Ad · Front · 500fps #5
Jo-Wilfried Tsonga's first serve from the ad court, filmed from a front angle. His split-step is minimal as he sets up, with a stable, slightly closed stance and a pronounced front-leg drive into the court before landing on his left foot to begin recovery.
|
500 |
2.7s |
First Serve · Ad · Toss · Front · 500fps
Jo-Wilfried Tsonga's first serve from the ad court, filmed from the front. His compact, rhythmic footwork into a platform stance is clear, with a small adjustment step before setting his feet and a stable, non-jumping base through the toss.
|
500 |
3.8s |
First Serve · Deuce · Arm-action · Front · 500fps #1
Jo-Wilfried Tsonga's first serve from the Deuce side, filmed from a front angle. After contact his arm continues upward with the racquet finishing on his right side as his weight drives into the court and he quickly drops both hands to transition into a compact ready position.
|
500 |
1.5s |
First Serve · Deuce · Arm-action · Front · 500fps #2
Jo-Wilfried Tsonga's first serve from the Deuce side, filmed from a front angle. The high-speed view makes it easy to see his racket face stay slightly closed at contact with the ball meeting the strings just above net height and his arm fully extended.
|
500 |
3.1s |
First Serve · Deuce · Arm-action · Front · 500fps #3
Jo-Wilfried Tsonga's first serve from the deuce side, filmed from a front camera angle. His continental grip is clearly visible on the racquet handle, with a pronounced wrist pronation through contact that turns the strings toward the target.
|
500 |
3.2s |
First Serve · Deuce · Arm-action · Front · 500fps #4
Jo-Wilfried Tsonga's first serve from the deuce side, filmed from a front angle. The racket arm action shows the strings approaching contact with a slightly closed face and the racket head accelerating steeply up and into the ball just above his outstretched tossing hand.
|
500 |
2.9s |
First Serve · Deuce · Arm-action · Front · 500fps #5
Jo-Wilfried Tsonga's first serve from the deuce side, filmed from a front angle. After contact his arm unwinds fully toward the target while his weight lands on his front foot, and he quickly lets both hands drop into a neutral position as he begins recovering toward his ready stance.
|
500 |
2.9s |
First Serve · Deuce · Arm-action · Front · 500fps #6
Jo-Wilfried Tsonga's first serve from the deuce court, filmed from a front angle. His continental grip is clearly visible, with a loose wrist that pronates aggressively through contact to create pronounced wrist snap.
|
500 |
2.7s |
First Serve · Deuce · Arm-action · Front · 500fps #7
Jo-Wilfried Tsonga's first serve from the deuce court, filmed from a front angle. His footwork shows a stable platform stance with a slight front-foot angle toward the net, and his weight transfers forward off a compact, minimal knee-bend loading step.
|
500 |
3s |
First Serve Down The Line · Deuce · Front · 240fps #1
Jo-Wilfried Tsonga's first serve from the deuce court, filmed from the front at 240 fps. His deep knee bend and aggressive leg drive upward are clearly visible, with the hips powerfully uncoiling toward the target as his back heel leaves the court.
|
240 |
3.2s |
First Serve Down The Line · Deuce · Front · 240fps #2
Jo-Wilfried Tsonga's first serve from the deuce side, filmed from a front angle at 240 fps. His continental grip stays firm with a relaxed hand, and the slow-motion view makes the upward wrist pronation into contact and brief wrist snap after impact clearly visible.
|
240 |
3.6s |
First Serve · Deuce · Front · 500fps #1
Jo-Wilfried Tsonga's first serve from the deuce court, filmed from a front angle. After contact his racquet finishes across his body while his weight drives into the court and his non-hitting arm tucks in, bringing him quickly back toward a balanced, ready position.
|
500 |
3s |
First Serve · Deuce · Front · 500fps #2
Jo-Wilfried Tsonga's first serve from the deuce court, filmed from a front angle. At contact his racket face is slightly tilted upward with the ball struck just above full extension, and the racket head accelerates steeply up and across the ball along a pronounced edge-on swing path.
|
500 |
3.5s |
First Serve · Deuce · Front · 500fps #3
Jo-Wilfried Tsonga's first serve from the Deuce side, filmed from a front angle. After contact his weight drives into the court and he lands on his front leg with his non-hitting arm dropping back before he quickly regroups into a ready position.
|
500 |
3.3s |
First Serve · Deuce · Toss · Front · 500fps
Jo-Wilfried Tsonga's first serve from the Deuce court, filmed from the front at 500 fps. His knees dip deeply as the tossing arm rises, creating a strong leg load that drives his hips upward and into the court during the serve motion.
|
500 |
3.1s |
First Serve Wide · Deuce · Front · 500fps
Jo-Wilfried Tsonga's first serve wide from the Deuce court, filmed from a front angle. His shoulders and trunk show a pronounced coil away from the target before uncoiling in sequence, with the chest rotating toward the net as the hitting shoulder drives up and through the ball.
|
500 |
3s |
First Serve → BH Volley · Ad · Front #1
Jo-Wilfried Tsonga's backhand volley from the Ad side, filmed from a front angle. His shoulders stay relatively square to the net while the trunk makes only a compact coil, with a short uncoil through contact that links a minimal torso turn to the forward motion of the arms.
|
|
6s |
First Serve · Ad · Front #1
Jo-Wilfried Tsonga's first serve from the Ad court, filmed from the front. His shoulders and trunk coil deeply away from the target before uncoiling in a pronounced rotational sequence that brings the chest square to the net just after contact.
|
|
2.9s |
First Serve · Ad · Front #2
Jo-Wilfried Tsonga's first serve from the Ad court, filmed from a front angle. His footwork includes a compact pinpoint stance with the back foot drawing up to the front foot before driving upward into the serve.
|
|
3.1s |
First Serve · Ad · Leg-action · Front #1
Jo-Wilfried Tsonga's first serve from the ad court, filmed from the front. His continental grip is firm with a relaxed hand, and you can see pronounced wrist pronation through contact as the racquet edge leads and then turns outward toward the target.
|
|
2.9s |
First Serve · Ad · Leg-action · Front #2
Jo-Wilfried Tsonga's first serve from the Ad court, filmed from the front. His deep knee bend and aggressive leg drive into the court are clearly visible, with his hips uncoiling upward as he pushes off the ground.
|
|
3s |
First Serve · Ad · Toss · Front #1
Jo-Wilfried Tsonga's first serve from the Ad court, filmed from the front. His shoulder line turns significantly away from the target while the trunk coils as a unit, then uncoils in sequence from hips to shoulders to arm during the upward swing.
|
|
3s |
First Serve · Deuce · Body-rotation · Front #1
Jo-Wilfried Tsonga's first serve from the deuce court, filmed from the front. The racket comes through with a closed face at contact, striking the ball slightly above head height with pronounced upward racket head speed.
|
|
2.8s |
First Serve → FH Volley → OH · Deuce · Front #1
Jo-Wilfried Tsonga's forehand volley from the deuce court, filmed from the front. His shoulders stay relatively square to the net while the trunk performs a compact, short-range rotation forward, with the upper body driving through the ball in sync with the forward step.
|
|
8.6s |
First Serve · Deuce · Front #1
Jo-Wilfried Tsonga's first serve from the deuce court, filmed from the front. His deep knee bend and explosive leg drive into the court are clearly visible, with his hips powerfully uncoiling upward as he transitions from the loading phase into contact.
|
|
3s |
First Serve · Deuce · Front #2
Jo-Wilfried Tsonga's first serve from the deuce court, filmed from the front. His continental grip is firm with a slightly relaxed wrist, allowing a pronounced pronation through contact that is easy to see from the front angle.
|
|
2.6s |
First Serve · Deuce · Leg-action · Front #1
Jo-Wilfried Tsonga's first serve from the deuce court, filmed from the front. His aggressive shoulder tilt and pronounced trunk coil into the trophy position are clearly visible as the torso uncoils upward in sync with the leg drive.
|
|
3.2s |
First Serve · Deuce · Toss · Front #1
Jo-Wilfried Tsonga's first serve from the deuce side, filmed from the front. The racket moves up on edge into a slightly closed face at contact, with the ball struck just above head height as the racket head accelerates steeply through the hitting zone.
|
|
3.6s |
First Serve · Ad · Arm-action · Rear · 240fps #1
Jo-Wilfried Tsonga's first serve from the ad court, filmed from a rear angle. The rear slow-motion view makes the upward racket path and slightly closed racket face at contact clearly visible as he strikes the ball at full extension above his head.
|
240 |
3s |
First Serve · Ad · Arm-action · Rear · 240fps #2
Jo-Wilfried Tsonga's first serve from the ad side, filmed from a rear angle at 240 fps. His continental grip is clearly visible on the serve, with a loose wrist that pronates aggressively through contact to accelerate the racket head.
|
240 |
2.9s |
First Serve · Ad · Leg-action · Rear · 500fps
Jo-Wilfried Tsonga's first serve from the Ad side, filmed from a rear angle. His exaggerated shoulder-over-shoulder action and pronounced trunk uncoil are easy to see as the torso rotates aggressively upward and into the court after maximum coil in the trophy position.
|
500 |
3.4s |
First Serve · Ad · Rear · 500fps #1
Jo-Wilfried Tsonga's first serve from the ad court, filmed from a rear angle. His shoulders rotate well past perpendicular to the baseline in the trophy phase, then uncoil in sequence with a pronounced trunk rotation driving up into contact.
|
500 |
2.4s |
First Serve · Ad · Rear · 500fps #2
Jo-Wilfried Tsonga's first serve from the ad court, filmed from a rear angle. His split-step into a wide stance is followed by a pronounced front-foot pivot and upward drive off the back leg, clearly visible as he loads before swinging.
|
500 |
5.4s |
First Serve · Ad · Toss · Rear · 500fps
Jo-Wilfried Tsonga's first serve from the ad court, filmed from a rear angle. After contact his tossing arm drops and then tucks in as his body weight lands on his front leg, bringing him back toward a neutral ready position on the baseline.
|
500 |
3.4s |
First Serve · Deuce · Arm-action · Rear · 240fps #1
Jo-Wilfried Tsonga's first serve from the deuce side, filmed from a rear angle at 240 fps. His shoulders load with a deep turn relative to the baseline before the trunk uncoils in a clearly sequenced motion from hips to shoulders into the hitting arm.
|
240 |
3.3s |
First Serve · Deuce · Arm-action · Rear · 240fps #3
Jo-Wilfried Tsonga's first serve from the deuce court, filmed from a rear angle at 240 fps. His footwork shows a compact platform stance with minimal heel lift, and he drives off both legs in a coordinated push into the court before landing on his front (left) foot.
|
240 |
2.8s |
First Serve · Deuce · Arm-action · Rear · 240fps #4
Jo-Wilfried Tsonga's first serve from the deuce side, filmed from a rear angle at 240 fps. After contact his arm unwinds fully with the racquet finishing on his left side while his back leg swings through to help him land inside the court and transition toward a ready position.
|
240 |
17.4s |
First Serve · Deuce · Body-rotation · Rear · 240fps
Jo-Wilfried Tsonga's first serve from the deuce side, filmed from a rear angle. His continental grip is clearly visible, with a loose wrist that pronates aggressively through contact to accelerate the racquet head.
|
240 |
3.2s |
First Serve Down The Line · Deuce · Rear · 240fps
Jo-Wilfried Tsonga's first serve from the deuce court, filmed from a rear angle. His footwork shows a rhythmic rocking motion into a pinpoint stance, with the back foot drawing up to the front before he drives up into the court.
|
240 |
3.9s |
First Serve · Deuce · Leg-action · Rear · 500fps #1
Jo-Wilfried Tsonga's first serve from the deuce court, filmed from a rear angle. His recovery shows a strong forward weight transfer landing on his left leg, with his non-hitting arm dropping quickly back toward a ready position as he comes out of the serve.
|
500 |
3.3s |
First Serve · Deuce · Leg-action · Rear · 500fps #2
Jo-Wilfried Tsonga's first serve from the deuce court, filmed from a rear angle. His continental grip is clearly visible, with a relaxed hand and pronounced wrist pronation through contact that finishes with the racquet wrapping across his body.
|
500 |
3.1s |
First Serve · Deuce · Rear · 500fps #1
Jo-Wilfried Tsonga's first serve from the deuce court, filmed from a rear angle. His continental grip is clearly visible on the racquet handle, with a pronounced wrist pronation through contact that continues into a relaxed, extended follow-through.
|
500 |
3.1s |
First Serve · Deuce · Rear · 240fps #2
Jo-Wilfried Tsonga's first serve from the deuce court, filmed from a rear angle at 240 fps. At contact his racket face is slightly tilted upward with the ball struck well above head height, and the racket head whips up and across the ball on a steeply ascending path.
|
240 |
3.6s |
First Serve Wide · Deuce · Rear · 500fps
Jo-Wilfried Tsonga's first serve from the Deuce court, hit wide and filmed from a rear angle. At contact his racket face is slightly tilted upward with the ball struck just above full extension, and the racket head whips rapidly up and across the hitting zone on a pronounced upward swing path.
|
500 |
4.3s |
First Serve · Ad · Body-rotation · Rear #1
Jo-Wilfried Tsonga's first serve from the Ad court, filmed from a rear angle. His follow-through finishes across his body with his back leg swinging forward, helping him land inside the court and flow directly into a balanced recovery position.
|
|
2.7s |
First Serve · Ad · Body-rotation · Rear #2
Jo-Wilfried Tsonga's first serve from the Ad court, filmed from a rear angle. After contact his torso continues rotating toward the court and his back leg swings through, helping him land inside the baseline and transition quickly toward a ready position.
|
|
3.5s |
First Serve Down The Middle · Ad · Rear #1
Jo-Wilfried Tsonga's first serve from the Ad court down the middle, filmed from a rear angle. At contact his racket face is slightly tilted forward with the ball struck at full extension well above his head, and the racket head accelerates steeply upward along the right side of his body.
|
|
4.5s |
First Serve Down The Middle · Ad · Rear #2
Jo-Wilfried Tsonga's first serve from the Ad court down the middle, filmed from a rear angle. After contact he lets his hitting arm decelerate across his body while his back leg swings forward into the court, bringing him quickly into a balanced, upright ready position on the baseline.
|
|
3.2s |
First Serve · Ad · Leg-action · Rear #1
Jo-Wilfried Tsonga's first serve from the Ad court, filmed from a rear angle. After contact his hitting arm decelerates across his body while his back leg swings forward into the court, helping him land balanced and ready for the next shot.
|
|
3.5s |
First Serve · Ad · Rear #1
Jo-Wilfried Tsonga's first serve from the Ad court, filmed from a rear angle. After contact he lands well inside the baseline with his weight driving forward, and his non-hitting arm tucks back in as he quickly regains a balanced, ready position for the next shot.
|
|
3.5s |
First Serve · Ad · Rear #2
Jo-Wilfried Tsonga's first serve from the Ad court, filmed from a rear angle. His continental grip is firm with a relaxed wrist that pronates aggressively through contact, making the wrist snap especially noticeable from behind.
|
|
5.3s |
First Serve · Ad · Rear #3
Jo-Wilfried Tsonga's first serve from the Ad court, filmed from a rear angle. After contact he lands well inside the court with his weight driving forward, and his non-hitting arm drops naturally as he quickly regains a balanced, ready position for the next ball.
|
|
3.3s |
First Serve Wide · Ad · Rear #1
Jo-Wilfried Tsonga's first serve from the Ad court, hit wide, filmed from a rear angle. After contact he lands well inside the court with his back leg swinging through, then quickly drops into a balanced ready position with both hands returning to the racquet in front of his body.
|
|
3.5s |
First Serve · Deuce · Arm-action · Rear #1
Jo-Wilfried Tsonga's first serve from the deuce court, filmed from a rear angle. His footwork features a rhythmic platform stance with a subtle knee bend and minimal rear-foot adjustment before driving up into the court.
|
|
3.3s |
First Serve · Deuce · Body-rotation · Rear #1
Jo-Wilfried Tsonga's first serve from the deuce court, filmed from a rear angle. After contact his torso unwinds fully toward the court and his back leg swings through, bringing him into a balanced, forward-leaning landing that sets up his ready position for the next shot.
|
|
4s |
First Serve · Deuce · Rear #1
Jo-Wilfried Tsonga's first serve from the deuce court, filmed from a rear angle. The contact point shows a fully extended arm with the racket face slightly pronated forward, creating a steep upward swing path and high racket head speed through the ball.
|
|
4.6s |
First Serve · Deuce · Rear #2
Jo-Wilfried Tsonga's first serve from the deuce court, filmed from a rear angle. His footwork shows a quick, compact adjustment of the back foot into a platform stance before the toss, with a pronounced knee bend driving upward into the serve.
|
|
3.1s |
First Serve · Ad · Arm-action · Side · 240fps
Jo-Wilfried Tsonga's first serve from the ad court, filmed from the side. His footwork shows a rhythmic rocker step into a pinpoint stance, with his back foot drawing up beside the front foot just before leg drive.
|
240 |
3s |
First Serve · Ad · Body-rotation · Side · 240fps
Jo-Wilfried Tsonga's first serve from the ad court, filmed from the side at 240 fps. His deep knee bend, aggressive leg drive, and rapid uncoiling of the hips into contact are clearly visible from this angle.
|
240 |
3.1s |
First Serve · Ad · Side · 120fps #1
Jo-Wilfried Tsonga's first serve from the ad side, filmed from a side angle at 120 fps. His hips load deeply with a pronounced knee bend, then drive upward as his back leg extends explosively into the court during the serve motion.
|
120 |
3.2s |
First Serve · Ad · Side · 240fps #2
Jo-Wilfried Tsonga's first serve from the ad side, filmed from a side angle. His shoulders rotate well past perpendicular to the baseline in the trophy phase, then uncoil ahead of the hips so the trunk whip is clearly visible in slow motion at 240 fps.
|
240 |
3.2s |
First Serve · Ad · Side · 240fps #3
Jo-Wilfried Tsonga's first serve from the ad court, filmed from the side at 240 fps. His deep knee bend and aggressive leg drive into the court are clearly visible, along with strong hip rotation leading the upward motion into the serve.
|
240 |
3.1s |
First Serve · Ad · Side · 240fps #4
Jo-Wilfried Tsonga's first serve from the ad side, filmed from a side angle. His deep knee bend and forward-driving leg extension are clearly visible as his hips open toward the court during the upward drive into the ball.
|
240 |
3.2s |
First Serve · Deuce · Body-rotation · Side · 240fps
Jo-Wilfried Tsonga's first serve from the deuce side, filmed from a side angle. His follow-through carries his torso and back leg into the court, with his non-hitting arm tucking in as he lands and quickly begins to recover toward a balanced ready position.
|
240 |
3.2s |
First Serve · Deuce · Side · 240fps #1
Jo-Wilfried Tsonga's first serve from the Deuce side, filmed from the Side angle. After contact his momentum carries him slightly into the court with the tossing arm dropping quickly as he lands on his front foot and begins bringing the racquet hand back toward a ready position.
|
240 |
3.3s |
First Serve · Deuce · Side · 240fps #2
Jo-Wilfried Tsonga's first serve from the deuce side, filmed from a side angle. The side view makes it easy to see his contact point well above head height with a slightly closed racket face and an upward swing path accelerating steeply through the ball.
|
240 |
4s |
First Serve · Deuce · Side · 240fps #3
Jo-Wilfried Tsonga's first serve from the deuce court, filmed from a side angle. His continental grip is clearly visible with a relaxed hand, and the side view makes the pronounced wrist pronation through contact easy to see.
|
240 |
3.3s |
First Serve · Deuce · Side · 120fps #4
Jo-Wilfried Tsonga's first serve from the deuce side, filmed from a side angle. From this view, you can clearly see his continental grip with a loose wrist that pronates aggressively through contact, causing the racquet face to snap upward and inward after impact.
|
120 |
4.5s |
First Serve · Ad · Arm-action · Side #1
Jo-Wilfried Tsonga's first serve from the Ad court, filmed from the side. His footwork shows a rhythmic rocker step into a pinpoint stance, with a strong upward leg drive and minimal landing shuffle into the court.
|
|
3.3s |
First Serve · Ad · Arm-action · Side #2
Jo-Wilfried Tsonga's first serve from the Ad court, filmed from the side. His follow-through brings his hitting arm down across his body while his back leg swings forward, helping him land inside the court and transition quickly toward a ready position.
|
|
3.9s |
First Serve · Ad · Arm-action · Side #3
Jo-Wilfried Tsonga's first serve from the ad side, filmed from a side angle. His hips load deeply with a pronounced knee bend before driving upward, and his rear hip clearly rotates through as his legs extend into the court.
|
|
3.8s |
First Serve → BH Volley · Ad · Side #1
Jo-Wilfried Tsonga's backhand volley from the Ad side, filmed from a side angle. His racket face stays slightly open at contact with the ball meeting the strings just in front of his body and around waist height, with a compact forward punch through the shot.
|
|
7.5s |
First Serve → BH Volley · Ad · Side #2
Jo-Wilfried Tsonga's backhand volley from the Ad side, filmed from a side angle. After contact he drives his weight forward into the court and quickly brings both hands back toward his torso to reset into a compact ready position for the next shot.
|
|
8.8s |
First Serve · Ad · Body-rotation · Side #1
Jo-Wilfried Tsonga's first serve from the Ad side, filmed from a side angle. His continental grip is firm with a relaxed wrist that pronates aggressively through contact, making the wrist snap especially clear from this view.
|
|
3s |
First Serve · Ad · Body-rotation · Side #2
Jo-Wilfried Tsonga's first serve from the ad court, filmed from a side angle. His continental grip is firm with a relaxed wrist that pronates aggressively through contact, creating a pronounced wrist snap just after impact.
|
|
3s |
First Serve → FH Swinging Volley → OH · Ad · Side #1
Jo-Wilfried Tsonga's first serve from the Ad court, filmed from the side. His hips load deeply with a pronounced knee bend before driving upward, and his rear hip rotates aggressively toward the court as his legs extend into the swinging volley overhead.
|
|
12s |
First Serve · Ad · Side #1
Jo-Wilfried Tsonga's first serve from the Ad side, filmed from the side. The racket comes through with a slightly closed face at a contact point well above his head, emphasizing an upward swing path and pronounced racket head acceleration through the ball.
|
|
3.2s |
First Serve · Ad · Side #2
Jo-Wilfried Tsonga's first serve from the Ad side, filmed from the side. After contact he lands well inside the court with his weight driving forward, his non-hitting arm dropping back as he quickly regathers into a compact ready position.
|
|
2.9s |
First Serve · Ad · Side #3
Jo-Wilfried Tsonga's first serve from the Ad side, filmed from the side. After contact he drives his weight into the court and quickly regathers his feet into a balanced ready position, with his non-hitting arm dropping naturally to aid his forward recovery.
|
|
4.9s |
First Serve · Ad · Side #4
Jo-Wilfried Tsonga's first serve from the Ad side, filmed from the side. His deep knee bend and explosive upward leg drive into the court are clearly visible, with his hips powerfully uncoiling as he extends toward contact.
|
|
2.6s |
First Serve · Ad · Side #5
Jo-Wilfried Tsonga's first serve from the Ad side, filmed from a side angle. His continental grip is firm with a relaxed wrist that clearly pronates through contact, creating a distinct wrist snap just after impact.
|
|
3s |
First Serve · Ad · Side #6
Jo-Wilfried Tsonga's first serve from the Ad side, filmed from the side. His shoulders rotate deeply away from the court during the toss, creating a pronounced trunk coil that uncoils upward and into the court in a clear sequence from hips to shoulders.
|
|
3s |
First Serve · Ad · Toss · Side #1
Jo-Wilfried Tsonga's first serve from the Ad court, filmed from the side. His deep knee bend and aggressive leg drive upward are clearly visible, with the hips powerfully extending as he pushes off the ground into contact.
|
|
3.4s |
First Serve · Ad · Toss · Side #2
Jo-Wilfried Tsonga's first serve from the Ad court, filmed from a side angle. His deep knee bend and aggressive leg drive into the court are clearly visible, with his hips powerfully uncoiling upward as he pushes off the ground.
|
|
2.8s |
First Serve · Ad · Toss · Side #3
Jo-Wilfried Tsonga's first serve from the Ad court, filmed from the side. His continental grip is clearly visible on the racquet handle, with a pronounced wrist pronation driving the racquet head up and through the ball at contact.
|
|
3.3s |
First Serve · Ad · Toss · Side #4
Jo-Wilfried Tsonga's first serve from the Ad court, filmed from the side. The racket comes up to a fully extended contact point well above his head with a slightly closed face, and the upward swing path produces visibly high racket head speed through the ball.
|
|
3s |
First Serve · Deuce · Arm-action · Side #1
Jo-Wilfried Tsonga's first serve from the deuce side, filmed from the side. His hips load with a pronounced knee bend before driving upward, with the back leg pushing off strongly to initiate upward and forward momentum into the court.
|
|
4.9s |
First Serve · Deuce · Arm-action · Side #2
Jo-Wilfried Tsonga's first serve from the deuce court, filmed from the side. After contact his serving arm extends fully into the court while his back leg swings through, helping him land inside the baseline and transition smoothly toward a balanced ready position.
|
|
4.6s |
First Serve · Deuce · Arm-action · Side #3
Jo-Wilfried Tsonga's first serve from the deuce side, filmed from a side angle. The side view makes it easy to see his fully extended tossing arm at contact and the upward racket path with a slightly closed racket face as it accelerates through the ball.
|
|
3.1s |
First Serve → BH Half Volley · Deuce · Side #1
Jo-Wilfried Tsonga's first serve from the deuce court, filmed from the side. His hips load deeply with a pronounced knee bend before driving upward, and his back leg extends aggressively into the court as the hips uncoil toward contact.
|
|
4.9s |
First Serve · Deuce · Body-rotation · Side #1
Jo-Wilfried Tsonga's first serve from the deuce court, filmed from the side. His shoulders turn well past 90 degrees relative to the baseline, creating a pronounced trunk coil that uncoils sequentially from hips to shoulders into the contact.
|
|
3.2s |
First Serve · Deuce · Body-rotation · Side #2
Jo-Wilfried Tsonga's first serve from the deuce court, filmed from the side. From this angle you can see his continental grip stay firm while his wrist pronates aggressively through contact, with a distinct snap as his forearm unwinds toward the target.
|
|
3.3s |
First Serve · Deuce · Body-rotation · Side #3
Jo-Wilfried Tsonga's first serve from the deuce court, filmed from the side. His footwork shows a compact platform stance with a controlled knee bend and a pronounced upward drive off both legs before landing slightly inside the court on his front foot.
|
|
3.2s |
First Serve · Deuce · Body-rotation · Side #4
Jo-Wilfried Tsonga's first serve from the deuce side, filmed from a side angle. His footwork shows a rhythmic rocking motion into a pinpoint stance before leg drive, with a clear weight transfer from back to front foot during the service motion.
|
|
3.3s |
First Serve → FH Volley · Deuce · Side #1
Jo-Wilfried Tsonga's forehand volley from the deuce side, filmed from a side angle. His quick split step into a slightly open stance and short adjustment steps toward the net are clearly visible before he plants and punches through the volley.
|
|
6.6s |
First Serve · Deuce · Leg-action · Side #1
Jo-Wilfried Tsonga's first serve from the deuce court, filmed from the side. The side angle makes it easy to see his tossing-arm extension and the upward racket head acceleration into contact, with the ball struck slightly in front of his body at a high contact point.
|
|
3.1s |
First Serve · Deuce · Side #1
Jo-Wilfried Tsonga's first serve from the deuce side, filmed from the side. His footwork shows a pronounced knee bend with a stable platform stance before driving upward into the court and landing well inside the baseline on his front foot.
|
|
3.2s |
First Serve · Deuce · Side #2
Jo-Wilfried Tsonga's first serve from the deuce side, filmed from the side. From this angle, his continental grip is clear with a loose hand and pronounced wrist pronation through contact, finishing with the wrist naturally unwinding toward the target.
|
|
3.1s |
First Serve · Deuce · Side #3
Jo-Wilfried Tsonga's first serve from the deuce side, filmed from a side angle. His hips load deeply with a pronounced knee bend before driving upward, showing strong leg extension through the trophy position into contact.
|
|
2.5s |
First Serve · Deuce · Side #4
Jo-Wilfried Tsonga's first serve from the deuce side, filmed from the side. His footwork shows a rhythmic rocking motion into a pinpoint stance, with a pronounced knee bend and upward drive off the front leg clearly visible from this angle.
|
|
2.8s |
First Serve · Deuce · Side #5
Jo-Wilfried Tsonga's first serve from the deuce side, filmed from a side angle. His deep knee bend and strong upward leg drive into the court are clearly visible, with his hips powerfully uncoiling as he transitions from the loading phase into contact.
|
|
4.5s |
First Serve · Deuce · Toss · Side #1
Jo-Wilfried Tsonga's first serve from the deuce court, filmed from the side. The side view makes it easy to see his tossing arm fully extended upward with the ball released slightly in front of his body, setting up a steep, upward racket path into contact.
|
|
2.9s |
First Serve · Deuce · Toss · Side #1
Jo-Wilfried Tsonga's first serve from the deuce side, filmed from a side angle. His footwork shows a controlled platform stance with minimal pre-toss movement, then a strong knee bend and upward drive off both legs into the court.
|
|
2.7s |
First Serve · Deuce · Toss · Side #2
Jo-Wilfried Tsonga's first serve from the deuce side, filmed from the side. His knees load deeply with a pronounced bend before driving up, and his hips rotate aggressively into the court as he uncoils toward contact.
|
|
4.3s |
First Serve · Deuce · Toss · Side #3
Jo-Wilfried Tsonga's first serve from the deuce side, filmed from the side. After contact he lands well inside the court with his tossing arm dropping back for balance before he rebounds into a neutral ready position.
|
|
2.8s |
FH Center · Arm-action · Court-level-front · Open #1
Jo-Wilfried Tsonga's forehand from the center of the court in an open stance, filmed from a court-level front angle. His strong knee bend and wide base load his legs before an aggressive hip turn whips his hips from closed to more open as he drives up into the ball.
|
|
2.3s |
FH Center · Arm-action · Court-level-front · Open #2
Jo-Wilfried Tsonga's forehand from the center of the court in an open stance, filmed from a court-level front angle. His hips stay relatively open toward the net as he loads on a wide base, with a deep knee bend and strong upward leg drive into the ball.
|
|
2.4s |
FH Center · Court-level-front · Open #1
Jo-Wilfried Tsonga's forehand from the center of the court in an open stance, filmed from a front court-level angle. His contact point is well in front of his body with the racket face slightly closed, and the racket head accelerates upward on a steep low-to-high path through the ball.
|
|
2.8s |
FH Center · Court-level-front · Open #2
Jo-Wilfried Tsonga's forehand from the center of the court in an open stance, filmed from a front court-level angle. After contact his follow-through wraps high across his body while his weight continues moving into the court, and he quickly brings both hands back toward a neutral ready position.
|
|
2.4s |
FH Center · Court-level-front · Open #3
Jo-Wilfried Tsonga's forehand from the center of the court in an open stance, filmed from a front court-level angle. His semi-western grip is evident in the way his wrist stays laid back through the forward swing before uncoiling into a pronounced pronation at contact.
|
|
2.8s |
FH Center · Court-level-front · Open #4
Jo-Wilfried Tsonga's forehand from the center of the court in an open stance, filmed from a front court-level angle. His shoulders rotate significantly past his hips on the unit turn before uncoiling in sequence from trunk to arm, with the chest finishing fully rotated toward the target.
|
|
2.9s |
FH Inside In · Court-level-front #1
Jo-Wilfried Tsonga's forehand InsideIn from the center of the court, filmed from a court_level front angle. His semi-western grip is clear with the strings lagging behind due to a laid-back wrist that snaps forward aggressively into contact.
|
|
2.7s |
FH Inside In · Court-level-front #2
Jo-Wilfried Tsonga's forehand from an inside-in position, filmed from a court-level front angle. At contact his racket face is slightly closed with the ball struck around waist-to-chest height, and the racket head accelerates steeply upward along an aggressive inside-in swing path.
|
|
2.5s |
FH Inside In · Court-level-front #3
Jo-Wilfried Tsonga's forehand InsideIn from the center of the court, filmed from a court_level front angle. After contact his follow-through finishes high across his body with his weight driving into the court, and he quickly brings both hands back to a neutral ready position for the next shot.
|
|
2.6s |
FH Inside In · Court-level-front #4
Jo-Wilfried Tsonga's forehand InsideIn from the center of the court, filmed from a court_level front angle. His feet set up in a strong open stance with a pronounced split-step leading into a quick pivot and aggressive weight transfer into the shot.
|
|
2.7s |
FH Inside In · Court-level-front #5
Jo-Wilfried Tsonga's forehand InsideIn from the center of the court, filmed from a court_level front angle. His semi-western grip is evident in the closed racquet face on the take-back, with a pronounced wrist lag that unwinds into a strong pronation through contact.
|
|
2.6s |
FH Inside In · Court-level-front #6
Jo-Wilfried Tsonga's forehand InsideIn from the center of the court, filmed from a court-level front angle. His hips open aggressively toward the target as his knees stay deeply flexed through the load, then his legs drive upward to straighten into contact.
|
|
2.3s |
FH Inside In · Court-level-front #7
Jo-Wilfried Tsonga's forehand InsideIn from the center of the court, filmed from a court_level front angle. After contact his follow-through wraps high across his body while his weight drives into the court, and he quickly brings both hands back toward a neutral ready position for the next shot.
|
|
2.3s |
FH Inside In · Court-level-front #8
Jo-Wilfried Tsonga's forehand from an inside-in position, filmed from a court-level front angle. His semi-western forehand grip is clear, with a pronounced wrist lag on the takeback that unwinds into a strong pronation through contact.
|
|
2.8s |
FH Inside In · Court-level-front #9
Jo-Wilfried Tsonga's forehand InsideIn from the center of the court, filmed from a court_level front angle. His footwork includes a quick adjustment hop into a semi-open stance, followed by a strong pivot and decisive recovery step back toward the middle.
|
|
2.3s |
FH Inside Out · Court-level-front #1
Jo-Wilfried Tsonga's forehand InsideOut from the center of the court, filmed from a court_level front angle. After contact his follow-through finishes high across his body with his weight driving into the court, and he quickly brings both hands back toward a ready position for the next shot.
|
|
5.7s |
FH Inside Out · Court-level-front #2
Jo-Wilfried Tsonga's forehand inside-out from the center of the court, filmed from a front court-level angle. At contact his racket face is slightly closed with the ball struck around waist to chest height, and the racket head accelerates upward on a steep low-to-high path.
|
|
2.9s |
FH Inside Out · Court-level-front #3
Jo-Wilfried Tsonga's forehand from an inside-out position, filmed from a court_level front angle. At contact his racket face is slightly closed with the ball struck around waist-to-chest height, and the racket head accelerates upward on a steep, whipping path through the hitting zone.
|
|
3s |
FH Inside Out · Court-level-front #4
Jo-Wilfried Tsonga's forehand InsideOut from the center of the court, filmed from a court_level front angle. His semi-western grip sets up a pronounced wrist lag on the takeback that unwinds into a strong pronation through contact.
|
|
2.4s |
FH Lob · Court-level-front
Jo-Wilfried Tsonga's forehand lob from the middle of the court, filmed from a court-level front angle. He plants in a semi-open stance with a small adjustment hop before contact, then takes a couple of quick recovery steps back toward the baseline after sending the lob.
|
|
3.3s |
FH Moves Back · Court-level-front
Jo-Wilfried Tsonga's forehand while moving back from a neutral court position, filmed from a court-level front angle. His follow-through finishes high across his body with his weight staying slightly on the back foot before he regroups into a compact ready position.
|
|
2.4s |
FH Running · Court-level-front #1
Jo-Wilfried Tsonga's running forehand from the middle of the court, filmed from a front court-level angle. His footwork features a quick adjustment shuffle into the ball followed by an open-stance plant on the outside leg before he drives through and recovers toward the center.
|
|
3.1s |
FH Running · Court-level-front #2
Jo-Wilfried Tsonga's running forehand from a neutral court position, filmed from a court-level front angle. His shoulders rotate aggressively relative to his hips during the unit turn, then uncoil in sequence with a pronounced trunk rotation driving the racket through contact.
|
|
2.6s |
FH Running · Court-level-front #3
Jo-Wilfried Tsonga's running forehand from the center of the court, filmed from a front court-level angle. At contact his racket face is slightly closed with the ball struck around waist height, and the racket head whips upward on a steep low-to-high path.
|
|
2.6s |
FH Short · Court-level-front #1
Jo-Wilfried Tsonga's forehand from the short court, filmed from a front court-level angle. His follow-through finishes high across his body with his weight moving into the court, and he quickly brings both hands back to a neutral ready position after contact.
|
|
2.7s |
FH Short · Court-level-front #2
Jo-Wilfried Tsonga's forehand from the short court, filmed from a front court-level angle. His racket contacts the ball slightly in front of his body with the face moderately closed, and the upward swing path creates a strong windshield-wiper motion through contact.
|
|
3.9s |
FH Short · Court-level-front #3
Jo-Wilfried Tsonga's forehand from the short court, filmed from a front court-level angle. His follow-through finishes high across his body with his non-hitting hand counterbalancing in front as he quickly regains a neutral ready position.
|
|
2.5s |
FH Short · Court-level-front · Open
Jo-Wilfried Tsonga's forehand from the center of the court in an open stance, filmed from a court-level front angle. His shoulders rotate well past perpendicular to the net on the unit turn, then his trunk uncoils aggressively ahead of the arm swing, showing clear separation between hip and shoulder rotation.
|
|
2.3s |
FH Wide · Court-level-front · Open #1
Jo-Wilfried Tsonga's wide forehand from an open stance on the deuce side, filmed from a court-level front angle. His follow-through finishes high across his body with his weight driving into the court, and he quickly brings both hands back to the ready position as he recovers toward center.
|
|
2.6s |
FH Wide · Court-level-front · Open #2
Jo-Wilfried Tsonga's forehand from a wide position in an open stance, filmed from a court-level front angle. His shoulders coil significantly past his hips before uncoiling, with the trunk rotation clearly leading the arm swing through contact.
|
|
2.6s |
FH Wide · Court-level-front · Open #3
Jo-Wilfried Tsonga's wide forehand from an open stance on the deuce side, filmed from a court-level front angle. His semi-western grip is paired with pronounced wrist lag on the takeback that unwinds into a strong pronation through contact.
|
|
2.3s |
FH Wide · Court-level-front · Open #4
Jo-Wilfried Tsonga's wide forehand from the Deuce side, filmed from a court-level front angle. His open stance is clear as he plants his outside foot, loads heavily on his right leg, and uses a lateral push to recover back toward the center after contact.
|
|
2.3s |
FH Center · Arm-action · Court-level-rear
Jo-Wilfried Tsonga's forehand from the center of the court, filmed from a court-level rear angle. His shoulders load with a pronounced upper-body coil relative to the hips, then uncoil in sequence so the trunk rotation clearly leads the arm swing through contact.
|
|
2s |
FH Center · Court-level-rear · Open #1
Jo-Wilfried Tsonga's forehand from the center of the court in an open stance, filmed from a rear court-level angle. His hips stay closed during the loading phase with a deep knee bend, then drive explosively into rotation as his legs extend into the court.
|
|
2.4s |
FH Center · Court-level-rear · Open #2
Jo-Wilfried Tsonga's forehand from the center of the court in an open stance, filmed from a rear court-level angle. His split-step leads into a quick pivot with the outside foot, setting an open base that lets him rotate through the shot while keeping his weight centered before a short recovery step back to ready position.
|
|
2.2s |
FH Inside In · Court-level-rear #1
Jo-Wilfried Tsonga's forehand InsideIn from the center of the court, filmed from a court_level rear angle. After contact his forehand finishes high across his body while his weight drives into the court, and he quickly re-settles into a ready position with both hands returning to the racquet.
|
|
2.4s |
FH Inside In · Court-level-rear #2
Jo-Wilfried Tsonga's forehand InsideIn from the center of the court, filmed from a court_level rear angle. His shoulders coil well past 90 degrees relative to his hips before uncoiling, with the trunk rotation clearly leading the forward swing and pulling the hitting arm through contact.
|
|
3.1s |
FH Inside In · Court-level-rear #3
Jo-Wilfried Tsonga's forehand InsideIn from the center of the court, filmed from a court_level rear angle. His hips load into a strong semi-open position with a deep knee bend, then drive upward and rotate aggressively as his legs extend through contact.
|
|
3s |
FH Inside Out · Arm-action · Court-level-rear
Jo-Wilfried Tsonga's inside-out forehand from a central position, filmed from a court-level rear angle. From this view you can see his semi-western grip creating pronounced wrist lag on the takeback that unwinds into a strong pronation through contact.
|
|
2.6s |
FH Inside Out · Court-level-rear #1
Jo-Wilfried Tsonga's inside-out forehand from the middle of the court, filmed from a court-level rear angle. His hips load into a deep knee bend before explosively unwinding, with strong leg drive pushing off the ground to open his hips toward the inside-out target.
|
|
3.2s |
FH Inside Out · Court-level-rear #2
Jo-Wilfried Tsonga's inside-out forehand from the center of the court, filmed from a court-level rear angle. His footwork includes a quick adjustment hop into a wide open stance, followed by a strong pivot and balanced recovery step back toward the middle.
|
|
3.1s |
FH Inside Out · Court-level-rear #3
Jo-Wilfried Tsonga's forehand InsideOut from the center of the court, filmed from a court_level rear angle. His semi-western grip is paired with a pronounced wrist lag on the takeback that unwinds into strong forearm and wrist pronation through contact.
|
|
2.9s |
FH Inside Out · Court-level-rear #4
Jo-Wilfried Tsonga's inside-out forehand from the center of the court, filmed from a court-level rear angle. His semi-western grip is paired with pronounced wrist lag on the racquet drop that unwinds into a strong pronation through contact.
|
|
2.5s |
FH Inside Out · Court-level-rear #5
Jo-Wilfried Tsonga's inside-out forehand from the center of the court, filmed from a court-level rear angle. His shoulders coil well past 90 degrees relative to his hips before uncoiling, with the trunk rotation clearly leading the arm swing through contact.
|
|
3s |
FH Moves Back · Court-level-rear
Jo-Wilfried Tsonga's forehand while moving back from a central position, filmed from a court-level rear angle. His quick retreating footwork into an open stance is followed by a strong push off the outside leg and a small recovery shuffle back toward the baseline center.
|
|
2.9s |
FH Running · Court-level-rear #1
Jo-Wilfried Tsonga's running forehand from the deuce side, filmed from a court-level rear angle. His semi-western grip is clear from the racquet face angle, and you can see pronounced wrist lag that releases into a sharp pronation through contact.
|
|
2.4s |
FH Running · Court-level-rear #2
Jo-Wilfried Tsonga's running forehand from a neutral court position, filmed from a court-level rear angle. His semi-western grip is evident with the racket face closed slightly, and you can see pronounced wrist lag that unwinds into a strong pronation through contact.
|
|
2.3s |
FH Running · Court-level-rear #3
Jo-Wilfried Tsonga's running forehand from the center of the court, filmed from a court_level rear angle. His footwork features a quick adjustment shuffle into an open stance followed by aggressive recovery steps back toward the middle after contact.
|
|
2.7s |
FH Running · Court-level-rear · Open
Jo-Wilfried Tsonga's running forehand from an open stance on the ad side, filmed from a court-level rear angle. His hips stay open to the court as his outside leg plants and drives, with a deep knee bend that loads the legs before he uncoils into the shot.
|
|
2.4s |
FH Short · Court-level-rear #1
Jo-Wilfried Tsonga's forehand from the short court, filmed from a rear court-level angle. His hips stay relatively closed through the loading phase with a deep knee bend, then drive explosively upward and into the court as his legs extend through contact.
|
|
2.7s |
FH Short · Court-level-rear #2
Jo-Wilfried Tsonga's forehand from the short court, filmed from a court-level rear angle. His semi-western grip is evident with the racquet hand positioned under the handle, and there is a pronounced wrist lag that unwinds into a sharp, relaxed release through contact.
|
|
2.7s |
FH Short · Court-level-rear #3
Jo-Wilfried Tsonga's forehand from the center of the court, filmed from a rear court-level angle. His hips load into a strong semi-open position with a deep knee bend, then uncoil aggressively as his legs drive up and forward through contact.
|
|
2.6s |
FH Wide · Court-level-rear · Open #1
Jo-Wilfried Tsonga's wide forehand from an open stance, filmed from a court-level rear angle. His racket meets the ball slightly in front of his body with a closed racket face and a steep low-to-high swing path that accelerates the racket head through contact.
|
|
2.5s |
FH Wide · Court-level-rear · Open #2
Jo-Wilfried Tsonga's forehand from a wide position in an open stance, filmed from a court-level rear angle. After contact his follow-through wraps high across his body while his weight continues moving back toward the center of the court, with his non-hitting hand extending to help him organize into a ready position.
|
|
2.3s |
FH Wide · Court-level-rear · Open #3
Jo-Wilfried Tsonga's forehand from a wide ball on the deuce side, filmed from a court-level rear angle. His hips stay noticeably open toward the court as he loads on a wide base, with strong knee flexion in both legs before an aggressive lateral leg drive into the shot.
|
|
2.7s |
FH Center · Front · Open · 500fps #1
Jo-Wilfried Tsonga's forehand from the center of the court in an open stance, filmed from a front angle. His semi-western grip is clear with the racquet hand laid under the handle and a pronounced wrist lag that unwinds into a sharp pronation through contact.
|
500 |
1.3s |
FH Center · Front · Open · 500fps #2
Jo-Wilfried Tsonga's forehand from the center in an open stance, filmed from a front angle. His shoulders stay closed well into the forward swing before the trunk unwinds aggressively, with the chest rotating toward the target in sync with the hitting shoulder driving through contact.
|
500 |
1.3s |
FH Center · Front · Open · 500fps #3
Jo-Wilfried Tsonga's forehand from the center of the court in an open stance, filmed from a front angle. His semi-western grip is evident with the racquet hand rotated under the handle and a pronounced wrist lag maintained before a sharp pronation through contact.
|
500 |
1.2s |
FH Center · Front · Open · 500fps #4
Jo-Wilfried Tsonga's forehand from the center of the court in an open stance, filmed from a front angle. After contact his follow-through finishes high across his body while his weight continues moving forward, and he quickly brings both hands back toward a ready position in front of his torso.
|
500 |
2.9s |
FH Center · Front · Open · 500fps #5
Jo-Wilfried Tsonga's forehand from the center of the court in an open stance, filmed from a front angle. The slow-motion view makes the slightly closed racket face at contact clear, with the ball struck around waist to chest height as the racket accelerates steeply upward through the hitting zone.
|
500 |
2.2s |
FH Center · Front · Open · 500fps #6
Jo-Wilfried Tsonga's forehand from the center of the court in an open stance, filmed from a front angle. The racket face is slightly closed at a contact point around waist to chest height, with the racket head accelerating steeply upward through the ball.
|
500 |
2.6s |
FH Inside In · Front · 500fps #1
Jo-Wilfried Tsonga's forehand from the center of the court, filmed from the front at 500 fps. His semi-western grip is clear from the way the racket face is closed at setup, and the slow motion makes the pronounced wrist lag and delayed uncoiling into contact easy to see.
|
500 |
2.7s |
FH Inside In · Front · 500fps #2
Jo-Wilfried Tsonga's forehand from a central court position, filmed from the front at 500 fps. The racket face is slightly closed at a contact point around waist to mid-torso height, with the racket head accelerating steeply upward along an inside-in swing path.
|
500 |
3.3s |
FH Inside In · Front · 500fps #3
Jo-Wilfried Tsonga's forehand InsideIn from the center of the court, filmed from a front angle. His semi-western grip is clearly visible with pronounced wrist lag in the racket drop before a strong pronation of the wrist through contact.
|
500 |
2.7s |
FH Inside In · Front · 500fps #4
Jo-Wilfried Tsonga's forehand from the center of the court, filmed from a front angle. His shoulders rotate well past perpendicular to the net on the unit turn, then his trunk uncoils aggressively ahead of the arm swing, making the sequence of hip-to-torso-to-shoulder rotation easy to distinguish in the high-speed footage.
|
500 |
2.6s |
FH Inside In · Front · 500fps #5
Jo-Wilfried Tsonga's forehand from the center of the court, filmed from the front. His hips stay closed through the loading phase with a deep knee bend, then drive explosively forward as his legs extend into contact.
|
500 |
2.1s |
FH Inside In · Front · 500fps #6
Jo-Wilfried Tsonga's forehand InsideIn from the center court position, filmed from a front angle. After contact, his follow-through finishes high across his body as his weight drives forward into the court and his non-hitting hand quickly returns to a balanced ready position.
|
500 |
2.7s |
FH Inside In · Front · 500fps #7
Jo-Wilfried Tsonga's forehand InsideIn from the center court position, filmed from a front angle. After contact his follow-through wraps high across his body while his weight continues moving forward, and he quickly brings both hands back toward a neutral ready position.
|
500 |
2.9s |
FH Inside In · Front · 500fps #8
Jo-Wilfried Tsonga's forehand InsideIn from the center of the court, filmed from a front angle. His footwork shows a quick adjustment step into a semi-open stance, with a pronounced split-step before loading on the outside leg and a small recovery step toward the center after contact.
|
500 |
3s |
FH Inside In · Front · 500fps #9
Jo-Wilfried Tsonga's forehand from a central position, filmed from the front. His open stance is clear as he plants his outside foot before driving into the shot, followed by a quick recovery step that brings him back toward a ready position.
|
500 |
2.8s |
FH Inside In · Front · Neutral · 500fps
Jo-Wilfried Tsonga's forehand from a neutral stance, filmed from the front at 500 fps slow motion. After contact his forehand follow-through finishes high across his body while his weight shifts onto his front leg and his non-hitting hand settles near his torso as he begins recovering toward a ready position.
|
500 |
2.3s |
FH Inside Out · Arm-action · Front · 500fps
Jo-Wilfried Tsonga's forehand from the center of the court, filmed from the front. After contact his follow-through finishes high across his body while his non-hitting arm retracts toward his torso as he regains a neutral ready position.
|
500 |
2.8s |
FH Inside Out · Front · 500fps #1
Jo-Wilfried Tsonga's forehand from a central position, filmed from the front. His semi-western grip and relaxed hand create noticeable wrist lag on the takeback that unloads into a sharp pronation through contact.
|
500 |
3.4s |
FH Inside Out · Front · 500fps #10
Jo-Wilfried Tsonga's inside-out forehand from the center of the court, filmed from the front at 500 fps. His semi-western forehand grip is clear, with pronounced wrist lag on the takeback that unwinds into a strong pronation of the wrist and forearm through contact.
|
500 |
2.4s |
FH Inside Out · Front · 500fps #11
Jo-Wilfried Tsonga's forehand from the center of the court, filmed from a front angle. His feet set up in a strong open stance with a pronounced split-step into a wide base before he drives into the inside-out forehand and then uses small adjustment steps to recover.
|
500 |
3.4s |
FH Inside Out · Front · 500fps #12
Jo-Wilfried Tsonga's forehand from the center of the court, filmed from a front angle. At contact his racket face is slightly closed with the ball meeting the strings around waist to chest height, and the racket head accelerates steeply upward along a windshield-wiper path.
|
500 |
2.6s |
FH Inside Out · Front · 500fps #13
Jo-Wilfried Tsonga's forehand from a central court position, filmed from the front at 500 fps. His semi-western grip is clear with the racket handle sitting deeper in the fingers, and the slow motion makes the delayed wrist lag and sharp forward release at contact easy to see.
|
500 |
3.5s |
FH Inside Out · Front · 500fps #14
Jo-Wilfried Tsonga's forehand from the center of the court, filmed from the front. The racket face is slightly closed at contact with the ball struck around waist to chest height, and the racket head accelerates steeply upward along an inside-out swing path.
|
500 |
2.9s |
FH Inside Out · Front · 500fps #2
Jo-Wilfried Tsonga's forehand from the middle of the court, filmed from a front angle. His hips stay relatively closed during the unit turn before driving aggressively into an open position, with a deep knee bend and strong upward leg drive clearly visible in the slow-motion footage.
|
500 |
1.6s |
FH Inside Out · Front · 500fps #3
Jo-Wilfried Tsonga's forehand from the center of the court, filmed from the front. His follow-through finishes high across his body with his non-hitting hand extending back for counterbalance before he quickly returns to a ready stance.
|
500 |
2.8s |
FH Inside Out · Front · 500fps #4
Jo-Wilfried Tsonga's forehand from the center of the court, filmed from a front angle. His hips uncoil aggressively from a loaded, wide base, with a deep knee bend and strong leg drive upward and into the court clearly visible in the slow-motion footage.
|
500 |
2.7s |
FH Inside Out · Front · 500fps #5
Jo-Wilfried Tsonga's forehand from the center of the court, filmed from a front angle. His shoulders rotate deeply away from the target during the unit turn, then uncoil in sync with the trunk so that the chest squares to the net just after contact, clearly showing the sequencing of upper-body rotation in slow motion.
|
500 |
2.8s |
FH Inside Out · Front · 500fps #6
Jo-Wilfried Tsonga's forehand from a central court position, filmed from a front angle. His shoulders and trunk coil significantly away from the target before contact, then uncoil in a clearly sequenced rotation that leads the arm and racket through the ball.
|
500 |
2.7s |
FH Inside Out · Front · 500fps #7
Jo-Wilfried Tsonga's forehand from a central court position, filmed from the front at 500 fps. The racket face is slightly closed at a contact point around waist to chest height, with the racket head accelerating steeply upward along an inside-out swing path.
|
500 |
2.9s |
FH Inside Out · Front · 500fps #8
Jo-Wilfried Tsonga's forehand from a central position, filmed from the front at 500 fps. His split step into an open stance is followed by a strong pivot on the right leg and a quick recovery step that squares his feet to move back to the center.
|
500 |
3.1s |
FH Inside Out · Front · 500fps #9
Jo-Wilfried Tsonga's forehand from the center of the court, filmed from a front angle. His split-step leads into a wide open-stance base, with a strong push off the right leg and a quick recovery step that brings him back toward a balanced ready position.
|
500 |
3.3s |
FH Inside Out · Front · Neutral · 500fps #1
Jo-Wilfried Tsonga's forehand from a neutral stance, filmed from the front at 500 fps. His shoulders and trunk show a pronounced coil against the hips during the unit turn, then uncoil in a clearly sequenced rotation that brings the hitting shoulder through first before the chest fully faces the net.
|
500 |
2.5s |
FH Inside Out · Front · Neutral · 500fps #2
Jo-Wilfried Tsonga's forehand from a neutral stance, filmed from a front camera angle in 500 fps slow motion. His shoulders rotate as a single unit with the trunk into a deep coil on the unit turn, then uncoil aggressively with the lead shoulder driving forward and the chest square to the net just after contact.
|
500 |
3.1s |
FH Moves Back · Front · 500fps #1
Jo-Wilfried Tsonga's forehand while moving back from a central position, filmed from the front at 500 fps. His semi-western forehand grip is clear, with a pronounced wrist lag on the takeback that whips forward into a strong pronation through contact.
|
500 |
2.7s |
FH Moves Back · Front · 500fps #2
Jo-Wilfried Tsonga's forehand from the center of the court, filmed from a front angle. His footwork shows a quick hop back to create spacing before loading into a wide open stance, with a small recovery step forward after contact.
|
500 |
2.9s |
FH Moves Back · Front · 500fps #3
Jo-Wilfried Tsonga's forehand from a central position, filmed from the front. His hips load with a pronounced coil as he moves back, with clear knee flexion and an aggressive leg drive into the court on the forward swing.
|
500 |
2.4s |
FH Moves Back · Front · 500fps #4
Jo-Wilfried Tsonga's forehand from the center of the court, filmed from the front at 500 fps. His footwork includes a quick hop back to create spacing before loading into a wide open stance, with a noticeable adjustment step to align his hips and shoulders to the incoming ball.
|
500 |
2.2s |
FH Moves Back · Front · 500fps #5
Jo-Wilfried Tsonga's forehand from a central position while moving back, filmed from the front at 500 fps. His semi-western grip is evident in the closed racquet face, and the slow motion makes his pronounced wrist lag into a late, sharp release at contact clearly visible.
|
500 |
2.3s |
FH Moves Back · Front · 500fps #6
Jo-Wilfried Tsonga's forehand from a neutral central position, filmed from the front. His shoulders and trunk show a pronounced coil away from the target followed by a rapid uncoiling, with the chest rotating square to the net slightly after the racquet begins its forward motion.
|
500 |
1.3s |
FH Moves Back · Front · 120fps #7
Jo-Wilfried Tsonga's forehand while moving back from the center of the court, filmed from a front angle. His semi-western grip is clearly visible, with pronounced wrist lag in the racquet head before a strong forearm and wrist pronation into contact.
|
120 |
2.4s |
FH Half Volley Moves Back · Front · 500fps
Jo-Wilfried Tsonga's forehand while moving back from the center, filmed from the front. The racket face is slightly closed at a contact point around waist to mid-torso height, with the racket head accelerating steeply upward through the ball.
|
500 |
1.8s |
FH Moves Back · Leg-action · Front · 500fps
Jo-Wilfried Tsonga's forehand from the center court position, filmed from the front. The racket face is slightly closed at contact with the ball meeting the strings around chest height, and the high-speed footage makes the rapid acceleration of the racket head through the hitting zone very clear.
|
500 |
3.4s |
FH Running · Front · 500fps #1
Jo-Wilfried Tsonga's running forehand from a neutral court position, filmed from the front at 500 fps. After contact his follow-through finishes high across his body while his non-hitting arm extends out for counterbalance before he regroups into a ready stance.
|
500 |
2.6s |
FH Running · Front · 500fps #2
Jo-Wilfried Tsonga's running forehand from the center of the court, filmed from a front angle. His aggressive hip drive into the court is paired with a deep knee bend on the outside leg, showing a strong push-off as he sprints through the shot.
|
500 |
2.6s |
FH Running · Front · 500fps #3
Jo-Wilfried Tsonga's running forehand from the center of the court, filmed from a front angle. His hips stay relatively closed as he drives forward, with a pronounced knee bend and explosive leg push-off visible in the outside leg during the running step into contact.
|
500 |
2.7s |
FH Running · Front · 500fps #4
Jo-Wilfried Tsonga's running forehand from the center of the court, filmed from a front angle. His aggressive leg drive is evident as his knees load deeply and his hips stay relatively open toward the net while he pushes explosively off his outside leg into contact.
|
500 |
2.8s |
FH Running · Front · 500fps #5
Jo-Wilfried Tsonga's running forehand from the center of the court, filmed from the front. His footwork features a quick adjustment hop into an open stance followed by aggressive recovery steps that push him back toward the middle after contact.
|
500 |
2.8s |
FH Running · Front · 500fps #6
Jo-Wilfried Tsonga's running forehand from the center court position, filmed from the front. His shoulders rotate sharply away from the target during the unit turn, then uncoil in sync with the trunk so that his chest faces forward just after contact, emphasizing strong shoulder–trunk sequencing through the shot.
|
500 |
2.6s |
FH Running · Front · 500fps #7
Jo-Wilfried Tsonga's running forehand from the center of the court, filmed from a front angle. His semi-western grip is clearly visible with the racket hand positioned under the handle, and there is pronounced wrist lag before a sharp, late wrist release through contact.
|
500 |
3.1s |
FH Running · Front · 500fps #8
Jo-Wilfried Tsonga's running forehand from the center of the court, filmed from the front. His footwork features a quick split-step into aggressive forward strides, finishing with an open stance that lets him plant the outside leg firmly before swinging.
|
500 |
3s |
FH Running · Front · 500fps #9
Jo-Wilfried Tsonga's running forehand from the center of the court, filmed from the front. His footwork features a quick adjustment hop into an open stance followed by aggressive recovery steps that bring him back toward the middle after contact.
|
500 |
3.3s |
FH Short · Front · 500fps #1
Jo-Wilfried Tsonga's forehand from the center of the court, filmed from a front angle. His split-step leads into a quick load on the outside leg in a mostly neutral stance, with a noticeable push off that drives his weight forward into the shot.
|
500 |
2.9s |
FH Short · Front · 500fps #2
Jo-Wilfried Tsonga's forehand from a central court position, filmed from the front at 500 fps. His shoulders rotate well past perpendicular to the net on the unit turn, then the trunk uncoils ahead of the arm swing, making the sequencing of torso and shoulder rotation easy to distinguish.
|
500 |
2.7s |
FH Short · Front · 500fps #3
Jo-Wilfried Tsonga's forehand from the middle of the court, filmed from a front angle. His hips stay closed during the initial load with a deep knee bend, then drive forward aggressively as his legs extend into contact.
|
500 |
2.8s |
FH Short · Front · 500fps #4
Jo-Wilfried Tsonga's forehand from the center of the court, filmed from a front angle. The slow-motion view makes the slightly closed racket face at contact clear, with the ball struck around waist height as the racket accelerates steeply upward through the hitting zone.
|
500 |
4.1s |
FH Short · Front · 500fps #5
Jo-Wilfried Tsonga's forehand from a central court position, filmed from the front. After contact his follow-through wraps high across his body as his weight shifts onto his front leg, and he quickly brings both hands back toward his torso to re-establish a ready position.
|
500 |
3s |
FH Short · Front · Neutral · 500fps
Jo-Wilfried Tsonga's forehand from a neutral stance, filmed from the front at 500 fps. His shoulders and trunk coil significantly away from the target before impact, then uncoil in a clearly sequenced rotation that brings the hitting shoulder through first, followed by the torso.
|
500 |
3s |
FH Wide · Leg-action · Front · 500fps
Jo-Wilfried Tsonga's wide forehand from the center of the court, filmed from the front. The racket face is slightly closed at a contact point around waist to chest height, with the racket head accelerating steeply upward along a low-to-high swing path.
|
500 |
2.6s |
FH Wide · Front · Neutral · 500fps #1
Jo-Wilfried Tsonga's forehand from a wide contact position in neutral stance, filmed from a front camera angle at 500 fps. His shoulders and trunk coil as the hitting-side shoulder drops slightly below the non-hitting shoulder, then uncoil in a sequenced rotation that brings the chest square to the net at contact.
|
500 |
2.8s |
FH Wide · Front · Neutral · 500fps #2
Jo-Wilfried Tsonga's forehand from a wide position, filmed from a front angle. After contact he lets the racquet wrap fully across his body while his weight transfers onto his front leg, bringing both hands back toward a compact ready position for recovery.
|
500 |
2.7s |
FH Wide · Front · Open · 500fps #1
Jo-Wilfried Tsonga's forehand from a wide position, filmed from the front. His follow-through finishes high across his body as his weight transfers onto his front leg, and he quickly brings both hands back toward a ready position after the swing.
|
500 |
3.8s |
FH Wide · Front · Open · 500fps #2
Jo-Wilfried Tsonga's forehand from a wide position in an open stance, filmed from the front at 500 fps. The racket face is slightly closed at a contact point around waist to mid-torso height, with the racket head accelerating steeply upward along a low-to-high swing path.
|
500 |
2.6s |
FH Wide · Front · Open · 500fps #3
Jo-Wilfried Tsonga's wide forehand from an open stance, filmed from a front angle. His shoulders rotate well past perpendicular to the net in the unit turn, then the trunk uncoils aggressively ahead of the arm, making the sequencing of torso rotation into contact very clear in slow motion.
|
500 |
2.6s |
FH Wide · Front · Open · 500fps #4
Jo-Wilfried Tsonga's forehand from the deuce court, filmed from a front angle. After contact on this wide ball, he finishes with a high wrap-around forehand follow-through while his weight continues to rotate off the right leg into a balanced, ready position.
|
500 |
2.6s |
FH Wide · Front · Open · 500fps #5
Jo-Wilfried Tsonga's forehand from a wide position in an open stance, filmed from the front at 500 fps. His semi-western forehand grip is clear from the racket angle, with pronounced wrist lag on the forward swing that releases into a sharp wrist snap through contact.
|
500 |
1.2s |
FH Center · Front · Open #1
Jo-Wilfried Tsonga's forehand from the center of the court in an open stance, filmed from the front. At contact his racket face is slightly closed with the ball meeting the strings around waist to chest height as the racket accelerates steeply upward through the hitting zone.
|
|
4.6s |
FH Center · Front · Open #2
Jo-Wilfried Tsonga's forehand from the center in an open stance, filmed from the front. From this angle, his semi-western forehand grip is evident with pronounced wrist lag in the takeback that unwinds into a strong, upward wrist snap through contact.
|
|
2.3s |
FH Short · Front
Jo-Wilfried Tsonga's forehand drop shot from the center of the court, filmed from the front. His knees stay flexed with a compact hip turn, and his legs subtly decelerate into the shot to soften the ball instead of driving through with full leg extension.
|
|
2.9s |
FH Inside Out · Front #1
Jo-Wilfried Tsonga's forehand from an inside-out position, filmed from the front. His split-step leads into a wide, aggressive open-stance base, followed by a strong pivot and quick recovery step back toward the center.
|
|
3.3s |
FH Inside Out · Front #2
Jo-Wilfried Tsonga's inside-out forehand from the center of the court, filmed from the front. After contact his racket finishes high across his body while his weight drives into the court, and he quickly resets his feet into a wide, athletic ready position.
|
|
3s |
FH Inside Out · Front #3
Jo-Wilfried Tsonga's forehand InsideOut from the center of the court, filmed from the front. His semi-western forehand grip is clear from the knuckle position on the racket handle, with a pronounced wrist lag that snaps forward just before contact.
|
|
2.6s |
FH Inside Out · Front #4
Jo-Wilfried Tsonga's forehand InsideOut from the center of the court, filmed from the front. His shoulders load with a pronounced turn relative to his hips before contact, then his trunk uncoils aggressively through the ball with the chest finishing fully rotated toward the target.
|
|
2.8s |
FH Inside Out · Front #5
Jo-Wilfried Tsonga's inside-out forehand from the center of the court, filmed from the front. After contact his follow-through wraps high across his body while his weight drives into the court, and he quickly brings both hands back to a neutral ready position.
|
|
3.2s |
FH Moves Back · Front #1
Jo-Wilfried Tsonga's forehand while moving back from a neutral position, filmed from the front. His hips stay relatively closed as he retreats, with a deep knee bend on the outside leg before driving up through the legs into contact.
|
|
2.8s |
FH Moves Back · Front #2
Jo-Wilfried Tsonga's forehand while moving back from a central position, filmed from the front. His hips stay relatively closed as he retreats, with a pronounced knee bend and strong leg drive upward as he plants and swings.
|
|
2.9s |
FH Moves Back · Front #3
Jo-Wilfried Tsonga's forehand while moving back from a central baseline position, filmed from the front. His semi-western forehand grip is paired with pronounced wrist lag on the takeback that unwinds into a strong pronation through contact.
|
|
3s |
FH Short · Front · Open
Jo-Wilfried Tsonga's forehand from the center of the court in an open stance, filmed from the front. At contact his racket face is slightly closed with the ball meeting the strings around waist to chest height, and the racket head accelerates steeply upward along a low-to-high swing path.
|
|
3.5s |
FH Center · Rear · Open · 500fps
Jo-Wilfried Tsonga's forehand from the center of the court in an open stance, filmed from a rear angle. His shoulders rotate well past perpendicular to the net on the unit turn, then uncoil rapidly with the trunk leading the racquet as his chest opens toward the target before contact.
|
500 |
2.4s |
FH Inside In · Leg-action · Rear · 500fps #1
Jo-Wilfried Tsonga's forehand from a central position, filmed from a rear angle. The racket meets the ball slightly in front of his lead hip with a closed racket face and a steep low-to-high swing path that accelerates rapidly through contact.
|
500 |
2.8s |
FH Inside In · Leg-action · Rear · 500fps #2
Jo-Wilfried Tsonga's forehand from a central position, filmed from a rear angle. His footwork features a pronounced split-step into an open stance, with a strong push off the outside leg and a clear recovery step back toward the center after contact.
|
500 |
2.9s |
FH Inside In · Leg-action · Rear · 500fps #3
Jo-Wilfried Tsonga's forehand from a central baseline position, filmed from a rear angle. His hips open aggressively toward the court as his right leg drives up and through the shot, with a deep knee bend visible during the loading phase.
|
500 |
2.7s |
FH Inside In · Rear · 500fps #1
Jo-Wilfried Tsonga's forehand from a central position, filmed from a rear angle. After contact his follow-through wraps high across his body while his weight continues moving into the court, bringing him quickly back toward a balanced ready stance.
|
500 |
2.6s |
FH Inside In · Rear · 500fps #2
Jo-Wilfried Tsonga's forehand from a central baseline position, filmed from a rear angle. His footwork includes a quick split step into an open stance, followed by a strong pivot on the right leg and efficient recovery steps back toward the middle.
|
500 |
2.6s |
FH Inside In · Rear · 500fps #3
Jo-Wilfried Tsonga's forehand Inside-In from the center of the court, filmed from a rear angle in 500 fps slow motion. His semi-western grip is evident with the racquet hand positioned under the handle, and there is a pronounced wrist lag that unwinds into a sharp pronation through contact.
|
500 |
3.1s |
FH Inside In · Rear · 500fps #4
Jo-Wilfried Tsonga's forehand from a neutral position, filmed from a rear angle. His shoulders rotate well past perpendicular to the baseline on the unit turn, then the trunk uncoils aggressively ahead of the arm swing, making the sequencing of shoulder and torso rotation easy to distinguish in slow motion.
|
500 |
2.9s |
FH Inside In · Rear · 500fps #5
Jo-Wilfried Tsonga's forehand from a central rear court position, filmed from a rear angle. His shoulders rotate well past perpendicular to the baseline on the unit turn, then uncoil in sequence with the trunk leading the arm swing, making the separation between hip and shoulder rotation easy to see in slow motion.
|
500 |
2.8s |
FH Inside Out · Arm-action · Rear · 500fps #1
Jo-Wilfried Tsonga's forehand from a central court position, filmed from a rear angle. His shoulders rotate well past perpendicular to the baseline on the unit turn, with a pronounced trunk coil that uncoils in sequence from hips to shoulders through contact.
|
500 |
3.1s |
FH Inside Out · Arm-action · Rear · 240fps #2
Jo-Wilfried Tsonga's inside-out forehand from the center of the court, filmed from a rear angle in 240 fps slow motion. His semi-western grip is easy to see from behind, with pronounced wrist lag on the forward swing that unwinds into a strong, relaxed wrist release through contact.
|
240 |
2.9s |
FH Inside Out · Arm-action · Rear · 240fps #3
Jo-Wilfried Tsonga's forehand from a central rear position, filmed from a rear angle at 240 fps. His shoulders rotate well past perpendicular to the net in the backswing, then the trunk uncoils ahead of the arm so the racket lags and whips through contact in a clear kinetic chain sequence.
|
240 |
2.3s |
FH Inside Out · Arm-action · Rear · 240fps #4
Jo-Wilfried Tsonga's forehand from the center of the court, filmed from a rear angle at 240 fps. The slow-motion view makes it easy to see his racket head drop well below the ball before driving up on an inside-out path with a slightly closed racket face at contact.
|
240 |
2.9s |
FH Inside Out · Arm-action · Rear · 240fps #5
Jo-Wilfried Tsonga's inside-out forehand from a central baseline position, filmed from a rear angle at 240 fps. His semi-western grip is evident in the strong wrist lag on the takeback that unwinds into a pronounced forearm and wrist pronation through contact.
|
240 |
3.3s |
FH Inside Out · Leg-action · Rear · 500fps
Jo-Wilfried Tsonga's forehand from a central baseline position, filmed from the rear. After contact his follow-through wraps high over his shoulder as his weight drives into the court, and he quickly re-centers his stance with both hands returning in front of his body ready for the next shot.
|
500 |
3.3s |
FH Inside Out · Rear · 500fps #1
Jo-Wilfried Tsonga's forehand from the center of the baseline, filmed from a rear angle. His hips load into a strong coil with a noticeable knee bend before driving upward and unwinding explosively through contact.
|
500 |
3.1s |
FH Inside Out · Rear · 500fps #2
Jo-Wilfried Tsonga's forehand InsideOut from the center of the court, filmed from a rear angle in 500 fps slow motion. His hips load in a strongly closed position with deep knee bend before driving upward and unwinding aggressively through contact, showing powerful leg drive into the shot.
|
500 |
2.4s |
FH Inside Out · Rear · 500fps #3
Jo-Wilfried Tsonga's forehand from an inside-out position, filmed from a rear angle. From this view, his semi-western grip and pronounced wrist lag into contact are clearly visible before a strong pronation through the ball.
|
500 |
2.6s |
FH Inside Out · Rear · 500fps #4
Jo-Wilfried Tsonga's forehand from a central court position, filmed from a rear angle. After contact his follow-through wraps high across his body while his non-hitting arm extends back for counterbalance, and he quickly regains a neutral ready stance with weight finishing on his front leg.
|
500 |
2.5s |
FH Inside Out · Rear · 500fps #5
Jo-Wilfried Tsonga's forehand from a central position, filmed from a rear angle. His semi-western grip is easy to see from behind, with pronounced wrist lag on the racquet drop and a sharp pronation of the wrist into contact.
|
500 |
2.6s |
FH Inside Out · Rear · 500fps #6
Jo-Wilfried Tsonga's inside-out forehand from the center of the court, filmed from a rear angle. His footwork includes a small hop into an open stance with a pronounced right-leg load, followed by a quick recovery step that brings him back toward the middle after contact.
|
500 |
2.9s |
FH Inside Out · Rear · 500fps #7
Jo-Wilfried Tsonga's forehand from a central position, filmed from a rear angle. His shoulders rotate well past perpendicular to the net on the unit turn, then the trunk uncoils aggressively ahead of the arm swing, making the sequencing of torso-to-racquet acceleration very clear in slow motion.
|
500 |
2.9s |
FH Moves Back · Leg-action · Rear · 500fps
Jo-Wilfried Tsonga's forehand from a central court position, filmed from a rear angle. His footwork shows a quick drop step as he moves back combined with an open-stance base, with the outside leg loading heavily before a strong push-off into recovery.
|
500 |
2.6s |
FH Moves Back · Rear · 500fps #1
Jo-Wilfried Tsonga's forehand while moving back from the center of the court, filmed from a rear angle in 500 fps slow motion. His hips stay relatively closed as he retreats, with a deep knee bend and strong leg drive upward and forward to stabilize the shot despite his backward movement.
|
500 |
2s |
FH Moves Back · Rear · 500fps #2
Jo-Wilfried Tsonga's forehand while moving back from a neutral court position, filmed from a rear angle. The high-speed view makes the steep low-to-high swing path clear, with the racket face slightly closed at contact and the ball struck around waist height in front of his body.
|
500 |
2.5s |
FH Moves Back · Rear · 500fps #3
Jo-Wilfried Tsonga's forehand while moving back from a neutral court position, filmed from a rear angle. His shoulders rotate well past perpendicular to the baseline on the unit turn, with a pronounced trunk coil that uncoils sequentially from hips to shoulders through contact.
|
500 |
2.3s |
FH Running · Leg-action · Rear · 500fps
Jo-Wilfried Tsonga's running forehand from a neutral court position, filmed from a rear angle. After contact his follow-through wraps high across his body while his weight continues forward, and his legs quickly re-load into a wide base to recover toward a ready position.
|
500 |
2.6s |
FH Running · Rear · 500fps
Jo-Wilfried Tsonga's running forehand from a neutral court position, filmed from the rear at 500 fps. At contact his racket face is slightly closed with the ball struck around waist height, and the racket head accelerates steeply upward along a pronounced low-to-high swing path.
|
500 |
2.8s |
FH Short · Leg-action · Rear · 500fps #1
Jo-Wilfried Tsonga's forehand from the center of the court, filmed from a rear angle. After contact he drives his weight forward onto his front leg, with his non-hitting arm retracting toward his body as he finishes the swing and quickly begins to recover toward a neutral ready position.
|
500 |
2.3s |
FH Short · Leg-action · Rear · 500fps #2
Jo-Wilfried Tsonga's forehand from the center of the court, filmed from a rear angle. The racket meets the ball slightly in front of his lead hip with the strings tilted slightly closed, and the slow motion makes the rapid acceleration of the racket head along a low-to-high path clearly visible.
|
500 |
4.7s |
FH Short · Rear · 500fps
Jo-Wilfried Tsonga's forehand from a central court position, filmed from a rear angle. His semi-western grip and pronounced wrist lag into contact are clearly visible in this high-speed view, with a strong pronation of the wrist through the follow-through.
|
500 |
2.2s |
FH Wide · Rear · Open · 500fps
Jo-Wilfried Tsonga's forehand from a wide position in an open stance, filmed from the rear. His hips stay closed during the loading phase with a deep knee bend, then drive explosively into rotation as his legs push up and out toward the wide ball.
|
500 |
2.3s |
FH Center · Rear · Open #1
Jo-Wilfried Tsonga's forehand from the center of the court in an open stance, filmed from a rear angle. His shoulders coil significantly past his hips before uncoiling, showing a pronounced separation between trunk rotation and arm swing as he drives through the ball.
|
|
2.2s |
FH Center · Rear · Open #2
Jo-Wilfried Tsonga's forehand from the center of the court in an open stance, filmed from a rear angle. His hips stay coiled as he loads on a strong, wide base, then uncoil aggressively with a pronounced leg drive off the ground to initiate the forward swing.
|
|
2.9s |
FH Center · Rear · Open #3
Jo-Wilfried Tsonga's forehand from the center of the court in an open stance, filmed from a rear angle. At contact his racket face is slightly closed with the ball struck around waist to chest height, and the racket head accelerates steeply upward along the right side of his body to create heavy topspin.
|
|
2.8s |
FH Center · Rear · Open #4
Jo-Wilfried Tsonga's forehand from the center of the court in an open stance, filmed from a rear angle. His shoulders rotate well past perpendicular to the baseline on the unit turn, then his trunk uncoils aggressively ahead of the arm to drive the kinetic chain into contact.
|
|
2.6s |
FH Inside In · Arm-action · Rear #1
Jo-Wilfried Tsonga's forehand InsideIn from the center of the court, filmed from a rear angle. His footwork features a quick adjustment hop into a semi-open stance, followed by a strong pivot off the right leg and a pronounced recovery step back toward the middle.
|
|
2.4s |
FH Inside In · Arm-action · Rear #2
Jo-Wilfried Tsonga's forehand InsideIn from the center of the court, filmed from a rear angle. After contact his follow-through wraps high across his body while his non-hitting arm tucks in, and he quickly re-centers his stance to recover for the next shot.
|
|
2.9s |
FH Inside In · Arm-action · Rear #3
Jo-Wilfried Tsonga's forehand InsideIn from the center of the court, filmed from a rear angle. His hips load in a closed position with a deep knee bend before driving upward and unwinding aggressively into the court with strong leg extension.
|
|
4.1s |
FH Inside In · Arm-action · Rear #4
Jo-Wilfried Tsonga's forehand Inside-In from the center of the court, filmed from a rear angle. The contact point is well in front of his body with the racket face slightly closed, and the racket head accelerates upward on a steep low-to-high path.
|
|
2.5s |
FH Inside In · Rear #1
Jo-Wilfried Tsonga's forehand from an inside-in position, filmed from a rear angle. His hips load into a strong closed position before uncoiling, with a deep knee bend and explosive leg drive pushing up and into the court.
|
|
2.4s |
FH Inside In · Rear #2
Jo-Wilfried Tsonga's forehand Inside-In from the center of the court, filmed from a rear angle. The racket face is slightly closed at a contact point around waist to mid-torso height, with the racket head accelerating steeply upward along an aggressive low-to-high swing path.
|
|
3.5s |
FH Inside Out · Arm-action · Rear
Jo-Wilfried Tsonga's forehand from an inside-out position, filmed from a rear angle. His follow-through finishes high across his body with the non-hitting arm retracting toward his torso as he recovers back into a ready stance.
|
|
3.1s |
FH Inside Out · Rear #1
Jo-Wilfried Tsonga's forehand InsideOut from the center of the court, filmed from a rear angle. His racket meets the ball slightly in front of his body with a closed racket face and a steep upward swing path that accelerates the racket head through contact.
|
|
2.5s |
FH Inside Out · Rear #2
Jo-Wilfried Tsonga's inside-out forehand from the center of the court, filmed from a rear angle. His feet load into a strong open stance with a pronounced right-leg push-off, followed by a quick hop-step recovery back toward the middle.
|
|
2.4s |
FH Inside Out · Rear #3
Jo-Wilfried Tsonga's forehand from an inside-out position, filmed from a rear angle. His shoulders turn well past perpendicular to the baseline before uncoiling, with a pronounced trunk rotation that clearly sequences from the hips through the upper body into the swing.
|
|
3.2s |
FH Moves Back · Arm-action · Rear
Jo-Wilfried Tsonga's forehand while moving back from the center of the baseline, filmed from the rear. His contact point is struck around waist to chest height with a slightly closed racket face and a pronounced upward whip of the racket head through contact.
|
|
2.3s |
FH Moves Back · Rear · Open
Jo-Wilfried Tsonga's forehand from the center court position in an open stance, filmed from a rear angle. At contact the racket face is slightly closed with the ball struck around waist to chest height, and the swing path drives steeply up and across the body, creating visibly high racket head speed.
|
|
3.9s |
FH Moves Back · Rear #1
Jo-Wilfried Tsonga's forehand while moving back from a central baseline position, filmed from a rear angle. His footwork includes a quick split step into retreating adjustment steps, setting up an open stance before driving through the forehand and recovering toward the middle.
|
|
2.7s |
FH Moves Back · Rear #2
Jo-Wilfried Tsonga's forehand while moving back from a neutral court position, filmed from a rear angle. His shoulders rotate well past perpendicular to the baseline on the unit turn, then the trunk uncoils aggressively ahead of the arm to drive the forward swing.
|
|
2.8s |
FH Running · Arm-action · Rear
Jo-Wilfried Tsonga's running forehand from the center of the court, filmed from a rear angle. His shoulders and trunk show a pronounced coil with the non-hitting arm counterbalancing, then a rapid uncoiling sequence that clearly starts from the hips and transfers upward through the torso into the hitting arm.
|
|
2.9s |
FH Running · Rear · Open
Jo-Wilfried Tsonga's running forehand from an open stance, filmed from the rear. His hips stay largely open to the court as his outside leg plants with a deep knee bend, then drives upward and inward to propel his body through contact.
|
|
2.8s |
FH Short · Rear · Open #1
Jo-Wilfried Tsonga's forehand from the center of the court, filmed from a rear angle. His open stance is clear as he plants his outside foot, rotates his hips aggressively into the ball, and uses quick recovery steps to regain his court position.
|
|
2.5s |
FH Short · Rear · Open #2
Jo-Wilfried Tsonga's forehand from a central open-stance position, filmed from a rear angle. At contact his racket face is slightly closed with the ball struck around waist to chest height, and the racket head accelerates steeply upward along an aggressive low-to-high swing path.
|
|
2.8s |
FH Short · Rear
Jo-Wilfried Tsonga's forehand from the center of the court, filmed from a rear angle. After contact his forehand follow-through wraps high over his shoulder while his weight drives into the court, quickly bringing both hands back to a neutral ready position for the next shot.
|
|
3.2s |
FH Wide · Arm-action · Rear · Open
Jo-Wilfried Tsonga's forehand from a wide position in an open stance, filmed from the rear. From this angle you can clearly see his semi-western grip creating pronounced wrist lag on the takeback before the wrist snaps forward through contact.
|
|
2.8s |
FH Wide · Rear · Open
Jo-Wilfried Tsonga's forehand from a wide position, filmed from a rear angle. His open stance is clear as his outside leg plants wide before contact and he uses a strong lateral push-off to recover back toward the center.
|
|
2.8s |
FH Center · Side · Open · 120fps #1
Jo-Wilfried Tsonga's forehand from the center of the court in an open stance, filmed from a side angle at 120 fps. After contact his follow-through wraps high across his body and he quickly re-centers his feet into a ready position with his non-hitting hand coming back toward the racket handle.
|
120 |
2.3s |
FH Center · Side · Open · 240fps #2
Jo-Wilfried Tsonga's forehand from the center of the court in an open stance, filmed from the side at 240 fps slow motion. His feet set wide in a strong open base with a pronounced loading on the outside leg before a quick pivot and recovery step back toward the center.
|
240 |
2.4s |
FH Center · Side · Open · 120fps #3
Jo-Wilfried Tsonga's forehand from the center of the court in an open stance, filmed from a side angle at 120 fps. His hips stay closed during the loading phase before driving explosively with strong leg push-off and pronounced knee bend into contact.
|
120 |
3s |
FH Inside In · Arm-action · Side · 120fps #1
Jo-Wilfried Tsonga's forehand from a central baseline position, filmed from a side angle in 120 fps slow motion. His footwork shows a quick adjustment hop into a semi-open stance, with a strong push off the back leg and a small recovery step forward after contact.
|
120 |
2.2s |
FH Inside In · Arm-action · Side · 120fps #2
Jo-Wilfried Tsonga's forehand from an inside-in position, filmed from a side angle at 120 fps. His footwork features a quick adjustment step into a strong semi-open stance, with a pronounced loading on the outside leg before driving through and bringing the back leg forward into recovery.
|
120 |
3.6s |
FH Inside In · Side · 120fps #1
Jo-Wilfried Tsonga's forehand from the center of the court, filmed from the side. At contact his racket face is slightly closed with the ball struck around waist to chest height, and the racket head accelerates steeply upward along a pronounced low-to-high swing path.
|
120 |
5.1s |
FH Inside In · Side · 240fps #2
Jo-Wilfried Tsonga's forehand from an inside-in position, filmed from a side angle at 240 fps. The slow-motion side view makes it clear that he strikes the ball slightly in front of his lead hip with a steep low-to-high swing path and a closed racket face at contact.
|
240 |
3.3s |
FH Inside In · Side · 240fps #3
Jo-Wilfried Tsonga's forehand from the center of the court, filmed from a side angle at 240 fps. His hips load in a strongly closed position with a deep knee bend before driving upward and unwinding aggressively through contact.
|
240 |
2.5s |
FH Inside Out · Arm-action · Side · 120fps #1
Jo-Wilfried Tsonga's forehand from the center of the court, filmed from the side. The slow-motion side view shows his racket dropping well below the ball before contact, with the racket face slightly closed as it accelerates steeply upward through the hitting zone.
|
120 |
3.2s |
FH Inside Out · Arm-action · Side · 120fps #2
Jo-Wilfried Tsonga's forehand from a neutral court position, filmed from the side. His hips load into a strong coil with clear external rotation of the back hip and a deep knee bend, then drive forward aggressively as his legs extend through contact.
|
120 |
2.7s |
FH Inside Out · Arm-action · Side · 120fps #3
Jo-Wilfried Tsonga's forehand from a neutral position, filmed from a side angle. His hips load into a deep knee bend before driving up and forward, with the lead hip opening aggressively toward the court as his legs extend through contact.
|
120 |
2.6s |
FH Inside Out · Arm-action · Side · 120fps #4
Jo-Wilfried Tsonga's inside-out forehand from a central position, filmed from a side angle in 120 fps slow motion. His footwork shows a quick adjustment hop into a strong open stance, with a small recovery step forward after contact to re-center for the next ball.
|
120 |
3s |
FH Inside Out · Side · 240fps #1
Jo-Wilfried Tsonga's inside-out forehand from the deuce side, filmed from a side angle at 240 fps. The contact point is well in front of his body with the racket face slightly closed, and the racket head accelerates steeply upward along a low-to-high swing path.
|
240 |
2.5s |
FH Inside Out · Side · 240fps #2
Jo-Wilfried Tsonga's forehand from a neutral position, filmed from the side at 240 fps. His follow-through wraps high across his body as his weight drives forward into the court, with his non-hitting hand retracting quickly into a compact, ready position.
|
240 |
4.2s |
FH Moves Back · Arm-action · Side · 120fps
Jo-Wilfried Tsonga's forehand while moving back from a neutral position, filmed from the side at 120 fps. His semi-western grip and relaxed hand allow pronounced wrist lag on the takeback, followed by a sharp release of the wrist into contact that is clearly visible in slow motion.
|
120 |
2.7s |
FH Half Volley Moves Back · Side · 240fps
Jo-Wilfried Tsonga's forehand while moving back from a half-volley position, filmed from the side at 240 fps. After contact his follow-through finishes high across his body as his weight continues drifting backward, and his non-hitting hand extends behind him to help stabilize before he resets into a ready position.
|
240 |
2.3s |
FH Moves Back · Side · 120fps #1
Jo-Wilfried Tsonga's forehand while moving back from a neutral court position, filmed from the side at 120 fps. His hips stay relatively closed as he loads on the outside leg, with a deep knee bend and strong leg drive upward and slightly backward to stabilize while hitting off a retreating stance.
|
120 |
2.1s |
FH Moves Back · Side · 120fps #2
Jo-Wilfried Tsonga's forehand from a neutral court position, filmed from the side. His follow-through finishes high with the racquet wrapping over his shoulder as his weight transfers onto his front leg, quickly bringing both hands back toward a ready position.
|
120 |
2s |
FH Moves Back · Side · 240fps #3
Jo-Wilfried Tsonga's forehand while moving back from a neutral court position, filmed from the side at 240 fps. His hips stay relatively closed as he loads on the outside leg, with a deep knee bend and strong upward leg drive clearly visible in slow motion.
|
240 |
2.8s |
FH Moves Back · Side · 240fps #4
Jo-Wilfried Tsonga's forehand while moving back from the baseline, filmed from a side angle. His shoulders load with a pronounced coil against the hips before contact, and the slow-motion view makes the rapid uncoiling of his trunk into the ball especially clear.
|
240 |
2.6s |
FH Moves Back · Side · 240fps #5
Jo-Wilfried Tsonga's forehand while moving back from a neutral position, filmed from a side angle at 240 fps. After contact his follow-through wraps high over his shoulder as his weight continues drifting backward, and his non-hitting hand extends behind him to help stabilize before he resets into a ready position.
|
240 |
3.6s |
FH Moves Back · Side · 240fps #6
Jo-Wilfried Tsonga's forehand while moving back from a neutral court position, filmed from the side at 240 fps. His shoulders rotate well past perpendicular to the net on the unit turn, then uncoil in sequence with the trunk leading the arm swing for a pronounced kinetic chain effect.
|
240 |
2.6s |
FH Moves Back · Side · 240fps #7
Jo-Wilfried Tsonga's forehand while moving back from a neutral court position, filmed from the side. From this angle the semi-western grip and pronounced wrist lag are clear before he drives the wrist into a strong pronation through contact.
|
240 |
2.4s |
FH Running · Arm-action · Side · 120fps #1
Jo-Wilfried Tsonga's running forehand from the deuce side, filmed from a side angle at 120 fps. His shoulders rotate deeply away from the ball during the loading phase, then uncoil rapidly with the trunk leading the kinetic chain into contact before the arm whips through.
|
120 |
2.4s |
FH Running · Arm-action · Side · 240fps #2
Jo-Wilfried Tsonga's running forehand from the side, filmed from a side angle at 240 fps. His hips clearly drive forward with each stride while the outside leg loads with a deep knee bend before pushing off into contact.
|
240 |
2.4s |
FH Running · Side · 120fps #1
Jo-Wilfried Tsonga's running forehand from the side, filmed from a side angle. The slow-motion view makes it easy to see his racket face slightly closed at contact with the ball struck around waist height as the racket head accelerates steeply up and through the hitting zone.
|
120 |
2.8s |
FH Running · Side · 240fps #2
Jo-Wilfried Tsonga's running forehand from the side, filmed from a side angle at 240 fps. His semi-western grip is clear with the racquet laid back, creating noticeable wrist lag that releases into a pronounced wrist snap through contact.
|
240 |
3.5s |
FH Running · Side · 240fps #3
Jo-Wilfried Tsonga's running forehand from the side, filmed from a side camera angle at 240 fps. His shoulders rotate well past perpendicular to the net in the backswing, then uncoil ahead of the hips so the trunk whip is clearly visible in slow motion.
|
240 |
2.4s |
FH Short · Side · 240fps #1
Jo-Wilfried Tsonga's forehand from the center of the baseline, filmed from the side. His hips load into a strong closed position with deep knee bend before driving upward and unwinding aggressively through contact.
|
240 |
2.5s |
FH Short · Side · 240fps #2
Jo-Wilfried Tsonga's forehand from the side, filmed from a side angle. In this slow-motion view, his semi-western grip and pronounced wrist lag are clearly visible as the racket head trails behind his hand before unrolling through contact.
|
240 |
3.1s |
FH Wide · Arm-action · Side · 240fps
Jo-Wilfried Tsonga's wide forehand from the side, filmed from a side angle at 240 fps. His follow-through wraps fully across his body with the non-hitting arm counterbalancing behind him before he returns to a compact ready position.
|
240 |
2.9s |
FH Wide · Side · Open · 240fps #1
Jo-Wilfried Tsonga's forehand from a wide position in an open stance, filmed from the side at 240 fps. His hips stay significantly open toward the court while a deep knee bend and strong leg drive upward and into the court are clearly visible in this slow motion view.
|
240 |
3.9s |
FH Wide · Side · Open · 120fps #2
Jo-Wilfried Tsonga's wide forehand from the Deuce side, filmed from a side angle in 120 fps slow motion. His open stance is clear as he plants his outside foot, rotates his hips aggressively into the ball, and uses a small recovery hop to push back toward the center.
|
120 |
2.7s |
FH Wide · Side · Open · 240fps #3
Jo-Wilfried Tsonga's forehand from a wide position, filmed from a side angle. His open stance is clear as he plants his outside foot, rotates his hips aggressively, and uses small recovery steps after contact to regain court position.
|
240 |
2.5s |
FH Wide · Side · Open · 240fps #4
Jo-Wilfried Tsonga's wide forehand from an open stance, filmed from the side. The side angle in 240 fps slow motion makes it clear that his racket face is slightly closed at a contact point just in front of his lead hip, with the racket head accelerating steeply upward through the ball.
|
240 |
2s |
FH Wide · Side · Open · 240fps #5
Jo-Wilfried Tsonga's forehand from a wide position in an open stance, filmed from a side angle. His semi-western grip is evident in the way his wrist stays laid back through the lag phase before releasing into a pronounced forearm and wrist pronation at contact.
|
240 |
2.7s |
FH Center · Side · Neutral
Jo-Wilfried Tsonga's forehand from the center of the court in neutral stance, filmed from the side. His follow-through finishes high with his weight driving forward into the court, and he quickly brings both hands back toward the racket to re-establish a ready position after contact.
|
|
2.5s |
FH Center · Side · Open #1
Jo-Wilfried Tsonga's forehand from the center of the court in an open stance, filmed from the side. His follow-through wraps high across his body with his weight driving forward into the court, and he quickly brings both hands back toward the racket to re-establish a ready position.
|
|
2.6s |
FH Center · Side · Open #2
Jo-Wilfried Tsonga's forehand from the center of the court in an open stance, filmed from the side. His hips stay closed during the loading phase with a pronounced knee bend, then drive aggressively into rotation as his legs extend through contact.
|
|
2.3s |
FH Center · Side · Open #3
Jo-Wilfried Tsonga's forehand from the center of the court in an open stance, filmed from the side. His feet plant wide in a strong open base with a pronounced loading on the outside leg before a quick pivot and recovery step back toward the middle.
|
|
2.4s |
FH Center · Side · Open #4
Jo-Wilfried Tsonga's forehand from the center of the court in an open stance, filmed from the side. His feet set wide in an open base with a pronounced load on the outside leg before he drives through and uses small recovery steps to regain his court position.
|
|
2.3s |
FH Center · Side · Open #5
Jo-Wilfried Tsonga's forehand from the center of the court in an open stance, filmed from the side. His semi-western grip is evident with a pronounced wrist lag on the racquet drop that unwinds into a strong pronation through contact.
|
|
2.5s |
FH Inside In · Arm-action · Side
Jo-Wilfried Tsonga's forehand from an inside-in position, filmed from a side angle. His follow-through finishes high with the hitting arm extending across his body while his non-hitting hand stays back to help his torso decelerate and return to a ready posture.
|
|
2.8s |
FH Inside In · Side #1
Jo-Wilfried Tsonga's forehand InsideIn from the center of the court, filmed from the side. His footwork includes a quick adjustment hop into a semi-open stance, followed by a strong pivot and forward weight transfer into the court.
|
|
3.2s |
FH Inside In · Side #2
Jo-Wilfried Tsonga's forehand Inside-In from the deuce side, filmed from the side. His shoulders rotate well past perpendicular to the net on the unit turn, then the trunk uncoils aggressively with a clear sequence from hip rotation into shoulder rotation through contact.
|
|
2.9s |
FH Inside In · Side #3
Jo-Wilfried Tsonga's forehand InsideIn from the Deuce side, filmed from a side angle. His shoulders turn well past 90 degrees relative to the baseline before uncoiling, with the trunk initiating rotation ahead of the arm to sequence the kinetic chain.
|
|
2.4s |
FH Inside In · Side #4
Jo-Wilfried Tsonga's forehand Inside-In from the side, filmed from a side angle. His racket contacts the ball slightly in front of his body with the strings nearly square to the target and the racket head accelerating steeply upward through contact.
|
|
4.2s |
FH Inside In · Side #5
Jo-Wilfried Tsonga's forehand from an inside-in position, filmed from a side angle. His semi-western grip is evident in the strong wrist lag on the take-back, followed by a pronounced wrist release through contact.
|
|
2.5s |
FH Inside In · Side #6
Jo-Wilfried Tsonga's forehand from an inside-in position, filmed from the side. At contact his racket face is slightly closed with the ball struck around waist to chest height, and the racket head accelerates steeply upward along a windshield-wiper path.
|
|
2.9s |
FH Inside In · Side #7
Jo-Wilfried Tsonga's forehand from an inside-in position, filmed from a side angle. His shoulders load with a pronounced turn relative to his hips before uncoiling in sequence, making the trunk rotation and delayed shoulder uncoil easy to distinguish.
|
|
2.4s |
FH Inside In · Side #8
Jo-Wilfried Tsonga's forehand from an inside-in position, filmed from the side. His hips load into a strong closed position with a deep knee bend, then drive forward aggressively as the legs extend through contact.
|
|
2.7s |
FH Inside In · Side #9
Jo-Wilfried Tsonga's forehand Inside-In from the Deuce side, filmed from the side. His feet load into a strong open stance with a pronounced hip coil, then he uses an aggressive pivot and crossover recovery step to move back toward the center.
|
|
2.7s |
FH Inside Out · Arm-action · Side
Jo-Wilfried Tsonga's forehand InsideOut from the center of the court, filmed from the side. His footwork shows a quick adjustment step into a strong open stance, with a small hop and organized recovery steps preparing him to move back toward the middle.
|
|
2.8s |
FH Inside Out · Side #1
Jo-Wilfried Tsonga's inside-out forehand from the deuce side, filmed from the side. His follow-through wraps high across his body as his weight drives forward into the court, and he quickly resets his feet into a neutral ready position after the swing.
|
|
4.7s |
FH Inside Out · Side #10
Jo-Wilfried Tsonga's inside-out forehand from the middle of the court, filmed from the side. His hips load into a strong semi-open position with deep knee flexion, then drive upward and rotate aggressively as his legs extend through contact.
|
|
2.8s |
FH Inside Out · Side #11
Jo-Wilfried Tsonga's inside-out forehand from the center of the court, filmed from the side. He plants in a strong open stance with a pronounced loading of the outside leg before driving through and taking a small recovery hop toward the middle.
|
|
2.6s |
FH Inside Out · Side #12
Jo-Wilfried Tsonga's inside-out forehand from the deuce side, filmed from a side angle. His shoulders load into a deep turn with pronounced trunk coil, then uncoil in sequence from hips to torso to arm, making the separation between upper and lower body easy to see.
|
|
3.9s |
FH Inside Out · Side #13
Jo-Wilfried Tsonga's inside-out forehand from the deuce side, filmed from the side. His hips load into a strong coil with a deep knee bend before driving upward and uncoiling through contact, showing an aggressive use of leg drive into the shot.
|
|
2.9s |
FH Inside Out · Side #14
Jo-Wilfried Tsonga's forehand from the inside-out position, filmed from the side. At contact his racket face is slightly closed with the ball struck around waist-to-chest height, and the racket head accelerates steeply upward along a pronounced low-to-high swing path.
|
|
2.9s |
FH Inside Out · Side #15
Jo-Wilfried Tsonga's inside-out forehand from the center of the court, filmed from the side. He uses an open stance with a strong load on his right leg, then executes a quick pivot and cross-step recovery to move back toward the middle after contact.
|
|
3s |
FH Inside Out · Side #2
Jo-Wilfried Tsonga's inside-out forehand from the deuce side, filmed from a side angle. At contact his racket face is slightly closed with the ball struck around waist to chest height, and the upward windshield-wiper swing path produces high racket head speed through the hitting zone.
|
|
3.1s |
FH Inside Out · Side #3
Jo-Wilfried Tsonga's inside-out forehand from the ad side, filmed from a side angle. After contact his follow-through wraps high across his body while his weight drives into the court, and he quickly brings both hands back to the racket in a neutral ready position.
|
|
2.7s |
FH Inside Out · Side #4
Jo-Wilfried Tsonga's inside-out forehand from the ad side, filmed from a side angle. His semi-western forehand grip is clear, with pronounced wrist lag on the forward swing that unwinds into a strong, late wrist release through contact.
|
|
2.8s |
FH Inside Out · Side #5
Jo-Wilfried Tsonga's inside-out forehand from the center of the court, filmed from a side angle. His semi-western grip is evident with a pronounced wrist lag on the racquet drop that unwinds into a strong pronation through contact.
|
|
3.1s |
FH Inside Out · Side #6
Jo-Wilfried Tsonga's forehand InsideOut from the center of the court, filmed from the side. After contact his follow-through wraps high across his body as his weight drives forward into the court, with his non-hitting hand extending back to help him quickly recover toward a neutral ready position.
|
|
2.9s |
FH Inside Out · Side #7
Jo-Wilfried Tsonga's inside-out forehand from the deuce side, filmed from a side angle. His shoulders load with a pronounced turn relative to his hips before uncoiling, with the trunk rotation clearly driving the forward swing sequence.
|
|
2.8s |
FH Inside Out · Side #8
Jo-Wilfried Tsonga's inside-out forehand from the center of the court, filmed from the side. His deep knee bend into the loading phase and aggressive push off the outside leg create strong hip rotation into an open stance through contact.
|
|
2.8s |
FH Inside Out · Side #9
Jo-Wilfried Tsonga's inside-out forehand from the deuce side, filmed from a side angle. His hips open aggressively toward the target as his knees sink into a deep load, creating a pronounced upward leg drive through contact.
|
|
2.7s |
FH Lob · Side #1
Jo-Wilfried Tsonga's forehand lob from the side, filmed from a side angle. After contact his follow-through finishes high with his hitting arm extending upward while his weight continues moving forward into a balanced recovery stance.
|
|
5s |
FH Lob · Side #2
Jo-Wilfried Tsonga's forehand lob from the side, filmed from a side angle. At contact his racket face is distinctly open with the ball struck above net height, and the racket head accelerates steeply upward on a pronounced vertical swing path.
|
|
3.1s |
FH Moves Back · Arm-action · Side
Jo-Wilfried Tsonga's forehand while moving back from a neutral position, filmed from the side. His shoulders rotate well past 90 degrees in the unit turn, then uncoil ahead of the hips so the trunk whip is clearly visible before the arm accelerates through contact.
|
|
2.4s |
FH Moves Back · Side · Open #1
Jo-Wilfried Tsonga's forehand from a moving-back open stance on the deuce side, filmed from the side. His follow-through finishes high with the hitting arm wrapping across his body while his weight continues drifting backward, and he quickly resets his feet into a neutral ready position after contact.
|
|
3.3s |
FH Moves Back · Side · Open #2
Jo-Wilfried Tsonga's forehand from an open stance while moving back, filmed from the side. The racket face is slightly closed at a contact point around waist to chest height, with the racket head accelerating steeply upward along a low-to-high swing path.
|
|
2.8s |
FH Moves Back · Side · Open #3
Jo-Wilfried Tsonga's forehand from an open stance while moving back, filmed from a side angle. The racket meets the ball slightly in front of his body with a closed racket face and a steep low-to-high swing path that accelerates the racket head upward through contact.
|
|
2.6s |
FH Moves Back · Side #1
Jo-Wilfried Tsonga's forehand while moving back from a neutral court position, filmed from the side. His semi-western grip is evident with pronounced wrist lag on the racquet drop that unwinds into a strong pronation through contact.
|
|
3.2s |
FH Moves Back · Side #2
Jo-Wilfried Tsonga's forehand while moving back from a neutral court position, filmed from the side. His hips stay relatively closed as he retreats, with a deep knee bend and strong leg drive upward to transfer weight into the ball despite moving backward.
|
|
3.1s |
FH Moves Back · Side #3
Jo-Wilfried Tsonga's forehand while moving back from a neutral position, filmed from the side. After contact his follow-through wraps high across his body as his weight continues drifting backward, and he quickly drops the racquet and non-hitting hand into a ready position to recover.
|
|
2.5s |
FH Moves Back · Side #4
Jo-Wilfried Tsonga's forehand while moving back from a neutral court position, filmed from the side. His shoulders load with a pronounced turn relative to his hips before contact, then his trunk uncoils aggressively forward, making the sequencing of torso rotation through the kinetic chain easy to distinguish.
|
|
3.3s |
FH Moves Back · Side #5
Jo-Wilfried Tsonga's forehand while moving back from a neutral court position, filmed from the side. His shoulders rotate well past perpendicular to the net on the backswing before the trunk uncoils aggressively into contact, with the chest finishing fully turned toward the target.
|
|
3.3s |
FH Moves Back · Side #6
Jo-Wilfried Tsonga's forehand while moving back from a neutral position, filmed from the side. His semi-western grip is evident with the racket face lagging behind the hand, and a pronounced wrist snap occurs just after contact as he drives through the ball.
|
|
3.1s |
FH Running · Arm-action · Side #1
Jo-Wilfried Tsonga's running forehand from the deuce side, filmed from the side. His semi-western grip is paired with pronounced wrist lag on the forward swing, then a sharp wrist release through contact as his arm accelerates up the line of the ball.
|
|
2.7s |
FH Running · Arm-action · Side #2
Jo-Wilfried Tsonga's running forehand from the deuce side, filmed from the side. His shoulders stay closed well into the forward swing, with a pronounced trunk coil that uncoils late as his right arm whips through contact.
|
|
2.4s |
FH Running · Side · Open #1
Jo-Wilfried Tsonga's running forehand from the deuce side in an open stance, filmed from the side. His follow-through wraps high across his body while his weight continues moving forward into the court, and he quickly brings both hands back toward a neutral ready position after the swing.
|
|
2.6s |
FH Running · Side · Open #2
Jo-Wilfried Tsonga's running forehand from an open stance, filmed from the side. His shoulders coil significantly against the direction of travel before uncoiling in sync with a strong trunk rotation that whips the arm through contact.
|
|
2.3s |
FH Running · Side · Open #3
Jo-Wilfried Tsonga's running forehand from an open stance, filmed from the side. His semi-western grip is evident in the strong racket lag, with the wrist laid back and then uncoiling sharply into contact.
|
|
2.6s |
FH Running · Side #1
Jo-Wilfried Tsonga's running forehand from the deuce side, filmed from the side. His shoulders and trunk load heavily against the direction of movement, then uncoil in a pronounced sequence where the torso rotation clearly precedes the arm swing through contact.
|
|
2.7s |
FH Running · Side #2
Jo-Wilfried Tsonga's running forehand from the side, filmed from a side angle. His hips stay closed as he loads off the outside leg, with a deep knee bend and strong forward leg drive propelling him through contact into his recovery steps.
|
|
2.9s |
FH Running · Side #3
Jo-Wilfried Tsonga's running forehand from the deuce side, filmed from the side. After contact he finishes with a high, wrap-around follow-through and quickly regathers his feet into a neutral ready position as his weight continues moving forward into the court.
|
|
3.8s |
FH Running · Side #4
Jo-Wilfried Tsonga's running forehand from the side, filmed from the side. The racket meets the ball slightly in front of his body with a closed racket face and a steep low-to-high swing path that accelerates the racket head through contact.
|
|
3s |
FH Running · Side #5
Jo-Wilfried Tsonga's running forehand from the deuce side, filmed from the side. His footwork features a quick adjustment hop into an open stance, followed by aggressive lateral recovery steps back toward the center.
|
|
2.7s |
FH Running · Side #6
Jo-Wilfried Tsonga's running forehand from the side, filmed from a side angle. His follow-through finishes high with his torso rotating through the shot, and he quickly regains a neutral stance with both hands returning to the racket in preparation for the next ball.
|
|
2.7s |
FH Short · Arm-action · Side #1
Jo-Wilfried Tsonga's forehand from the middle of the court, filmed from the side. His hips load deeply with a pronounced knee bend before driving up through the legs into contact, making the strong hip rotation and leg push-off very clear from this angle.
|
|
2.2s |
FH Short · Arm-action · Side #2
Jo-Wilfried Tsonga's forehand from the center of the baseline, filmed from a side angle. His contact point is well in front of his body with the racket face slightly closed and the racket head accelerating steeply upward through the ball.
|
|
3.8s |
FH Short · Arm-action · Side #3
Jo-Wilfried Tsonga's forehand from the middle of the court, filmed from the side. His compact arm action is paired with a strong open-stance base, with quick adjustment steps setting his feet before he uncoils into the shot.
|
|
3.2s |
FH Short · Side · Neutral
Jo-Wilfried Tsonga's forehand from a neutral stance, filmed from the side. His hips stay relatively closed during the unit turn before driving forward, with a noticeable knee bend that loads the back leg and then extends into the court.
|
|
2.9s |
FH Short · Side · Open #1
Jo-Wilfried Tsonga's forehand from an open stance on the baseline, filmed from the side. His semi-western forehand grip is paired with pronounced wrist lag on the forward swing that unwinds into a strong pronation through contact.
|
|
3.1s |
FH Short · Side · Open #2
Jo-Wilfried Tsonga's forehand from the middle of the court in an open stance, filmed from the side. His shoulders rotate well past perpendicular to the net on the unit turn, then uncoil aggressively ahead of the hips to drive the trunk through contact.
|
|
4.3s |
FH Short · Side · Open #3
Jo-Wilfried Tsonga's forehand from the center of the court in an open stance, filmed from a side angle. His early, wide split step sets up a strong open base, with a pronounced weight shift from the back leg and a quick recovery step bringing him back toward a neutral position on the baseline.
|
|
2.7s |
FH Short · Side #1
Jo-Wilfried Tsonga's forehand from the center of the court, filmed from the side. His contact point is well in front of his body with the racket face slightly closed, and the swing path drives upward aggressively, producing high racket head speed through the ball.
|
|
3.9s |
FH Short · Side #10
Jo-Wilfried Tsonga's forehand from the side, filmed from a side angle. His shoulders load with a pronounced turn relative to his hips before uncoiling, showing a clear sequence where the trunk rotation leads the arm swing through contact.
|
|
4.7s |
FH Short · Side #11
Jo-Wilfried Tsonga's forehand from the side, filmed from a side angle. His contact point is well in front of his body with the racket face slightly closed, and the racket head accelerates upward on a steep low-to-high path through the ball.
|
|
2.7s |
FH Short · Side #12
Jo-Wilfried Tsonga's forehand from the side, filmed from a side angle. His shoulders load with a pronounced turn relative to his hips before the forward swing, then his trunk uncoils aggressively through contact with noticeable separation between upper and lower body.
|
|
2.8s |
FH Short · Side #13
Jo-Wilfried Tsonga's forehand from the center of the court, filmed from the side. His semi-western forehand grip is clear, with pronounced wrist lag on the takeback that unwinds into a strong pronation through contact on the short ball.
|
|
2.7s |
FH Short · Side #14
Jo-Wilfried Tsonga's forehand from the Deuce side, filmed from the side. His follow-through finishes high with his hitting arm wrapping across his body as his weight drives forward, and he quickly re-centers his stance into a ready position after contact.
|
|
4.9s |
FH Short · Side #15
Jo-Wilfried Tsonga's forehand from the middle of the court, filmed from the side. His footwork features a quick split step into an aggressive open stance, with a strong pivot on the outside leg before he drives through the ball.
|
|
2.8s |
FH Short · Side #2
Jo-Wilfried Tsonga's forehand from the middle of the court, filmed from the side. His shoulders coil well past 90 degrees relative to his hips before uncoiling, with the trunk rotation clearly initiating the forward swing ahead of the arm release.
|
|
4.3s |
FH Short · Side #3
Jo-Wilfried Tsonga's forehand from the deuce side, filmed from the side. His hips load into a deep knee bend before driving forward, with his rear leg pushing explosively through the court as his hips uncoil into contact.
|
|
2.4s |
FH Short · Side #4
Jo-Wilfried Tsonga's forehand from the short court position, filmed from the side. His semi-western grip is evident with a pronounced wrist lag on the takeback that unwinds into a strong pronation through contact.
|
|
3.1s |
FH Short · Side #5
Jo-Wilfried Tsonga's forehand from the center of the court, filmed from the side. His semi-western grip is evident in the laid-back racket position, with pronounced wrist lag that uncoils into a sharp pronation through contact.
|
|
2.8s |
FH Short · Side #6
Jo-Wilfried Tsonga's forehand from the middle of the court, filmed from the side. His footwork includes a pronounced split-step into a wide open stance, with a strong push off his outside leg to drive into the short ball before taking a small recovery adjustment.
|
|
2.8s |
FH Short · Side #7
Jo-Wilfried Tsonga's forehand from the middle of the court, filmed from the side. His follow-through wraps high across his body as his weight drives forward into the court, and he quickly brings both hands back to a ready position after contact.
|
|
5.8s |
FH Short · Side #8
Jo-Wilfried Tsonga's forehand from the side, filmed from a side angle. His deep knee bend and strong leg drive into the court are clearly visible as his hips open aggressively toward the net before contact.
|
|
2.4s |
FH Short · Side #9
Jo-Wilfried Tsonga's forehand from the center of the court, filmed from the side. His footwork features a quick split-step into a strong open stance, with an aggressive pivot and decisive recovery step back toward the middle after contact.
|
|
3.1s |
FH Wide · Arm-action · Side #1
Jo-Wilfried Tsonga's forehand from a wide position, filmed from the side. His follow-through wraps high across his body as his weight drives into the court, and he quickly brings both hands back to a neutral ready position after contact.
|
|
2.5s |
FH Wide · Arm-action · Side #2
Jo-Wilfried Tsonga's wide forehand from the side, filmed from a side angle. His contact point is well in front of his body with the racket face slightly closed, and the racket head accelerates upward on a steep low-to-high path through the ball.
|
|
2.6s |
FH Wide · Arm-action · Side #3
Jo-Wilfried Tsonga's forehand wide from the side, filmed from a side angle. His footwork pattern shows a quick adjustment step into an open stance before contact, followed by an aggressive recovery step that drives him back toward the center of the court.
|
|
2.5s |
FH Wide · Side · Open #1
Jo-Wilfried Tsonga's forehand from a wide position on the court, filmed from the side. His open stance shows strong hip rotation with a deep knee bend on the outside leg driving up and into the ball.
|
|
2.4s |
FH Wide · Side · Open #10
Jo-Wilfried Tsonga's wide forehand from an open stance, filmed from the side. His hips stay relatively open to the court as he loads on a deep knee bend, then drive upward with strong leg extension into contact.
|
|
2.6s |
FH Wide · Side · Open #2
Jo-Wilfried Tsonga's forehand from a wide ball in an open stance, filmed from the side. His shoulders load with a pronounced coil against the hips before contact, then the trunk uncoils aggressively through the ball with a clear sequential rotation from pelvis to upper torso.
|
|
2.6s |
FH Wide · Side · Open #3
Jo-Wilfried Tsonga's forehand from a wide position in an open stance, filmed from the side. The racket contacts the ball slightly in front of his lead hip with a closed racket face and an upward, accelerating swing path that produces heavy topspin.
|
|
3.2s |
FH Wide · Side · Open #4
Jo-Wilfried Tsonga's forehand from a wide position on the court, filmed from the side. He plants in a strong open stance with his outside leg loading heavily before uncoiling and using quick recovery steps to push back toward the center.
|
|
2.6s |
FH Wide · Side · Open #5
Jo-Wilfried Tsonga's wide forehand from an open stance on the deuce side, filmed from the side. The side angle makes it easy to see his slightly closed racket face at contact and how far in front of his body he strikes the ball.
|
|
2.6s |
FH Wide · Side · Open #6
Jo-Wilfried Tsonga's forehand from a wide position in an open stance, filmed from the side. His semi-western grip and relaxed hand create clear wrist lag on the takeback that unwinds into a pronounced forearm and wrist pronation through contact.
|
|
2.5s |
FH Wide · Side · Open #7
Jo-Wilfried Tsonga's wide forehand from an open stance on the deuce side, filmed from the side. His semi-western grip is paired with pronounced wrist lag in the racquet drop, followed by a sharp pronation of the wrist through contact.
|
|
2.5s |
FH Wide · Side · Open #8
Jo-Wilfried Tsonga's wide forehand from the deuce court, filmed from the side. His follow-through wraps high across his body while his weight continues moving toward the court, bringing him quickly back toward a neutral ready position.
|
|
2.6s |
FH Wide · Side · Open #9
Jo-Wilfried Tsonga's forehand from a wide ball on the deuce side in an open stance, filmed from the side. His upper body shows a deep shoulder turn with the trunk heavily coiled against the hips, then uncoils aggressively ahead of the arm swing to drive the kinetic chain.
|
|
2.7s |
BH Return 1st Serve · Deuce · 500fps #1
Jo-Wilfried Tsonga's backhand return of first serve from the deuce court, filmed from a front angle. His compact split-step lands just before the opponent’s contact, leading into a slight open stance with a small lateral adjustment step to align his body to the incoming serve.
|
500 |
2s |
BH Return 1st Serve · Ad · Court-level-front #1
Jo-Wilfried Tsonga's backhand return of first serve from the Ad court, filmed from court-level front. His follow-through finishes high with the racket out in front as he quickly brings both hands back toward his torso to reset into a compact ready position.
|
|
2.7s |
BH Return 1st Serve · Deuce · Court-level-front #1
Jo-Wilfried Tsonga's first serve from the deuce court, filmed from a court-level front angle. His shoulders rotate deeply away from the target during the trophy position and then uncoil in sync with a pronounced trunk rotation that leads the arm into contact.
|
|
2.4s |
BH Return · Deuce · Court-level-front #2
Jo-Wilfried Tsonga's two-handed backhand return from the deuce court, filmed from a court-level front angle. His racket face is slightly closed at contact with the ball struck around waist height, and the compact swing path produces a sharp acceleration through the hitting zone.
|
|
2.2s |
BH Return 2nd Serve · Ad · Court-level-front #1
Jo-Wilfried Tsonga's second serve from the Ad side, filmed from a court-level front angle. At contact his racket face is slightly closed with the ball struck just above head height, emphasizing an upward, pronated swing path for spin.
|
|
3.1s |
BH Return 2nd Serve · Ad · Court-level-front #2
Jo-Wilfried Tsonga's second serve from the Ad court, filmed from a court-level front angle. His racket face is slightly closed at contact with the ball struck just above shoulder height, and the upward swing path creates noticeable racket head acceleration through the hitting zone.
|
|
3.3s |
BH Return 2nd Serve · Ad · Court-level-front #3
Jo-Wilfried Tsonga's second serve from the Ad side, filmed from a court-level front angle. His deep knee bend and aggressive leg drive into the court are clearly visible, with the hips uncoiling upward as he explodes off the ground into the serve.
|
|
3.2s |
BH Return 2nd Serve · Ad · Court-level-front #4
Jo-Wilfried Tsonga's second serve from the Ad side, filmed from a court-level front angle. His shoulders and trunk coil noticeably away from the target during the toss, then uncoil in sequence so the chest squares to the net just after contact, emphasizing upper-body rotation driving up through the serve.
|
|
3.3s |
BH Return 2nd Serve · Ad · Court-level-front #5
Jo-Wilfried Tsonga's backhand return of second serve from the Ad side, filmed from a court-level front angle. He uses a compact split step into a neutral stance, then takes a small adjustment step with his left foot before planting and driving through the return.
|
|
3.4s |
BH Return 2nd Serve · Ad · Court-level-front #6
Jo-Wilfried Tsonga's second serve from the Ad court, filmed from a court-level front angle. His motion shows a deep knee bend in the loading phase with strong leg drive upward, and his hips uncoil aggressively toward the court as he extends into the serve.
|
|
4.1s |
BH Return Slice 1st Serve · Ad · Court-level-front #1
Jo-Wilfried Tsonga's first serve from the Ad court, filmed from court-level front. His shoulders rotate deeply away from the court during the toss, creating a pronounced trunk coil that then uncoils sequentially from hips to shoulders into contact.
|
|
2.9s |
BH Return Slice 1st Serve · Ad · Court-level-front #2
Jo-Wilfried Tsonga's first serve from the Ad side, filmed from a court-level front angle. At contact his racket face is slightly closed with the ball struck just above full extension, and the racket head accelerates steeply upward along a pronounced pronation-driven swing path.
|
|
3.8s |
BH Return Slice 1st Serve · Ad · Court-level-front #3
Jo-Wilfried Tsonga's first serve return from the Ad side, filmed from a court-level front angle. His compact split step into a slightly open stance sets up a short lateral adjustment step toward the ball before a quick recovery back toward the center.
|
|
3.2s |
BH Return Slice 1st Serve · Deuce · Court-level-front #1
Jo-Wilfried Tsonga's backhand slice return of first serve from the deuce court, filmed from court-level front. His early split step into a slightly open stance leads into a small adjustment step with the outside foot before he carves the slice and quickly recovers back toward the center.
|
|
2.7s |
FH Return 1st Serve · Ad · Court-level-front #1
Jo-Wilfried Tsonga's first serve from the Ad court, filmed from a court-level front angle. His continental grip is firm with a relaxed wrist that pronates aggressively through contact, creating a distinct snap just after impact.
|
|
2.8s |
FH Return 1st Serve · Ad · Court-level-front #2
Jo-Wilfried Tsonga's first serve from the Ad court, filmed from a court-level front angle. His continental grip is firm with a relaxed wrist that pronates aggressively through contact, creating a pronounced wrist snap visible just after impact.
|
|
2s |
FH Return 1st Serve · Ad · Court-level-front #3
Jo-Wilfried Tsonga's first serve from the Ad court, filmed from a court-level front angle. At contact his racket face is slightly tilted forward with the ball struck just above head height, and the racket head accelerates steeply upward along the right side of his body.
|
|
2.6s |
FH Return 1st Serve · Deuce · Court-level-front #1
Jo-Wilfried Tsonga's first serve from the deuce court, filmed from a court-level front angle. His shoulders load with a pronounced turn relative to his hips before uncoiling in sync with trunk rotation, creating a clear sequence from torso drive into the serving arm.
|
|
2.8s |
FH Return 2nd Serve · Ad · Court-level-front #1
Jo-Wilfried Tsonga's second serve from the Ad court, filmed from a court-level front angle. His shoulders and trunk coil deeply away from the court during the trophy phase, then uncoil in a synchronized sequence with his hips to drive upward into contact.
|
|
4s |
FH Return 2nd Serve · Ad · Court-level-front #2
Jo-Wilfried Tsonga's second serve from the Ad side, filmed from a court-level front angle. His service motion shows a pronounced shoulder-over-shoulder action with strong trunk coil on the toss that uncoils in sync with his upward drive to the ball.
|
|
3.3s |
FH Return 2nd Serve · Deuce · Court-level-front #1
Jo-Wilfried Tsonga's second serve from the deuce side, filmed from a court-level front angle. At contact his racket face is slightly closed with the ball struck just above head height, and the upward swing path and rapid racket head acceleration are clearly visible from this view.
|
|
2.9s |
FH Return 2nd Serve · Deuce · Court-level-front #2
Jo-Wilfried Tsonga's second serve from the deuce side, filmed from a court-level front angle. His continental grip is clearly visible on the serve with a loose wrist that pronates aggressively through contact to add spin.
|
|
3.1s |
FH Return 2nd Serve · Deuce · Court-level-front #3
Jo-Wilfried Tsonga's second serve from the deuce side, filmed from a court-level front angle. His footwork includes a rhythmic rocking motion into a pinpoint stance, with a pronounced knee bend and upward drive off both feet before landing slightly inside the baseline.
|
|
2.9s |
BH Return 2nd Serve · Ad · Court-level-rear #1
Jo-Wilfried Tsonga's second serve from the Ad court, filmed from a court-level rear angle. His continental grip is firm with a relaxed wrist that pronates aggressively through contact, making the wrist snap especially visible from behind.
|
|
2.9s |
BH Return 2nd Serve · Ad · Court-level-rear #2
Jo-Wilfried Tsonga's second serve from the Ad court, filmed from a court-level rear angle. The racket face can be seen pronating through contact with a slightly closed angle, meeting the ball just above head height to create spin and kick.
|
|
3.3s |
BH Return 2nd Serve · Ad · Court-level-rear #3
Jo-Wilfried Tsonga's second serve from the Ad court, filmed from a court-level rear angle. His footwork features a rhythmic rocking motion into a pinpoint stance, with a pronounced knee bend and upward leg drive that keeps his feet grounded until just after contact.
|
|
3s |
BH Return 2nd Serve · Deuce · Court-level-rear #2
Jo-Wilfried Tsonga's backhand return of second serve from the deuce court, filmed from a court-level rear angle. His shoulders and trunk load together with a pronounced upper-body turn before contact, then uncoil in sequence with a slight separation between hip rotation and shoulder rotation.
|
|
3s |
FH Return 1st Serve · Deuce · Court-level-rear #1
Jo-Wilfried Tsonga's first serve from the deuce court, filmed from a court-level rear angle. His deep knee bend and aggressive leg drive into the court are clearly visible, with the hips powerfully unwinding toward the target as he pushes up off the ground.
|
|
2.4s |
FH Return 2nd Serve · Ad · Court-level-rear #2
Jo-Wilfried Tsonga's second serve from the Ad court, filmed from a court-level rear angle. His continental grip is clearly visible on the serve with a relaxed hand, and you can see pronounced wrist pronation through contact as the racquet edge leads and then turns outward toward the target.
|
|
4.1s |
FH Return 2nd Serve · Deuce · Court-level-rear #2
Jo-Wilfried Tsonga's second serve from the deuce court, filmed from a court-level rear angle. His footwork includes a rhythmic rocking motion into a pinpoint stance, with a pronounced knee bend and upward drive off both feet before landing slightly inside the baseline.
|
|
2.8s |
BH Return 1st Serve · Ad · Front · 500fps #1
Jo-Wilfried Tsonga's backhand return on a first serve from the ad side, filmed from a front camera angle. His shoulders and trunk show a pronounced unit turn before contact, with a clear uncoiling sequence where the torso rotates toward the net slightly ahead of the arms to drive the two-handed swing.
|
500 |
2.6s |
BH Return 1st Serve · Ad · Front · 240fps #2
Jo-Wilfried Tsonga's backhand return of first serve from the ad court, filmed from a front angle at 240 fps. His hips stay relatively closed to the net at contact while his knees are deeply flexed, giving a strong upward leg drive through the return.
|
240 |
2.4s |
BH Return 1st Serve · Ad · Front · 240fps #3
Jo-Wilfried Tsonga's backhand return of first serve from the ad court, filmed from a front angle. After contact his follow-through finishes high with the racquet toward his non-dominant side while his weight transfers back to a neutral stance and his hands reset in front of his body for recovery.
|
240 |
2.1s |
BH Return 1st Serve · Ad · Front · 240fps #4
Jo-Wilfried Tsonga's first serve from the ad court, filmed from a front angle at 240 fps. His compact pre-serve stance transitions into a pronounced knee bend with a rhythmic weight transfer from front to back foot before driving up into the motion.
|
240 |
2.5s |
BH Return 1st Serve · Ad · Front · 240fps #5
Jo-Wilfried Tsonga's backhand return on a first serve from the ad court, filmed from a front angle at 240 fps. His hips stay relatively closed to the net at contact while his knees are deeply flexed, showing a strong leg drive upward as he pushes off the court into the return.
|
240 |
2.7s |
BH Return 1st Serve · Deuce · Front · 500fps #1
Jo-Wilfried Tsonga's backhand return of first serve from the deuce court, filmed from a front angle. His racket contacts the ball slightly in front of his body with a closed racket face, and the two-handed swing path drives upward through contact with noticeable racket head speed.
|
500 |
2s |
BH Return 1st Serve · Deuce · Front · 500fps #2
Jo-Wilfried Tsonga's backhand return against a first serve from the deuce side, filmed from a front court-level angle. His shoulders and trunk show a pronounced coiling on the unit turn, then a sharp, synchronized uncoil where the torso rotation clearly leads the racquet through contact in the kinetic chain.
|
500 |
2.1s |
BH Return 1st Serve · Deuce · Front · 500fps #3
Jo-Wilfried Tsonga's backhand return of first serve from the deuce court, filmed from a front angle. His shoulders and trunk show a pronounced early coil against the incoming serve, then uncoil in a tightly sequenced rotation that brings the chest square to the net just after contact.
|
500 |
2.1s |
BH Return 1st Serve · Deuce · Front · 240fps #4
Jo-Wilfried Tsonga's backhand return of first serve from the deuce court, filmed from the front. His hips stay relatively closed at contact while his knees are deeply flexed, giving a strong base as his legs drive up through the shot.
|
240 |
2.2s |
BH Return 1st Serve · Deuce · Front · 240fps #5
Jo-Wilfried Tsonga's backhand return of first serve from the deuce court, filmed from the front at 240 fps. His shoulders and trunk load together into a compact unit turn, then uncoil in sequence with a slight lead from the hips that brings the chest square to the net at contact.
|
240 |
2.9s |
BH Return 1st Serve · Deuce · Front · 240fps #6
Jo-Wilfried Tsonga's backhand return on a first serve from the deuce side, filmed from a front angle. His racket face is slightly closed at contact with the ball meeting the strings around waist height, and the racket head accelerates sharply forward through the hitting zone.
|
240 |
2.6s |
BH Return 1st Serve · Deuce · Front · 500fps #7
Jo-Wilfried Tsonga's backhand return of first serve from the deuce court, filmed from a front angle. His two-handed backhand uses a firm continental right hand with an eastern left-hand grip, and the slow-motion angle makes the early wrist set and stable, minimal wrist flex at contact very clear.
|
500 |
2.1s |
BH Return 2nd Serve · Ad · Front · 240fps #1
Jo-Wilfried Tsonga's backhand return on a second serve from the ad court, filmed from a front angle at 240 fps. His shoulders and trunk coil as he completes a full unit turn, then uncoil in sequence with the hips leading the rotation before the shoulders square to the net at impact.
|
240 |
2.5s |
BH Return 2nd Serve · Ad · Front · 240fps #2
Jo-Wilfried Tsonga's second serve from the ad court, filmed from a front camera angle at 240 fps. His shoulder line stays relatively closed through the toss and initial knee bend, then the trunk uncoils aggressively upward and into the court in sync with the upward arm swing.
|
240 |
2.6s |
BH Return 2nd Serve · Ad · Front · 240fps #3
Jo-Wilfried Tsonga's backhand return on a second serve from the ad side, filmed from a front camera angle at 240 fps. At contact his racket face is slightly closed with the ball meeting the strings around waist height, and the two-handed swing path moves sharply forward through the hitting zone with noticeable racket head acceleration.
|
240 |
2.7s |
BH Return 2nd Serve · Ad · Front · 240fps #4
Jo-Wilfried Tsonga's second serve from the ad side, filmed from a front angle. His continental grip is clearly visible on the serve, with a loose wrist that pronates aggressively through contact.
|
240 |
2.4s |
BH Return 2nd Serve · Ad · Front · 240fps #5
Jo-Wilfried Tsonga's backhand return of second serve from the ad court, filmed from a front angle at 240 fps. His hips stay relatively closed to the net while his knees load deeply, and he drives up through his legs to push into the court on contact.
|
240 |
2.2s |
BH Return 2nd Serve · Ad · Front · 500fps #6
Jo-Wilfried Tsonga's backhand return on a second serve from the ad court, filmed from a front angle. After contact his follow-through finishes high with the racquet toward his non-dominant side as he quickly brings both hands back toward his center line to recover into a balanced ready position.
|
500 |
2.1s |
BH Return 2nd Serve · Ad · Front · 500fps #7
Jo-Wilfried Tsonga's backhand return on a second serve from the ad side, filmed from a front angle. After contact his follow-through finishes high with the racket slightly toward his left side as his weight transfers forward and he quickly resets his feet into a ready position.
|
500 |
2.5s |
BH Return 2nd Serve · Ad · Front · 500fps #8
Jo-Wilfried Tsonga's second-serve return backhand from the ad side, filmed from a front angle. His hips stay relatively closed as he loads with a deep knee bend, then drive upward through the legs to initiate rotation into the two-handed backhand.
|
500 |
2.6s |
BH Return 2nd Serve · Ad · Leg-kick · Front · 240fps
Jo-Wilfried Tsonga's second serve from the ad court, filmed from the front. The racket contacts the ball slightly above head height with a clearly pronated racket face and upward swing path visible in the slow-motion 240 fps footage.
|
240 |
2.3s |
BH Return 2nd Serve · Deuce · Front · 500fps #1
Jo-Wilfried Tsonga's backhand return on a second serve from the deuce side, filmed from a front angle. His shoulders and trunk show a compact unit turn on the takeback, then uncoil together with minimal lateral sway, making the sequencing of torso rotation into the stroke easy to distinguish in slow motion.
|
500 |
2.6s |
BH Return 2nd Serve · Deuce · Front · 500fps #2
Jo-Wilfried Tsonga's backhand return on a second serve from the deuce side, filmed from a front camera angle in high-speed 500 fps. His shoulders rotate as a unit with the trunk into a compact coil on the unit turn, then uncoil in sequence with a slight lead from the hips before the upper torso squares up to contact.
|
500 |
2.4s |
BH Return 2nd Serve · Deuce · Front · 240fps #3
Jo-Wilfried Tsonga's backhand return on a second serve from the deuce side, filmed from a front angle. He uses a compact split-step into a neutral stance, then loads on his outside leg before taking a small recovery step back toward the center after contact.
|
240 |
2.9s |
BH Return 2nd Serve · Deuce · Front · 240fps #4
Jo-Wilfried Tsonga's backhand return on a second serve from the deuce side, filmed from a front angle. His two-handed backhand grip is clearly visible, with the non-dominant (left) hand set higher on the handle and the wrists staying laid back through the swing before a compact release at contact.
|
240 |
2.5s |
BH Return 2nd Serve · Deuce · Front · 240fps #5
Jo-Wilfried Tsonga's second serve from the deuce side, filmed from a front angle. His knees load deeply before leg drive, and his hips stay closed toward the baseline early in the motion before rotating up into contact.
|
240 |
2.5s |
BH Return Slice 1st Serve · Ad · Front · 240fps
Jo-Wilfried Tsonga's backhand slice return on a first serve from the ad court, filmed from the front at 240fps. After contact his racquet finishes out in front with the non-hitting hand extending back for counterbalance as he steps back toward a compact ready position.
|
240 |
2.5s |
BH Return Slice 2nd Serve · Ad · Front · 240fps
Jo-Wilfried Tsonga's backhand slice return on a second serve from the ad court, filmed from the front at 240 fps. After contact his racket finishes out in front with the non-hitting hand extending back slightly for counterbalance as he steps toward the baseline and begins to reset into a ready position.
|
240 |
2.7s |
BH Return Slice 2nd Serve · Deuce · Front · 240fps
Jo-Wilfried Tsonga's backhand slice return on a second serve from the deuce side, filmed from the front at 240 fps. After contact his racket finishes out in front with the non-hitting hand extending back for counterbalance as he recovers into a compact ready position.
|
240 |
2.7s |
FH Return 1st Serve · Ad · Front · 500fps #1
Jo-Wilfried Tsonga's first serve from the ad side, filmed from a front camera angle. His deep knee bend and aggressive leg drive upward are clearly visible, with the hips uncoiling toward the target as his front leg straightens through contact.
|
500 |
1.9s |
FH Return 1st Serve · Ad · Front · 500fps #2
Jo-Wilfried Tsonga's first serve from the ad side, filmed from a front camera angle. His shoulders and trunk show a pronounced coil during the trophy phase, then uncoil in a clearly sequenced motion from hips through torso to the hitting shoulder as he drives up to contact.
|
500 |
2s |
FH Return 2nd Serve · Ad · Front · 500fps #1
Jo-Wilfried Tsonga's second serve from the ad side, filmed from a front camera angle. His shoulder line stays closed longer during the toss and loading phase, then the trunk uncoils sharply upward as the hitting shoulder elevates and rotates through the contact.
|
500 |
2.5s |
FH Return 2nd Serve · Ad · Front · 500fps #2
Jo-Wilfried Tsonga's second serve from the ad side, filmed from a front angle. His continental grip is clearly visible with a relaxed hand, and the wrist pronates aggressively through contact, finishing with the palm facing slightly toward the left side fence.
|
500 |
2.6s |
FH Return 2nd Serve · Ad · Front · 500fps #3
Jo-Wilfried Tsonga's second serve from the ad side, filmed from a front angle. At contact his racket face is only slightly closed with the ball struck well above head height, and the racket head accelerates steeply upward along the right side of his body to impart heavy spin.
|
500 |
2.7s |
FH Return 2nd Serve · Ad · Front · 240fps #4
Jo-Wilfried Tsonga's second serve from the ad side, filmed from the front at 240fps. His knees dip deeply before trophy position and his hips drive upward together with an explosive leg push, creating a strong upward motion through his lower body.
|
240 |
3.2s |
FH Return 2nd Serve · Ad · Front · 240fps #5
Jo-Wilfried Tsonga's second serve from the ad side, filmed from a front camera angle at 240 fps. After contact he drives his weight into the court and quickly brings both hands back toward a compact ready position, preparing to react to the return.
|
240 |
2.3s |
FH Return 2nd Serve · Deuce · Front · 500fps #1
Jo-Wilfried Tsonga's second serve from the deuce side, filmed from a front angle. His continental grip is clearly visible with a relaxed hand, and you can see pronounced wrist pronation through contact as the racket accelerates up and across the ball.
|
500 |
1.9s |
FH Return 2nd Serve · Deuce · Front · 500fps #2
Jo-Wilfried Tsonga's second serve from the deuce side, filmed from a front angle. At contact his racket face is slightly closed with the ball struck just above head height, and the upward swing path produces pronounced racket head speed through the hitting zone.
|
500 |
2.5s |
FH Return 2nd Serve · Deuce · Front · 240fps #3
Jo-Wilfried Tsonga's second serve return from the deuce side, filmed from a front camera angle. His shoulders and trunk show a pronounced unit turn during the split and load phase, then uncoil in sequence with the hips initiating rotation before the upper torso and hitting arm come through.
|
240 |
2.7s |
FH Return 2nd Serve · Deuce · Front · 240fps #4
Jo-Wilfried Tsonga's forehand return of a second serve from the deuce side, filmed from a front angle. His split-step occurs just before the opponent’s contact, leading into a quick pivot into an open stance with a small adjustment step to set his feet before swinging.
|
240 |
2s |
BH Return 2nd Serve · Ad · Front #1
Jo-Wilfried Tsonga's second serve from the Ad court, filmed from the front. After contact he lands balanced on his front foot with his non-hitting arm dropping naturally as he quickly brings both hands back to the ready position for the next shot.
|
|
2.8s |
BH Return 2nd Serve · Ad · Front #2
Jo-Wilfried Tsonga's second serve return from the Ad court, filmed from the front. His compact split step into a slightly open stance is followed by a short lateral adjustment step that sets his feet before he drives into the backhand return.
|
|
3.5s |
BH Return 2nd Serve · Ad · Front #3
Jo-Wilfried Tsonga's second serve from the Ad court, filmed from the front. After contact he lands balanced on his front foot with his non-hitting arm tucking in as he drives up and forward into a compact, ready position for the next shot.
|
|
3.1s |
BH Return 2nd Serve · Ad · Front #4
Jo-Wilfried Tsonga's second serve from the Ad court, filmed from the front. His deep knee bend and aggressive leg drive upward are clearly visible, with the hips uncoiling as he pushes off the ground into the serve.
|
|
3.2s |
BH Return 2nd Serve · Ad · Front #5
Jo-Wilfried Tsonga's second serve from the Ad court, filmed from the front. His continental grip is clearly visible with a relaxed hand on the racquet, and you can see his wrist pronate aggressively through contact to add spin.
|
|
3.1s |
BH Return 2nd Serve · Ad · Front #6
Jo-Wilfried Tsonga's second serve return from the Ad court, filmed from the front. After contact his two-handed backhand follow-through finishes high with the non-hitting hand staying on the racquet as he transfers weight into the court and quickly resets his stance for the next shot.
|
|
3.1s |
BH Return 2nd Serve · Deuce · Front #1
Jo-Wilfried Tsonga's second serve from the deuce side, filmed from the front. His continental grip is clearly visible on the serve, with a loose wrist that pronates aggressively through contact for added spin.
|
|
3.3s |
BH Return 2nd Serve · Deuce · Front #2
Jo-Wilfried Tsonga's second_serve from the deuce side, filmed from the front. His footwork includes a compact pinpoint stance with the back foot drawing up to the front before he drives up into the ball and lands slightly inside the court for quick recovery.
|
|
2.5s |
BH Return 2nd Serve · Deuce · Front #3
Jo-Wilfried Tsonga's second serve from the deuce side, filmed from the front. His legs load with a deep knee bend before driving upward, and his hips stay closed toward the baseline until just after contact.
|
|
2.6s |
BH Return 2nd Serve · Deuce · Front #4
Jo-Wilfried Tsonga's backhand return of second serve from the deuce court, filmed from the front. His shoulders and trunk coil early as he turns sideways on the return, then uncoil in a tightly linked sequence where the torso rotation clearly drives the two-handed swing through contact.
|
|
3.1s |
FH Return 1st Serve · Ad · Front #1
Jo-Wilfried Tsonga's first serve from the Ad court, filmed from the front. His footwork features a rhythmic rocking motion into a pinpoint stance, with a pronounced knee bend and upward drive off both feet before landing slightly inside the baseline.
|
|
2s |
FH Return 1st Serve · Ad · Front #2
Jo-Wilfried Tsonga's first serve from the Ad court, filmed from the front. The racket face is slightly pronated at contact with the ball struck just above head height, and the racket head accelerates steeply upward along the right side of his body.
|
|
2.3s |
FH Return 1st Serve · Deuce · Front #1
Jo-Wilfried Tsonga's first serve from the deuce side, filmed from the front. His continental grip is clearly visible on the tossing hand side, with a pronounced wrist pronation through contact that turns the strings directly toward the target.
|
|
2.6s |
FH Return 1st Serve · Deuce · Front #2
Jo-Wilfried Tsonga's first serve from the deuce court, filmed from the front. His footwork shows a rhythmic rocking motion into a pinpoint stance, with a strong upward drive off the front leg and a small hop into the court for recovery.
|
|
2.3s |
FH Return 2nd Serve · Ad · Front #1
Jo-Wilfried Tsonga's second serve return from the Ad court, filmed from the front. After contact his forehand follow-through finishes high across his body while his weight continues moving into the court, bringing him quickly back into a compact ready position.
|
|
3.4s |
FH Return 2nd Serve · Ad · Front #2
Jo-Wilfried Tsonga's second serve from the Ad court, filmed from the front. His knees dip deeply before upward leg drive, and his hips uncoil from a closed position into contact, clearly showing how his lower body loads and rotates into the serve.
|
|
3.6s |
FH Return 2nd Serve · Ad · Front #3
Jo-Wilfried Tsonga's second serve from the Ad court, filmed from the front. At contact his racket face is slightly closed with the ball struck just above head height, and the racket head accelerates up and across the ball to impart strong spin.
|
|
2.6s |
FH Return 2nd Serve · Deuce · Front #1
Jo-Wilfried Tsonga's second serve from the deuce side, filmed from the front. His continental grip is clearly visible, with a relaxed hand and a pronounced wrist pronation through contact that continues into the follow-through.
|
|
3.1s |
FH Return 2nd Serve · Deuce · Front #2
Jo-Wilfried Tsonga's second serve from the deuce side, filmed from the front. After contact he lands into the court with his weight moving forward and quickly brings both hands back to a neutral ready position for the next shot.
|
|
3.1s |
FH Return 2nd Serve · Deuce · Front #3
Jo-Wilfried Tsonga's second serve from the deuce court, filmed from the front. After contact he lands well inside the court with his weight driving forward, and his non-hitting arm drops naturally as he quickly returns to a compact ready position.
|
|
2.4s |
FH Return 2nd Serve · Deuce · Front #4
Jo-Wilfried Tsonga's second serve return from the deuce court, filmed from the front. His split-step is timed just before the opponent’s contact, leading into a quick pivot and semi-open stance that lets him load on his right leg before initiating the forehand.
|
|
2.4s |
BH Return 1st Serve · Ad · Rear · 240fps #1
Jo-Wilfried Tsonga's backhand return of first serve from the ad court, filmed from a rear angle at 240 fps. His follow-through finishes high with the racket wrapping around his left shoulder as his weight transfers into the court and he quickly resets his feet toward a neutral ready position.
|
240 |
2.6s |
BH Return 1st Serve · Ad · Rear · 240fps #2
Jo-Wilfried Tsonga's backhand return on a first serve from the ad court, filmed from a rear angle at 240 fps. His racket meets the ball slightly in front of his body with a relatively closed face, and the compact swing path produces a quick acceleration of the racket head through contact.
|
240 |
2.1s |
BH Return 1st Serve · Ad · Rear · 240fps #3
Jo-Wilfried Tsonga's backhand return on a first serve from the ad side, filmed from a rear angle at 240 fps. His racket contacts the ball slightly in front of his lead hip with a relatively closed racket face and a compact, upward swing path through contact.
|
240 |
1.8s |
BH Return 2nd Serve · Ad · Leg-action · Rear · 500fps
Jo-Wilfried Tsonga's backhand return of second serve from the ad side, filmed from a rear angle. His split-step into a semi-open stance is followed by a strong push off the outside leg, with clear recovery steps preparing him to move back toward the center of the baseline.
|
500 |
2.9s |
BH Return 2nd Serve · Ad · Rear · 500fps #1
Jo-Wilfried Tsonga's backhand return on a second serve from the ad side, filmed from a rear angle. He uses a compact split-step into a semi-open stance, then takes quick adjustment steps to align his body before driving through the return and recovering back toward the center.
|
500 |
2.6s |
BH Return 2nd Serve · Ad · Rear · 500fps #2
Jo-Wilfried Tsonga's backhand return on a second serve from the ad side, filmed from a rear angle in 500 fps slow motion. His shoulders and trunk coil early as he turns sideways, then uncoil in sequence with the hips leading and the upper torso following into contact.
|
500 |
2.4s |
BH Return 2nd Serve · Ad · Rear · 240fps #3
Jo-Wilfried Tsonga's backhand return on a second serve from the ad side, filmed from a rear angle at 240 fps. His split-step is timed just before the opponent’s contact, followed by a quick pivot into a mostly neutral stance with a small adjustment step to align his body behind the ball.
|
240 |
2.1s |
BH Return 2nd Serve · Ad · Rear · 240fps #4
Jo-Wilfried Tsonga's backhand return on a second serve from the ad side, filmed from a rear angle. He times a compact split-step just before contact, then plants in a mostly neutral stance with a small adjustment step to load his outside leg before swinging.
|
240 |
2.8s |
BH Return 2nd Serve · Ad · Rear · 240fps #5
Jo-Wilfried Tsonga's second serve from the ad side, filmed from a rear angle in high-speed 240 fps. His legs load with a deep knee bend before driving upward, and his hips rotate aggressively into the court as his back leg swings forward into the landing.
|
240 |
2.3s |
BH Return 2nd Serve · Ad · Rear · 240fps #6
Jo-Wilfried Tsonga's second serve from the ad court, filmed from a rear angle at 240 fps. His continental grip is clearly visible on the serve, with a pronounced wrist pronation through contact that continues into a loose, relaxed wrist finish.
|
240 |
2.4s |
BH Return 2nd Serve · Deuce · Rear · 500fps
Jo-Wilfried Tsonga's backhand return on a second serve from the deuce side, filmed from a rear angle. His split-step precedes a quick pivot into a semi-open stance, with small adjustment steps aligning his body before he drives through the two-handed backhand and takes a couple of lateral recovery steps back toward the center.
|
500 |
2.6s |
BH Return Slice 1st Serve · Deuce · Rear · 240fps
Jo-Wilfried Tsonga's backhand slice return of first serve from the deuce court, filmed from a rear angle at 240 fps. His continental grip stays relatively firm while the hitting wrist remains slightly laid back through the swing, with only a subtle release toward contact.
|
240 |
2.5s |
FH Return 2nd Serve · Ad · Rear · 500fps #1
Jo-Wilfried Tsonga's second serve from the ad court, filmed from a rear angle. His compact, rhythmic service motion is paired with a small pre-serve hop into a semi-open stance, setting up balanced leg drive toward the ad side baseline corner.
|
500 |
3.1s |
FH Return 2nd Serve · Ad · Rear · 500fps #2
Jo-Wilfried Tsonga's second serve from the ad court, filmed from a rear angle. After contact he drives his weight into the court and quickly brings his non-hitting hand back toward his centerline as he transitions into a compact ready position for the next shot.
|
500 |
3.1s |
FH Return 1st Serve · Deuce · Leg-action · Rear · 500fps
Jo-Wilfried Tsonga's first serve from the deuce court, filmed from a rear angle. His continental grip stays firm while his wrist pronates aggressively through contact, with the racquet head whipping from edge-on to a fully rotated position toward the target.
|
500 |
2.6s |
FH Return Slice 2nd Serve · Deuce · Rear · 240fps
Jo-Wilfried Tsonga's forehand slice return of a second serve from the deuce court, filmed from a rear angle at 240fps. His follow-through finishes with the racquet hand traveling across his body while his weight transfers forward, allowing him to recover quickly back into a balanced ready position.
|
240 |
1.9s |
BH Return 1st Serve · Ad · Rear #1
Jo-Wilfried Tsonga's first serve from the Ad court, filmed from a rear angle. His hips load into a deep knee bend before driving upward, with the back leg pushing explosively off the court to initiate strong hip rotation into the serve.
|
|
2.8s |
BH Return 1st Serve · Ad · Rear #2
Jo-Wilfried Tsonga's first serve from the Ad court, filmed from a rear angle. His continental grip is clearly visible on the serve, with a pronounced wrist pronation through contact that turns the strings square toward the box.
|
|
2.4s |
BH Return 1st Serve · Deuce · Rear #1
Jo-Wilfried Tsonga's first serve from the deuce court, filmed from a rear angle. After contact he lands well inside the court with his weight driving forward, his non-hitting arm dropping back for balance before he quickly regroups toward a neutral ready position.
|
|
3.1s |
BH Return 2nd Serve · Ad · Rear #2
Jo-Wilfried Tsonga's backhand return of second serve from the ad court, filmed from a rear angle. His split-step occurs just before contact and he uses a quick lateral adjustment into a mostly neutral stance before driving through the return and taking a small recovery step back toward center.
|
|
3.5s |
BH Return 2nd Serve · Deuce · Rear #2
Jo-Wilfried Tsonga's backhand return of second serve from the deuce court, filmed from a rear angle. His split-step lands just before contact and he uses a small lateral adjustment into a mostly neutral stance before pushing off into his recovery steps.
|
|
2.5s |
BH Return Slice 1st Serve · Ad · Rear #1
Jo-Wilfried Tsonga's backhand slice return of first serve from the ad court, filmed from a rear angle. His continental grip is firm with the hitting wrist slightly laid back, staying stable through contact with minimal wrist roll.
|
|
2.9s |
BH Return Slice 1st Serve · Deuce · Rear #1
Jo-Wilfried Tsonga's backhand slice return of first serve from the deuce court, filmed from the rear. After contact he extends the racket forward with his upper body weight moving into the court, then quickly brings both hands back toward his center to re-establish a compact ready position.
|
|
2.7s |
BH Return Slice 2nd Serve · Ad · Rear #1
Jo-Wilfried Tsonga's second serve from the Ad court, filmed from a rear angle. His continental grip is firm with a relatively relaxed wrist, allowing a clear pronation of the forearm and wrist through contact.
|
|
3.5s |
BH Return Slice 2nd Serve · Ad · Rear #2
Jo-Wilfried Tsonga's backhand slice return on a second serve from the Ad court, filmed from a rear angle. After contact, his racquet extends out toward the target as his weight moves into the court and he quickly brings both hands back toward the center to re-establish a compact ready position.
|
|
3.3s |
BH Return Slice 2nd Serve · Deuce · Rear #2
Jo-Wilfried Tsonga's backhand slice return of second serve from the deuce court, filmed from a rear angle. His small adjustment steps set up a slightly open stance, with a compact split-step just before contact that lets him lean into the slice while keeping his weight moving forward into the court.
|
|
3.3s |
FH Return 1st Serve · Ad · Rear #1
Jo-Wilfried Tsonga's first serve from the Ad court, filmed from a rear angle. His shoulder line rotates well past perpendicular to the baseline in the trophy position, then uncoils in sync with a pronounced trunk rotation that drives up through the kinetic chain into contact.
|
|
2.5s |
FH Return 1st Serve · Ad · Rear #2
Jo-Wilfried Tsonga's first serve from the Ad court, filmed from a rear angle. His follow-through carries his racket arm across his body while his back leg swings forward, helping him land inside the court and transition quickly toward a ready position.
|
|
2.8s |
FH Return 2nd Serve · Ad · Rear #2
Jo-Wilfried Tsonga's second serve from the Ad court, filmed from a rear angle. His continental grip is firm with a relaxed wrist that pronates aggressively through contact, making the wrist snap especially clear from behind.
|
|
4.9s |
FH Return 2nd Serve · Deuce · Rear #1
Jo-Wilfried Tsonga's second serve from the deuce side, filmed from a rear angle. At contact his racket face is slightly closed with the ball struck just above head height, producing a pronounced upward swing path and high racket head speed through the hit.
|
|
2.9s |
FH Return 2nd Serve · Deuce · Rear #2
Jo-Wilfried Tsonga's second serve from the deuce court, filmed from a rear angle. His legs load with a deep knee bend before driving upward, and his hips uncoil aggressively into the court as his back leg kicks through the baseline.
|
|
3.1s |
BH Return 1st Serve · Ad · Side · 240fps #1
Jo-Wilfried Tsonga's backhand return of first serve from the ad court, filmed from a side angle. His two-handed backhand grip is clearly visible, with the dominant hand in a semi-western position and the non-dominant hand driving the stroke as his wrists stay laid back before a late, sharp release through contact.
|
240 |
2.6s |
BH Return 1st Serve · Ad · Side · 120fps #2
Jo-Wilfried Tsonga's backhand return against a first serve from the ad side, filmed from a side angle. His two-handed backhand grip stays firm with minimal wrist flex, and the slow motion makes the slight wrist stabilization at contact clearly visible.
|
120 |
2.4s |
BH Return 1st Serve · Ad · Side · 240fps #3
Jo-Wilfried Tsonga's backhand return on a first serve from the ad side, filmed from a side angle at 240 fps. His racket contacts the ball slightly in front of his lead hip with a relatively closed racket face and a compact, upward swing path through contact.
|
240 |
2.1s |
BH Return 1st Serve · Ad · Side · 240fps #4
Jo-Wilfried Tsonga's backhand return on a first serve from the ad court, filmed from a side angle. His compact split-step into a semi-open stance is visible, with a quick push off the outside leg to load and then recover efficiently toward the center.
|
240 |
2.3s |
BH Return 1st Serve · Ad · Side · 240fps #5
Jo-Wilfried Tsonga's backhand return on a first serve from the ad side, filmed from a side angle at 240 fps. His shoulders rotate as a unit with a pronounced trunk coil on the unit turn, then uncoil in sync with his hip rotation to transfer energy smoothly into the two-handed backhand.
|
240 |
2.4s |
BH Return 1st Serve · Deuce · Arm-action · Side · 240fps
Jo-Wilfried Tsonga's backhand return of first serve from the deuce court, filmed from the side. His two-handed grip stays compact with a firm bottom hand while the wrist remains laid back through the unit turn before subtly releasing toward contact.
|
240 |
1.7s |
BH Return 1st Serve · Deuce · Side · 240fps #1
Jo-Wilfried Tsonga's backhand return on a first serve from the deuce side, filmed from a side angle at 240 fps. His split-step lands just before the opponent’s contact and he quickly plants into a neutral stance with a small adjustment step to load the outside leg before swinging.
|
240 |
2.1s |
BH Return 1st Serve · Deuce · Side · 240fps #2
Jo-Wilfried Tsonga's backhand return on a first serve from the deuce court, filmed from a side angle at 240 fps. After contact he lets the racquet finish high in front while his weight continues moving into the court, bringing both hands back toward a compact ready position for the next shot.
|
240 |
2.1s |
BH Return 1st Serve · Deuce · Side · 240fps #3
Jo-Wilfried Tsonga's first serve from the deuce side, filmed from a side angle at 240 fps. His hips load deeply with a pronounced knee bend before driving upward, and you can see his back leg extend aggressively as his hips uncoil into the court.
|
240 |
2.3s |
BH Return 1st Serve · Deuce · Side · 240fps #4
Jo-Wilfried Tsonga's backhand return on a first serve from the deuce side, filmed from a side angle. After contact his follow-through finishes around shoulder height with the non-hitting arm counterbalancing behind him as he transfers weight into the court and quickly resets his feet toward a neutral ready position.
|
240 |
2.8s |
BH Return 2nd Serve · Ad · Side · 240fps #1
Jo-Wilfried Tsonga's backhand return on a second serve from the ad court, filmed from a side angle. His racket contacts the ball slightly in front of his lead hip with a relatively closed racket face and a steep, accelerating swing path visible in the high-speed footage.
|
240 |
2.3s |
BH Return 2nd Serve · Ad · Side · 240fps #2
Jo-Wilfried Tsonga's second serve from the ad side, filmed from a side angle at 240 fps. His continental grip is clearly visible with a relaxed hand on the handle, and the slow motion makes his pronounced wrist pronation through contact easy to see.
|
240 |
3.2s |
BH Return 2nd Serve · Deuce · Side · 240fps #1
Jo-Wilfried Tsonga's second serve from the deuce side, filmed from a side angle. His continental grip is clearly visible with a relaxed hand on the racquet handle, and the slow motion makes the upward wrist pronation through contact easy to see.
|
240 |
2.3s |
BH Return 2nd Serve · Deuce · Side · 240fps #2
Jo-Wilfried Tsonga's backhand return of a second serve from the deuce side, filmed from a side angle at 240 fps. His racket face is slightly closed at contact with the ball struck around waist height, and the racket head accelerates forward on a relatively linear path through the hitting zone.
|
240 |
2.3s |
BH Return 2nd Serve · Deuce · Side · 120fps #3
Jo-Wilfried Tsonga's second serve from the deuce side, filmed from a side angle at 120 fps. His legs load with a deep knee bend before driving upward, and his hips open toward the court as he extends into the serve.
|
120 |
2.4s |
BH Return Slice 1st Serve · Deuce · Side · 120fps
Jo-Wilfried Tsonga's backhand slice return on a first serve from the deuce side, filmed from the side. His hips stay relatively closed with a pronounced knee bend on the outside leg, creating a low base before he extends through the return with a controlled leg drive.
|
120 |
2.8s |
BH Return Slice 2nd Serve · Ad · Side · 240fps #1
Jo-Wilfried Tsonga's backhand slice return on a second serve from the ad side, filmed from a side angle at 240 fps. At contact, his racket face is slightly open with the ball meeting the strings around waist height as the racket travels on a noticeably downward, carving path through the hitting zone.
|
240 |
2.4s |
BH Return Slice 2nd Serve · Ad · Side · 240fps #2
Jo-Wilfried Tsonga's backhand slice return on a second serve from the ad side, filmed from a side angle at 240 fps. After contact his racket finishes out in front with the non-hitting hand extending back for counterbalance as he transfers weight forward and quickly begins to recover toward a neutral ready position.
|
240 |
3.4s |
FH Return 1st Serve · Deuce · Side · 240fps #1
Jo-Wilfried Tsonga's first serve from the deuce side, filmed from a side angle at 240 fps. His hips load deeply with a pronounced knee bend before driving upward, and his back leg extends aggressively into the court as his hips uncoil toward contact.
|
240 |
2.6s |
FH Return 1st Serve · Deuce · Side · 240fps #2
Jo-Wilfried Tsonga's first serve from the deuce side, filmed from a side angle at 240 fps. His shoulders load with a pronounced turn relative to his hips before uncoiling in sync with an aggressive trunk rotation into contact, making the sequential opening of torso and hitting shoulder easy to distinguish.
|
240 |
2.4s |
FH Return 1st Serve · Deuce · Side · 240fps #3
Jo-Wilfried Tsonga's first serve from the deuce court, filmed from a side angle. After contact he lands well inside the court with his weight driving forward, and his non-hitting arm tucks in as he quickly begins to recover toward a ready position for the next shot.
|
240 |
2.4s |
FH Return 2nd Serve · Deuce · Side · 120fps #1
Jo-Wilfried Tsonga's second serve from the deuce side, filmed from a side angle at 120 fps. His continental grip is clearly visible with a relaxed hand, and the slow motion makes the forearm pronation and late wrist snap up and across the ball easy to see.
|
120 |
2.3s |
FH Return 2nd Serve · Deuce · Side · 240fps #2
Jo-Wilfried Tsonga's second serve from the deuce side, filmed from a side angle. His deep knee bend and aggressive leg drive into the court are clearly visible, along with strong hip rotation uncoiling upward through contact.
|
240 |
2.6s |
FH Return Slice 1st Serve · Ad · Side · 120fps #1
Jo-Wilfried Tsonga's first serve from the ad side, filmed from a side camera angle at 120 fps. His footwork shows a controlled platform stance with a pronounced knee bend and an explosive upward drive off both legs into the court.
|
120 |
2.5s |
FH Return Slice 1st Serve · Ad · Side · 120fps #2
Jo-Wilfried Tsonga's first serve from the ad court, filmed from the side. At contact his racket face is slightly tilted forward with the ball struck well above his head, and the racket head whips up and across his body on a steeply upward swing path.
|
120 |
2.3s |
BH Return 1st Serve · Ad · Side #1
Jo-Wilfried Tsonga's first serve from the Ad court, filmed from a side angle. His continental grip is clearly visible with a relaxed hand, and you can see pronounced wrist pronation through contact as the racket edge leads and then turns outward toward the target.
|
|
2s |
BH Return 1st Serve · Ad · Side #2
Jo-Wilfried Tsonga's first serve from the Ad court, filmed from the side. The side view makes it easy to see his racket face staying slightly closed at a high contact point above his head, with the racket head accelerating steeply up and through the ball.
|
|
2.4s |
BH Return 1st Serve · Ad · Side #3
Jo-Wilfried Tsonga's first serve from the Ad side, filmed from the side. The side view makes it easy to see his contact point fully extended above his head with a slightly closed racket face driving up and through the ball.
|
|
2.8s |
BH Return 1st Serve · Ad · Side #4
Jo-Wilfried Tsonga's first serve from the ad side, filmed from a side angle. His shoulders and trunk load with a pronounced coil away from the court before uncoiling in sequence from hips to shoulders into contact.
|
|
3.1s |
BH Return 1st Serve · Ad · Side #5
Jo-Wilfried Tsonga's first serve from the Ad court, filmed from the side. After contact he drives his weight into the court and quickly drops his tossing arm to transition into a balanced landing and ready position for the next shot.
|
|
2.9s |
BH Return 1st Serve · Ad · Side #6
Jo-Wilfried Tsonga's first serve from the Ad court, filmed from a side angle. His shoulders load with a pronounced upper-body tilt before uncoiling, with the trunk rotating in sequence from hips to shoulders to arm through contact.
|
|
2.9s |
BH Return 1st Serve · Ad · Side #7
Jo-Wilfried Tsonga's first serve from the Ad court, filmed from the side. His footwork shows a pronounced platform stance with a controlled knee bend and an aggressive upward drive off the back leg into the court.
|
|
2.7s |
BH Return 1st Serve · Deuce · Arm-action · Side #1
Jo-Wilfried Tsonga's first serve return from the deuce side, filmed from the side. His hips stay relatively closed as he loads with a noticeable knee bend, then uncoil with a short, explosive leg drive into the court.
|
|
2.5s |
BH Return 1st Serve · Deuce · Side #1
Jo-Wilfried Tsonga's first serve from the deuce court, filmed from a side angle. From this view, you can clearly see his continental grip stay firm while his wrist pronates aggressively through contact to drive the ball.
|
|
2.7s |
BH Return 1st Serve · Deuce · Side #2
Jo-Wilfried Tsonga's first serve from the deuce court, filmed from a side angle. His deep knee bend and aggressive leg drive into the court are clearly visible, with his hips powerfully rotating upward and forward as he pushes off the ground.
|
|
2.3s |
BH Return 1st Serve · Deuce · Side #3
Jo-Wilfried Tsonga's first serve from the deuce side, filmed from a side angle. His shoulders load into a deep turn relative to his hips before uncoiling in a pronounced trunk rotation that drives upward into the hitting motion.
|
|
2.6s |
BH Return 1st Serve · Deuce · Side #5
Jo-Wilfried Tsonga's first serve from the deuce side, filmed from a side angle. His footwork shows a rhythmic rocking motion into a pinpoint stance, with a pronounced knee bend and upward drive that is easy to track from the side view.
|
|
2.4s |
BH Return 1st Serve · Deuce · Side #6
Jo-Wilfried Tsonga's first serve from the deuce side, filmed from the side. The racket contacts the ball slightly in front of his body with a steeply upward swing path and a relatively closed racket face, emphasizing upward racket head speed through contact.
|
|
1.9s |
BH Return 2nd Serve · Ad · Side #1
Jo-Wilfried Tsonga's second serve from the Ad side, filmed from a side angle. His continental grip is clearly visible on the serve, with a pronounced wrist pronation through contact that continues into a relaxed, loose-wristed follow-through.
|
|
2.5s |
BH Return 2nd Serve · Ad · Side #2
Jo-Wilfried Tsonga's second serve from the Ad side, filmed from a side angle. His shoulders and trunk coil markedly away from the court during the toss, then uncoil in a sequenced motion that brings the hitting shoulder up and through before the torso fully rotates toward the target.
|
|
3s |
BH Return 2nd Serve · Ad · Side #3
Jo-Wilfried Tsonga's second serve from the Ad side, filmed from the side. After contact he drives his weight into the court, with his back leg swinging through and his non-hitting hand dropping naturally as he lands balanced and ready for the next shot.
|
|
3s |
BH Return 2nd Serve · Ad · Side #4
Jo-Wilfried Tsonga's second-serve return backhand from the Ad court, filmed from the side. His hips stay relatively closed at the load phase with a pronounced knee bend, then unwind with a strong upward leg drive into the ball.
|
|
2.9s |
BH Return 2nd Serve · Ad · Side #5
Jo-Wilfried Tsonga's second serve from the Ad side, filmed from the side. The side view makes the upward swing path and slightly closed racket face at contact easy to see as he strikes the ball just above head height.
|
|
2.3s |
BH Return 2nd Serve · Ad · Side #6
Jo-Wilfried Tsonga's second serve from the Ad court, filmed from a side angle. His motion shows a pronounced shoulder-over-shoulder action with strong trunk coil during the toss and a sharp uncoiling upward through contact, clearly linking torso rotation to his serving arm.
|
|
2.5s |
BH Return 2nd Serve · Ad · Side #7
Jo-Wilfried Tsonga's second serve from the Ad side, filmed from a side angle. His continental grip is clearly visible with a relaxed hand, and the side view makes the upward wrist pronation and subtle snap through contact easy to see.
|
|
2.9s |
BH Return 2nd Serve · Ad · Side #8
Jo-Wilfried Tsonga's second serve from the Ad side, filmed from a side angle. His footwork shows a rhythmic rocking motion into a pinpoint stance before the toss, with a pronounced front-foot drive into the court during the serve.
|
|
2.5s |
BH Return 2nd Serve · Ad · Side #9
Jo-Wilfried Tsonga's second serve from the Ad court, filmed from the side. His shoulder line turns well past perpendicular to the baseline during the trophy phase, then the trunk uncoils in sync with leg drive so the chest opens toward the net only at the moment of upward racket acceleration.
|
|
2.5s |
BH Return 2nd Serve · Deuce · Arm-action · Side #2
Jo-Wilfried Tsonga's second serve from the deuce side, filmed from the side. His hips drive up and forward from a deep knee bend, with strong leg extension propelling his torso into the court as his back hip fully opens toward the net at contact.
|
|
3.1s |
BH Return 2nd Serve · Deuce · Side #1
Jo-Wilfried Tsonga's second serve from the deuce side, filmed from the side. After contact he lets his hitting arm decelerate across his body while his weight lands on his front foot, bringing him quickly back into a compact ready position.
|
|
2.5s |
BH Return 2nd Serve · Deuce · Side #2
Jo-Wilfried Tsonga's second serve from the deuce side, filmed from a side angle. His continental grip is clearly visible on the serve, with a loose wrist that pronates aggressively through contact to add spin.
|
|
2.3s |
BH Return 2nd Serve · Deuce · Side #3
Jo-Wilfried Tsonga's second serve return from the deuce court, filmed from the side. His follow-through finishes with the racquet wrapping around his left shoulder as his weight transfers into the court and his non-hitting hand drops back to help him recover quickly toward a neutral ready position.
|
|
3s |
BH Return 2nd Serve · Deuce · Side #4
Jo-Wilfried Tsonga's second serve from the deuce side, filmed from a side angle. His continental grip is clearly visible on the racquet handle, with a distinct wrist pronation through contact that continues into a relaxed, extended follow-through.
|
|
2.9s |
BH Return 2nd Serve · Deuce · Side #5
Jo-Wilfried Tsonga's second serve from the deuce side, filmed from a side angle. The side view makes it easy to see his contact point slightly above head height with a relatively closed racket face and upward swing path for spin.
|
|
3.1s |
BH Return Slice 1st Serve · Ad · Arm-action · Side #1
Jo-Wilfried Tsonga's first serve from the Ad court, filmed from the side. His hips load with a deep knee bend before driving upward, with the rear hip clearly rotating through as his legs extend into the court.
|
|
2.8s |
BH Return Slice 1st Serve · Ad · Side #1
Jo-Wilfried Tsonga's first serve from the Ad court, filmed from the side. After contact he lets his hitting arm decelerate across his body while his back leg swings forward into the court, bringing him quickly into a balanced, ready position for the next shot.
|
|
3s |
BH Return Slice 1st Serve · Ad · Side #2
Jo-Wilfried Tsonga's first serve return from the Ad court, filmed from the side. His hips stay relatively closed as he sets the slice return, with a noticeable flex in the knees that loads the back leg before a compact push toward the ball.
|
|
2.5s |
BH Return Slice 1st Serve · Ad · Side #3
Jo-Wilfried Tsonga's first serve from the Ad side, filmed from a side angle. His continental grip is clearly visible with a relaxed hand, and the side view makes the pronounced wrist pronation through contact easy to see.
|
|
2.6s |
BH Return Slice 1st Serve · Ad · Side #4
Jo-Wilfried Tsonga's first serve return backhand slice from the Ad court, filmed from the side. His knees dip deeply during the return preparation, with his hips staying relatively closed as his back leg drives forward into the split step and initial unit turn.
|
|
2.4s |
BH Return Slice 1st Serve · Ad · Side #5
Jo-Wilfried Tsonga's first serve from the Ad court, filmed from the side. The racket moves up on edge into contact with a slightly closed face at a contact point well above his head, emphasizing a steep downward swing path and high racket head speed through the ball.
|
|
2.7s |
BH Return Slice 1st Serve · Ad · Side #6
Jo-Wilfried Tsonga's first serve return from the Ad court, filmed from the side. His shoulders and trunk stay coiled as he sets the sliced backhand, then uncoil together in a compact motion with limited upper-body rotation through contact.
|
|
3.3s |
BH Return Slice 1st Serve · Ad · Side #7
Jo-Wilfried Tsonga's first serve from the Ad court, filmed from the side. His footwork includes a small adjustment step into a pinpoint stance before the toss, with a pronounced knee bend and upward drive visible from this angle.
|
|
3.2s |
BH Return Slice 1st Serve · Ad · Side #8
Jo-Wilfried Tsonga's first serve from the Ad court, filmed from the side. After contact he lets his hitting arm finish across his body while his back leg swings forward into the court, bringing him quickly into a balanced ready position.
|
|
2.8s |
BH Return Slice 1st Serve · Deuce · Side #1
Jo-Wilfried Tsonga's first serve from the deuce side, filmed from a side angle. His deep knee bend into the loading phase and aggressive leg drive upward make the hip extension and upward thrust through the kinetic chain very clear.
|
|
2.6s |
BH Return Slice 1st Serve · Deuce · Side #2
Jo-Wilfried Tsonga's first serve from the deuce court, filmed from the side. At contact his racket face is slightly tilted forward with the ball struck just above full extension, and the racket head accelerates steeply upward along the edge of the ball.
|
|
2.6s |
BH Return Slice 1st Serve · Deuce · Side #3
Jo-Wilfried Tsonga's first serve return backhand slice from the deuce side, filmed from the side. The racket face stays slightly open at contact with the ball meeting the strings around waist height, and the racket path moves forward with a compact, abbreviated follow-through.
|
|
2.9s |
BH Return Slice 1st Serve · Deuce · Side #4
Jo-Wilfried Tsonga's first serve from the deuce court, filmed from a side angle. His shoulders rotate deeply away from the court during the trophy phase, with a pronounced trunk coil that uncoils in sync with his leg drive to transfer energy up through the kinetic chain.
|
|
3.7s |
FH Return 1st Serve · Ad · Side #1
Jo-Wilfried Tsonga's first serve from the Ad court, filmed from the side. His shoulder line turns well past perpendicular to the baseline, creating a pronounced trunk coil that unravels in sequence from hips to shoulders as he drives up to contact.
|
|
2.3s |
FH Return 1st Serve · Ad · Side #2
Jo-Wilfried Tsonga's first serve from the Ad court, filmed from the side. After contact his follow-through finishes across his body with his weight driving into the court, and he quickly brings both hands back toward a neutral ready position.
|
|
2.9s |
FH Return 1st Serve · Ad · Side #3
Jo-Wilfried Tsonga's first serve from the Ad court, filmed from the side. His hips load deeply with a pronounced knee bend before driving upward, with the rear hip rotating aggressively toward the court as his legs extend into the hit.
|
|
2.9s |
FH Return 1st Serve · Ad · Side #4
Jo-Wilfried Tsonga's first serve from the Ad side, filmed from a side angle. His deep knee bend into the loading phase and aggressive leg drive upward are clearly visible, along with strong hip extension as he uncoils into the court.
|
|
2.4s |
FH Return 1st Serve · Ad · Side #5
Jo-Wilfried Tsonga's first serve from the Ad court, filmed from the side. His footwork includes a pronounced left-foot pivot into a platform stance, with a clear knee bend and upward drive off both legs before landing slightly inside the baseline.
|
|
2.7s |
FH Return 1st Serve · Deuce · Side #1
Jo-Wilfried Tsonga's first serve from the deuce side, filmed from the side. His deep knee bend and aggressive leg drive into the court are clearly visible, with his hips powerfully uncoiling upward as he pushes off the ground.
|
|
2.4s |
FH Return 1st Serve · Deuce · Side #2
Jo-Wilfried Tsonga's first serve from the deuce court, filmed from the side. After contact he lands well inside the court with his weight driving forward, and his tossing arm drops back into a relaxed position before he quickly regathers into a ready stance.
|
|
2.8s |
FH Return 1st Serve · Deuce · Side #3
Jo-Wilfried Tsonga's first serve from the deuce side, filmed from a side angle. At contact his racket face is slightly tilted forward with the ball struck well above head height, and the racket head accelerates steeply upward along the right side of his body.
|
|
3s |
FH Return 1st Serve · Deuce · Side #4
Jo-Wilfried Tsonga's first serve from the deuce side, filmed from a side angle. His shoulders load with a pronounced turn away from the court, then his trunk uncoils aggressively upward and into the court in sync with his arm swing during the trophy and acceleration phases.
|
|
2.5s |
FH Return 1st Serve · Deuce · Side #5
Jo-Wilfried Tsonga's first serve from the deuce side, filmed from the side. The side angle makes it easy to see his upward racket-head acceleration into the ball and the slightly closed racket face at contact just in front of his body line.
|
|
3.6s |
FH Return 1st Serve · Deuce · Side #6
Jo-Wilfried Tsonga's first serve from the deuce court, filmed from the side. His footwork includes a rhythmic rocking motion into a pinpoint stance, with a pronounced knee bend and upward drive that is easy to track from this angle.
|
|
2.4s |
FH Return 2nd Serve · Ad · Arm-action · Side #2
Jo-Wilfried Tsonga's second serve from the Ad court, filmed from the side. His follow-through carries his hitting arm fully across his body while his back leg swings forward, leaving him in a balanced, upright position ready to move for the next shot.
|
|
2.7s |
FH Return 2nd Serve · Ad · Side #2
Jo-Wilfried Tsonga's second serve return from the Ad side, filmed from the side. His footwork features a pronounced split-step timed to the toss, followed by a quick pivot into a semi-open stance that readies him to drive off his outside leg.
|
|
3s |
FH Return 2nd Serve · Deuce · Side #1
Jo-Wilfried Tsonga's second serve from the deuce court, filmed from the side. His shoulders and trunk load with a pronounced coil during the trophy position, then uncoil in a clearly sequenced motion from hips to shoulders as he drives up to contact.
|
|
2.4s |
FH Return 2nd Serve · Deuce · Side #10
Jo-Wilfried Tsonga's second serve from the deuce side, filmed from the side. The racket face is slightly closed at contact with the ball struck just above shoulder height, and the upward swing path creates a pronounced brushing action through the hit.
|
|
2.8s |
FH Return 2nd Serve · Deuce · Side #11
Jo-Wilfried Tsonga's second serve from the deuce side, filmed from a side angle. His racket contacts the ball slightly above head height with a clearly pronated racket face, and the upward swing path creates visible topspin and kick.
|
|
3.3s |
FH Return 2nd Serve · Deuce · Side #2
Jo-Wilfried Tsonga's second serve from the deuce side, filmed from a side angle. After contact he lets his hitting arm extend fully across his body while his back leg swings forward into the court, bringing him quickly into a balanced ready position for the next shot.
|
|
3.1s |
FH Return 2nd Serve · Deuce · Side #3
Jo-Wilfried Tsonga's second serve from the deuce side, filmed from the side. His deep knee bend and aggressive leg drive into the court are clearly visible as his hips uncoil upward and forward through contact.
|
|
2.9s |
FH Return 2nd Serve · Deuce · Side #4
Jo-Wilfried Tsonga's second serve from the deuce side, filmed from a side angle. From this view, his continental grip is evident with a relaxed hand and a pronounced wrist pronation through contact as the racquet accelerates up and across the ball.
|
|
3.2s |
FH Return 2nd Serve · Deuce · Side #5
Jo-Wilfried Tsonga's second serve from the deuce court, filmed from the side. His shoulders and trunk coil deeply away from the court during the trophy phase, then uncoil in a clear sequence from hips to upper torso as he drives up into contact.
|
|
2.9s |
FH Return 2nd Serve · Deuce · Side #6
Jo-Wilfried Tsonga's second serve from the deuce side, filmed from the side. His deep knee bend and aggressive leg drive into the court are clearly visible, with his hips powerfully uncoiling upward as he extends into the serve.
|
|
2.7s |
FH Return 2nd Serve · Deuce · Side #7
Jo-Wilfried Tsonga's second serve from the deuce side, filmed from the side. His shoulders rotate deeply away from the court during the trophy phase, then the trunk uncoils in sync with his upward drive so the chest opens toward the net just after contact.
|
|
2.4s |
FH Return 2nd Serve · Deuce · Side #8
Jo-Wilfried Tsonga's second serve from the deuce side, filmed from the side. His continental grip stays firm while the wrist pronates aggressively through contact, with a noticeable snap upward as he drives up and across the ball.
|
|
2.8s |
FH Return 2nd Serve · Deuce · Side #9
Jo-Wilfried Tsonga's second serve from the deuce side, filmed from the side. His follow-through finishes with his weight driving into the court and his non-hitting hand counterbalancing behind him before he settles into a compact ready position for the next shot.
|
|
3.1s |
FH Return Slice 1st Serve · Deuce · Side #1
Jo-Wilfried Tsonga's first serve from the deuce court, filmed from the side. His continental grip stays firm with a noticeable wrist pronation through contact, as the racket face turns outward after impact.
|
|
2.1s |
FH Return Slice 1st Serve · Deuce · Side #2
Jo-Wilfried Tsonga's first serve from the deuce court, filmed from the side. His shoulders load with a pronounced upper-body coil against the hips before uncoiling in a sequenced trunk rotation that drives his hitting shoulder up and into contact.
|
|
2.4s |
FH Return Slice 1st Serve · Deuce · Side #5
Jo-Wilfried Tsonga's first serve from the deuce side, filmed from a side angle. His footwork shows a compact pivot into a platform stance with a pronounced knee bend, followed by a clear front-leg drive into the court during the service motion.
|
|
2.5s |
FH Return Slice 1st Serve · Deuce · Side #7
Jo-Wilfried Tsonga's first serve from the deuce court, filmed from the side. His hips load deeply with a pronounced knee bend before driving up through the legs into contact, making the upward leg drive and hip extension very clear.
|
|
2.6s |
Second Serve → BH Volley · Ad · Court-level-front #2
Jo-Wilfried Tsonga's backhand volley from the Ad side, filmed from a court-level front angle. He uses a quick split step into a short lateral adjustment and plants in a compact neutral stance before taking a minimal recovery step forward toward the net.
|
|
7.5s |
Second Serve · Ad · Court-level-front #1
Jo-Wilfried Tsonga's second serve from the Ad court, filmed from a court-level front angle. His deep knee bend and strong upward leg drive into the court are clearly visible, with the hips uncoiling aggressively as he pushes off the ground.
|
|
3.2s |
Second Serve · Ad · Court-level-front #2
Jo-Wilfried Tsonga's second serve from the Ad court, filmed from a court-level front angle. His deep knee bend and strong upward leg drive into the court are clearly visible as his hips stay closed through the toss and then rotate explosively toward the target.
|
|
3.5s |
Second Serve · Ad · Court-level-front #3
Jo-Wilfried Tsonga's second serve from the Ad court, filmed from a court-level front angle. After contact he drives his weight into the court, with his back leg swinging through and his hands returning together in front of his body as he settles into a compact ready position.
|
|
3.6s |
Second Serve · Ad · Toss · Court-level-front #2
Jo-Wilfried Tsonga's second serve from the Ad court, filmed from a court-level front angle. His feet stay grounded in a stable platform stance through the toss, with a subtle knee bend loading before he drives up into the serve.
|
|
3.3s |
Second Serve Wide · Ad · Court-level-front #2
Jo-Wilfried Tsonga's second serve out wide from the Ad court, filmed from a court-level front angle. At contact his racket face is slightly tilted up with the ball struck just above head height, and the upward swing path creates visible topspin and kick.
|
|
3.1s |
Second Serve · Deuce · Court-level-front #1
Jo-Wilfried Tsonga's second serve from the deuce side, filmed from a court-level front angle. His shoulders and trunk coil strongly away from the target before uncoiling in a pronounced sequence, with the chest rotating through toward the net well ahead of the hitting arm.
|
|
3s |
Second Serve · Deuce · Court-level-front #2
Jo-Wilfried Tsonga's second serve from the deuce side, filmed from a court-level front angle. His continental grip is clearly visible with a relaxed hand on the handle, and there is pronounced wrist pronation through contact as the racquet edge leads before snapping into the ball.
|
|
3s |
Second Serve · Deuce · Court-level-front #3
Jo-Wilfried Tsonga's second serve from the deuce side, filmed from a court-level front angle. His shoulders rotate as a unit with a pronounced trunk coil during the toss, then uncoil in sequence from hips to shoulders just before contact, creating a clear separation between upper and lower body.
|
|
3.2s |
Second Serve Down The Middle · Deuce · Court-level-front #2
Jo-Wilfried Tsonga's second serve from the deuce side, filmed from a court-level front angle. His footwork includes a rhythmic rocking motion into a pinpoint stance, with a pronounced knee bend and upward drive off both feet before landing slightly inside the baseline.
|
|
3.5s |
Second Serve · Deuce · Toss · Court-level-front #1
Jo-Wilfried Tsonga's second serve from the deuce side, filmed from a court-level front angle. His shoulder line can be seen tilting steeply as his tossing arm extends upward, creating a pronounced trunk coil that then unwinds in sequence from the hips through the shoulders into the serving arm.
|
|
3.1s |
Second Serve · Deuce · Toss · Court-level-front #2
Jo-Wilfried Tsonga's second serve from the deuce side, filmed from court-level front. His shoulder line turns slightly away from the court as he initiates a compact trunk coil, then uncoils in sequence from hips through torso to shoulders just before contact.
|
|
3.2s |
Second Serve Wide · Deuce · Court-level-front #2
Jo-Wilfried Tsonga's second serve wide from the Deuce court, filmed from a court-level front angle. At contact, his racket face is slightly closed with the ball struck just above head height, and the upward brushing motion creates visible kick and racket head acceleration through the strike zone.
|
|
3s |
Second Serve · Ad · Court-level-rear #2
Jo-Wilfried Tsonga's second serve from the Ad court, filmed from a court-level rear angle. His footwork features a rhythmic rocking motion into a pinpoint stance, with a pronounced knee bend and upward drive off both feet before landing slightly inside the baseline to begin his recovery.
|
|
3.1s |
Second Serve · Ad · Toss · Court-level-rear #1
Jo-Wilfried Tsonga's second serve from the Ad court, filmed from a court-level rear angle. After contact he drives up and into the court, letting his tossing arm drop and his back leg swing through as he lands on his front foot and quickly settles into a balanced ready position.
|
|
3.3s |
Second Serve · Ad · Toss · Court-level-rear #2
Jo-Wilfried Tsonga's second serve from the Ad side, filmed from a court-level rear angle. After contact he lands into the court with his weight moving forward and quickly brings both hands back to the ready position as he completes his service follow-through.
|
|
3.4s |
Second Serve Wide · Ad · Court-level-rear #2
Jo-Wilfried Tsonga's second serve from the Ad court out wide, filmed from a court-level rear angle. His shoulders and trunk show a pronounced coil during the trophy position, followed by a strong uncoiling sequence that leads the racquet up through contact.
|
|
3.5s |
Second Serve · Deuce · Court-level-rear #1
Jo-Wilfried Tsonga's second serve from the deuce side, filmed from a court-level rear angle. The racket face can be seen pronating through contact with a slightly upward swing path, striking the ball just above head height to impart spin.
|
|
3.1s |
Second Serve · Deuce · Court-level-rear #2
Jo-Wilfried Tsonga's second serve from the deuce side, filmed from a court-level rear angle. His footwork includes a compact pinpoint stance with the back foot drawing up to the front foot before the toss, followed by a pronounced upward drive off both legs into the court.
|
|
3.2s |
Second Serve Down The Middle · Deuce · Court-level-rear #2
Jo-Wilfried Tsonga's second serve from the deuce side, filmed from a court-level rear angle. His shoulders and trunk coil deeply away from the court during the toss, then uncoil in a pronounced sequence from hips to shoulders to arm, with the hitting shoulder finishing well across his body.
|
|
3.3s |
Second Serve · Deuce · Toss · Court-level-rear #2
Jo-Wilfried Tsonga's second serve from the deuce side, filmed from a court-level rear angle. His feet stay grounded in a pinpoint stance during the toss, with a subtle knee bend and weight shift onto the front foot just before he drives up into the serve.
|
|
3.3s |
Second Serve · Ad · Arm-action · Front · 500fps #1
Jo-Wilfried Tsonga's second serve from the ad court, filmed from a front camera angle. His hips stay relatively closed to the net through the toss and knee bend, with a strong upward leg drive that straightens both knees aggressively into the hit.
|
500 |
1.6s |
Second Serve · Ad · Arm-action · Front · 500fps #2
Jo-Wilfried Tsonga's second serve from the ad side, filmed from a front angle. After contact his arm action continues upward with the hitting hand finishing high while his weight transfers into the court, bringing him quickly back toward a balanced ready position.
|
500 |
1.5s |
Second Serve · Ad · Arm-action · Front · 500fps #3
Jo-Wilfried Tsonga's second serve from the ad court, filmed from a front angle. His hips stay relatively closed to the baseline during the knee bend, then uncoil upward in sync with an aggressive leg drive that pushes him off the ground into the court.
|
500 |
3.1s |
Second Serve · Ad · Front · 500fps #1
Jo-Wilfried Tsonga's second serve from the ad court, filmed from a front angle. His continental grip is clearly visible with a relaxed hand, and you can see pronounced wrist pronation through and after contact.
|
500 |
3.2s |
Second Serve · Ad · Front · 240fps #2
Jo-Wilfried Tsonga's second serve from the ad court, filmed from a front camera angle at 240 fps. His shoulders rotate as a unit with the trunk into a deep coil during the toss, then uncoil aggressively upward so the chest opens toward the net just before contact, clearly showing the sequencing of trunk rotation into the serving arm.
|
240 |
3s |
Second Serve · Ad · Front · 240fps #3
Jo-Wilfried Tsonga's second serve from the ad court, filmed from a front angle. His deep knee bend and aggressive leg drive upward are clearly visible, with the hips rising and uncoiling as he pushes off the ground into the serve.
|
240 |
2.9s |
Second Serve · Deuce · Arm-action · Front · 500fps #1
Jo-Wilfried Tsonga's second serve from the deuce side, filmed from a front angle. His shoulder line can be seen tilting steeply upward as the tossing arm rises, with the trunk initiating a subtle coil before uncoiling in sync with the upward arm swing into contact.
|
500 |
3s |
Second Serve · Deuce · Arm-action · Front · 500fps #2
Jo-Wilfried Tsonga's second serve from the deuce side, filmed from a front angle. The slow-motion view makes it easy to see his shoulders close significantly during the trophy position and then uncoil in sequence with the trunk as he drives up into contact.
|
500 |
3s |
Second Serve · Deuce · Arm-action · Front · 500fps #3
Jo-Wilfried Tsonga's second serve from the deuce side, filmed from a front angle. From this view you can clearly see his shoulders tilt and rotate upward as the trunk coils, then uncoils in sequence from hips through torso to the serving arm during the hitting phase.
|
500 |
3.3s |
Second Serve · Deuce · Arm-action · Front · 500fps #4
Jo-Wilfried Tsonga's second serve from the deuce side, filmed from a front court-level angle. The racket moves up with a slightly closed face at contact, meeting the ball just above head height with a pronounced upward swing path for spin.
|
500 |
3.2s |
Second Serve · Deuce · Body-rotation · Front · 500fps
Jo-Wilfried Tsonga's second serve from the deuce side, filmed from a front angle. His compact split step leads into a strong knee bend and staggered stance, with the front foot planting slightly toward the sideline as he drives up and into the court.
|
500 |
3.4s |
Second Serve · Deuce · Front · 500fps #1
Jo-Wilfried Tsonga's second serve from the deuce court, filmed from a front angle. His shoulder line rotates significantly away from the target during the toss, then his trunk uncoils in a clearly sequenced motion from hips to shoulders into contact.
|
500 |
3.2s |
Second Serve · Deuce · Front · 500fps #2
Jo-Wilfried Tsonga's second serve from the deuce court, filmed from a front angle. His follow-through finishes across his body with his back leg kicking behind, and he quickly brings both hands back toward a neutral ready position to recover for the next shot.
|
500 |
2.6s |
Second Serve · Deuce · Toss · Front · 500fps
Jo-Wilfried Tsonga's second serve from the deuce side, filmed from a front angle. His shoulders and trunk coil together early in the tossing motion, with a noticeable upper-body tilt that sets up a strong uncoiling rotation into the serve.
|
500 |
2.4s |
Second Serve · Ad · Front #2
Jo-Wilfried Tsonga's second serve from the ad side, filmed from the front. His continental grip is clearly visible with a relaxed hand, and you can see pronounced wrist pronation through contact as the racket edge leads and then turns outward toward the target.
|
|
3.3s |
Second Serve · Deuce · Body-rotation · Front #2
Jo-Wilfried Tsonga's second serve from the deuce side, filmed from the front. The racket face is slightly closed at contact with the ball struck around head height, and you can see the racket head accelerate upward along a pronounced vertical swing path.
|
|
2.9s |
Second Serve · Deuce · Front #1
Jo-Wilfried Tsonga's second serve from the deuce side, filmed from the front. At contact his racket face is slightly closed with the ball struck just above head height, and the upward swing path creates noticeable racket head acceleration through the hitting zone.
|
|
2.8s |
Second Serve · Deuce · Front #2
Jo-Wilfried Tsonga's second serve from the deuce side, filmed from a front angle. His shoulders and trunk show a pronounced coil during the trophy position, then uncoil in a clearly sequenced motion from hips through torso to shoulders as he drives up to contact.
|
|
3.2s |
Second Serve · Deuce · Toss · Front #2
Jo-Wilfried Tsonga's second serve from the deuce court, filmed from the front. His knees load deeply under the tossing arm while the hips stay relatively closed to the baseline before driving upward into the serve.
|
|
3.1s |
Second Serve · Ad · Arm-action · Rear · 240fps
Jo-Wilfried Tsonga's second serve from the ad side, filmed from a rear angle. The high-speed view makes it easy to see his racket face stay slightly closed at contact with the ball struck just above head height before accelerating up and across for heavy spin.
|
240 |
3.1s |
Second Serve · Ad · Body-rotation · Rear · 500fps
Jo-Wilfried Tsonga's second serve from the ad side, filmed from a rear angle. His hips load in a closed position then unwind aggressively as his back leg drives up and forward, with a deep knee bend providing strong upward leg drive into the ball.
|
500 |
3.1s |
Second Serve · Ad · Leg-action · Rear · 500fps #1
Jo-Wilfried Tsonga's second serve from the ad court, filmed from a rear angle. His split-step flows into a rhythmic knee bend with an explosive leg drive upward, and his back leg swings through to aid recovery toward the center baseline.
|
500 |
3.1s |
Second Serve · Ad · Leg-action · Rear · 500fps #2
Jo-Wilfried Tsonga's second serve from the ad side, filmed from a rear angle. The racket contacts the ball slightly above head height with a clearly closed racket face, and the upward brushing swing path is easy to see as the racket accelerates steeply up and across the ball.
|
500 |
3s |
Second Serve · Ad · Rear · 500fps #1
Jo-Wilfried Tsonga's second serve from the ad court, filmed from a rear angle. His footwork shows a rhythmic rocking motion into a pinpoint stance, with the back foot drawing up to the front before he drives upward into the court.
|
500 |
3.1s |
Second Serve · Ad · Rear · 500fps #2
Jo-Wilfried Tsonga's second serve from the ad court, filmed from a rear angle. His continental grip is clearly visible with a relaxed hand, and you can see pronounced wrist pronation through and after contact as the racket edge leads into the ball.
|
500 |
3.1s |
Second Serve · Ad · Rear · 500fps #3
Jo-Wilfried Tsonga's second serve from the ad court, filmed from a rear angle. After contact he lands on his front (left) foot with his torso unwinding toward the court and quickly brings both hands back to a neutral ready position for the next shot.
|
500 |
2.8s |
Second Serve · Ad · Rear · 500fps #4
Jo-Wilfried Tsonga's second serve from the ad court, filmed from a rear angle. His continental grip is clearly visible with a relaxed hand, and the slow-motion view makes the pronounced wrist pronation through and after contact easy to see.
|
500 |
3.2s |
Second Serve · Ad · Rear · 500fps #5
Jo-Wilfried Tsonga's second serve from the ad court, filmed from a rear angle. After contact he drives his weight into the court and quickly lets his tossing arm drop back into a balanced, athletic ready position for the next shot.
|
500 |
3.4s |
Second Serve · Deuce · Arm-action · Rear · 500fps #1
Jo-Wilfried Tsonga's second serve from the deuce side, filmed from a rear angle. The racket face can be seen pronating aggressively through contact with a slightly upward swing path, striking the ball just above head height.
|
500 |
2.9s |
Second Serve · Deuce · Arm-action · Rear · 240fps #2
Jo-Wilfried Tsonga's second serve from the deuce court, filmed from a rear angle. His continental grip is clearly visible, with a relaxed hand that allows pronounced wrist pronation through contact and a distinct snap as the racket accelerates up the back of the ball.
|
240 |
3s |
Second Serve · Deuce · Arm-action · Rear · 240fps #3
Jo-Wilfried Tsonga's second serve from the deuce side, filmed from a rear angle at 240 fps. His follow-through finishes across his body with the non-hitting arm dropping back for counterbalance before he lands into the court and begins to square up into a ready position.
|
240 |
2.6s |
Second Serve · Deuce · Arm-action · Rear · 240fps #4
Jo-Wilfried Tsonga's second serve from the deuce court, filmed from a rear angle. His feet stay grounded longer through the loading phase, with a pronounced knee bend before an aggressive upward drive off the back leg into a balanced landing inside the court.
|
240 |
3s |
Second Serve · Deuce · Body-rotation · Rear · 500fps
Jo-Wilfried Tsonga's second serve from the deuce court, filmed from a rear angle. His follow-through unwinds fully toward the court with his back leg swinging through and his upper body finishing square, quickly transitioning his hands back toward a neutral ready position.
|
500 |
3.6s |
Second Serve · Deuce · Leg-action · Rear · 500fps #1
Jo-Wilfried Tsonga's second serve from the deuce court, filmed from a rear angle. His footwork shows a pronounced knee bend and driving leg extension into the court, with his back foot leaving the ground as he lands on his front foot to start the recovery.
|
500 |
3s |
Second Serve · Deuce · Leg-action · Rear · 500fps #2
Jo-Wilfried Tsonga's second serve from the deuce side, filmed from a rear angle. His deep knee bend and staggered stance make the explosive leg drive and upward hip extension especially clear as he pushes off the court into the serve.
|
500 |
3.3s |
Second Serve · Deuce · Rear · 500fps #1
Jo-Wilfried Tsonga's second serve from the deuce court, filmed from a rear angle. His legs load with a deep knee bend before driving upward, and his hips stay closed toward the baseline until just after racquet drop, when they rotate explosively into the court.
|
500 |
2.8s |
Second Serve · Deuce · Rear · 500fps #2
Jo-Wilfried Tsonga's second serve from the deuce court, filmed from a rear angle. The racket face can be seen pronating through contact with a slightly upward swing path, striking the ball just above head height to impart strong topspin and kick.
|
500 |
2.8s |
Second Serve · Deuce · Rear · 500fps #3
Jo-Wilfried Tsonga's second serve from the deuce side, filmed from a rear angle. The racket face is slightly closed at contact with the ball struck just above head height, and the upward swing path creates heavy spin as the racket accelerates through the hitting zone.
|
500 |
3.1s |
Second Serve · Deuce · Toss · Rear · 500fps #1
Jo-Wilfried Tsonga's second serve from the deuce side, filmed from a rear angle. His continental grip stays relaxed with a slightly flexed wrist, allowing a late pronation of the hitting hand just before and through contact.
|
500 |
3.4s |
Second Serve · Deuce · Toss · Rear · 500fps #2
Jo-Wilfried Tsonga's second serve from the deuce side, filmed from a rear angle. The racket moves up to contact with a slightly closed face and pronounced upward swing path, striking the ball just above head height for heavy spin.
|
500 |
3.3s |
Second Serve · Ad · Arm-action · Rear #2
Jo-Wilfried Tsonga's second serve from the Ad court, filmed from a rear angle. The racket moves up on a steep edge-on path with a slightly closed face at contact, striking the ball just above head height to create heavy spin.
|
|
3.5s |
Second Serve → BH Drop Volley · Ad · Rear #2
Jo-Wilfried Tsonga's second serve from the ad court, filmed from a rear angle. His deep knee bend and explosive upward leg drive into the court are clearly visible, with the hips uncoiling aggressively toward the target as he pushes off the ground.
|
|
6.9s |
Second Serve · Ad · Body-rotation · Rear #1
Jo-Wilfried Tsonga's second serve from the Ad court, filmed from a rear angle. His shoulders load into a deep coil relative to his hips before uncoiling in sync with trunk rotation, creating a pronounced shoulder-over-shoulder action through the hitting phase.
|
|
3.6s |
Second Serve · Ad · Body-rotation · Rear #2
Jo-Wilfried Tsonga's second serve from the Ad court, filmed from a rear angle. His hips load into a strong coil with noticeable knee bend before driving upward, and you can see his rear hip aggressively uncoil toward the court as his legs extend through the serve.
|
|
2.9s |
Second Serve Down The Middle · Ad · Rear #2
Jo-Wilfried Tsonga's second serve from the Ad court down the middle, filmed from a rear angle. His deep knee bend and strong upward leg drive into the court are clearly visible, with his hips uncoiling aggressively toward the target line during the serve motion.
|
|
3.2s |
Second Serve · Ad · Leg-action · Rear #2
Jo-Wilfried Tsonga's second serve from the ad court, filmed from the rear. His deep knee bend and aggressive leg drive upward are clearly visible, along with strong hip rotation that uncoils toward the target as he pushes off the ground.
|
|
3.3s |
Second Serve · Ad · Rear #1
Jo-Wilfried Tsonga's second serve from the Ad court, filmed from a rear angle. His continental grip is clearly visible, with a relaxed hand that allows pronounced wrist pronation through contact.
|
|
3s |
Second Serve · Ad · Rear #2
Jo-Wilfried Tsonga's second serve from the Ad side, filmed from a rear angle. His shoulders rotate significantly away from the court during the trophy phase, then uncoil in sync with the trunk as he drives up into the serve, creating a clear sequential rotation from hips to shoulders.
|
|
3.1s |
Second Serve · Deuce · Body-rotation · Rear #2
Jo-Wilfried Tsonga's second serve from the deuce side, filmed from a rear angle. From this view you can see his continental grip stay firm while his wrist pronates aggressively through contact to drive the serve.
|
|
3.6s |
Second Serve · Deuce · Leg-action · Rear #1
Jo-Wilfried Tsonga's second serve from the deuce side, filmed from a rear angle. His shoulders and trunk show a pronounced coil during the trophy position, then uncoil in sequence with the hips to drive upward into the ball.
|
|
3.3s |
Second Serve · Deuce · Leg-action · Rear #2
Jo-Wilfried Tsonga's second serve from the deuce side, filmed from a rear angle. From this view, his continental grip is stable with minimal grip change during the toss, and you can see a pronounced wrist pronation through contact that continues into the follow-through.
|
|
3.3s |
Second Serve · Deuce · Leg-action · Rear #3
Jo-Wilfried Tsonga's second serve from the deuce court, filmed from a rear angle. His footwork shows a rhythmic rocking motion into the trophy position, with a pronounced knee bend and upward leg drive that pushes him into the court after contact.
|
|
3.3s |
Second Serve · Deuce · Rear #1
Jo-Wilfried Tsonga's second serve from the deuce court, filmed from a rear angle. The racket face is slightly closed at contact with the ball struck just above head height, and the upward swing path creates noticeable racket head speed through the hitting zone.
|
|
3.1s |
Second Serve · Deuce · Rear #2
Jo-Wilfried Tsonga's second serve from the deuce court, filmed from a rear angle. His footwork includes a pronounced pinpoint stance with the back foot drawing up to the front before an aggressive upward push into the court.
|
|
3.4s |
Second Serve · Deuce · Toss · Rear #2
Jo-Wilfried Tsonga's second serve from the deuce court, filmed from a rear angle. His shoulder line rotates deeply away from the court during the toss, creating a pronounced trunk coil that uncoils sequentially from hips to shoulders into the hitting phase.
|
|
3.3s |
Second Serve · Ad · Arm-action · Side · 120fps
Jo-Wilfried Tsonga's second serve from the ad court, filmed from the side. His footwork shows a measured platform stance with a controlled knee bend and a clear front-foot drive into the court as he lands and begins his recovery.
|
120 |
3.2s |
Second Serve · Ad · Body-rotation · Side · 240fps #1
Jo-Wilfried Tsonga's second serve from the ad side, filmed from a side angle. The racket face is slightly closed at a contact point above head height, with the racket accelerating steeply upward along the right side of his body to impart strong topspin.
|
240 |
3.3s |
Second Serve · Ad · Body-rotation · Side · 240fps #2
Jo-Wilfried Tsonga's second serve from the ad side, filmed from a side angle at 240 fps. His footwork shows a measured platform stance with a controlled knee bend and a pronounced upward drive off both legs before landing slightly inside the court on his front (left) foot.
|
240 |
3.1s |
Second Serve · Ad · Body-rotation · Side · 240fps #3
Jo-Wilfried Tsonga's second serve from the ad side, filmed from a side angle. The racket face is slightly closed at a contact point above head height, with the racket head accelerating steeply upward along the right side of his body to create strong spin.
|
240 |
3.3s |
Second Serve · Ad · Side · 240fps #1
Jo-Wilfried Tsonga's second serve from the ad side, filmed from a side angle. His feet set in a platform stance with a pronounced knee bend, and you can clearly see the rear leg driving up and into the court as he lands on his front foot to start his recovery.
|
240 |
3.5s |
Second Serve · Ad · Side · 240fps #2
Jo-Wilfried Tsonga's second serve from the ad side, filmed from the side. His footwork shows a rhythmic rocking motion into a pinpoint stance, with a pronounced knee bend and upward leg drive that is clearly visible in slow motion.
|
240 |
3.1s |
Second Serve · Deuce · Body-rotation · Side · 120fps
Jo-Wilfried Tsonga's second serve from the deuce side, filmed from the side. His continental grip is clearly visible with a relaxed hand, and the slow-motion angle makes the upward wrist pronation into contact easy to see.
|
120 |
2.8s |
Second Serve · Deuce · Side · 240fps #1
Jo-Wilfried Tsonga's second serve from the deuce side, filmed from a side angle. His shoulders and trunk show a pronounced coil during the trophy position, then uncoil in a sequenced motion starting from the hips and torso before the shoulder rotates up and through the ball.
|
240 |
3.2s |
Second Serve · Deuce · Side · 240fps #2
Jo-Wilfried Tsonga's second serve from the deuce side, filmed from a side angle. The racket contacts the ball slightly above head height with a clearly pronated racket face and an upward, brushing swing path that increases racket head speed through contact.
|
240 |
3.5s |
Second Serve · Ad · Arm-action · Side #2
Jo-Wilfried Tsonga's second serve from the Ad side, filmed from the side. His shoulder line rotates deeply away from the court before contact and then uncoils in sync with a pronounced trunk drive upward, making the shoulder-over-shoulder action and torso extension easy to distinguish.
|
|
3.1s |
Second Serve · Ad · Body-rotation · Side #2
Jo-Wilfried Tsonga's second serve from the Ad court, filmed from the side. His hips load closed then rotate aggressively toward the court as his knees drive upward, with a pronounced push off the back leg visible from this angle.
|
|
3.7s |
Second Serve · Ad · Leg-action · Side #2
Jo-Wilfried Tsonga's second serve from the Ad court, filmed from the side. His footwork includes a pronounced knee bend and upward drive off the back leg, with a controlled landing on the front foot that sets his stance for quick recovery.
|
|
3.3s |
Second Serve · Ad · Side #1
Jo-Wilfried Tsonga's second serve from the Ad side, filmed from the side. His follow-through carries his hitting arm fully across his body as his weight lands on his front foot, bringing him quickly back into a compact ready position with both hands returning to the racquet.
|
|
3.4s |
Second Serve · Ad · Side #2
Jo-Wilfried Tsonga's second serve from the Ad side, filmed from the side. His follow-through carries his body weight into the court with his back leg kicking up behind him, and he quickly drops the racquet to transition into a compact ready position.
|
|
2.9s |
Second Serve · Ad · Side #3
Jo-Wilfried Tsonga's second serve from the Ad side, filmed from the side. His shoulders rotate well past perpendicular to the baseline in the trophy position, then his trunk uncoils in sync with his leg drive to transfer energy up through the kinetic chain.
|
|
3.2s |
Second Serve · Ad · Toss · Side #1
Jo-Wilfried Tsonga's second serve from the Ad court, filmed from the side. After contact his weight drives into the court with a full shoulder rotation, and he finishes in a balanced landing that brings him quickly back into a compact ready position.
|
|
3.8s |
Second Serve · Ad · Toss · Side #2
Jo-Wilfried Tsonga's second serve from the ad court, filmed from the side. His deep knee bend and strong upward leg drive into the court are clearly visible, with his hips extending aggressively toward the baseline as he initiates the serve motion.
|
|
3.3s |
Second Serve · Ad · Toss · Side #3
Jo-Wilfried Tsonga's second serve from the Ad court, filmed from a side angle. His continental grip stays relaxed with a noticeable wrist pronation through contact that continues into a loose, extended finish.
|
|
3.1s |
Second Serve · Deuce · Arm-action · Side #2
Jo-Wilfried Tsonga's second serve from the deuce side, filmed from the side. His relaxed continental grip is paired with a pronounced wrist pronation through contact, clearly visible as the racket face snaps from edge-on to square with the ball.
|
|
3.6s |
Second Serve · Deuce · Body-rotation · Side #1
Jo-Wilfried Tsonga's second serve from the deuce side, filmed from a side angle. His footwork shows a compact platform stance with a pronounced knee bend, and from this view you can clearly see his weight transferring from the back foot to the front foot as he drives up into the serve.
|
|
3.5s |
Second Serve · Deuce · Body-rotation · Side #2
Jo-Wilfried Tsonga's second serve from the deuce side, filmed from a side angle. The racket can be seen dropping deeply behind his back before driving up on edge into contact, with the ball struck slightly above head height and the strings pronating aggressively through the hit.
|
|
2.8s |
Second Serve · Deuce · Side #1
Jo-Wilfried Tsonga's second serve from the deuce side, filmed from a side angle. His shoulders rotate deeply away from the court during the trophy phase, with a pronounced trunk coil that then uncoils in sync with his leg drive and upward arm motion.
|
|
3.2s |
Second Serve · Deuce · Side #2
Jo-Wilfried Tsonga's second serve from the deuce side, filmed from a side angle. His deep knee bend and aggressive leg drive into the court are clearly visible as his hips uncoil upward and forward through contact.
|
|
3s |
Second Serve · Deuce · Side #3
Jo-Wilfried Tsonga's second serve from the deuce side, filmed from the side. His hips load with a pronounced knee bend before driving upward, with the back leg extending aggressively into the court as the hips uncoil toward contact.
|
|
3.1s |
Second Serve · Deuce · Side #4
Jo-Wilfried Tsonga's second serve from the deuce side, filmed from the side. His continental grip is easy to see here, with a loose wrist that pronates aggressively through contact to add spin and safety to the serve.
|
|
3.2s |
Second Serve · Deuce · Side #5
Jo-Wilfried Tsonga's second serve from the deuce side, filmed from the side. His footwork includes a small rhythmic rocker step into a pinpoint stance, with a pronounced knee bend and upward drive clearly visible before he lands slightly inside the baseline.
|
|
3.3s |
Second Serve · Deuce · Side #6
Jo-Wilfried Tsonga's second serve from the deuce side, filmed from the side. After contact he drives his weight into the court and quickly brings his non-hitting hand back toward his torso as he lands in a balanced position ready for the next shot.
|
|
3.2s |
Second Serve · Deuce · Toss · Side #1
Jo-Wilfried Tsonga's second serve from the deuce side, filmed from the side. His hips load with a deep knee bend and pronounced leg drive upward, showing how his back hip leads the motion into contact.
|
|
3.3s |
Second Serve · Deuce · Toss · Side #2
Jo-Wilfried Tsonga's second serve from the deuce side, filmed from a side angle. His footwork shows a compact platform stance with minimal rocking motion into the court before landing on his front foot and bringing the back leg through for recovery.
|
|
3.4s |
Second Serve · Deuce · Toss · Side #3
Jo-Wilfried Tsonga's second serve from the deuce court, filmed from the side. The racket moves up to contact with a slightly closed face and reaches the ball at about head height, showing a steep upward swing path for spin.
|
|
3.3s |
BH Slice Center · Front · 500fps #1
Jo-Wilfried Tsonga's backhand slice from the center of the court, filmed from a front angle. His knees are noticeably flexed as he loads, with the front hip slightly closed and the back leg providing a stable base through the slicing motion.
|
500 |
2.7s |
BH Slice Center · Front · 240fps #2
Jo-Wilfried Tsonga's backhand slice from the center of the court, filmed from a front angle. After contact he extends the racquet hand forward with the non-hitting hand staying back for counterbalance, then brings both hands toward his body as he recovers into a compact ready position.
|
240 |
2.6s |
BH Slice Moves Back · Front · 500fps #1
Jo-Wilfried Tsonga's backhand slice while moving back from a neutral position, filmed from the front. The racket face is noticeably open at contact with the ball struck around waist height, and the downward, slightly across-the-body swing path is clearly visible in slow motion.
|
500 |
2.6s |
BH Slice Moves Back · Front · 500fps #2
Jo-Wilfried Tsonga's backhand slice while moving back from a central position, filmed from a front angle. His footwork shows small retreating adjustment steps into a slightly open stance, with a subtle split-step before he loads the outside leg for the slice.
|
500 |
3s |
BH Slice Running · Front · 500fps #1
Jo-Wilfried Tsonga's running backhand slice from the front, filmed from a court-level front angle. The racket face stays slightly open at contact with the ball struck around waist height, and the high-to-low swing path produces a distinct downward cutting motion through impact.
|
500 |
2.6s |
BH Slice Running · Front · 240fps #2
Jo-Wilfried Tsonga's running backhand slice from the front, filmed from a front angle. His shoulders stay relatively closed with a pronounced upper-body tilt, and the trunk rotation uncoils late with the chest staying side-on longer before releasing through contact.
|
240 |
2.9s |
BH Slice Running · Front · 240fps #3
Jo-Wilfried Tsonga's running backhand slice from the front, filmed from a front court-level angle at 240 fps. After contact his racket finishes out in front with the non-hitting hand extending back for counterbalance as he transfers his weight onto the outside leg to recover toward a neutral ready position.
|
240 |
2.4s |
BH Slice Running · Front · 240fps #4
Jo-Wilfried Tsonga's running backhand slice from the front, filmed from a front angle at 240 fps. His follow-through extends out in front with the racket face slightly open while his non-hitting arm counterbalances behind him before he regathers into a neutral ready position.
|
240 |
2.6s |
BH Slice Running · Front · 240fps #5
Jo-Wilfried Tsonga's running backhand slice from the front, filmed from a front angle. His shoulders stay relatively closed with a pronounced upper-body tilt, and the slow motion makes it easy to see the trunk uncoil slightly later than the initial shoulder turn as he extends through the ball.
|
240 |
2.4s |
BH Slice Short · Front · 240fps #1
Jo-Wilfried Tsonga's backhand slice from the center of the court, filmed from a front angle. His knees stay flexed as he steps into the ball, with his hips remaining relatively closed while the front leg provides a stable base through contact.
|
240 |
3.8s |
BH Slice Short · Front · 240fps #2
Jo-Wilfried Tsonga's backhand slice from a short court position, filmed from the front at 240 fps. His hips stay relatively closed while his knees maintain a moderate bend, with the front leg bracing and the back leg lightly loading to support the slicing motion.
|
240 |
3.4s |
BH Slice Wide · Front · 500fps #1
Jo-Wilfried Tsonga's backhand slice from a wide position, filmed from the front. His racket face is noticeably open at contact with the ball struck around waist height, and the downward, slightly across-the-body swing path is clearly visible in slow motion.
|
500 |
2.7s |
BH Slice Wide · Front · 240fps #2
Jo-Wilfried Tsonga's backhand slice from a wide position, filmed from a front angle. His stance stays mostly neutral as he steps out to the wide ball, with a small adjustment step after contact to recover back toward the center.
|
240 |
3.3s |
BH Slice Wide · Front · 240fps #3
Jo-Wilfried Tsonga's backhand slice from a wide position, filmed from the front at 240 fps. After contact he extends the racquet hand out toward the target while his non-hitting arm counterbalances behind him, then he brings both hands back toward his body as he regains a neutral ready position.
|
240 |
2.8s |
BH Slice Wide · Front · 240fps #4
Jo-Wilfried Tsonga's backhand slice from a wide position, filmed from a front angle. The racket face is noticeably open at contact with the ball taken around waist height, and the downward, slightly across-the-body swing path is clear in slow motion at 240 fps.
|
240 |
2.7s |
BH Slice Wide · Front · 240fps #5
Jo-Wilfried Tsonga's backhand slice from a wide position, filmed from the front. From this angle, you can clearly see his continental grip stay firm while the hitting wrist remains slightly laid back through the swing, stabilizing the racket face as it moves through contact.
|
240 |
2.8s |
BH Slice Wide · Front · 240fps #6
Jo-Wilfried Tsonga's backhand slice from a wide position, filmed from the front. After contact his follow-through extends out toward the target with the racquet face slightly open while his weight continues to move into the court and his non-hitting hand settles near his torso as he prepares to recover.
|
240 |
2.9s |
FH Slice Running · Front · 500fps #1
Jo-Wilfried Tsonga's running forehand slice from the front, filmed from a court-level front angle. The racket face stays slightly open at contact with the ball struck around waist height, and the high-to-low swing path creates visible backspin as the racket head accelerates through impact.
|
500 |
2.7s |
FH Slice Running · Front · 500fps #2
Jo-Wilfried Tsonga's running forehand slice from a neutral court position, filmed from the front at 500 fps. After contact, his racquet finishes out in front with the non-hitting hand extending back for counterbalance as he transfers his weight forward into a compact recovery stance.
|
500 |
2.7s |
FH Slice Short · Front · 500fps
Jo-Wilfried Tsonga's forehand slice from the center of the court, filmed from the front. His feet set in a neutral stance with a small adjustment step into the ball, and you can see a compact recovery step back toward a ready position immediately after contact.
|
500 |
3.4s |
FH Slice Running · Front
Jo-Wilfried Tsonga's running forehand slice from the front of the court, filmed from a front angle. His footwork features quick adjustment steps into a semi-open stance, with a pronounced left-leg plant that lets him stay low and recover forward after contact.
|
|
3.2s |
BH Slice → Lob Running · Rear · 500fps
Jo-Wilfried Tsonga's running backhand slice lob from a neutral court position, filmed from a rear angle. His continental grip stays firm with the hitting wrist laid back through the swing, then subtly unhinges upward at contact to add loft to the lob.
|
500 |
3s |
BH Slice Moves Back · Rear · 240fps
Jo-Wilfried Tsonga's backhand slice while moving back from a neutral court position, filmed from a rear angle. His upper body shows a pronounced shoulder turn with the hitting-side shoulder dropping slightly as the trunk coils early, then uncoils in sync with the forward swing to keep the racquet path stable through contact.
|
240 |
2.9s |
BH Slice Running · Leg-action · Rear · 500fps
Jo-Wilfried Tsonga's running backhand slice from a neutral court position, filmed from the rear at 500 fps. The racket face is noticeably open at contact with the ball struck around waist height, and the swing path moves slightly downward and forward to impart underspin.
|
500 |
2.7s |
BH Slice Running · Rear · 500fps #1
Jo-Wilfried Tsonga's running backhand slice from a neutral court position, filmed from a rear angle. From this view, his continental grip is clearly visible with a firm but relaxed hand, and his hitting wrist stays slightly laid back through contact before subtly stabilizing into the follow-through.
|
500 |
2.9s |
BH Slice Running · Rear · 240fps #2
Jo-Wilfried Tsonga's running backhand slice from a neutral court position, filmed from a rear angle at 240 fps. His continental grip stays firm with a slightly laid-back wrist, creating a stable racket face through contact despite his forward momentum.
|
240 |
2.5s |
BH Slice Running · Rear · 240fps #3
Jo-Wilfried Tsonga's running backhand slice from a neutral court position, filmed from a rear angle at 240 fps. His shoulders rotate early as the trunk coils against the direction of movement, then uncoil in sequence with the hitting arm to keep the racquet face stable through contact.
|
240 |
2.8s |
BH Slice Short · Rear · 500fps #1
Jo-Wilfried Tsonga's backhand slice from a central court position, filmed from a rear angle. His shoulders rotate early as the trunk coils on the unit turn, then uncoil in sync with the hitting arm to create a long, downward slicing path through contact.
|
500 |
3s |
BH Slice Short · Rear · 500fps #2
Jo-Wilfried Tsonga's backhand slice from a central court position, filmed from a rear angle. The high-speed footage makes it easy to see his slightly open racket face at contact, with the ball struck around waist height as the racket tracks on a distinctly downward, skimming path.
|
500 |
3.2s |
BH Slice Short · Rear · 240fps #3
Jo-Wilfried Tsonga's backhand slice from a central court position, filmed from a rear angle. His knees stay flexed with a wide base as his hips remain relatively closed, letting his back leg lightly load and then trail behind through the slice.
|
240 |
3.7s |
BH Slice Wide · Arm-action · Rear · 240fps
Jo-Wilfried Tsonga's backhand slice from a wide position, filmed from a rear angle. His continental grip is clearly visible with a slightly firm grip pressure, and the rear view makes it easy to see his stable wrist position staying laid back through contact with minimal wrist flex.
|
240 |
2.8s |
BH Slice Wide · Leg-action · Rear · 500fps
Jo-Wilfried Tsonga's backhand slice from a wide position, filmed from a rear angle. After contact his racquet finishes out in front while his weight continues moving toward the court, and his non-hitting arm extends back slightly before he brings both hands toward a compact ready position.
|
500 |
3.3s |
BH Slice Wide · Rear · 500fps #1
Jo-Wilfried Tsonga's backhand slice from a wide position, filmed from a rear angle. His footwork includes a quick adjustment step out toward the ball followed by a slightly open stance that allows him to stay sideways through contact while preparing a recovery step back toward the center.
|
500 |
3.2s |
BH Slice Wide · Rear · 500fps #2
Jo-Wilfried Tsonga's backhand slice from a wide position, filmed from a rear angle. His footwork includes a quick lateral adjustment into a slightly open stance, with a pronounced right leg load before a small recovery step back toward the center.
|
500 |
2.7s |
BH Slice Wide · Rear · 240fps #3
Jo-Wilfried Tsonga's backhand slice wide from a neutral position, filmed from a rear angle at 240 fps. His continental grip is clearly visible with a firm but relaxed hand, and the slow motion makes the stable wrist angle and minimal wrist flexion through contact easy to see.
|
240 |
3.1s |
BH Slice Wide · Rear · 240fps #4
Jo-Wilfried Tsonga's backhand slice from a wide position, filmed from a rear angle. His hips stay relatively closed while his knees flex into a low base, with the outside leg anchoring and the inside leg lightly stepping through to support the slicing motion.
|
240 |
3.2s |
BH Slice Wide · Rear · 240fps #5
Jo-Wilfried Tsonga's backhand slice from a wide position, filmed from a rear angle. His footwork includes a quick adjustment step out toward the sideline followed by a slightly open stance that lets him stay sideways through contact while preparing recovery steps back toward center.
|
240 |
2.7s |
BH Slice Running · Side · 240fps
Jo-Wilfried Tsonga's running backhand slice from a neutral court position, filmed from the side. His hips stay relatively closed to the net while his outside knee bends deeply to support a long, low stride through the shot.
|
240 |
3.3s |
BH Slice Short · Side · 240fps
Jo-Wilfried Tsonga's backhand slice from the side, filmed from a side angle. His continental grip is clearly visible, with a firm but relaxed hand position and a stable wrist that stays laid back through contact to keep the racket face slightly open.
|
240 |
2.6s |
BH Slice Wide · Side · 240fps
Jo-Wilfried Tsonga's backhand slice from a wide position, filmed from the side. His footwork includes a quick adjustment step out toward the ball followed by a slightly open stance, with his weight moving laterally as he carves through the slice.
|
240 |
3.3s |
FH Slice Running · Side #1
Jo-Wilfried Tsonga's running forehand slice from the deuce side, filmed from the side. His continental grip stays firm with a slightly laid-back wrist, creating a stable racket face through contact despite his forward momentum.
|
|
3.1s |
FH Slice Running · Side #2
Jo-Wilfried Tsonga's running forehand slice from the side, filmed from a side angle. The contact is made slightly in front of his body with the racket face moderately open and traveling on a distinctly downward, cutting path through the ball.
|
|
2.9s |
FH Slice Running · Side #3
Jo-Wilfried Tsonga's running forehand slice from the side, filmed from a side angle. After contact his racquet finishes out in front with the non-hitting arm extended back for counterbalance as he continues his forward momentum into a low, wide recovery stance.
|
|
2.9s |