David Ferrer
CC BY 2.0 — Wikimedia

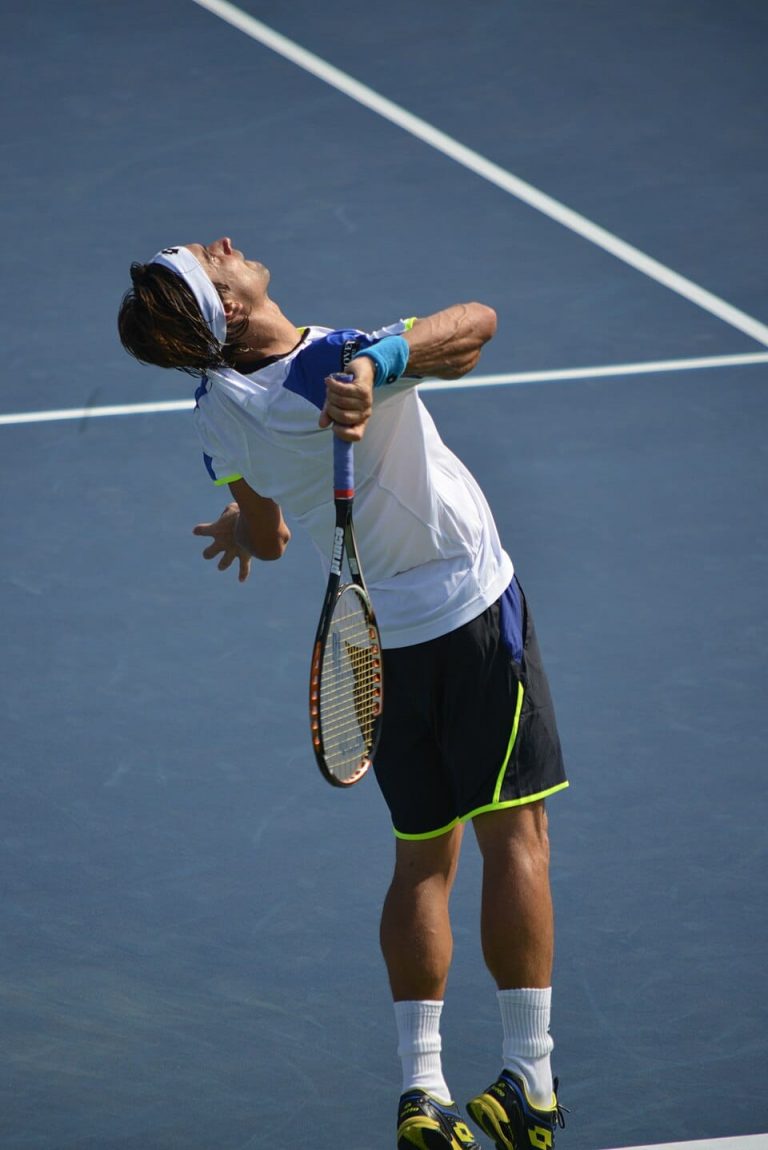
David Ferrer "The Wall"

Spain
Active Retired #3 career high 27 titles Right-handed Two-Handed BH 175cm
Relentless competitor known as one of the fittest players on tour. Powerful forehand and tireless defense with never-give-up mentality on every point.

Coaches: Javier Piles

Video Library (530 videos)

Name FPS Duration
FH Approach · Court-level-front David Ferrer’s forehand approach from the center of the court, filmed from a court_level front angle. His hips stay relatively low with a deep knee bend on the loading leg, then drive upward as both legs extend aggressively into the court to transfer his momentum forward.
5.6s
BH · Arm-action · Court-level-front #1 David Ferrer’s two-handed backhand from a central baseline position, filmed from a court-level front angle. His relatively compact grip structure shows a firm, stable bottom hand with minimal wrist lag, while the top hand guides a subtle wrist roll through contact.
2.8s
BH · Arm-action · Court-level-front #2 David Ferrer’s backhand from the middle of the court, filmed from a court-level front angle. His compact split step leads into a quick pivot onto a neutral stance, with both feet setting firmly before he drives through the ball and then taking small recovery steps back to center.
2.7s
BH Center · Court-level-front · Closed #1 David Ferrer’s backhand from the center of the court in a closed stance, filmed from a front court-level angle. After contact his follow-through finishes high with both hands on the racquet while his weight moves into the court and he quickly resets his feet into a ready position.
2.8s
BH Center · Court-level-front · Closed #2 David Ferrer’s backhand from the center of the court in a closed stance, filmed from a front court-level angle. At contact his racket face is nearly square to the ball with the strike point around waist height, and the racket head accelerates steeply forward and slightly upward through the hitting zone.
2.4s
BH Center · Court-level-front · Closed #3 David Ferrer’s backhand from the center of the court in a closed stance, filmed from a front court-level angle. His hips stay relatively closed to the net while his knees are deeply flexed, showing strong leg drive upward and forward through the shot.
2.6s
BH Center · Court-level-front · Closed #4 David Ferrer’s backhand from the center of the court in a closed stance, filmed from a front court-level angle. After contact his follow-through finishes high with the racket over his front shoulder as he quickly brings both hands back toward his body to reset into a compact ready position.
2.6s
BH Center Cross Court · Court-level-front David Ferrer’s backhand from the center of the court, hit cross-court and filmed from a court-level front angle. After contact his follow-through finishes high with the racquet toward his left side as he quickly brings both hands back toward his torso to reset into a compact ready position.
3.3s
BH Half Volley Center · Court-level-front David Ferrer’s backhand from the center of the court, filmed from a front court-level angle. He sets up in a neutral stance with a quick adjustment step before contact and immediately takes small recovery steps back toward the middle after the swing.
2s
BH Center · Court-level-front · Neutral #1 David Ferrer’s backhand from the center of the court in a neutral stance, filmed from a front court-level angle. At contact, his racket face is almost perfectly square to the ball with the contact point around waist height, and the two-handed swing drives straight through the ball before finishing over his front shoulder.
2.4s
BH Center · Court-level-front · Neutral #2 David Ferrer’s two-handed backhand from the center of the court in a neutral stance, filmed from a court-level front angle. His relatively firm eastern backhand grip on the bottom hand combines with a laid-back wrist position that stays stable through contact with only a subtle release of the top hand wrist after impact.
2.9s
BH Center · Court-level-front · Neutral #3 David Ferrer’s backhand from the center in a neutral stance, filmed from a court-level front angle. His two-handed backhand contact is made around waist to hip height with a slightly closed racket face and a compact, forward-driving swing path through the ball.
2.8s
BH Center · Court-level-front · Open David Ferrer’s backhand from the center of the court in an open stance, filmed from a front court-level angle. His quick split step into a wide open stance is followed by a compact lateral adjustment and a strong recovery step that readies him to move immediately for the next ball.
2.7s
BH Running · Court-level-front #1 David Ferrer’s running backhand from the middle of the court, filmed from a court-level front angle. His hips stay relatively closed as he sprints, with a deep knee bend and strong push off the outside leg to plant and drive into the two-handed backhand.
3.1s
BH Running · Court-level-front #2 David Ferrer’s running backhand from the center of the court, filmed from court_level front. His hips stay low with deep knee flexion as he sprints, then he plants his outside leg firmly to drive his hips and legs through the shot while still moving.
2.9s
BH Running · Court-level-front #3 David Ferrer's running backhand from a neutral court position, filmed from a court-level front angle. His hips stay low with deep knee flexion as he sprints and plants, and you can see his legs driving laterally to stop and load before rotating through the shot.
2.9s
BH Wide · Court-level-front · Closed #1 David Ferrer’s wide backhand from the front court-level angle in a closed stance. At contact his racket face is almost square to the ball with the strike zone around waist height, and the racket head accelerates steeply upward along the baseline-to-sideline swing path.
2.9s
BH Wide · Court-level-front · Closed #2 David Ferrer’s wide backhand from a closed stance, filmed from a court-level front angle. The racket face is slightly closed at contact with the ball struck around waist height, and his compact two-handed swing drives the racket head forward on a relatively straight path through the hitting zone.
3.2s
BH Wide · Court-level-front · Closed #3 David Ferrer’s wide backhand from a closed stance on the deuce side, filmed from a court-level front angle. His hips stay closed to the net as he plants his outside leg, with a deep knee bend and strong push off that drives his body through the shot.
3.1s
BH Wide · Court-level-front · Closed #4 David Ferrer's wide two-handed backhand from a closed stance on the deuce side, filmed from a court-level front angle. His shoulders rotate well past perpendicular to the net on the unit turn, then his trunk uncoils ahead of the arm swing so the torso leads the racquet through contact.
3.3s
BH Wide Cross Court · Court-level-front David Ferrer's wide backhand from the center, filmed from a court-level front angle. His shoulders rotate as a single unit with the trunk on the unit turn, then uncoil aggressively through contact with the chest finishing fully toward the target.
3.2s
BH Wide Down The Line · Court-level-front David Ferrer’s backhand from a wide position on the deuce side, filmed from a court-level front angle. His hips stay relatively closed as he drives off a strong, wide base, with deep knee bend in both legs to push into the shot and recover quickly.
2.8s
BH Wide · Court-level-front · Neutral #1 David Ferrer's backhand from a wide neutral-stance position, filmed from a court-level front angle. His shoulders rotate as a single unit with the trunk on the unit turn, then uncoil sharply from the hips upward, showing a clear sequential unwind through the torso into the arms.
2.6s
BH Wide · Court-level-front · Neutral #2 David Ferrer’s wide backhand from a neutral stance, filmed from a court-level front angle. His racket face is slightly closed at a contact point near hip height, with the two-handed swing driving forward through the ball for a compact, accelerating racket head path.
3.1s
BH Wide · Court-level-front · Open #1 David Ferrer's wide two-handed backhand from the Deuce side in an open stance, filmed from a court-level front angle. After contact his follow-through finishes high with the racquet over his right shoulder as he quickly uncoils his hips and brings both hands back toward a compact ready position to recover for the next shot.
3.2s
BH Wide · Court-level-front · Open #2 David Ferrer’s wide backhand from the Deuce side in an open stance, filmed from a court-level front angle. His shoulders rotate significantly past his hips on the unit turn, then the trunk uncoils ahead of the arms so the racquet lags slightly behind the torso through contact.
3.1s
BH Wide · Court-level-front · Open #3 David Ferrer’s backhand from a wide position on the deuce side, filmed from a court-level front angle. He plants in a strong open stance with his outside foot bracing his weight, then uses quick recovery steps to push back toward the center after contact.
3.7s
BH · Arm-action · Court-level-rear #1 David Ferrer’s backhand from the center of the court, filmed from a court-level rear angle. His compact split step leads into a quick pivot and semi-open stance, with small adjustment steps between shots to keep his feet set behind the ball.
3.1s
BH · Arm-action · Court-level-rear #2 David Ferrer’s backhand from the center of the court, filmed from a court_level rear angle. His follow-through finishes high with the racket over his shoulder as his weight drives forward, and he quickly resets his feet into a compact ready position for the next shot.
3.2s
BH · Arm-action · Court-level-rear #3 David Ferrer’s backhand from the center of the court, filmed from a court-level rear angle. After contact his follow-through finishes high with the racket over his right shoulder while his weight drives forward and he quickly resets both hands on the handle into a compact ready position.
2.5s
BH · Arm-action · Court-level-rear #4 David Ferrer’s two-handed backhand from the center of the court, filmed from a court-level rear angle. At contact his racket face is almost perfectly square to the incoming ball with the contact point around waist height, and the racket head accelerates steeply up the back of the ball for strong topspin.
2.4s
BH Center Down The Line · Court-level-rear David Ferrer’s backhand from the center of the court hit down the line, filmed from a court-level rear angle. His two-handed backhand uses a firm continental grip on the right hand with noticeable wrist stability, while the left wrist creates subtle lag and then straightens through contact.
3.2s
BH Center · Court-level-rear · Neutral David Ferrer's backhand from the center of the court in a neutral stance, filmed from a rear court-level angle. His hips stay relatively closed through the load with a deep knee bend, then unwind in sync with a strong leg drive that pushes up and into the court.
2.6s
BH Center · Court-level-rear · Neutral #1 David Ferrer’s backhand from the center of the court in a neutral stance, filmed from a rear court-level angle. After contact he finishes with the racquet high and his weight moving slightly forward, quickly bringing both hands back toward his torso as he resets into a compact ready position.
3.3s
BH Center · Court-level-rear · Neutral #2 David Ferrer’s backhand from the center of the court in a neutral stance, filmed from a rear court-level angle. His hips stay relatively closed with a deep knee bend on both legs, and you can see his legs driving up and forward together through contact to recover quickly to the middle.
2.8s
BH Center · Court-level-rear · Open David Ferrer’s backhand from the center of the court in an open stance, filmed from a court-level rear angle. His quick shuffle steps set up a wide, stable base before contact, and he immediately executes a small hop and crossover recovery step to get back into position.
3.3s
BH Moves Back · Court-level-rear #1 David Ferrer’s backhand while moving back from a neutral position, filmed from a court-level rear angle. His two-handed grip stays compact with minimal wrist flex, and you can see the non-dominant wrist staying firm through contact to stabilize the racquet face.
2.8s
BH Moves Back · Court-level-rear #2 David Ferrer’s backhand while moving back from a neutral position, filmed from a court-level rear angle. After contact he finishes with a high two-handed follow-through and quickly resets his feet into a low, wide ready stance to recover for the next shot.
2.8s
BH Running · Court-level-rear #1 David Ferrer’s running backhand from a neutral position, filmed from a court_level rear angle. His shoulders and trunk coil strongly against his hip line on the preparation, then uncoil in a tightly sequenced rotation that drives the two-handed swing through contact even while moving laterally.
2.1s
BH Running · Court-level-rear #2 David Ferrer’s running backhand from the rear court position, filmed from a court-level rear angle. His quick adjustment steps and low, wide base are evident as he sprints laterally and sets into a semi-open stance before driving through the two-handed backhand.
3.5s
BH Running · Court-level-rear #3 David Ferrer's running two-handed backhand from a neutral court position, filmed from a court_level rear angle. At contact his racket face is nearly square to the baseline with the ball struck around waist height, and the racket head accelerates steeply upward along the baseline to create heavy topspin.
2.1s
BH Running · Court-level-rear #4 David Ferrer’s running backhand from the center of the court, filmed from a court-level rear angle. His rapid adjustment steps into the shot lead into a mostly open stance, followed by quick recovery footwork that immediately pulls him back toward the middle of the baseline.
3.1s
BH Running · Court-level-rear #5 David Ferrer's running backhand from a neutral court position, filmed from a court_level rear angle. At contact his racket face is slightly closed with the ball struck around waist height, and the racket head accelerates steeply upward along the baseline direction after impact.
2.9s
BH Short · Court-level-rear David Ferrer’s backhand from the short court, filmed from a rear court-level angle. His shoulders rotate well past perpendicular to the net on the unit turn, then his trunk uncoils aggressively through contact with both shoulders finishing high and fully rotated toward the target.
5.5s
BH Wide · Court-level-rear · Closed #1 David Ferrer’s wide backhand from a closed stance on the deuce side, filmed from a court-level rear angle. His shoulders rotate well past 90 degrees relative to the baseline on the unit turn, then the trunk uncoils ahead of the arms to drive the racquet through contact.
2.7s
BH Wide · Court-level-rear · Closed #2 David Ferrer's wide two-handed backhand from a closed stance on the deuce side, filmed from a court-level rear angle. His relatively firm eastern backhand grip on the left hand combines with a stable, laid-back right wrist that stays quiet through contact before a compact, controlled release.
2.6s
BH Wide · Court-level-rear · Neutral David Ferrer’s wide backhand from a neutral stance, filmed from a court-level rear angle. After contact his two-handed follow-through finishes high with his weight driving back toward the center of the baseline, and he quickly resets both hands on the racquet in a compact ready position.
3.3s
BH Center · Court-level-side · Closed David Ferrer’s backhand from the center of the court in a closed stance, filmed from a court-level side angle. From this side view, his two-handed grip keeps the wrists relatively firm with a slight lag on the racket head before contact, followed by a compact, controlled wrist release through the ball.
2.5s
BH Center · Court-level-side · Neutral David Ferrer’s backhand from the center of the court in neutral stance, filmed from a court-level side angle. His shoulders rotate well past perpendicular to the net on the unit turn, then uncoil in sync with a strong trunk rotation that clearly leads the racquet through contact.
2.5s
BH Moves Back · Court-level-side #1 David Ferrer's backhand while moving back from a neutral position, filmed from a court-level side angle. The side view makes it easy to see his contact point slightly in front of his body with a relatively closed racket face and a steep upward swing path through the ball.
2.9s
BH Moves Back · Court-level-side #2 David Ferrer’s backhand while moving back from a neutral court position, filmed from a court-level side angle. His quick adjustment steps backward set up a stable two-handed backhand in a mostly neutral stance, with a small hop into his recovery step after contact.
3s
BH Running · Court-level-side David Ferrer’s running backhand from the deuce side, filmed from a court-level side angle. His shoulders and trunk rotate as a single unit on the unit turn, then uncoil aggressively through contact with the rear shoulder driving through and the trunk continuing to rotate well into the follow-through despite his lateral movement.
3.1s
BH Wide · Court-level-side · Closed #2 David Ferrer’s backhand from a wide ball on the deuce side, filmed from a court-level side angle. His closed stance is clear as he plants the front foot across his body after a quick lateral shuffle, then uses small adjustment steps to recover back toward the center.
2.9s
BH Wide · Court-level-side · Closed #3 David Ferrer’s wide backhand from a closed stance on the deuce side, filmed from a court-level side angle. His racket contacts the ball slightly in front of his lead hip with a relatively vertical string bed, and the swing path accelerates low to high with noticeable racket head speed through contact.
2.7s
BH Center · Front · Closed #1 David Ferrer’s backhand from the center of the court in a closed stance, filmed from the front. His shoulders rotate as a single unit with the trunk on the unit turn, then uncoil together through contact with minimal separation between upper body and hips.
2.6s
BH Center · Front · Closed #2 David Ferrer’s backhand from the center of the court in a closed stance, filmed from the front. His shoulders rotate as a unit with the trunk into a full coil, then uncoil sequentially from hips to shoulders to arms, making the upper body rotation especially clear from this angle.
2.6s
BH Center · Front · Closed #3 David Ferrer’s backhand from the center of the court in a closed stance, filmed from the front. His two-handed grip stays firm with minimal wrist flex, while the dominant hand guides a compact wrist motion through contact.
2.6s
BH Center Down The Line · Front David Ferrer’s backhand from the center of the court, hit down the line, filmed from the front. His two-handed grip is firm with the dominant hand in a continental position and the off-hand dictating topspin, while his wrists stay relatively quiet until a late, compact release through contact.
2.8s
BH Center · Front · Neutral #1 David Ferrer’s backhand from the center of the court in a neutral stance, filmed from the front. His compact split step leads into small adjustment hops and a neutral stance setup, followed by a quick recovery step that readies him to move laterally for the next shot.
2.8s
BH Center · Front · Neutral #2 David Ferrer’s backhand from the center in neutral stance, filmed from the front. His shoulders and trunk coil together early, then uncoil in a tightly linked sequence where the chest rotates toward the net just after the hips initiate the turn.
2.6s
BH Center · Front · Open David Ferrer’s two-handed backhand from the center of the court in an open stance, filmed from the front. At contact his racket face is nearly square to the ball with the contact point around waist height, and the racket head accelerates straight through the line of the shot before wrapping across his body.
3s
BH Inside Out · Front David Ferrer’s backhand inside-out from the center of the court, filmed from the front. His quick split-step into a wide base leads into a strong neutral stance, followed by rapid recovery steps that reset him toward the middle after contact.
3.3s
BH Running · Front · Open David Ferrer’s running two-handed backhand from an open stance, filmed from the front. His semi-western bottom hand and continental top hand stay firm while the wrists remain relaxed, creating a noticeable wrist lag that straightens into a strong, stable position at contact.
2.9s
BH Wide · Front · Closed #1 David Ferrer’s backhand from a wide position, filmed from the front. His closed stance is clear as he steps across his body with the front foot, using a strong lateral push-off and quick recovery shuffle back toward the center after contact.
2.9s
BH Wide · Front · Closed #2 David Ferrer’s backhand from a wide position, filmed from the front. His closed stance is clear as he steps across his body with the front foot, using a quick adjustment hop to load on the outside leg before driving into the shot.
2.5s
BH Wide · Front · Closed #3 David Ferrer’s wide backhand from a closed stance, filmed from the front. His two-handed grip is firm with the wrists staying relatively quiet through the backswing, then unhinging slightly at contact as the dominant right wrist guides the racquet face through the ball.
2.6s
BH Wide · Front · Closed #4 David Ferrer’s wide backhand from the front, filmed from a front angle. His closed stance is clear as he steps across with his front foot, using a strong lateral push-off and quick recovery step back toward the center after contact.
2.7s
BH Wide Cross Court · Front David Ferrer’s backhand from a wide position, filmed from the front. After contact he finishes with a high two-handed follow-through and quickly brings both hands back toward his body as he pushes off the outside leg to recover toward the center.
3.2s
BH Wide Down The Line · Front David Ferrer's wide backhand from the center, filmed from the front. His two-handed grip stays compact with the wrists laid back on the takeback and then pronating together through contact for a firm, controlled strike.
3.1s
BH Wide · Front · Open David Ferrer’s wide backhand from an open stance, filmed from the front. After contact he finishes with the racquet high in front of his body and quickly brings both hands back toward the center, using small adjustment steps to recover into a ready position.
2.8s
BH · Arm-action · Rear #1 David Ferrer’s backhand from the center of the court, filmed from a rear angle. After contact his follow-through finishes high with the racquet over his shoulder while his weight drives forward, and he quickly brings both hands down into a compact ready position for the next shot.
2.7s
BH · Arm-action · Rear #2 David Ferrer's backhand from the center of the court, filmed from a rear angle. His shoulders rotate well past perpendicular to the baseline on the unit turn, then his trunk uncoils in a tightly sequenced motion that brings the hitting shoulder through first before the hips fully square to the net.
3s
BH Center · Rear · Closed David Ferrer’s backhand from the center of the court, filmed from a rear angle. His closed stance is clear as his right foot steps across the baseline plane, with quick adjustment steps before contact and an immediate recovery step back toward the center.
2.3s
BH Center Cross Court · Rear David Ferrer’s two-handed backhand from the center of the court, filmed from a rear angle. His semi-western bottom hand and firm, laid-back top wrist create noticeable wrist lag before contact, then both wrists stabilize through the strike for a compact, controlled finish.
2.1s
BH Inside Out · Rear David Ferrer’s two-handed backhand InsideOut from the center of the court, filmed from the rear. At contact his racket face is nearly square to the target with the ball struck around waist height, and the racket head accelerates on a slightly upward, inside-out swing path.
2.5s
BH Running · Rear · Open David Ferrer’s running backhand from an open stance, filmed from the rear. After contact he finishes with a high two-handed follow-through and quickly resets his feet, bringing the racquet back to a neutral ready position as he recovers toward center court.
2.9s
BH Half Volley Wide · Rear David Ferrer's wide backhand from the deuce side, filmed from a rear angle. His hips stay low with a deep knee bend as he pushes off the outside leg, showing strong lateral drive to reach the wide ball before rotating his hips through contact.
2.9s
BH · Arm-action · Side #1 David Ferrer's backhand from a neutral court position, filmed from the side. His shoulders load with a pronounced upper-body coil against the hips, then uncoil in sequence so the trunk rotation clearly initiates the forward swing before the arms release through contact.
2.8s
BH · Arm-action · Side #2 David Ferrer's backhand from the side, filmed from a side court-level angle. At contact his racket face is almost perfectly square to the ball with the contact point slightly in front of his lead hip, and the racket head accelerates steeply upward along the swing path for heavy topspin.
2.9s
BH · Arm-action · Side #3 David Ferrer's backhand from a neutral court position, filmed from the side. His strong knee bend and aggressive leg drive into the court are clear as his hips stay closed through the load and then rotate forward through contact.
2.6s
BH · Arm-action · Side #4 David Ferrer's backhand from a neutral court position, filmed from the side. His hips stay relatively closed through the load with deep knee flexion, then drive upward and slightly forward as his legs extend into the shot.
3.7s
BH · Arm-action · Side #5 David Ferrer’s two-handed backhand from a neutral court position, filmed from the side. His semi-closed two-handed grip is firm with noticeable wrist lag on the dominant hand that straightens through contact for a solid, controlled strike.
3.2s
BH Center · Side · Closed #1 David Ferrer’s backhand from the center of the court in a closed stance, filmed from the side. After contact his follow-through wraps high across his body as he drives his weight forward, with his non-hitting hand quickly releasing and helping him reset into a compact ready position.
2.9s
BH Center · Side · Closed #2 David Ferrer’s backhand from the center of the court in a closed stance, filmed from the side. After contact he drives his weight forward into the court, with his non-hitting hand releasing the racquet and quickly coming back toward his torso as he transitions into a compact ready position.
2.6s
BH Center · Side · Closed #3 David Ferrer’s backhand from the center of the court in a closed stance, filmed from the side. His hips stay closed toward the net with a deep knee bend, and his rear leg drives forward as he uncoils into the ball.
2.4s
BH Center · Side · Closed #4 David Ferrer’s backhand from the center of the court in a closed stance, filmed from the side. His shoulders rotate well past perpendicular to the net on the unit turn, then the trunk uncoils ahead of the arms so the torso leads the racquet through contact.
2.8s
BH Half Volley Center · Side David Ferrer’s backhand from the center of the court, filmed from the side. At contact his racket face is nearly square to the ball with the strike point around waist height, and the racket head accelerates steeply up the back of the ball on a pronounced low-to-high path.
1.9s
BH Center · Side · Neutral #1 David Ferrer's backhand from the center of the court in a neutral stance, filmed from the side. His feet set early with a small adjustment hop into a neutral stance, and he uses a quick crossover recovery step after contact to be ready for the next ball.
2.9s
BH Center · Side · Neutral #2 David Ferrer’s backhand from the center of the court in a neutral stance, filmed from the side. At contact his racket face is almost perfectly vertical with the ball struck around waist to hip height, and the racket head accelerates forward on a relatively straight path through the hitting zone.
2.9s
BH Center · Side · Neutral #3 David Ferrer's backhand from the center in neutral stance, filmed from the side. His shoulders rotate well past perpendicular to the net on the unit turn, then the trunk uncoils ahead of the arms to initiate racket acceleration through contact.
3.1s
BH Center · Side · Open #1 David Ferrer’s backhand from the center of the court in an open stance, filmed from the side. His hips stay relatively closed at the start with deep knee flexion, then uncoil with a strong upward leg drive that straightens both legs through contact.
3s
BH Center · Side · Open #2 David Ferrer’s backhand from the center of the court in an open stance, filmed from the side. His deep knee bend and strong leg drive into the ground load his hips, which stay relatively closed before unwinding through contact.
2.5s
BH Center · Side · Open #3 David Ferrer’s two-handed backhand from the center of the court in an open stance, filmed from the side. His racket meets the ball slightly in front of his body with a closed racket face and a steep upward swing path, creating strong racket head acceleration through contact.
2.7s
BH Moves Back · Side #1 David Ferrer’s backhand while moving back from a neutral court position, filmed from the side. His shoulders rotate well past perpendicular to the net on the unit turn, then the trunk uncoils ahead of the arms to drive the racquet through contact in a clear kinetic chain sequence.
2.8s
BH Moves Back · Side #2 David Ferrer's backhand while moving back from a neutral court position, filmed from the side. His deep knee bend and strong push off the outside leg are clear as his hips stay closed to the net through the loading phase before unwinding into contact.
2.5s
BH Moves Back · Side #3 David Ferrer's backhand while moving back from a neutral position, filmed from the side. His two-handed grip stays compact with the bottom hand driving the stroke as the wrists remain firm through contact, with only a slight release of the dominant wrist after impact.
2.6s
BH Running · Side · Open David Ferrer’s running two-handed backhand from an open stance, filmed from the side. After contact his follow-through wraps high across his body while his weight continues moving laterally, and he quickly brings both hands back toward his center to recover into a ready position.
2.8s
BH Running · Side #1 David Ferrer’s running two-handed backhand from a neutral court position, filmed from the side. His shoulders rotate well past perpendicular to the net on the unit turn, then uncoil in sequence with the trunk leading the racquet through contact.
2.5s
BH Running · Side #2 David Ferrer’s running two-handed backhand from the deuce side, filmed from the side. His semi-western bottom hand grip and firm top hand show a strong wrist lag on the takeback that unloads into a pronounced wrist snap through contact.
3.1s
BH Short · Side David Ferrer’s two-handed backhand from the short court position, filmed from the side. His relatively firm grip pairing and minimal wrist flexion are visible as the racquet stays stable through contact with only a slight release of the wrists after impact.
2.9s
BH Wide · Side · Closed #1 David Ferrer's wide backhand from a closed stance on the deuce side, filmed from the side. His deep knee bend and strong push off the outside leg load the hips aggressively before uncoiling through contact while the shoulders stay closed.
2.8s
BH Wide · Side · Closed #2 David Ferrer’s wide backhand from a closed stance on the deuce side, filmed from a side angle. His hips stay closed to the net as he loads deeply into the outside leg, then drives upward and forward with strong knee bend and leg extension through contact.
2.7s
BH Wide · Side · Closed #3 David Ferrer’s wide backhand from a closed stance, filmed from the side. His hips stay closed to the net as he plants his outside leg, with a deep knee bend and strong push off that drives his body through the shot.
2.9s
BH Wide · Side · Closed #4 David Ferrer’s wide backhand from the side, filmed from a side angle in a closed stance. After contact he drives his weight through his front leg and finishes with both hands high across his body before quickly resetting his feet toward the center of the court.
3.2s
BH Wide · Side · Closed #5 David Ferrer’s wide backhand from a closed stance on the side of the court, filmed from the side. At contact his racket face is slightly closed with the ball struck around waist to hip height, and the racket head accelerates forward on a low-to-high path through the hitting zone.
2.9s
BH Wide · Side · Closed #6 David Ferrer’s wide backhand from a closed stance on the side of the court, filmed from the side. After contact he drives his weight through the shot and quickly brings both hands back toward his center line, resetting his feet into a ready position for the next ball.
2.7s
BH Wide · Leg-action · Side David Ferrer’s backhand from a wide position, filmed from the side. His two-handed grip stays compact with a noticeable laid-back wrist on the dominant hand that firms up into a strong, stable position right at contact.
2.7s
BH Wide · Side · Open #1 David Ferrer’s backhand wide from an open stance on the deuce side, filmed from the side. His two-handed grip is firm with the non-dominant hand driving the racquet, and there is a noticeable wrist lag that straightens through contact without excessive wrist snap.
2.6s
BH Wide · Side · Open #2 David Ferrer’s wide backhand from an open stance, filmed from the side. At contact his racket face is slightly closed with the ball meeting the strings around waist height, and the racket head accelerates forward along a relatively straight path toward the target.
2.6s
BH Wide · Side · Open #3 David Ferrer’s backhand from a wide position on the deuce side, filmed from the side. He uses an open stance with rapid adjustment steps and a pronounced knee bend before pushing off his outside leg to recover toward the center.
3.5s
BH Wide · Side · Open #4 David Ferrer’s wide backhand from the deuce side, filmed from the side. His open stance shows strong knee flexion and a deep hip sit before contact, with the legs driving laterally to reach the wide ball while the hips stay relatively open to the court.
3.2s
BH Wide · Side · Open #5 David Ferrer’s wide backhand from an open stance, filmed from the side. His shoulders rotate significantly past his hips on the unit turn, then his trunk uncoils ahead of the arms, creating a clear sequential kinetic chain through contact.
3s
BH Wide · Side · Open #6 David Ferrer's wide two-handed backhand from an open stance on the side of the court, filmed from a side angle. His semi-western right hand and continental left hand stay firm with noticeable wrist lag on the takeback that straightens into a strong, stable wrist position through contact.
2.6s
BH Drop Shot → FH Volley David Ferrer’s backhand drop shot from the baseline, filmed from a front view. His compact split step into a slightly closed stance precedes a short, soft stride into the ball, with a quick recovery step ready to move forward if the drop shot is retrieved.
5.9s
FH Drop Shot · Court-level-front David Ferrer’s forehand drop shot from the middle of the court, filmed from a court-level front angle. His compact split step into a semi-open stance is followed by a small adjustment hop and a short recovery step forward, emphasizing quick feet even on a soft touch shot.
3.9s
FH Drop Shot · Side David Ferrer’s forehand drop shot from the center of the court, filmed from the side. His hips stay relatively closed with a pronounced knee bend, and he uses a subtle upward leg drive to soften the swing and take pace off the ball.
3.7s
First Serve · Ad · Arm-action · Court-level-front #1 David Ferrer's first serve from the Ad side, filmed from a court-level front angle. His tossing arm extends fully upward before dropping quickly as the racket accelerates into a relatively high contact point slightly above head level with a clearly closed racket face.
2.5s
First Serve · Ad · Arm-action · Court-level-front #2 David Ferrer’s first serve from the Ad court, filmed from a court-level front angle. His continental grip is firm with a relaxed wrist that pronates aggressively through contact, creating a pronounced wrist snap visible from the front.
2.9s
First Serve · Ad · Arm-action · Court-level-front #3 David Ferrer's first serve from the Ad court, filmed from a court-level front angle. His shoulders and trunk coil strongly away from the target before uncoiling in sequence, with the front shoulder staying closed well into the toss and then rotating aggressively through contact.
3.1s
First Serve · Ad · Body-rotation · Court-level-front #1 David Ferrer's first serve from the Ad court, filmed from a court-level front angle. He uses a strong knee bend into a platform stance, then drives upward with a pronounced hip and shoulder rotation before landing inside the court on his front foot.
2.9s
First Serve · Ad · Court-level-front #1 David Ferrer's first serve from the Ad court, filmed from a court-level front angle. His shoulders rotate as a unit with the trunk into a deep coil before contact, then uncoil in a clearly sequenced motion from hips through torso to the serving arm.
3.1s
First Serve · Ad · Court-level-front #2 David Ferrer’s first serve from the Ad court, filmed from a court-level front angle. His deep knee bend and strong leg drive into the court are clearly visible as his hips uncoil upward and forward through the serve motion.
2.6s
First Serve · Ad · Court-level-front #3 David Ferrer's first serve from the Ad court, filmed from a court-level front angle. His deep knee bend and strong upward leg drive are clearly visible as his hips uncoil toward the target during the service motion.
3.1s
First Serve · Ad · Court-level-front #4 David Ferrer's first serve from the Ad court, filmed from a court-level front angle. At contact his racket face is slightly tilted forward with the ball struck just above head height, and the upward swing path produces noticeable racket head speed through the hitting zone.
3.2s
First Serve · Deuce · Arm-action · Court-level-front #1 David Ferrer's first serve from the deuce court, filmed from court-level front. From this angle you can clearly see his shoulders turn well past sideways during the toss, with a pronounced trunk coil that uncoils sequentially from hips to shoulders into the hitting arm.
3.1s
First Serve · Deuce · Arm-action · Court-level-front #2 David Ferrer's first serve from the deuce court, filmed from a court-level front angle. His stance is initially wide and stable, with a pronounced knee bend, and his front-foot pivot into the court is clearly visible as he drives up to the ball.
2.6s
First Serve · Deuce · Arm-action · Court-level-front #3 David Ferrer's first serve from the deuce court, filmed from a court-level front angle. His feet stay grounded through the trophy position with a stable base, and you can clearly see the driving push off his back leg as he transfers weight into the court.
2.6s
First Serve · Deuce · Body-rotation · Court-level-front #1 David Ferrer's first serve from the deuce side, filmed from a court-level front angle. After contact his torso continues rotating toward the court and he lands on his front (left) foot with his non-hitting arm dropping naturally, finishing in a compact ready position for the next shot.
2.6s
First Serve · Deuce · Court-level-front #1 David Ferrer's first serve from the deuce court, filmed from a court-level front angle. His continental grip is firm with a slightly relaxed wrist, allowing for a pronounced pronation of the forearm and wrist through contact.
2.9s
First Serve · Deuce · Court-level-front #2 David Ferrer's first serve from the deuce court, filmed from a court-level front angle. His feet show a controlled pinpoint stance, bringing the back foot up to the front before driving up into the serve with a pronounced knee bend.
2.9s
First Serve · Deuce · Court-level-front #3 David Ferrer’s first serve from the deuce court, filmed from a court-level front angle. After contact he lands on his front left foot with his torso uncoiling into the court, and his non-hitting arm drops back as he quickly regathers into a compact ready position.
3.1s
First Serve Down The Middle · Deuce · Court-level-front #1 David Ferrer's first serve from the deuce court, filmed from a court-level front angle. His footwork includes a small pinpoint stance with the back foot drawing up to the front foot before he drives up into the serve.
3.1s
First Serve · Deuce · Toss · Court-level-front #1 David Ferrer's first serve from the deuce court, filmed from a court-level front angle. After contact, he drives his weight into the court with a full upward-and-forward arm extension, then quickly lets his tossing hand drop and regathers both hands in front of his body as he lands ready for the next shot.
3.1s
First Serve · Ad · Body-rotation · Court-level-rear #1 David Ferrer’s first serve from the Ad court, filmed from a court-level rear angle. After contact he drives his weight into the court with a full torso uncoil, his back leg kicking up behind as he lands balanced and quickly settles into a compact ready position for the next shot.
4.5s
First Serve · Deuce · Body-rotation · Court-level-rear #1 David Ferrer's first serve from the deuce side, filmed from a court-level rear angle. At contact his racket face is nearly vertical with a slight pronation-driven tilt, and the ball is struck just above head height with the racket head accelerating steeply up and into the court.
2.8s
First Serve · Deuce · Court-level-rear #1 David Ferrer's first serve from the deuce court, filmed from a court-level rear angle. From this view, his continental grip and firm but relaxed wrist position are evident, with a pronounced pronation of the forearm and wrist through contact.
2.9s
First Serve · Deuce · Court-level-rear #2 David Ferrer's first serve from the deuce court, filmed from a court-level rear angle. At contact his racket face is slightly tilted upward with the ball struck just above full extension, and the racket head accelerates steeply up and across the ball along a pronounced pronation-driven swing path.
3.1s
First Serve · Ad · Body-rotation · Court-level-side #1 David Ferrer's first serve from the Ad court, filmed from a side court-level angle. After contact he drives his weight into the court with a full shoulder and hip rotation, landing on his front foot and quickly bringing his non-hitting arm back in to transition toward a ready recovery position.
4.5s
First Serve · Ad · Court-level-side #1 David Ferrer's first serve from the Ad court, filmed from a court-level side angle. At contact his racket face is slightly tilted forward with the ball struck just above head height, and the racket head accelerates steeply upward along the baseline toward a full pronated finish.
2.5s
First Serve · Deuce · Body-rotation · Court-level-side #1 David Ferrer's first serve from the deuce court, filmed from a court-level side angle. His footwork shows a compact pinpoint stance with the back foot drawing up to the front, and you can clearly see his weight driving forward into the court as he lands on his front leg after contact.
3.6s
First Serve · Deuce · Court-level-side #1 David Ferrer’s first serve from the deuce side, filmed from a court-level side angle. His footwork shows a compact, rhythmic rocking motion into a platform stance, with a pronounced knee bend and driving front-leg extension into the court.
4.7s
First Serve Down The Middle · Ad · Front #1 David Ferrer’s first serve from the Ad court down the middle, filmed from the front. At contact his racket face is nearly square to the target with the ball struck slightly above head height, and the racket head drives up and into the court with noticeable acceleration through the hitting zone.
3s
First Serve · Ad · Front #1 David Ferrer’s first serve from the Ad court, filmed from the front. At contact his racket face is slightly tilted forward with the ball struck just above full extension, and the racket head accelerates steeply upward along the right side of his body.
3s
First Serve · Ad · Toss · Front #1 David Ferrer's first serve from the Ad court, filmed from the front. At contact his racket face is nearly square to the target with the ball struck slightly above full extension, and the upward swing path produces noticeable racket head speed through the hitting zone.
3s
First Serve · Ad · Toss · Front #2 David Ferrer's first serve from the Ad court, filmed from a front angle. His shoulders and trunk rotate as a single unit during the toss, then uncoil aggressively toward the target with a pronounced upward shoulder tilt driving into the serve.
3s
First Serve · Deuce · Front #1 David Ferrer's first serve from the deuce court, filmed from the front. His shoulders rotate as a unit with the trunk during the toss and coil, then uncoil in a clearly sequenced motion from hips to shoulders into the hitting arm.
3.1s
First Serve · Deuce · Toss · Front #1 David Ferrer’s first serve from the deuce court, filmed from the front. His deep knee bend and strong leg drive into the court are clearly visible as his hips stay closed toward the net before uncoiling up into the serve.
3.2s
First Serve · Ad · Rear #1 David Ferrer's first serve from the Ad court, filmed from a rear angle. His feet set in a platform stance with a pronounced knee bend, and he drives up into the court with a strong front-leg push before landing on his left foot well inside the baseline.
3.1s
First Serve · Ad · Toss · Rear #1 David Ferrer's first serve from the ad court, filmed from a rear angle. His continental grip is firm with minimal grip change, and from behind you can see a pronounced wrist pronation through contact that continues into a relaxed, downward wrist finish.
2.6s
First Serve · Ad · Toss · Rear #2 David Ferrer's first serve from the Ad court, filmed from a rear angle. After contact he lands on his front (left) foot with his tossing arm dropping quickly as he brings both hands back toward a compact, neutral ready position.
2.8s
First Serve Wide · Ad · Rear #1 David Ferrer's first serve from the Ad court, hit wide and filmed from a rear angle. His shoulders rotate deeply so that his back briefly faces the net before an aggressive trunk uncoil drives up and into the ball.
3.3s
First Serve Wide · Ad · Rear #2 David Ferrer's first serve from the Ad court, hit wide and filmed from a rear angle. His continental grip is firm with minimal grip change, and you can see a pronounced wrist pronation through contact as the strings drive out toward the wide target.
3.2s
First Serve · Deuce · Body-rotation · Rear #1 David Ferrer's first serve from the deuce court, filmed from a rear angle. His deep knee bend and strong upward leg drive load his hips, which uncoil aggressively into the court as his back hip rotates through the serve.
3.2s
First Serve · Deuce · Rear #1 David Ferrer’s first serve from the deuce court, filmed from a rear angle. His footwork includes a small adjustment step before setting his feet, followed by a controlled knee bend into a platform stance that remains stable through the upward drive.
3s
First Serve · Deuce · Toss · Rear #1 David Ferrer's first serve from the deuce court, filmed from a rear angle. His legs load with a deep knee bend and his hips stay closed to the baseline during the toss, setting up a strong upward leg drive into the serve.
3s
First Serve Wide · Deuce · Rear #1 David Ferrer’s first serve from the Deuce side out wide, filmed from a rear angle. His deep knee bend and strong leg drive are clearly visible from behind, along with his hips uncoiling toward the target as he pushes up into the ball.
2.9s
First Serve · Ad · Arm-action · Side #1 David Ferrer's first serve from the ad court, filmed from the side. At contact his racket face is nearly square to the ball with the contact point well above his head, and the racket head whips up and across, indicating strong pronation through the strike.
3s
First Serve · Ad · Body-rotation · Side #1 David Ferrer's first serve from the Ad court, filmed from a side angle. His shoulders load with a pronounced coil relative to his hips before uncoiling in sequence, making the trunk rotation and shoulder-over-shoulder action through contact clearly visible.
2.3s
First Serve · Ad · Body-rotation · Side #2 David Ferrer's first serve from the Ad court, filmed from the side. His continental grip stays firm with a noticeable wrist pronation through contact, as his wrist moves from a laid-back position into a strong, pronated finish.
2.6s
First Serve · Ad · Side #1 David Ferrer’s first serve from the Ad side, filmed from the side. His deep knee bend and strong upward leg drive into the court are clearly visible, along with his hips uncoiling as he extends toward the ball.
2.8s
First Serve · Ad · Side #2 David Ferrer's first serve from the Ad side, filmed from the side. After contact his follow-through finishes across his body as his back leg swings forward, and he quickly regains a balanced stance with both hands returning toward a ready position.
3s
First Serve · Deuce · Arm-action · Side #1 David Ferrer's first serve from the deuce side, filmed from the side. His knees dip deeply before leg drive, with the hips staying closed to the court until just after push-off.
2.9s
First Serve · Deuce · Arm-action · Side #1 David Ferrer’s first serve from the deuce side, filmed from the side. His continental grip is firm with a relaxed wrist that pronates aggressively through contact, creating a pronounced wrist snap just after impact.
3.3s
First Serve · Deuce · Body-rotation · Side #1 David Ferrer's first serve from the deuce court, filmed from the side. His continental grip stays firm while his wrist pronates aggressively through contact, with a noticeable wrist snap as he drives up and into the ball.
3.6s
First Serve · Deuce · Side #1 David Ferrer's first serve from the deuce side, filmed from a side angle. His shoulders rotate well past perpendicular to the baseline during the trophy phase, with a pronounced trunk coil that uncoils in sync with his leg drive and upward racquet motion.
2.5s
First Serve · Deuce · Side #2 David Ferrer’s first serve from the deuce side, filmed from the side. After contact he lands on his front leg with his torso driving into the court and his non-hitting arm dropping back, quickly bringing both hands together in front as he transitions into a compact ready position.
2.6s
First Serve · Deuce · Side #3 David Ferrer's first serve from the deuce side, filmed from the side. His continental grip stays firm with a clearly visible wrist pronation through contact as the racquet accelerates up and across the ball.
3s
First Serve · Deuce · Side #4 David Ferrer's first serve from the deuce court, filmed from the side. His deep knee bend and strong leg drive into the court are clearly visible as his hips uncoil aggressively upward and forward through contact.
2.6s
First Serve · Deuce · Toss · Side #1 David Ferrer's first serve from the deuce side, filmed from the side. At contact his racket face is slightly tilted forward with the ball struck just above full extension, and the racket head accelerates upward along a steep, continuous swing path.
2.6s
FH Center Cross Court · Court-level-front David Ferrer’s forehand from the center of the court, filmed from a front court-level angle. His deep knee bend and strong leg drive into the court are clearly visible as his hips rotate aggressively into the shot.
2.7s
FH Center Down The Line · Court-level-front David Ferrer's forehand from the center of the court hit down the line, filmed from a front court-level angle. His semi-western grip is evident with a pronounced wrist lag on the takeback that unwinds into a strong, controlled pronation through contact.
2.7s
FH Center · Court-level-front · Open David Ferrer’s forehand from the center of the court in an open stance, filmed from a court-level front angle. His hips stay loaded and coiled as his knees flex deeply, then drive upward through contact with an aggressive uncoiling of the hips toward the ball.
2.6s
FH Center · Court-level-front · Open #1 David Ferrer's forehand from the center of the court in an open stance, filmed from a court-level front angle. His shoulders rotate well past perpendicular to the net on the unit turn, then his trunk uncoils aggressively ahead of the arm swing, showing clear separation between hip and shoulder rotation.
2.9s
FH Center · Court-level-front · Open #2 David Ferrer's forehand from the center of the court in an open stance, filmed from a front court-level angle. After contact his follow-through wraps high across his body as he transfers weight onto his front leg and quickly resets both hands on the racquet in a compact ready position.
2.7s
FH Center · Court-level-front · Open #3 David Ferrer’s forehand from the center of the court in an open stance, filmed from a front court-level angle. His feet plant wide in the open stance with a quick adjustment hop just before contact, then he uses a small crossover recovery step to get back toward his ready position.
2.8s
FH Center · Court-level-front · Open #4 David Ferrer’s forehand from the center of the court in an open stance, filmed from a front court-level angle. His shoulders rotate well past perpendicular to the net on the unit turn, then the trunk uncoils aggressively ahead of the arm swing, making the sequencing of torso-to-racquet motion easy to see.
3s
FH Center · Court-level-front · Open #5 David Ferrer’s forehand from the center of the court in an open stance, filmed from a front court-level angle. His semi-western grip is evident with a pronounced wrist lag on the takeback that unwinds into a strong, controlled wrist pronation through contact.
2.3s
FH Center · Court-level-front · Open #6 David Ferrer’s forehand from the center of the court in an open stance, filmed from a front court-level angle. His quick split step into a wide open stance is followed by a strong pivot on the outside leg, then immediate small recovery steps that bring him back toward the center baseline.
2.7s
FH Center · Court-level-front · Open #7 David Ferrer’s forehand from the center of the court in an open stance, filmed from a front court-level angle. After contact his follow-through wraps high across his body while his weight drives forward, and he quickly resets his feet into a compact ready position for the next shot.
3.1s
FH Center · Court-level-front · Open #8 David Ferrer’s forehand from the center of the court in an open stance, filmed from a front court-level angle. His hips stay loaded and coiled as he sinks into a deep knee bend, then drive upward with strong leg push-off before uncoiling into contact.
3s
FH Inside In · Court-level-front #1 David Ferrer’s forehand Inside-In from the Deuce side, filmed from a court-level front angle. His strong hip turn into contact is supported by a deep knee bend and aggressive leg drive off the right leg as he rotates through the shot.
2.6s
FH Inside In · Court-level-front #2 David Ferrer's inside-in forehand from the middle of the court, filmed from a court-level front angle. After contact his follow-through wraps high across his body while his weight drives into the court, and he quickly resets both hands on the racquet in a compact ready position.
3s
FH Inside In · Court-level-front #3 David Ferrer’s forehand Inside-In from the center of the court, filmed from a court-level front angle. His semi-western grip is evident with a pronounced wrist lag on the takeback that uncoils into a strong pronation through contact.
2.8s
FH Inside In · Court-level-front #4 David Ferrer’s forehand Inside-In from the Deuce side, filmed from a court-level front angle. His semi-western grip is evident with a pronounced wrist lag on the takeback that unwinds into a strong, forward wrist snap through contact.
3.8s
FH Inside In · Court-level-front #5 David Ferrer's forehand Inside-In from the center of the court, filmed from a court-level front angle. After contact his follow-through finishes high across his body as he drives his weight into the court and quickly resets both hands on the racquet in a ready position.
3s
FH Inside In · Court-level-front #6 David Ferrer's forehand Inside-In from the middle of the court, filmed from a court-level front angle. His semi-western grip is evident with the racquet laid back and strong wrist lag before a pronounced wrist snap through contact.
3.7s
FH Inside Out · Court-level-front #1 David Ferrer’s forehand InsideOut from the center of the court, filmed from a court_level front angle. At contact his racket face is slightly closed with the ball meeting the strings around waist to chest height, and the racket head accelerates steeply upward on a low-to-high swing path.
2.7s
FH Inside Out · Court-level-front #2 David Ferrer’s forehand InsideOut from the Deuce side, filmed from CourtLevelFront. From this angle, his semi-western grip and strong wrist lag are evident as the racket head trails noticeably behind his hand before snapping forward into contact.
2.8s
FH Inside Out · Court-level-front #3 David Ferrer’s inside-out forehand from the center of the court, filmed from a court-level front angle. His semi-western grip is evident with a pronounced wrist lag on the racquet drop that unwinds into a strong pronation through contact.
3.3s
FH Inside Out · Court-level-front #4 David Ferrer’s inside-out forehand from the deuce side, filmed from a court-level front angle. After contact his follow-through wraps high across his body while he quickly re-centers with small adjustment steps and brings both hands back toward a ready position.
2.8s
FH Inside Out · Court-level-front #5 David Ferrer’s forehand from the middle of the court, filmed from a front court-level angle. His hips stay low with a deep knee bend during the loading phase, then drive upward and uncoil aggressively through contact as his legs push off the court.
2.6s
FH Inside Out · Court-level-front #6 David Ferrer’s forehand InsideOut from the center of the court, filmed from a court_level front angle. His hips stay low with a deep knee bend on the loading leg, then drive upward and rotate aggressively as he uncoils into the ball.
2.8s
FH Inside Out · Court-level-front #7 David Ferrer’s inside-out forehand from the center of the court, filmed from a court-level front angle. After contact his follow-through wraps high across his body while his weight drives into the court, and he quickly brings both hands back to a neutral ready position for the next shot.
3.7s
FH Moves Back · Court-level-front #1 David Ferrer's forehand while moving back from a neutral position, filmed from a front court-level angle. His hips stay relatively closed as he retreats, with a deep knee bend and strong leg drive upward to stabilize the stroke despite moving backward.
3s
FH Moves Back · Court-level-front #2 David Ferrer’s forehand while moving back from a neutral court position, filmed from a court-level front angle. His shoulders rotate significantly past his hips on the unit turn, then uncoil in sequence with a pronounced trunk rotation driving through contact.
2.4s
FH Moves Back · Court-level-front #3 David Ferrer's forehand while moving back from a neutral position, filmed from a court-level front angle. At contact his racket face is slightly closed with the ball struck around waist height, and the racket head accelerates steeply upward along a low-to-high swing path.
2.9s
FH Moves Back · Court-level-front #4 David Ferrer’s forehand while moving back from a neutral position, filmed from a court_level front angle. At contact his racket face is slightly closed with the ball meeting the strings around waist to chest height, and the racket head accelerates steeply upward along a low-to-high swing path.
3s
FH Moves Back · Court-level-front #5 David Ferrer's forehand while moving back from a central baseline position, filmed from a court-level front angle. His quick split step into small retreating adjustment steps sets up a semi-open stance, enabling an immediate push back into the court after contact.
3.1s
FH Running · Court-level-front #1 David Ferrer’s running forehand from the deuce side, filmed from a court-level front angle. His quick adjustment steps into a semi-open stance and immediate crossover recovery step back toward the center are clearly visible in his footwork pattern.
2.6s
FH Running · Court-level-front #2 David Ferrer’s running forehand from the deuce side, filmed from a court_level front angle. After contact his follow-through wraps high across his body while his weight continues moving forward, and he quickly re-centers with both hands returning to the racquet in a ready position.
2.6s
FH Running · Court-level-front #3 David Ferrer’s running forehand from the Deuce side, filmed from court level front. His shoulders rotate well past perpendicular to the net on the unit turn, then his trunk uncoils aggressively through contact with a pronounced separation between hip and shoulder rotation.
2.9s
FH Running · Court-level-front #4 David Ferrer’s running forehand from the deuce side, filmed from a court-level front angle. At contact his racket face is slightly closed with the ball struck around waist height, and the racket head accelerates steeply upward along a low-to-high path for heavy topspin.
3.1s
FH Running · Court-level-front #5 David Ferrer’s running forehand from the middle of the court, filmed from a court_level front angle. After contact his follow-through finishes high across his body while his weight continues moving forward, and he quickly brings both hands back toward the racket to reset into a compact ready position.
3.1s
FH Short · Court-level-front #1 David Ferrer’s forehand from the center of the court, filmed from a front court-level angle. His quick split-step into a semi-open stance and small adjustment steps set up the short ball, followed by immediate recovery footwork ready for the next shot.
4.8s
FH Short · Court-level-front #2 David Ferrer’s forehand from the deuce side, filmed from a court-level front angle. At contact his racket face is slightly closed with the ball meeting the strings just above net height, and the racket head accelerates steeply upward along a low-to-high swing path.
4.1s
FH Short · Court-level-front #3 David Ferrer's forehand from the short court, filmed from a front court-level angle. His shoulders rotate as a single unit with the trunk on the unit turn, then uncoil aggressively with noticeable chest rotation toward the net before contact.
3.3s
FH Short · Court-level-front #4 David Ferrer’s forehand from the short court, filmed from a court-level front angle. His deep knee bend and aggressive leg drive into the court are clearly visible as his hips uncoil from a semi-open position into contact.
4s
FH Short · Court-level-front #5 David Ferrer’s forehand from the short court, filmed from a front court-level angle. His semi-western grip is evident with pronounced wrist lag on the takeback that unwinds into a firm, stable wrist position at contact.
3.3s
FH Wide Down The Line · Court-level-front David Ferrer's forehand from a wide position, filmed from a court-level front angle. At contact his racket face is slightly closed with the ball struck around waist height, and the racket head accelerates steeply upward along a low-to-high swing path.
2.8s
FH Wide · Court-level-front · Open #1 David Ferrer’s forehand from a wide position on the deuce side, filmed from a court-level front angle. His open stance is set with a strong outside leg plant and a quick recovery push back toward the center after contact.
2.4s
FH Wide · Court-level-front · Open #2 David Ferrer’s forehand from a wide position in an open stance, filmed from a court-level front angle. His semi-western grip is evident with the racket face slightly closed, and there is clear wrist lag before a strong pronation through contact.
2.8s
FH Wide · Court-level-front · Open #3 David Ferrer’s forehand from a wide position in an open stance, filmed from a court-level front angle. His semi-western grip is evident with the racquet laid back and strong wrist lag maintained before a sharp wrist release through contact.
2.6s
FH Wide · Court-level-front · Open #4 David Ferrer’s forehand from the deuce court, filmed from a court-level front angle. At contact his racket face is slightly closed with the ball struck around waist to chest height, and the racket head accelerates steeply upward along a low-to-high swing path for heavy topspin.
2.6s
FH Wide · Court-level-front · Open #5 David Ferrer’s forehand from a wide position in an open stance, filmed from a court-level front angle. His shoulders rotate well past perpendicular to the net before contact, then his trunk uncoils aggressively ahead of the arm, showing clear kinetic chain sequencing from hips to torso to racquet.
3s
FH Wide · Court-level-front · Open #6 David Ferrer's forehand from a wide position in an open stance, filmed from a court-level front angle. His shoulders load with a deep coil against the hips before uncoiling, and the trunk rotation clearly leads the arm swing through contact.
2.5s
FH Wide · Court-level-front · Open #7 David Ferrer’s forehand from the Deuce court, filmed from a court-level front angle. After contact he finishes with a high windshield-wiper follow-through while his weight continues moving toward the sideline, quickly bringing both hands back in front to reset into a compact ready position.
2.6s
FH Wide · Court-level-front · Open #8 David Ferrer’s forehand from a wide position in an open stance, filmed from a court-level front angle. His shoulders rotate well past perpendicular to the net on the unit turn, then his trunk uncoils aggressively ahead of the arm swing, showing clear separation between hip and shoulder rotation.
3.2s
FH Center · Court-level-rear · Open #1 David Ferrer's forehand from the center of the court in an open stance, filmed from a rear court-level angle. After contact his follow-through wraps high across his body while his weight transfers into the court and he quickly resets his feet into a compact ready position.
2.7s
FH Center · Court-level-rear · Open #2 David Ferrer’s forehand from the center of the court in an open stance, filmed from a rear court-level angle. His semi-western grip is evident in the strong wrist lag on the takeback that unwinds into a pronounced pronation through contact.
2.6s
FH Center · Court-level-rear · Open #3 David Ferrer’s forehand from the center of the court in an open stance, filmed from a rear court-level angle. His semi-western grip is evident in the strong wrist lag on the racquet head, which then unwinds into a pronounced wrist pronation through contact.
2.7s
FH Inside In · Court-level-rear #1 David Ferrer’s forehand Inside-In from the Deuce side, filmed from a court-level rear angle. At contact his racket face is slightly closed with the ball struck around waist to chest height, and the racket head accelerates steeply upward along an inside-out swing path.
2.6s
FH Inside In · Court-level-rear #2 David Ferrer’s forehand Inside-In from the Deuce side, filmed from a court-level rear angle. At contact his racket face is slightly closed with the ball struck around waist to chest height, and the racket head accelerates steeply upward along an aggressive inside-out swing path.
3.3s
FH Inside In · Court-level-rear #3 David Ferrer’s inside-in forehand from the deuce side, filmed from a court-level rear angle. At contact his racket face is slightly closed with the ball struck around waist to chest height, and the racket head accelerates steeply upward along a windshield-wiper path.
3.1s
FH Inside Out · Court-level-rear #1 David Ferrer's inside-out forehand from the Deuce side, filmed from a court-level rear angle. At contact his racket face is slightly closed with the ball struck around waist to chest height, and the upward windshield-wiper swing path accelerates the racket head aggressively through the hitting zone.
2.1s
FH Inside Out · Court-level-rear #2 David Ferrer’s inside-out forehand from the center of the court, filmed from a court-level rear angle. He uses a quick split-step into an open stance, then takes rapid adjustment steps around the ball before driving off his right leg and recovering back toward the middle.
2.7s
FH Moves Back · Court-level-rear #1 David Ferrer's forehand while moving back from a neutral court position, filmed from a court-level rear angle. At contact his racket face is slightly closed with the ball struck around waist height, and the racket head accelerates steeply upward along a low-to-high swing path.
3.1s
FH Moves Back · Court-level-rear #3 David Ferrer’s forehand while moving back from a neutral court position, filmed from a court-level rear angle. His shoulders turn well past his hips to create a strong trunk coil, then uncoil in sequence from the pelvis through the torso to the hitting shoulder as he swings forward.
2.8s
FH Running · Arm-action · Court-level-rear David Ferrer’s running forehand from a neutral court position, filmed from a court-level rear angle. His shoulders turn well past perpendicular to the net before uncoiling, with the trunk rotation clearly leading the arm swing as he accelerates through contact while on the move.
2.8s
FH Running · Court-level-rear David Ferrer’s running forehand from a neutral court position, filmed from a court-level rear angle. His hips stay low with deep knee flexion as he sprints wide, then he drives off the outside leg to rotate his hips through the shot while still moving laterally.
3s
FH Short · Court-level-rear David Ferrer’s forehand from the center of the court, filmed from a court_level rear angle. After contact his follow-through wraps high across his body while his weight drives forward, and he quickly resets his feet into a compact ready position for the next shot.
3.3s
FH Wide · Arm-action · Court-level-rear David Ferrer’s wide forehand from the deuce side, filmed from a court-level rear angle. His semi-western grip is evident in the way his wrist lags behind the racquet head on the take-back and then pronates sharply through contact.
2.8s
FH Center · Court-level-side · Open #1 David Ferrer’s forehand from the center of the court in an open stance, filmed from a court-level side angle. His quick split step into a wide open stance is followed by a strong push off the outside leg and a small recovery shuffle that readies him for the next shot.
2.6s
FH Center · Court-level-side · Open #2 David Ferrer's forehand from the center of the court in an open stance, filmed from a court-level side angle. After contact his follow-through finishes high across his body while his weight drives forward into the court, allowing him to quickly reset his feet into a compact ready position.
2.9s
FH Center · Court-level-side · Open #3 David Ferrer’s forehand from the center of the court in an open stance, filmed from a court-level side angle. His hips stay loaded and coiled while his knees are deeply bent, then his legs drive up and through the shot as his hips rotate aggressively toward the target.
2.8s
FH Center · Court-level-side · Open #4 David Ferrer’s forehand from the center of the court in an open stance, filmed from a court-level side angle. From this side view, his upper body shows an early, deep shoulder turn with the trunk fully coiled against the hips, then uncoiling in sequence as the shoulders lead the forward rotation into contact.
3.2s
FH Center · Court-level-side · Open #5 David Ferrer's forehand from the center of the court in an open stance, filmed from a court-level side angle. At contact his racket face is slightly closed with the ball struck around waist to chest height, and the upward windshield-wiper swing path produces heavy topspin with noticeable racket head acceleration through the strike zone.
2.7s
FH Inside In · Court-level-side #1 David Ferrer's forehand InsideIn from the deuce side, filmed from a court_level_side angle. His shoulders rotate well past 90 degrees in the unit turn, then uncoil in sync with his trunk so the chest fully faces the target at contact before the shoulders continue through the finish.
2.6s
FH Inside In · Court-level-side #2 David Ferrer's forehand Inside-In from the deuce side, filmed from a court-level side angle. His footwork features a quick adjustment hop into a semi-open stance, followed by aggressive forward recovery steps that keep him tight to the baseline after contact.
2.6s
FH Inside In · Court-level-side #3 David Ferrer’s forehand Inside-In from the Deuce side, filmed from a court-level side angle. His feet set up in a strong neutral-to-slightly-open stance, with a quick adjustment hop and small shuffle steps that position his body behind the ball before he drives through the shot.
3.8s
FH Inside Out · Court-level-side #1 David Ferrer’s inside-out forehand from the deuce side, filmed from a court-level side angle. His semi-western grip is evident with a pronounced wrist lag on the takeback that unwinds into a strong pronation through contact.
2.6s
FH Inside Out · Court-level-side #2 David Ferrer’s forehand InsideOut from the Deuce side, filmed from a court_level_side angle. His deep knee bend and strong leg drive into the court are clear as his hips stay closed during the load, then rotate aggressively through contact.
3.4s
FH Inside Out · Court-level-side #3 David Ferrer’s inside-out forehand from the deuce side, filmed from a court-level side angle. His quick adjustment steps set up an open stance, and he immediately performs a small crossover recovery step to be ready for the next ball.
3.3s
FH Moves Back · Court-level-side #1 David Ferrer’s forehand while moving back from a neutral court position, filmed from a court-level side angle. After contact he finishes with a high, across-the-body follow-through and quickly regains a balanced stance with both hands coming back toward the racket in preparation for the next shot.
2.8s
FH Moves Back · Court-level-side #2 David Ferrer’s forehand while moving back from a neutral position, filmed from a court-level side angle. After contact his follow-through finishes high across his body as his weight continues drifting backward, and he quickly resets his feet into a compact ready position for the next shot.
3.1s
FH Moves Back · Court-level-side #3 David Ferrer's forehand while moving back from a deep court position, filmed from a court-level side angle. His quick adjustment steps as he retreats set up a semi-open stance, followed by an immediate crossover recovery step toward the baseline after contact.
2.6s
FH Moves Back · Court-level-side #4 David Ferrer’s forehand while moving back from a central baseline position, filmed from a court-level side angle. His quick adjustment steps backward into an open stance, followed by a strong recovery step toward the baseline, emphasize his constant readiness for the next shot.
2.4s
FH Moves Back · Court-level-side #5 David Ferrer's forehand while moving back from a neutral position, filmed from a court-level side angle. His hips stay relatively closed as he retreats, with a pronounced knee bend and strong leg drive upward to stabilize and lift the ball despite moving backward.
3.1s
FH Running · Court-level-side #1 David Ferrer’s running forehand from the deuce side, filmed from a court-level side angle. His semi-western grip is evident with a pronounced wrist lag on the forward swing that unwinds into a strong pronation through contact.
2.8s
FH Running · Court-level-side #2 David Ferrer’s running forehand from the deuce side, filmed from a court-level side angle. At contact his racket face is slightly closed with the ball struck around waist height, and the racket head accelerates steeply upward along a low-to-high path.
2.8s
FH Short · Court-level-side David Ferrer’s forehand from the short court, filmed from a court level side angle. His shoulders rotate well past his hips on the unit turn, then the trunk uncoils aggressively into contact with a clear sequence from hip rotation to shoulder rotation.
4.2s
FH Wide · Court-level-side · Open #1 David Ferrer’s forehand from a wide position on the deuce side, filmed from a court-level side angle. He plants in a strong open stance with his outside leg loading heavily, then uses quick recovery steps to push back toward the center after contact.
2.9s
FH Wide · Court-level-side · Open #2 David Ferrer’s forehand from a wide position in an open stance, filmed from a court-level side angle. After contact his follow-through wraps high across his body while his weight continues driving toward the court, quickly bringing both hands back to a ready position for the next shot.
2.6s
FH Center Cross Court · Front David Ferrer's forehand from the center of the court, filmed from the front. At contact his racket face is slightly closed with the ball struck around waist height, and the racket head accelerates steeply upward on a windshield-wiper path for heavy topspin.
2.9s
FH Center Down The Line · Front David Ferrer's forehand from the center of the court, hit down the line, filmed from the front. His shoulders load with a pronounced coil against the hips, then uncoil in sequence with the trunk rotating aggressively toward the target before contact.
2.7s
FH Center · Front · Neutral David Ferrer’s forehand from the center of the court in a neutral stance, filmed from the front. His hips stay relatively closed at the start with a deep knee bend, then uncoil as his legs drive upward and forward through contact.
3.1s
FH Center · Front · Open #1 David Ferrer’s forehand from the center of the court in an open stance, filmed from the front. His semi-western grip is evident in the strong wrist lag on the takeback that unwinds into a pronounced wrist snap through contact.
2.5s
FH Center · Front · Open #2 David Ferrer’s forehand from the center of the court, filmed from a front angle. His open stance is clear as he plants his outside foot early, using quick adjustment steps to set his base before rotating into the shot.
2.7s
FH Inside In · Front #1 David Ferrer’s forehand Inside-In from the Deuce court, filmed from the front. His deep knee bend and strong leg drive into the court are clearly visible as his hips rotate aggressively through the shot from a semi-open stance.
2.9s
FH Inside In · Front #2 David Ferrer’s forehand InsideIn from the Deuce court, filmed from the front. After contact his follow-through finishes high across his body as he drives his weight into the court and quickly resets his feet into a compact ready position.
3.1s
FH Inside In · Front #3 David Ferrer’s forehand Inside In from the center of the court, filmed from the front. At contact his racket face is slightly closed with the ball struck around waist to chest height, and the racket head accelerates steeply upward along a low-to-high swing path.
3.1s
FH Inside Out · Front #1 David Ferrer’s forehand InsideOut from the center of the court, filmed from a front angle. His hips stay relatively closed through the loading phase with a deep knee bend, then drive upward and rotate aggressively as his legs push off the ground into contact.
3s
FH Inside Out · Front #2 David Ferrer’s forehand InsideOut from the center of the court, filmed from the front. His shoulders rotate deeply past perpendicular to the net on the unit turn, then uncoil in sync with his trunk so that his chest faces the target at contact before his hitting shoulder continues to wrap across his body.
3.3s
FH Inside Out · Front #3 David Ferrer’s forehand InsideOut from the center of the court, filmed from the front. His shoulders rotate well past perpendicular to the net on the unit turn, then the trunk uncoils sharply with the chest finishing fully toward the target as part of a clear kinetic chain from legs through torso to arm.
2.9s
FH Inside Out · Front #4 David Ferrer’s inside-out forehand from the center of the court, filmed from the front. After contact his follow-through wraps high across his body while his weight drives forward, and he quickly resets his feet into a compact ready position for the next shot.
3.1s
FH Inside Out · Front #5 David Ferrer’s forehand InsideOut from the center of the court, filmed from the front. His semi-western grip is evident with the racket handle angled diagonally through the palm, and his wrist maintains a pronounced lag before snapping forward into contact.
2.9s
FH Inside Out · Front #6 David Ferrer’s forehand from the center court position, filmed from the front. His shoulders rotate well past perpendicular to the net on the unit turn, then his trunk uncoils aggressively into contact with a clearly sequenced rotation from hips to shoulders.
4.1s
FH Inside Out · Front #8 David Ferrer’s inside-out forehand from the center of the court, filmed from the front. He uses a quick split step into an open stance, then pushes off his outside leg and takes small adjustment steps to recover back toward the middle after contact.
2.8s
FH Moves Back · Front #1 David Ferrer’s forehand while moving back from a neutral position, filmed from the front. His semi-western grip is evident with notable wrist lag on the take-back that straightens into a firm, stable wrist at contact.
2.9s
FH Moves Back · Front #2 David Ferrer's forehand while moving back from a central baseline position, filmed from the front. After contact his follow-through finishes high across his body and he quickly regroups with both hands on the racquet, shuffling back into a compact ready position.
2.9s
FH Running · Front #1 David Ferrer’s running forehand from the deuce side, filmed from the front. His semi-western grip is evident with a pronounced wrist lag on the forward swing that snaps through just after contact.
2.7s
FH Running · Front #2 David Ferrer’s running forehand from the deuce side, filmed from the front. His semi-western grip is evident with the racket face slightly closed, and there is pronounced wrist lag that snaps forward just before contact.
2.6s
FH Running · Front #3 David Ferrer’s running forehand from the center of the court, filmed from the front. His footwork features a quick split-step into rapid adjustment steps and a wide open stance as he strikes, followed by aggressive recovery steps back toward the middle.
2.7s
FH Running · Front #4 David Ferrer’s running forehand from the deuce side, filmed from the front. After contact his follow-through finishes high across his body while his weight continues moving forward, and he quickly resets his feet into a compact ready position for the next shot.
3.3s
FH Running · Front #5 David Ferrer’s running forehand from the deuce side, filmed from the front. His shoulders rotate sharply away from the net during the unit turn, then unwind in sync with his trunk so that his chest finishes fully facing the target as he completes the swing.
3s
FH Wide · Arm-action · Front #1 David Ferrer’s forehand from a wide position, filmed from the front. His hips stay relatively low with a strong knee bend, and you can see his legs driving laterally to recover back toward the center after contact.
2.6s
FH Wide · Arm-action · Front #2 David Ferrer's forehand from a wide position, filmed from the front. His quick split-step into aggressive lateral steps sets up an open stance, with his outside leg planting firmly before he pushes back toward the center.
3.4s
FH Wide Cross Court · Front David Ferrer’s forehand from the center of the court, filmed from the front. His semi-western grip is clear from the front angle, with pronounced wrist lag on the takeback that unwinds into a strong pronation through contact.
2.9s
FH Wide Down The Line · Front David Ferrer’s forehand from a wide position, filmed from the front. His footwork includes a quick adjustment shuffle into an open stance, followed by a strong recovery step back toward the center after contact.
3.2s
FH Wide · Front · Open #1 David Ferrer’s forehand from a wide position in the deuce court, filmed from the front. His open stance shows strong knee flexion and aggressive hip rotation toward the ball as he drives off the outside leg to recover.
2.6s
FH Wide · Front · Open #2 David Ferrer’s forehand from a wide position in an open stance, filmed from the front. His shoulders rotate significantly past his hips on the unit turn, then his trunk uncoils ahead of the arm swing, with the front view making the sequence of chest rotation toward the net very clear.
2.6s
FH Wide · Front · Open #3 David Ferrer’s forehand from the Deuce court, filmed from a front angle. After contact on this wide ball, he finishes with a high windshield-wiper follow-through while his weight stays loaded on the outside leg before he quickly pushes back toward a neutral ready position.
2.4s
FH Wide · Front · Open #4 David Ferrer's forehand from the center in an open stance, filmed from the front. His hips stay relatively open to the net while his knees bend deeply to load, with a strong push off the outside leg as he drives into the wide ball.
2.5s
FH Wide · Front · Open #5 David Ferrer's forehand from a wide position in an open stance, filmed from the front. His semi-western grip is evident with the racket face slightly closed, and there is clear wrist lag before a strong pronation through contact.
3.1s
FH Center · Arm-action · Rear #1 David Ferrer’s forehand from center court, filmed from a rear angle. His shoulders rotate deeply relative to his hips on the unit turn, then his trunk uncoils aggressively through contact with a pronounced separation between upper and lower body.
2.6s
FH Center · Arm-action · Rear #2 David Ferrer's forehand from the center of the court, filmed from a rear angle. His hips stay closed through the loading phase with a deep knee bend before driving upward and uncoiling into the shot.
2.6s
FH Center · Arm-action · Rear #3 David Ferrer's forehand from the center of the court, filmed from a rear angle. After contact his follow-through wraps high across his body while his weight transfers into the court, and he quickly brings both hands back to a neutral ready position for the next shot.
3.4s
FH Center · Arm-action · Rear #4 David Ferrer's forehand from the center of the court, filmed from a rear angle. His compact split step into a semi-open stance is followed by quick adjustment steps that align his hips and shoulders before he drives through the ball.
2.4s
FH Center · Arm-action · Rear #5 David Ferrer's forehand from the center of the court, filmed from a rear angle. After contact his follow-through wraps high over his shoulder while his weight drives forward and he quickly repositions both hands on the racquet into a compact ready stance.
3.2s
FH Center · Rear · Open David Ferrer’s forehand from the center of the court in an open stance, filmed from a rear angle. His shoulders rotate well past perpendicular to the net on the unit turn, then uncoil in sequence with the trunk leading the swing before the arm whips through contact.
2.9s
FH Inside In · Arm-action · Rear David Ferrer’s forehand from the center of the court, filmed from a rear angle. His feet set up in a strong open stance with a small adjustment step before contact and a quick crossover recovery step to get back into position.
2.6s
FH Inside In · Rear #1 David Ferrer’s inside-in forehand from the Deuce court, filmed from a rear angle. His shoulders rotate well past perpendicular to the net on the unit turn, then his trunk uncoils aggressively ahead of the arm to drive the kinetic chain through contact.
2.6s
FH Inside In · Rear #2 David Ferrer's inside-in forehand from the Deuce side, filmed from a rear angle. After contact his follow-through wraps high across his body and he quickly brings both hands back in front of his torso as he recovers to a neutral ready position.
3.2s
FH Inside Out · Arm-action · Rear #1 David Ferrer’s forehand from the center of the court, filmed from a rear angle. His contact point is well in front of his body with the racket face slightly closed, and the racket head accelerates on a low-to-high inside-out swing path.
2.6s
FH Inside Out · Arm-action · Rear #2 David Ferrer's inside-out forehand from a central position, filmed from a rear angle. His shoulders rotate well past perpendicular to the baseline on the unit turn, then uncoil in sequence with the trunk so that the chest fully faces the target at contact.
3.4s
FH Inside Out · Arm-action · Rear #3 David Ferrer’s forehand from the center of the court, filmed from a rear angle. His shoulders rotate well beyond perpendicular to the net on the unit turn, then the trunk uncoils aggressively ahead of the arm, creating clear separation between hip rotation and upper-body release.
2.7s
FH Inside Out · Arm-action · Rear #4 David Ferrer's inside-out forehand from the center of the court, filmed from a rear angle. His shoulders rotate well past perpendicular to the baseline on the unit turn, then uncoil in sync with his hips so the trunk drives the racket through contact.
3s
FH Inside Out · Arm-action · Rear #5 David Ferrer's inside-out forehand from the middle of the court, filmed from a rear angle. His contact is made slightly in front of his lead hip with a closed racket face and a pronounced low-to-high whip of the racket head through the contact zone.
4s
FH Inside Out · Rear #1 David Ferrer’s inside-out forehand from the Deuce side, filmed from a rear angle. At contact his racket face is slightly closed with the ball struck around waist to chest height, and the racket head accelerates steeply upward along a low-to-high swing path.
3.4s
FH Inside Out · Rear #2 David Ferrer’s inside-out forehand from the center of the court, filmed from a rear angle. His shoulders rotate well past 90 degrees in the backswing, creating a pronounced trunk coil that uncoils sequentially from hips to shoulders through contact.
2.8s
FH Inside Out · Rear #3 David Ferrer’s inside-out forehand from the center of the court, filmed from a rear angle. At contact his racket face is slightly closed with the ball struck around waist to chest height, and the racket head accelerates steeply upward along a heavy topspin swing path.
3.2s
FH Moves Back · Arm-action · Rear David Ferrer's forehand while moving back from a deep court position, filmed from the rear. His quick adjustment steps backward set up a semi-open stance, with his weight loaded on the outside leg before driving through the shot.
3s
FH · Rear #2 David Ferrer's forehand while moving back from the baseline, filmed from a rear court-level angle. His shoulders rotate well past 90 degrees relative to his hips on the unit turn, then his trunk uncoils aggressively forward so the chest finishes facing well into the court after contact.
3s
FH Moves Back · Rear David Ferrer’s forehand while moving back from the center of the court, filmed from the rear. From this angle, his semi-western grip and pronounced wrist lag are clear before he accelerates the racket head with a sharp wrist release through contact.
2.8s
FH Running · Rear David Ferrer’s running forehand from the deuce court, filmed from a rear angle. He sprints laterally out wide, plants in a semi-open stance, and uses quick recovery steps to push back toward the center after contact.
3.1s
FH Short · Rear David Ferrer’s forehand from the center of the court, filmed from a rear court-level angle. His quick adjustment steps set up a strong open-stance base before contact, followed by an immediate recovery shuffle back to his ready position.
4.9s
FH Short · Rear David Ferrer's forehand from the center of the court, filmed from a rear angle. His shoulders rotate well past 90 degrees relative to his hips on the unit turn, then his trunk uncoils aggressively with the chest driving forward toward the contact zone before the arm whips through.
6.4s
FH Wide · Arm-action · Rear #1 David Ferrer’s wide forehand from the deuce side, filmed from a rear angle. After contact his follow-through wraps high across his body while his weight drives back toward the center of the baseline, with his non-hitting arm extending out for balance as he recovers.
2.7s
FH Wide · Arm-action · Rear #2 David Ferrer’s wide forehand from the deuce side, filmed from a rear angle. His semi-western forehand grip is evident with a pronounced wrist lag in the takeback that unwinds into a strong pronation through contact.
3.1s
FH Wide · Rear · Open #1 David Ferrer's wide forehand from an open stance on the deuce side, filmed from a rear angle. At contact his racket face is slightly closed with the ball struck around waist height, and the racket head accelerates steeply upward along a low-to-high swing path.
2.6s
FH Wide · Rear · Open #2 David Ferrer’s forehand from a wide position in the Ad court, filmed from a rear angle in an open stance. His semi-western grip is evident with pronounced wrist lag on the takeback that unwinds into a strong pronation through contact.
3.1s
FH Center · Arm-action · Side #1 David Ferrer's forehand from the center of the court, filmed from the side. After contact his follow-through wraps high across his body as his weight drives forward into the court, with his non-hitting hand extending back to help him quickly recover toward a ready position.
2.5s
FH Center · Arm-action · Side #2 David Ferrer's forehand from the center of the court, filmed from the side. At contact his racket face is slightly closed with the ball struck around waist to chest height, and you can clearly see the racket head accelerating steeply upward through the ball.
2.9s
FH Center · Side · Open #1 David Ferrer’s forehand from the center of the court, filmed from the side. His open stance is paired with a quick split step into a strong base, followed by an aggressive hip rotation and immediate recovery step back toward the middle.
2.9s
FH Center · Side · Open #2 David Ferrer’s forehand from the center of the court in an open stance, filmed from the side. After contact his follow-through wraps high across his body while his weight drives forward into the court, quickly bringing both hands back to a compact ready position for the next shot.
2.8s
FH Center · Side · Open #3 David Ferrer's forehand from the center of the court in an open stance, filmed from the side. At contact his racket face is slightly closed with the ball struck around waist to chest height, and the racket head accelerates steeply upward along a low-to-high swing path.
2.6s
FH Center · Side · Open #4 David Ferrer’s forehand from the center of the court in an open stance, filmed from the side. At contact, his racket face is slightly closed with the ball struck around waist to chest height as the racket accelerates steeply upward along a low-to-high swing path.
2.5s
FH Inside In · Arm-action · Side David Ferrer's forehand Inside-In from the deuce side, filmed from a side angle. His contact point is well in front of his body with the racket face slightly closed, and the racket head accelerates steeply upward through contact for heavy topspin.
2.4s
FH Inside In · Side #1 David Ferrer’s forehand Inside-In from the deuce side, filmed from the side. His early shoulder turn and pronounced trunk coil are clearly visible, with the torso uncoiling ahead of the arm to drive the kinetic chain through contact.
3s
FH Inside In · Side #2 David Ferrer’s forehand Inside-In from the Deuce court, filmed from the side. He plants in a strong open stance with quick adjustment steps beforehand, then uses a small crossover recovery step to move back toward the center.
3.3s
FH Inside In · Side #3 David Ferrer's forehand Inside-In from the Deuce court, filmed from the side. His deep knee bend and strong leg drive into the court are clearly visible as his hips rotate aggressively through the shot.
2.9s
FH Inside Out · Arm-action · Side #1 David Ferrer's inside-out forehand from the deuce side, filmed from the side. From this angle, you can clearly see his semi-western grip creating strong wrist lag on the takeback and a pronounced wrist snap through contact.
2.6s
FH Inside Out · Arm-action · Side #2 David Ferrer's inside-out forehand from the center of the court, filmed from the side. He sets up in a strong neutral-to-slightly-open stance with quick adjustment steps before planting his outside foot, then uses a small hop on the recovery to be ready for the next shot.
2.5s
FH Inside Out · Arm-action · Side #3 David Ferrer’s inside-out forehand from the deuce court, filmed from the side. His semi-western grip is evident with strong wrist lag on the takeback that unwinds into a pronounced wrist snap through contact.
2.5s
FH Inside Out · Arm-action · Side #4 David Ferrer’s forehand from the Deuce court, filmed from the side. His follow-through finishes high across his body with the non-hitting arm retracting back, and he quickly regains a balanced stance ready to recover for the next shot.
2.4s
FH Inside Out · Side #1 David Ferrer’s forehand hit Inside Out from the Deuce court, filmed from the side. From this angle his semi-western grip is clear, with pronounced wrist lag on the takeback that unwinds into a strong pronation through contact.
2.6s
FH Inside Out · Side #2 David Ferrer's inside-out forehand from the deuce side, filmed from a side angle. His feet load in a semi-open stance with a pronounced hip turn, and he uses quick adjustment steps before driving forward and recovering along the baseline.
2.8s
FH Inside Out · Side #3 David Ferrer’s forehand InsideOut from the Deuce court, filmed from the side. His hips stay low with a deep knee bend on the loading leg, then drive forward as his rear hip aggressively rotates through the shot.
2.6s
FH Inside Out · Side #4 David Ferrer’s inside-out forehand from the deuce side, filmed from the side. His follow-through finishes high across his body as he quickly brings both hands back to a neutral position and resets his feet for recovery.
3.4s
FH Inside Out · Side #5 David Ferrer's inside-out forehand from the deuce side, filmed from a side angle. At contact his racket face is slightly closed with the ball struck around waist to chest height, and the racket head accelerates steeply upward along a windshield-wiper path.
3.1s
FH Inside Out · Side #6 David Ferrer’s inside-out forehand from the deuce side, filmed from a side angle. After contact his follow-through finishes high across his body as he drives his weight into the court and quickly resets his feet into a compact ready position.
2.7s
FH Inside Out · Side #7 David Ferrer’s forehand InsideOut from the Deuce side, filmed from the side. His deep knee bend and aggressive leg drive into the court are clearly visible, along with strong hip rotation from a semi-open stance.
2.5s
FH Inside Out · Side #8 David Ferrer’s inside-out forehand from the deuce side, filmed from a side angle. He uses an open stance with a pronounced load on his outside leg, then takes quick recovery steps back toward the center after contact.
3.8s
FH Moves Back · Arm-action · Side #1 David Ferrer’s forehand while moving back from a neutral position, filmed from the side. From this angle, you can see a pronounced wrist lag as he drives forward, with a semi-western grip and a late wrist snap through contact.
2.8s
FH Moves Back · Arm-action · Side #2 David Ferrer’s forehand while moving back from a neutral position, filmed from the side. His hips stay relatively closed as he retreats, with a pronounced knee bend and strong rear-leg load before driving up through the shot.
3.1s
FH Moves Back · Arm-action · Side #3 David Ferrer's forehand while moving back from a deep court position, filmed from the side. At contact his racket face is slightly closed with the ball meeting the strings around waist to chest height, and the racket head accelerates steeply upward through the hitting zone.
4.7s
FH Moves Back · Leg-action · Side David Ferrer's forehand while moving back from a deep court position, filmed from the side. From this angle, his semi-western grip is evident with a pronounced wrist lag before contact and a strong wrist snap through the hitting zone.
2.4s
FH Moves Back · Side #1 David Ferrer’s forehand while moving back from the deuce side, filmed from the side. At contact his racket face is slightly closed with the ball meeting the strings around waist height, and the racket head accelerates steeply upward along a low-to-high swing path.
3s
FH Moves Back · Side #2 David Ferrer's forehand while moving back from a deep court position, filmed from the side. His quick adjustment steps backward keep him in a semi-open stance, with a compact load on the outside leg before pushing forward into recovery.
2.9s
FH Moves Back · Side #3 David Ferrer's forehand while moving back from a neutral court position, filmed from the side. His follow-through wraps high across his body and he quickly regathers his feet into a wide, athletic stance, ready to recover for the next shot.
2.6s
FH Moves Back · Side #4 David Ferrer's forehand while moving back from a neutral position, filmed from the side. His shoulders rotate well past 90 degrees relative to his hips on the unit turn, then his trunk uncoils aggressively forward with a clear sequential release from hips to shoulders through contact.
2.4s
FH Moves Back · Side #5 David Ferrer’s forehand while moving back from a neutral position, filmed from the side. From this angle you can see his semi-western grip creating pronounced wrist lag on the takeback that unwinds into a strong forward pronation through contact.
3.1s
FH Moves Back · Side #6 David Ferrer's forehand while moving back from a neutral position, filmed from the side. His deep knee bend and strong rear-leg drive into the court are clearly visible as his hips stay closed through the load phase before rotating into contact.
2.9s
FH Running · Side #1 David Ferrer's running forehand from the deuce side, filmed from the side. At contact his racket face is slightly closed with the ball struck around waist height, and the racket head accelerates steeply upward through the ball on a pronounced low-to-high path.
3.6s
FH Running · Side #2 David Ferrer's running forehand from the deuce side, filmed from the side. His shoulders load with a deep turn relative to his hips before contact, then his trunk uncoils aggressively forward as his legs drive through the open-stance recovery.
3.3s
FH Running · Side #3 David Ferrer’s running forehand from the deuce side, filmed from the side. His hips stay low with deep knee flexion as he sprints, then drive forward with strong leg extension as he plants and rotates into the shot.
3.2s
FH Short · Arm-action · Side David Ferrer’s forehand from the center of the baseline, filmed from the side. His semi-western grip is evident with a pronounced wrist lag on the take-back that unwinds into a compact snap through contact.
4.7s
FH Short · Side #1 David Ferrer's forehand from the center of the baseline, filmed from the side. His deep knee bend and strong leg drive into the court are clearly visible as his hips rotate aggressively through the shot.
3s
FH Short · Side #2 David Ferrer's forehand from the deuce court, filmed from the side. His semi-western grip is evident with a pronounced wrist lag on the take-back that unwinds into a strong, controlled pronation through contact.
3.3s
FH Short · Side #3 David Ferrer’s forehand from the deuce court, filmed from the side. At contact his racket face is slightly closed with the ball struck around waist height, and the racket head accelerates steeply upward along a low-to-high swing path.
3.5s
FH Short · Side #4 David Ferrer’s forehand from the deuce side, filmed from the side. After contact his follow-through wraps high across his body as he steps forward, quickly resetting his feet into a low, ready position for the next shot.
3.4s
FH Short · Side #5 David Ferrer’s forehand from the deuce court, filmed from the side. His deep knee bend and strong leg drive into the court are clearly visible, with his hips rotating aggressively toward the net as he unloads into the short ball.
3.7s
FH Wide · Arm-action · Side #1 David Ferrer's forehand on a wide ball from the deuce side, filmed from the side. His shoulders rotate well past 90 degrees relative to the net on the unit turn, then the trunk uncoils ahead of the arm swing so the racquet lags and whips through contact.
2.9s
FH Wide · Arm-action · Side #2 David Ferrer’s wide forehand from the deuce court, filmed from the side. His contact point is well in front of his body with the racket face slightly closed, and the racket head accelerates upward on a steep low-to-high path.
2.6s
FH Wide · Arm-action · Side #3 David Ferrer’s wide forehand from the deuce side, filmed from the side. His hips stay low with a deep knee bend as he loads, then drive forward aggressively off the outside leg to push into the ball.
2.6s
FH Wide · Arm-action · Side #4 David Ferrer’s forehand from a wide position, filmed from the side. His quick adjustment steps into an open stance and low knee bend are clearly visible as he plants his outside leg before driving into the shot.
3.8s
FH Wide Down The Line · Side David Ferrer's wide forehand from the deuce side, filmed from the side. His footwork includes a quick adjustment shuffle into an open stance, followed by aggressive recovery steps back toward the center after contact.
2.4s
FH Wide · Side · Open #1 David Ferrer’s wide forehand from the deuce side in an open stance, filmed from the side. At contact his racket face is slightly closed with the ball struck around waist to chest height, and the racket head accelerates steeply upward along a low-to-high swing path.
2.8s
FH Wide · Side · Open #2 David Ferrer's forehand from a wide position in an open stance, filmed from the side. His deep knee bend and aggressive leg drive into the ground are clearly visible, with his hips staying open toward the court as he rotates through contact.
2.6s
FH Wide · Side · Open #3 David Ferrer’s wide forehand from the deuce side in an open stance, filmed from the side. After contact his follow-through wraps high across his body while his weight drives into the court, and he quickly re-loads with both hands on the racquet in a compact ready position.
3.4s
FH Wide · Side · Open #4 David Ferrer’s forehand from the deuce side, filmed from the side. His open stance shows strong knee flexion and aggressive hip rotation into the shot as his legs drive laterally out to the wide ball.
2.6s
FH Return 2nd Serve #4 David Ferrer’s second serve from the deuce side, filmed from a front court-level angle. His legs show a deep knee bend before the toss and a strong upward leg drive that extends through contact, with the hips uncoiling toward the court to initiate the service motion.
2.5s
BH Return 1st Serve · Ad · Court-level-front #1 David Ferrer’s first serve return backhand from the Ad side, filmed from a court-level front angle. His compact split step into a slightly open stance sets up a quick lateral adjustment, followed by a small recovery step toward the center after contact.
2.6s
BH Return 1st Serve · Ad · Court-level-front #2 David Ferrer’s first serve from the Ad court, filmed from a front court-level angle. His continental grip is firm with a relaxed wrist that pronates aggressively through contact, creating a distinct wrist snap just after impact.
2.6s
BH Return 1st Serve · Ad · Court-level-front #3 David Ferrer’s backhand return of first serve from the Ad court, filmed from a front court-level angle. At contact his racket face is slightly closed with the ball struck around waist height, and both hands drive through the ball on a compact, forward swing path.
2.8s
BH Return 1st Serve · Ad · Court-level-front #4 David Ferrer’s backhand return of first serve from the Ad court, filmed from court-level front. After contact his follow-through finishes high with both hands on the racquet as he quickly regroups, bringing the racquet back to a neutral ready position while his weight shifts back toward the center of the baseline.
2.9s
BH Return 1st Serve · Ad · Court-level-front #5 David Ferrer’s first serve from the Ad side, filmed from a court-level front angle. His continental grip stays firm while his wrist pronates distinctly through contact, with a noticeable snap as he drives up and into the ball.
3.1s
BH Return 1st Serve · Ad · Court-level-front #6 David Ferrer’s backhand return of first serve from the Ad court, filmed from a court-level front angle. His hips stay relatively closed at contact while a deep knee bend and strong push off the outside leg drive his body into the court.
3s
BH Return 1st Serve · Ad · Court-level-front #7 David Ferrer’s backhand return of first serve from the Ad side, filmed from a front court-level angle. His two-handed backhand grip is clearly visible with the non-dominant (left) hand driving the racquet while the dominant (right) wrist stays firm and relatively quiet through contact, limiting excess wrist snap.
3s
BH Return 1st Serve · Deuce · Court-level-front #1 David Ferrer’s first serve from the deuce court, filmed from a court-level front angle. His continental grip is firm with a relaxed wrist that pronates aggressively through contact, making the wrist snap clearly visible from the front.
3.2s
BH Return 1st Serve · Deuce · Court-level-front #2 David Ferrer’s first serve from the deuce court, filmed from a front court-level angle. His continental grip is firm with minimal grip change during the motion, and you can clearly see pronounced wrist pronation through contact as the racquet face closes into the court.
3.2s
BH Return 1st Serve · Deuce · Court-level-front #3 David Ferrer’s backhand return of first serve from the deuce court, filmed from court-level front. His shoulders and trunk coil early as he turns sideways, then uncoil in a compact sequence with the hips initiating the rotation before the upper torso follows through the contact.
2.7s
BH Return 1st Serve · Deuce · Court-level-front #4 David Ferrer’s backhand return of first serve from the deuce court, filmed from a court-level front angle. He uses a compact split step into a semi-open stance, then takes quick adjustment steps to set his feet before driving through the two-handed backhand.
3s
BH Return 1st Serve · Deuce · Court-level-front #5 David Ferrer’s backhand return of first serve from the deuce court, filmed from court-level front. His hips stay relatively closed through the return with a deep knee bend on both legs, showing strong leg drive upward as he uncoils into the ball.
2.9s
BH Return 1st Serve · Deuce · Court-level-front #6 David Ferrer’s backhand return of first serve from the deuce court, filmed from a court-level front angle. His two-handed backhand grip stays compact with a firm, stable wrist position on both hands, showing minimal wrist deviation through contact.
3.2s
BH Return 1st Serve · Deuce · Court-level-front #7 David Ferrer's backhand return of first serve from the deuce court, filmed from a court-level front angle. His racket face is slightly closed at contact with the ball struck around waist height, and the compact two-handed swing drives the racket head straight through the line of the incoming serve.
3.3s
BH Return 2nd Serve · Ad · Court-level-front #1 David Ferrer’s backhand return of a second serve from the Ad court, filmed from a front court-level angle. After contact he extends his two-handed follow-through straight toward the server and quickly brings both hands back in front of his body, using small adjustment steps to recover into a compact ready position on the baseline.
3s
BH Return 2nd Serve · Ad · Court-level-front #2 David Ferrer's backhand return of a second serve from the Ad court, filmed from a court-level front angle. His shoulders and trunk coil early as he turns sideways, then uncoil in a tightly sequenced motion where the torso rotation clearly leads the racquet swing through contact.
3.3s
BH Return 2nd Serve · Ad · Court-level-front #3 David Ferrer’s second serve from the Ad court, filmed from a front court-level angle. At contact his racket face is only slightly closed with the ball struck around shoulder height, and the racket head accelerates steeply upward along the inside of the ball to impart strong topspin.
3s
BH Return 2nd Serve · Ad · Court-level-front #4 David Ferrer’s backhand return of second serve from the Ad court, filmed from a front court-level angle. His racket face is slightly closed at contact with the ball struck around waist height, and the compact swing path drives the strings directly through the incoming serve.
3.3s
BH Return 2nd Serve · Ad · Court-level-front #5 David Ferrer’s backhand return on a second serve from the Ad court, filmed from a court-level front angle. At contact his racket face is slightly closed with the ball meeting the strings around waist height, and the compact swing path accelerates the racket head straight through the line of the incoming serve.
3.3s
BH Return 2nd Serve · Ad · Court-level-front #6 David Ferrer’s backhand return of a second serve from the Ad side, filmed from a court-level front angle. After contact, he finishes with his two-handed follow-through high across his body and quickly brings both hands back in front of his torso to reset into a compact ready position.
3.1s
BH Return 2nd Serve · Ad · Court-level-front #7 David Ferrer’s backhand return of second serve from the Ad court, filmed from a front court-level angle. After contact his follow-through finishes high with both hands on the racquet, and he quickly brings the racquet back to a neutral position while his weight shifts forward preparing for the next shot.
3.1s
BH Return 2nd Serve · Ad · Court-level-front #8 David Ferrer’s backhand return of a second serve from the Ad court, filmed from a court-level front angle. He uses a compact split-step into a neutral stance, then takes quick adjustment steps to set his feet before driving through the two-handed backhand.
2.9s
BH Return 2nd Serve · Deuce · Court-level-front #1 David Ferrer’s backhand return of a second serve from the deuce court, filmed from a court-level front angle. He uses a compact split-step into a neutral stance, then takes a small adjustment step with his outside foot before driving into the return and quickly recovering toward the center.
3.5s
BH Return 2nd Serve · Deuce · Court-level-front #2 David Ferrer’s backhand return of second serve from the deuce court, filmed from court-level front. His shoulders rotate as a unit with the trunk into a compact coil, then uncoil in sequence from hips to torso to shoulders, making the upper body rotation easy to compare to the racquet’s forward acceleration.
3s
BH Return 2nd Serve · Deuce · Court-level-front #3 David Ferrer’s backhand return of a second serve from the deuce court, filmed from a court-level front angle. He uses a compact split step into a neutral stance, then takes quick adjustment steps to align his body before planting his outside foot for the two-handed backhand.
2.9s
FH Return 1st Serve · Ad · Court-level-front #1 David Ferrer’s first serve from the Ad side, filmed from a court-level front angle. His continental grip stays firm with a relaxed wrist that pronates aggressively through contact, making the wrist snap especially visible from the front.
2.9s
FH Return 1st Serve · Ad · Court-level-front #2 David Ferrer's first serve from the Ad side, filmed from a court-level front angle. His shoulders and trunk coil strongly away from the target before uncoiling in sequence, with the chest rotating toward the net just after the tossing arm drops.
3s
FH Return 1st Serve · Ad · Court-level-front #3 David Ferrer’s first serve from the Ad court, filmed from a court-level front angle. After contact he lands on his front (left) leg with his hitting arm finishing across his body and quickly brings both hands back in front to recover into a compact ready position.
2.6s
FH Return 1st Serve · Ad · Court-level-front #4 David Ferrer’s first serve from the Ad side, filmed from a front court-level angle. His footwork includes a small adjustment step into a solid platform stance, with a controlled knee bend and balanced landing on his front foot before recovering.
3s
FH Return 1st Serve · Deuce · Court-level-front #1 David Ferrer’s first serve from the deuce court, filmed from a court-level front angle. After contact he lands on his front (left) foot with his torso driving into the court, and his non-hitting arm drops back as he quickly regathers his feet into a compact ready position for the next shot.
2.9s
FH Return 1st Serve · Deuce · Court-level-front #2 David Ferrer’s first serve from the deuce court, filmed from a court-level front angle. His footwork includes a small, rhythmic rocking motion into a pinpoint stance before driving up, with a pronounced front-foot landing that sets up an immediate recovery step behind the baseline.
2.9s
FH Return 2nd Serve · Deuce · Court-level-front #2 David Ferrer’s forehand return of second serve from the deuce side, filmed from a court-level front angle. He uses a quick split-step into a semi-open stance, then takes small adjustment steps to set his feet before driving forward into the return.
2.9s
BH Return 1st Serve · Ad · Court-level-rear #1 David Ferrer’s backhand return of first serve from the Ad court, filmed from a court-level rear angle. He uses a quick split-step into a compact lateral adjustment and sets up in a mostly neutral stance before driving through the return and recovering back toward the center.
3s
BH Return 1st Serve · Ad · Court-level-rear #2 David Ferrer’s first serve from the Ad court, filmed from a court-level rear angle. His racket comes up on edge before pronating into a slightly closed face at contact, with the ball struck just above head height to maximize racket head speed up and through the ball.
3.2s
BH Return 1st Serve · Ad · Court-level-rear #3 David Ferrer’s backhand return of first serve from the Ad side, filmed from a court-level rear angle. He uses a quick split-step into a neutral stance, then takes small adjustment steps to align his body before driving through the two-handed backhand and recovering toward the center.
2.8s
BH Return 1st Serve · Ad · Court-level-rear #4 David Ferrer’s backhand return of first serve from the Ad court, filmed from a court-level rear angle. His shoulders rotate as a single unit with the trunk, showing a compact coil on the unit turn and a synchronized uncoiling where the hips initiate just before the upper body continues through contact.
3s
BH Return 1st Serve · Deuce · Court-level-rear #1 David Ferrer’s backhand return of first serve from the deuce court, filmed from a court-level rear angle. After contact his two-handed follow-through finishes around shoulder height while his weight continues moving into the court, and he quickly brings both hands back toward the racket in front of his body to re-establish a compact ready position.
2.7s
BH Return 2nd Serve · Ad · Court-level-rear #2 David Ferrer’s backhand return of a second serve from the Ad side, filmed from a court-level rear angle. He takes a small split-step just before contact and uses a compact lateral adjustment into a neutral stance before driving through the return and recovering.
2.8s
BH Return 2nd Serve · Deuce · Court-level-rear #1 David Ferrer’s second serve from the deuce court, filmed from a court-level rear angle. At contact his racket face is only slightly open with the ball struck around head height, and the upward swing path creates noticeable topspin while the racket head accelerates up and across the ball.
2.7s
BH Return 2nd Serve · Deuce · Court-level-rear #2 David Ferrer’s backhand return on a second serve from the deuce court, filmed from a court-level rear angle. After contact he finishes with his two-handed follow-through high across his body and quickly resets his feet into a wide, ready position to recover for the next shot.
3.2s
FH Return 1st Serve · Deuce · Court-level-rear #1 David Ferrer's first serve from the deuce court, filmed from a court-level rear angle. From this angle, you can clearly see his continental grip stay firm while his wrist pronates aggressively through contact to drive the serve.
3.3s
FH Return 1st Serve · Deuce · Court-level-rear #2 David Ferrer’s first serve from the deuce court, filmed from a court-level rear angle. His legs load with a deep knee bend before driving upward, and his hips rotate aggressively into the court as his back leg swings forward for landing.
3s
BH Return 1st Serve · Ad · Court-level-side #1 David Ferrer’s backhand return of first serve from the Ad court, filmed from a court-level side angle. After contact his follow-through finishes high with the racket wrapping around his left shoulder as he quickly pushes off his outside leg to recover back toward a neutral ready position.
2.5s
BH Return 1st Serve · Ad · Court-level-side #2 David Ferrer’s first serve return backhand from the Ad court, filmed from a court-level side angle. His shoulders rotate nearly perpendicular to the net on the unit turn, with a pronounced trunk coil that uncoils sequentially from hips to shoulders as he drives through the return.
2.6s
BH Return 1st Serve · Deuce · Court-level-side #1 David Ferrer’s backhand return of first serve from the deuce court, filmed from court level side. His two-handed backhand meets the ball slightly in front of his body with a closed racket face and a compact, forward swing path through contact.
2.8s
BH Return 1st Serve · Deuce · Court-level-side #2 David Ferrer’s backhand return of first serve from the deuce court, filmed from a court-level side angle. His feet execute a quick split-step into a small lateral adjustment, setting up a stable, slightly open stance as he meets the ball.
2.9s
BH Return 1st Serve · Deuce · Court-level-side #3 David Ferrer’s backhand return of first serve from the deuce court, filmed from a court-level side angle. After contact his follow-through finishes high with the racket wrapping toward his non-hitting side, and he quickly brings both hands back toward his body as he recovers his stance and readies for the next shot.
2.9s
BH Return 1st Serve · Deuce · Court-level-side #4 David Ferrer’s first serve from the deuce side, filmed from a court-level side angle. His deep knee bend and strong leg drive into the court are clearly visible as his hips uncoil upward and forward through the serve.
3.2s
BH Return 2nd Serve · Ad · Court-level-side #1 David Ferrer’s backhand return of a second serve from the Ad side, filmed from a court-level side angle. His hips stay relatively closed as he loads, with a deep knee bend and strong leg drive upward and into the court as he swings through the return.
2.9s
BH Return 2nd Serve · Ad · Court-level-side #2 David Ferrer’s second serve from the Ad court, filmed from a court-level side angle. His continental grip stays firm with a relaxed wrist, allowing a clear pronation of the forearm and subtle wrist snap through contact.
2.9s
BH Return 2nd Serve · Ad · Court-level-side #3 David Ferrer’s second serve from the Ad court, filmed from a court-level side angle. His continental grip stays firm while his wrist pronates aggressively through contact, creating a distinct snap just after impact.
3s
BH Return 2nd Serve · Ad · Court-level-side #4 David Ferrer’s backhand return of a second serve from the Ad side, filmed from a court-level side angle. His hips stay relatively closed through the return with a deep knee bend and strong leg drive upward as he pushes off the ground into contact.
2.7s
BH Return 2nd Serve · Ad · Court-level-side #5 David Ferrer’s backhand return of a second serve from the Ad court, filmed from a court-level side angle. His two-handed grip stays compact with the non-dominant hand driving the racquet, while the dominant wrist remains firm with minimal flexion through contact.
3.1s
BH Return 2nd Serve · Deuce · Court-level-side #2 David Ferrer's backhand return of a second serve from the deuce court, filmed from a court-level side angle. His two-handed backhand grip stays compact with a firm, stable wrist structure, showing minimal wrist flexion through contact before a controlled, relaxed release into the follow-through.
3.1s
FH → Second Serve → Return · Ad · Court-level-side #2 David Ferrer’s forehand return of a second serve from the Ad court, filmed from a court-level side angle slightly to the rear. His quick split-step into an open stance and immediate lateral push toward the ball are clearly visible, followed by short recovery steps preparing him for the next shot.
2.9s
FH Return 1st Serve · Deuce · Court-level-side #1 David Ferrer’s first serve return from the deuce court, filmed from a court-level side angle. His compact split-step drops him into a low, wide base, and he uses a quick lateral shuffle into a neutral stance before planting and driving into the return.
3.3s
FH Return 1st Serve · Deuce · Court-level-side #2 David Ferrer's first serve from the deuce court, filmed from a court-level side angle. His shoulders load with a pronounced turn relative to his hips before uncoiling in sequence, making the trunk rotation and shoulder-over-shoulder action in the trophy and acceleration phases clearly visible from the side.
3.7s
FH Return 1st Serve · Deuce · Court-level-side #4 David Ferrer’s first serve from the deuce court, filmed from a court-level side angle. His shoulders rotate deeply with a pronounced trunk coil during the trophy phase, then uncoil in a clearly sequenced motion from hips to shoulders into the hitting zone.
3.3s
BH Return 1st Serve · Ad · Front #1 David Ferrer’s first-serve return from the Ad court, filmed from the front. His shoulders and trunk coil early as he turns into the two-handed backhand, then uncoil in a compact, synchronized sequence with minimal extra torso rotation through contact.
3.2s
BH Return 1st Serve · Ad · Front #2 David Ferrer’s backhand return of first serve from the Ad court, filmed from the front. His shoulders rotate as a unit with a strong trunk coil on the unit turn, then uncoil rapidly through contact with the chest finishing square to the net.
2.9s
BH Return 1st Serve · Ad · Front #3 David Ferrer’s backhand return of first serve from the Ad court, filmed from the front. At contact his racket face is relatively square to the incoming ball with the contact point around waist height, and the two-handed swing drives the racket head straight through the line of the shot.
3s
BH Return 2nd Serve · Ad · Front #1 David Ferrer's backhand return of a second serve from the Ad court, filmed from the front. He executes a quick split-step into a semi-open stance, then uses small adjustment steps to load on his outside leg before driving into the return and recovering toward the center.
3.1s
BH Return 2nd Serve · Ad · Front #2 David Ferrer’s backhand return on a second serve from the Ad court, filmed from the front. His shoulders rotate as a unit with the trunk into a compact coil before contact, then uncoil together with minimal independent shoulder tilt, making the sequencing of trunk rotation easy to see from this angle.
3.4s
BH Return 2nd Serve · Deuce · Front #2 David Ferrer’s backhand return of second serve from the deuce side, filmed from the front. His hips stay relatively closed as he loads with a deep knee bend, then his legs drive upward together to stabilize his two-handed swing through contact.
3.1s
FH Return 1st Serve · Ad · Front #1 David Ferrer’s first serve from the Ad side, filmed from the front. His continental grip is firm with a subtle increase in wrist pronation as he drives up to contact, making the wrist snap clearly visible from this angle.
2.4s
FH Return 1st Serve · Ad · Front #2 David Ferrer's first serve from the Ad court, filmed from the front. At contact his racket face is slightly tilted forward with the ball struck just above head height, and the racket head accelerates steeply upward along the right side of his body.
3s
FH Return 1st Serve · Ad · Front #3 David Ferrer’s first serve from the Ad side, filmed from the front. At contact his racket face is slightly closed with the ball struck just above head height, and the racket head accelerates steeply upward along a pronounced pronation path.
2.5s
FH Return 1st Serve · Deuce · Front #1 David Ferrer's first serve from the deuce side, filmed from the front. His deep knee bend and strong leg drive upward are clearly visible, with the hips uncoiling toward the target as he pushes off the ground.
2.9s
FH Return 1st Serve · Deuce · Front #2 David Ferrer’s first serve from the deuce court, filmed from the front. His continental grip is firm with a relaxed wrist that pronates aggressively through contact, creating a pronounced wrist snap toward the target.
3.1s
FH Return 2nd Serve · Ad · Front #2 David Ferrer’s second serve from the Ad court, filmed from the front. From this angle, his continental grip is clear, with a relaxed wrist that pronates aggressively through contact to add spin.
2.9s
FH Return 2nd Serve · Deuce · Front #2 David Ferrer’s second-serve return from the deuce court, filmed from the front. After contact he drives his weight into the court, brings his non-hitting hand back toward his center, and quickly resets his feet into a compact ready position for the next shot.
3.1s
BH Return 1st Serve · Ad · Rear #1 David Ferrer’s backhand return of first serve from the Ad court, filmed from a rear angle. His two-handed backhand grip stays compact with limited wrist extension, and the non-dominant (left) wrist drives through contact with a firm, stable position.
2.8s
BH Return 2nd Serve · Ad · Rear #2 David Ferrer’s backhand return of a second serve from the Ad court, filmed from a rear angle. He takes a small adjustment hop into a neutral stance before contact, then uses quick recovery steps to shuffle back toward the center of the baseline.
3.2s
FH Return 1st Serve · Deuce · Rear #1 David Ferrer’s first serve from the deuce court, filmed from a rear angle. After contact his follow-through finishes across his body and he quickly lands on his front foot, bringing his back leg through to recover toward a neutral ready position on the baseline.
2.9s
FH Return 1st Serve · Deuce · Rear #2 David Ferrer’s first serve from the deuce court, filmed from the rear. At contact his racket face is slightly tilted forward with the ball struck just above full extension, and the racket head accelerates steeply upward along the right side of his body to impart strong topspin.
3s
FH Return 2nd Serve · Deuce · Rear #2 David Ferrer's second-serve return from the deuce side, filmed from a rear angle. His hips stay relatively closed as he loads on a deep knee bend, then uncoil with a strong forward leg drive into the court.
3s
BH Return 1st Serve · Ad · Side #1 David Ferrer’s backhand return of first serve from the Ad court, filmed from the side. His hips stay relatively closed at contact with a deep knee bend and strong forward leg drive, emphasizing his low, stable base through the return.
3s
BH Return 1st Serve · Ad · Side #2 David Ferrer’s backhand return of first serve from the Ad court, filmed from the side. At contact his racket face is nearly square to the ball with the contact point around waist height, and the racket head accelerates forward on a compact, slightly upward swing path.
2.9s
BH Return 1st Serve · Ad · Side #3 David Ferrer’s backhand return of first serve from the Ad court, filmed from the side. After contact he extends his follow-through toward the baseline while his weight transfers into the court and his non-hitting hand quickly comes back toward his body to help him reset into a ready position.
2.6s
BH Return 1st Serve · Ad · Side #4 David Ferrer’s backhand return of first serve from the Ad side, filmed from the side. After contact he finishes with his two hands high in front of his body and quickly brings the racquet back toward his center as his weight transfers forward into a compact recovery stance.
3.4s
BH Return 1st Serve · Ad · Side #5 David Ferrer’s backhand return of first serve from the Ad side, filmed from the side. His hips stay low with a deep knee bend on the return load, and his legs drive forward into the court as he uncoils into the shot.
3.2s
BH Return 1st Serve · Deuce · Side #1 David Ferrer’s first serve from the deuce side, filmed from a side angle. His deep knee bend and aggressive leg drive into the court are clearly visible as his hips uncoil upward and forward through the serve.
2.9s
BH Return 1st Serve · Deuce · Side #2 David Ferrer’s backhand return of first serve from the deuce side, filmed from a side angle. His shoulders and trunk coil early against the incoming serve, then uncoil in a tightly sequenced motion where the upper body rotation clearly leads the racquet through contact.
3.1s
BH Return 1st Serve · Deuce · Side #3 David Ferrer's backhand return of first serve from the deuce court, filmed from the side. His compact split-step leads into a quick pivot into a semi-open stance, with small adjustment steps aligning his body before he drives through the return and takes a couple of short recovery steps back toward the center.
3.3s
BH Return 1st Serve · Deuce · Side #4 David Ferrer’s first serve from the deuce court, filmed from a side angle. His shoulders rotate deeply away from the court during the trophy phase, then the trunk uncoils in sequence with the upward leg drive before the arm whips through contact.
2.9s
BH Return 2nd Serve · Ad · Side #1 David Ferrer’s backhand return of second serve from the Ad court, filmed from the side. His hips stay relatively closed as he loads with a deep knee bend, then drive forward off the back leg to initiate rotation into the shot.
2.7s
BH Return 2nd Serve · Ad · Side #2 David Ferrer’s backhand return of a second serve from the Ad court, filmed from the side. His shoulders rotate early as he coils the trunk on the unit turn, then uncoil in sync with the hips so the upper body stays slightly closed through contact before unwinding fully into the follow-through.
2.9s
BH Return 2nd Serve · Ad · Side #3 David Ferrer’s backhand return of a second serve from the Ad side, filmed from the side. His hips stay relatively closed with a deep knee bend on the outside leg, then drive upward and slightly forward as both legs extend through contact.
2.9s
BH Return 2nd Serve · Deuce · Side #1 David Ferrer’s backhand return of a second serve from the deuce side, filmed from the side. After contact his follow-through finishes high with the racket out in front as he quickly pushes off his outside leg to recover back toward a neutral ready position.
3.2s
BH Return 2nd Serve · Deuce · Side #2 David Ferrer’s backhand return of a second serve from the deuce side, filmed from the side. His racket meets the ball slightly in front of his body with a closed racket face and a compact, forward swing path through contact.
2.9s
FH Return 1st Serve · Ad · Arm-action · Side #1 David Ferrer's first serve from the Ad court, filmed from the side. His legs load with a deep knee bend before driving upward, and his hips rotate aggressively into the court as he uncoils toward the ball.
2.3s
FH Return 1st Serve · Ad · Side #1 David Ferrer’s first serve from the Ad side, filmed from the side. His footwork shows a pronounced front-leg drive into the court from a platform stance, with a balanced landing on his left foot that sets up an immediate recovery step.
2.7s
FH Return 1st Serve · Ad · Side #2 David Ferrer’s first serve from the Ad court, filmed from the side. His deep knee bend and strong leg drive into the court are clearly visible, along with his hips uncoiling upward as he explodes toward the ball.
3.2s
FH Return 1st Serve · Ad · Side #3 David Ferrer’s first-serve return from the Ad court, filmed from the side. His early shoulder turn loads the trunk in a tight coil, then the torso uncoils sequentially from hips to shoulders to arm as he drives through the return.
2.9s
FH Return 1st Serve · Ad · Side #4 David Ferrer’s first serve from the Ad side, filmed from the side. After contact he drives his weight into the court and quickly brings his non-hitting arm back in front of his body as he lands in a balanced stance ready for the next shot.
2.3s
FH Return 1st Serve · Side #3 David Ferrer’s first serve from the deuce court, filmed from a side court-level angle. At contact his racket face is slightly tilted forward with the ball struck just above full extension, and the racket head accelerates steeply upward along the right side of his body for heavy topspin and kick.
3s
FH Return 1st Serve · Deuce · Side #1 David Ferrer's first serve from the deuce court, filmed from the side. After contact he lets his hitting arm finish across his body while his back leg swings through into the court, bringing him quickly into a balanced ready position for the next shot.
2.9s
FH Return 1st Serve · Deuce · Side #2 David Ferrer's first serve from the deuce side, filmed from a side angle. His continental grip stays firm with a noticeable wrist pronation through contact, creating a clear snap as the racquet accelerates up and across the ball.
3.3s
FH Return 1st Serve · Deuce · Side #3 David Ferrer’s first serve from the deuce court, filmed from the side. His footwork includes a small adjustment step into a pinpoint stance before the toss, then a pronounced front-leg drive into the court with a clear landing on his left foot to start the recovery.
3.2s
FH Return 1st Serve · Deuce · Side #4 David Ferrer's first serve from the deuce side, filmed from a side angle. His deep knee bend and strong leg drive into the court are clearly visible as his hips uncoil upward and forward through contact.
2.9s
FH Return 1st Serve · Deuce · Side #5 David Ferrer’s first serve from the deuce court, filmed from the side. At contact his racket face is slightly tilted forward with the ball struck just above full extension, and the racket head accelerates upward along a pronounced, whippy swing path.
3.1s
FH Return 1st Serve · Deuce · Side #6 David Ferrer's first serve from the deuce court, filmed from a side angle. His shoulders load with a deep turn relative to his hips before uncoiling in a clear kinetic chain from the trunk into the arm during the upward swing.
2.4s
FH Return 2nd Serve · Ad · Side #1 David Ferrer's second-serve return from the Ad side, filmed from the side. His shoulders and trunk load with a compact coil before contact, then uncoil in a tightly sequenced rotation that keeps his chest facing the baseline only briefly before continuing into a full, controlled follow-through.
3.9s
FH Return 2nd Serve · Ad · Side #2 David Ferrer’s second serve from the Ad side, filmed from a side angle. At contact his racket face is slightly closed with the ball struck just above head height, and you can clearly see the upward swing path accelerating through the ball.
3.3s
FH Return 2nd Serve · Ad · Side #3 David Ferrer's forehand return of a second serve from the Ad side, filmed from the side. His follow-through finishes high with his weight driving into the court, and he quickly brings both hands back toward his torso to reset into a compact ready position for the next shot.
2.9s
FH Return 2nd Serve · Deuce · Side #1 David Ferrer's second serve from the deuce side, filmed from a side angle. His shoulders rotate well past 90 degrees relative to the baseline in the trophy phase, then his trunk uncoils in sync with his leg drive so the chest squares to the net just after contact.
3.2s
FH Return 2nd Serve · Deuce · Side #2 David Ferrer's second serve from the deuce side, filmed from a side angle. His continental grip remains firm with a noticeable increase in wrist pronation through contact, as the racket face turns down and across the ball late in the motion.
3s
FH Return 2nd Serve · Deuce · Side #3 David Ferrer’s second serve from the deuce side, filmed from the side. At contact his racket face is slightly closed with the ball struck just above head height, and the swing path accelerates up and across the ball to impart strong topspin.
3.3s
Second Serve · Ad · Body-rotation · Court-level-front #2 David Ferrer's second serve from the Ad court, filmed from a court-level front angle. His shoulders and trunk coil strongly away from the target before uncoiling in sequence, with the front shoulder dropping and the chest rotating toward the net as he drives up into contact.
3s
Second Serve · Ad · Court-level-front #2 David Ferrer's second serve from the Ad court, filmed from a court-level front angle. His continental grip is firm with a slightly relaxed wrist, allowing a clear pronation through contact as the wrist snaps forward to impart spin.
2.9s
Second Serve Down The Middle · Ad · Court-level-front #2 David Ferrer's second serve from the Ad side down the middle, filmed from a court-level front angle. After contact he lands on his front (left) foot with his weight moving into the court, and his non-hitting arm drops quickly as he brings both hands back toward a compact ready position.
2.9s
Second Serve · Deuce · Body-rotation · Court-level-front #2 David Ferrer's second serve from the deuce court, filmed from a court-level front angle. At contact, his racket face is only slightly closed with the ball struck just above head height, and the upward swing path creates noticeable racket head acceleration through the hitting zone.
3s
Second Serve · Deuce · Court-level-front #2 David Ferrer's second serve from the deuce side, filmed from a court-level front angle. His continental grip is firm with a slightly laid-back wrist during the toss and backswing, moving into a pronounced wrist pronation through contact.
3s
Second Serve Down The Middle · Deuce · Court-level-front #2 David Ferrer's second serve from the deuce side, filmed from a front court-level angle. His knees dip into a deep bend before the toss, and you can see his legs driving upward together as his hips stay relatively closed to the baseline through contact.
3.1s
Second Serve · Deuce · Toss · Court-level-front #2 David Ferrer’s second serve from the deuce side, filmed from a court-level front angle. His deep knee bend and strong upward leg drive into the court are clearly visible as his hips stay closed through the toss and then rotate into contact.
3.3s
Second Serve · Ad · Court-level-rear #2 David Ferrer's second serve from the Ad court toward the body, filmed from a court-level rear angle. His footwork includes a pronounced front-foot pivot and controlled knee bend, with a balanced landing on his left leg that sets up a quick recovery step behind the baseline.
3s
Second Serve · Ad · Body-rotation · Court-level-side #2 David Ferrer's second serve from the Ad court, filmed from a court-level side angle. His shoulders and trunk show a pronounced coil during the trophy position, then uncoil in sequence from hips to shoulders as he drives up into the serve.
3.3s
Second Serve · Ad · Court-level-side #2 David Ferrer's second serve from the Ad court, filmed from a court-level side angle. His shoulders load with a pronounced turn relative to his hips before uncoiling in a smooth, sequential trunk rotation up into the contact.
3.2s
Second Serve · Ad · Front #2 David Ferrer's second serve from the Ad court, filmed from the front. His deep knee bend and strong upward leg drive into the court are clearly visible, along with his hips uncoiling toward the target as he extends to contact.
3.3s
Second Serve · Ad · Toss · Front #2 David Ferrer's second serve from the Ad side, filmed from the front. His front-facing stance shows a rhythmic knee bend into a balanced trophy position, with a small adjustment step of the front foot just before the toss to set his weight evenly.
3.1s
Second Serve Wide · Ad · Front #2 David Ferrer’s second serve from the Ad court, hit wide and filmed from the front. His shoulders and trunk rotate together into a compact coil before uncoiling in a unified motion up through contact, with the chest finishing slightly turned toward the wide target.
3.1s
Second Serve · Deuce · Front #1 David Ferrer's second serve from the deuce court, filmed from a front court-level angle. At contact his racket face is slightly closed with the ball struck just above head height, and the upward swing path creates noticeable racket head acceleration through the hitting zone.
2.4s
Second Serve · Deuce · Front #1 David Ferrer's second serve from the deuce court, filmed from the front. After contact his weight transfers into the court and he quickly brings both hands back toward a compact ready position, preparing to react to the return.
3.2s
Second Serve · Deuce · Front #2 David Ferrer's second serve from the deuce side, filmed from the front. His shoulders rotate as a unit with the trunk during the toss and then uncoil together into contact, with the chest clearly opening toward the target as the kinetic chain unwinds.
3.1s
Second Serve · Deuce · Front #3 David Ferrer's second serve from the deuce court, filmed from the front. At contact his racket face is only slightly closed with the ball struck just above head height, and the upward swing path produces visible racket head acceleration through the hitting zone.
3s
Second Serve · Deuce · Toss · Front #1 David Ferrer's second serve from the deuce side, filmed from the front. His feet remain staggered in a platform stance as he bends deeply at the knees before driving up into the serve, with a small front-foot adjustment to maintain alignment toward the deuce court.
3.2s
Second Serve · Deuce · Toss · Front #2 David Ferrer's second serve from the deuce side, filmed from the front. His continental grip is firm with minimal grip change during the toss, and his wrist stays relaxed in a neutral position before pronating aggressively through contact.
2.9s
Second Serve · Ad · Rear #2 David Ferrer's second serve from the Ad court, filmed from a rear angle. From this view, his continental grip is steady with a relaxed hand, and you can see pronounced wrist pronation driving the racquet through the ball after contact.
3.2s
Second Serve · Ad · Toss · Rear #2 David Ferrer's second serve from the Ad court, filmed from a rear angle. His shoulders and trunk rotate together into a compact coil during the toss, then uncoil in a single continuous motion that links his hip turn to the upward swing.
2.7s
Second Serve Wide · Ad · Rear #2 David Ferrer’s second serve from the Ad court, hit wide and filmed from the rear. From this angle, you can clearly see his continental grip stay firm while his wrist pronates aggressively through contact to direct the serve out wide.
3.5s
Second Serve · Deuce · Arm-action · Rear #2 David Ferrer's second serve from the deuce court, filmed from a rear angle. After contact his arm action continues fully across his body while his weight transfers into the court, finishing in a compact, ready position with both hands quickly returning toward the racquet.
3s
Second Serve · Deuce · Body-rotation · Rear #2 David Ferrer's second serve from the deuce court, filmed from a rear angle. At contact his racket face is slightly closed with the ball struck just above head height, and the upward swing path creates noticeable racket head acceleration through the hitting zone.
3.1s
Second Serve · Deuce · Rear #2 David Ferrer's second serve from the deuce court, filmed from a rear angle. After contact he lands well inside the court with his weight driving forward, and his non-hitting arm tucks in as he quickly recovers toward a compact ready position on the baseline.
3.2s
Second Serve · Deuce · Toss · Rear #2 David Ferrer's second serve from the deuce side, filmed from a rear angle. After contact he lets his tossing arm drop naturally while his weight moves into the court, quickly bringing both hands back to the ready position for the next shot.
3.2s
Second Serve Wide · Deuce · Rear #2 David Ferrer's second serve from the deuce court, hit wide and filmed from the rear. After contact he lands on his front (left) foot and quickly lets his tossing arm drop into a balanced position as he recovers toward the center to prepare for the next shot.
2.9s
Second Serve · Ad · Arm-action · Side #1 David Ferrer's second serve from the Ad court, filmed from the side. His deep knee bend and strong leg drive upward are clearly visible, with his hips extending fully as he pushes off the ground into the serve.
3.1s
Second Serve · Ad · Arm-action · Side #2 David Ferrer's second serve from the Ad side, filmed from a side angle. His stance remains stable with a pronounced knee bend, and from this view you can see his weight driving up through his legs into the trophy position before he lands slightly inside the baseline for recovery.
3s
Second Serve · Ad · Side #1 David Ferrer's second serve from the Ad side, filmed from the side. After contact he drives his weight into the court and quickly brings his non-hitting hand back to the ready position as he completes his follow-through.
3.1s
Second Serve · Ad · Side #2 David Ferrer's second serve from the Ad side, filmed from the side. His deep knee bend and strong upward leg drive into the court are clearly visible as his hips uncoil toward the target.
2.9s
Second Serve · Ad · Side #3 David Ferrer's second serve from the Ad side, filmed from the side. His shoulders and trunk coil noticeably away from the court during the trophy phase, then uncoil in a tightly sequenced motion that brings the hitting shoulder up and through the ball before the torso fully squares to the net.
3s
Second Serve · Ad · Toss · Side #1 David Ferrer's second serve from the Ad court, filmed from the side. From this angle, you can see his continental grip stay firm while his wrist pronates aggressively through contact to add spin and control.
2.9s
Second Serve · Ad · Toss · Side #2 David Ferrer's second serve from the Ad court, filmed from the side. The racket contacts the ball just above head height with a slightly closed face, and you can see a pronounced upward swing path that accelerates the racket head through the ball.
3s
Second Serve · Deuce · Arm-action · Side #1 David Ferrer's second serve from the deuce court, filmed from the side. After contact he lets his hitting arm decelerate across his body while his back leg swings forward into the court, bringing him smoothly into a balanced ready position.
2.9s
Second Serve · Deuce · Arm-action · Side #2 David Ferrer's second serve from the deuce side, filmed from a side angle. His knees load deeply before leg drive, with the hips staying closed toward the baseline during the toss and then uncoiling upward into contact.
2.9s
Second Serve · Deuce · Body-rotation · Side #1 David Ferrer's second serve from the deuce side, filmed from a side angle. His continental grip stays firm with a relaxed wrist that pronates aggressively through contact, creating a pronounced wrist snap after impact.
2.9s
Second Serve · Deuce · Body-rotation · Side #2 David Ferrer's second serve from the deuce side, filmed from the side. His deep knee bend and strong leg drive into the court are clearly visible as his hips rotate from a closed position in the trophy phase to a more open position at contact.
3.1s
Second Serve · Deuce · Side #1 David Ferrer's second serve from the deuce side, filmed from the side. He uses a rhythmic, compact service motion with a controlled knee bend and an abbreviated leg drive that keeps his stance stable through the toss and contact.
3s
Second Serve · Deuce · Side #2 David Ferrer's second serve from the deuce side, filmed from the side. At contact his racket face is slightly closed with the ball struck just above head height, and the upward swing path creates a noticeable brushing action up the back of the ball.
3s
Second Serve · Deuce · Side #3 David Ferrer's second serve from the deuce side, filmed from the side. His feet stay staggered in a platform stance through the toss, with a pronounced knee bend and upward drive off the back leg into the court.
3.1s
Second Serve · Deuce · Toss · Side #2 David Ferrer's second serve from the deuce side, filmed from the side. His shoulders rotate well past perpendicular to the baseline during the toss, creating a pronounced trunk coil that then uncoils sequentially from hips to shoulders into the contact.
2.9s
BH Slice Short · Court-level-front #1 David Ferrer’s backhand slice from the deuce side, filmed from a court-level front angle. He plants his outside foot first into a neutral stance, then uses small adjustment steps with a low, stable base to move into and through the ball.
5.4s
BH Slice Short · Court-level-front #2 David Ferrer’s backhand slice from the short court, filmed from a front court-level angle. His compact split step into a slightly open stance leads into a controlled forward weight transfer, with a small recovery adjustment of his right foot immediately after contact.
5.6s
BH Slice Wide · Court-level-front David Ferrer’s backhand slice from a wide position, filmed from a court_level front angle. From this angle you can see his continental grip stay firm with minimal grip change as the wrist remains stable and slightly laid back through contact to keep the slice low.
2.8s
FH Slice Wide · Court-level-front David Ferrer's forehand slice from a wide position, filmed from a court-level front angle. His hips stay relatively closed while his knees flex deeply, with the outside leg bracing and the inside leg stepping through to stabilize the low, skidding slice.
2.7s
BH Slice Center · Front David Ferrer’s backhand slice from the center of the court, filmed from the front. His racket face is noticeably open at contact with the ball struck around waist height, and the racket moves on a distinct high-to-low path creating pronounced backspin.
3s
BH Slice Running · Front David Ferrer’s running backhand slice from the front, filmed from a front angle. After contact his racquet finishes out in front as he continues moving through the shot, with his non-hitting hand helping him quickly regain a compact ready position.
2.9s
BH Slice Wide · Front David Ferrer’s backhand slice from a wide position, filmed from the front. His continental grip is firm with a slightly laid-back wrist, and you can clearly see the stable wrist angle maintained through contact without any late wrist snap.
2.6s
FH Slice Wide · Rear David Ferrer's forehand slice from a wide position, filmed from a rear angle. His continental grip is clearly visible, with a firm but relaxed wrist that stays stable through contact rather than snapping or pronating.
3.4s
BH Slice Center · Side David Ferrer's backhand slice from the center of the court, filmed from the side. After contact his racket finishes out in front as his weight continues moving slightly forward, and he quickly brings both hands back toward his torso to reset into a compact ready position.
3.4s
BH Slice Running · Side David Ferrer’s running backhand slice from a neutral court position, filmed from the side. His shoulders stay markedly closed relative to the net through contact while the trunk uncoils late, making the upper-body rotation lag behind the initial leg drive in the kinetic chain.
2.9s
BH Slice Short · Side #1 David Ferrer’s backhand slice from the deuce side, filmed from the side. His shoulders rotate early with a pronounced upper-body tilt, and the trunk stays relatively closed through contact before uncoiling minimally into the follow-through.
3.1s
BH Slice Short · Side #2 David Ferrer’s backhand slice from the deuce court, filmed from the side. After contact his racquet finishes slightly in front as his weight moves forward, and he quickly brings both hands toward his body to reset into a compact ready position.
2.2s
BH Slice Wide · Side #1 David Ferrer's wide backhand slice from the deuce side, filmed from the side. The racket face is noticeably open at contact with the ball struck slightly below waist height, and the racket travels on a pronounced high-to-low path through the hitting zone.
3.2s
BH Slice Wide · Side #2 David Ferrer's wide backhand slice from the deuce side, filmed from a side angle. His deep knee bend and strong rear-leg drive into the court are clearly visible as he stays low through contact to control the wide reach.
2.5s
BH Slice Wide · Side #3 David Ferrer’s backhand slice from the deuce court, filmed from the side. His hips stay relatively closed to the net while his knees flex deeply, showing a pronounced lateral push off the outside leg to reach the wide ball before carving the slice.
3.1s
FH Slice Running · Side #1 David Ferrer’s running forehand slice from the deuce side, filmed from the side. After contact his racket finishes out in front as he stays low through the shot, then he quickly brings both hands back toward his body while pushing off his outside leg to recover toward a neutral ready position.
3.8s
FH Slice Running · Side #2 David Ferrer's running forehand slice from the deuce side, filmed from the side. His shoulders stay relatively closed to the net while the trunk subtly uncoils through contact, with the non-dominant arm counterbalancing to control the degree of upper-body rotation during the stretch.
3.9s
FH Slice Wide · Side #1 David Ferrer's forehand slice from a wide position, filmed from the side. The racket face is noticeably open at contact with the ball struck around waist height, and the racket travels on a distinctly downward, chopping path through impact.
3.2s
FH Slice Wide · Side #2 David Ferrer’s forehand slice from a wide position, filmed from the side. His footwork features a quick adjustment step into a semi-open stance, with a small hop after contact to recover his balance and prepare for the next movement.
4.5s