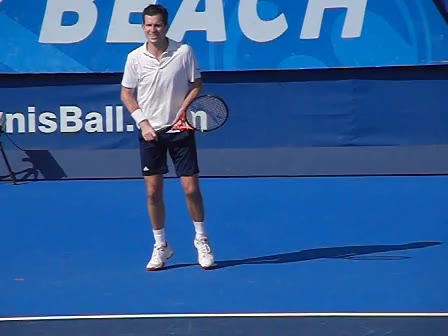
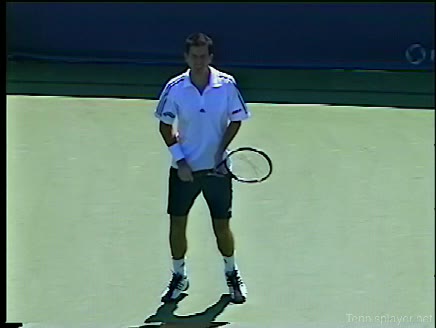
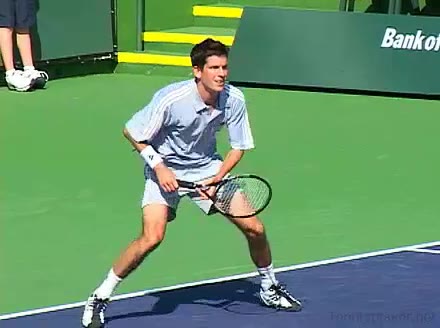
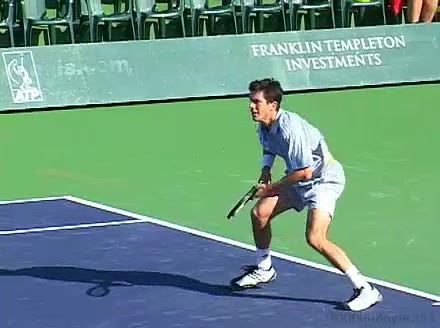
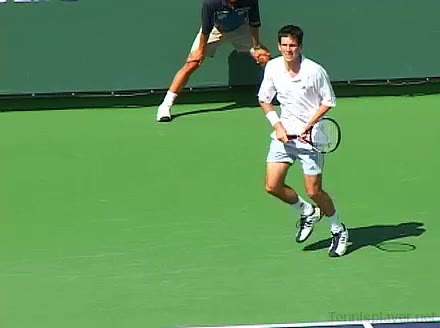
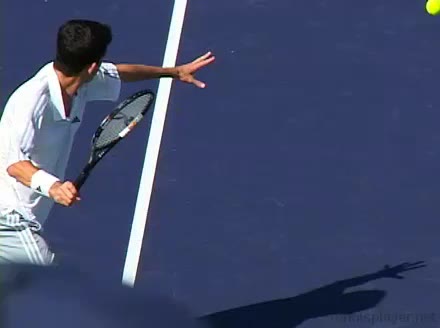
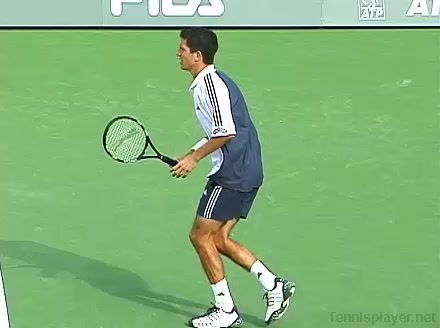
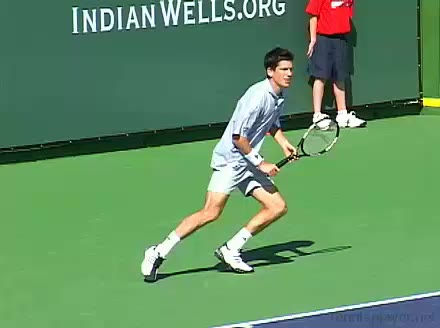
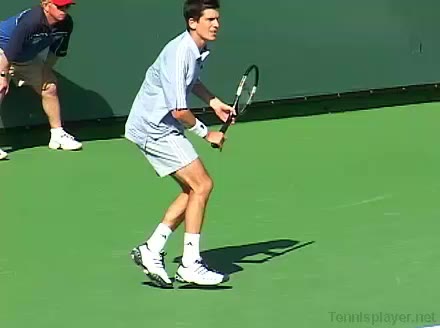
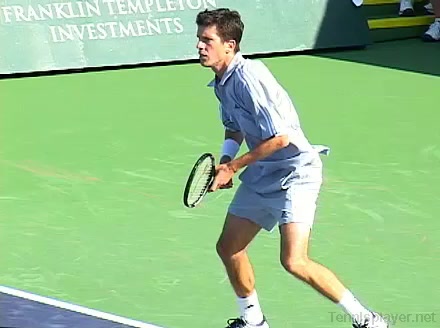
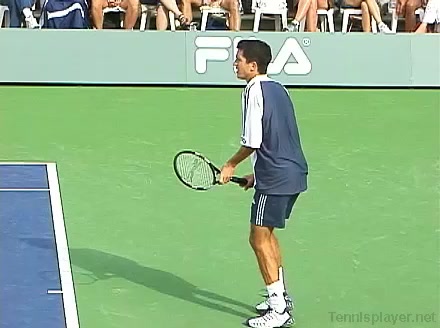
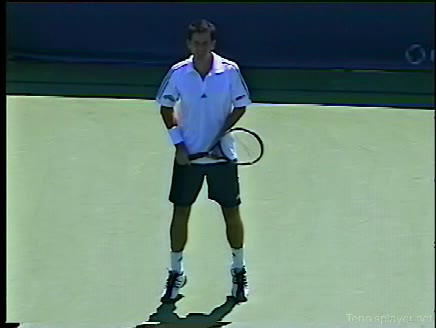
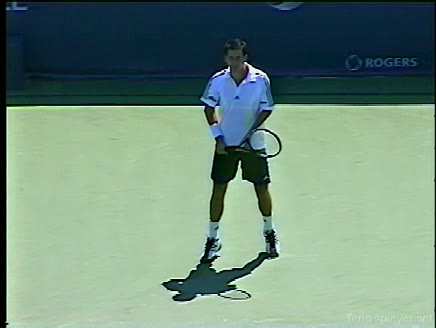
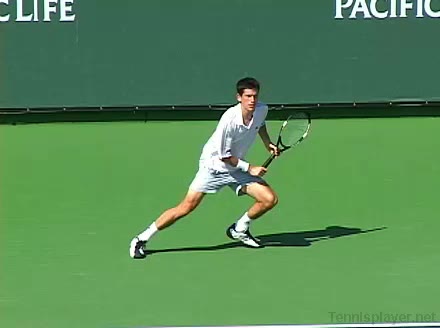
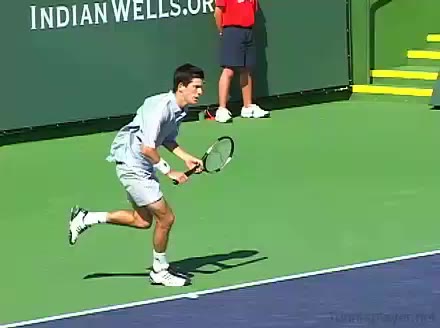
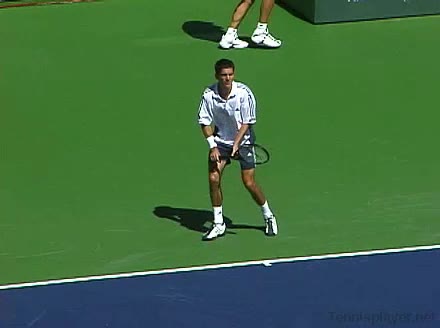
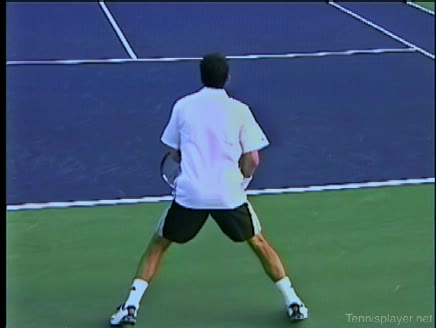
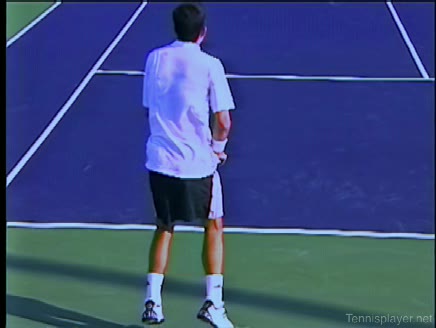
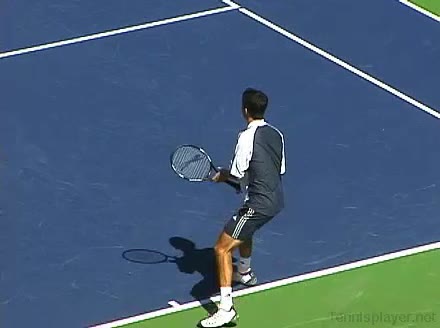
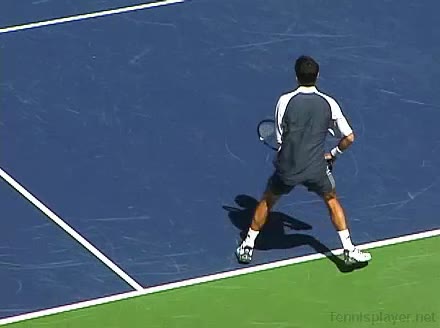
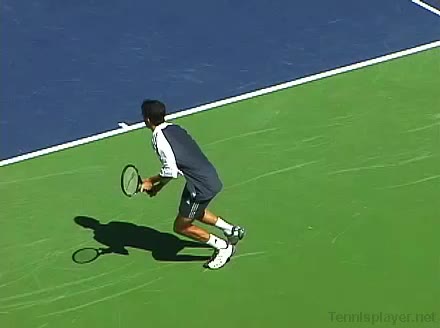
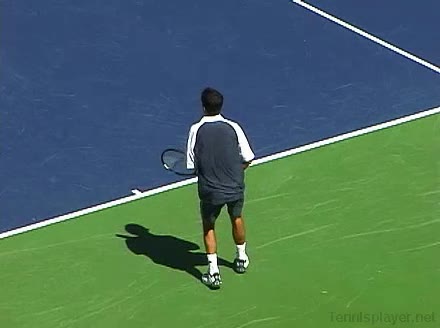
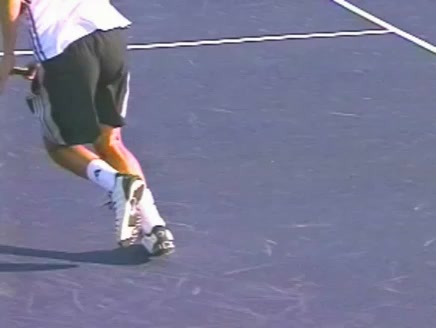
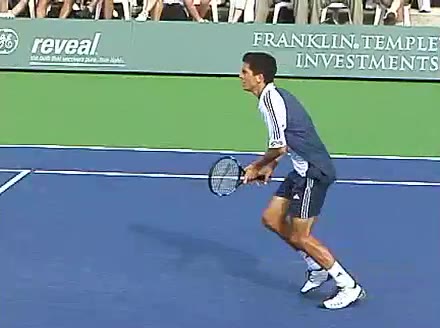
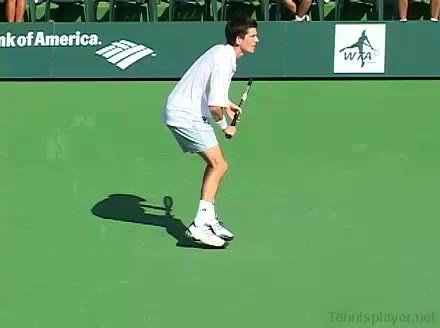
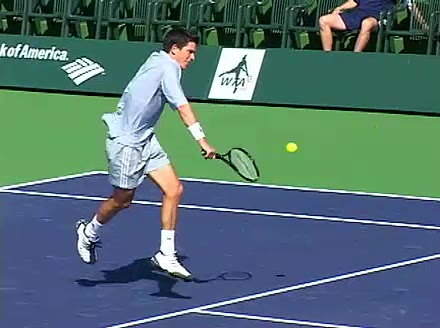
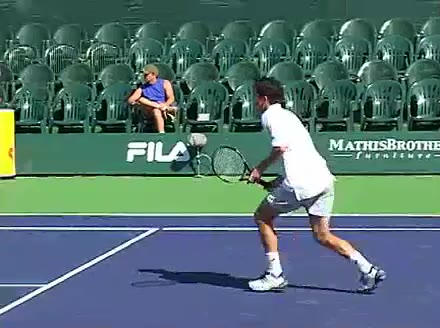
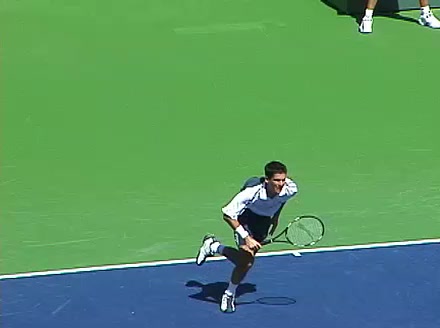
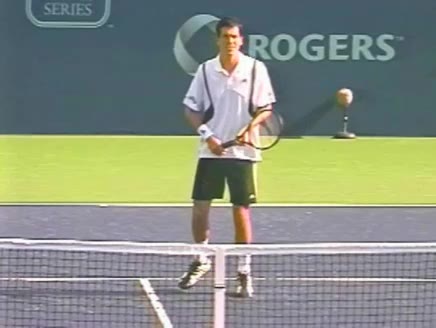
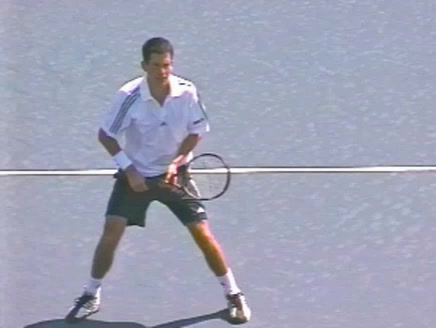
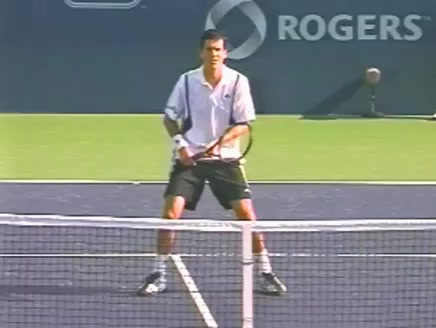
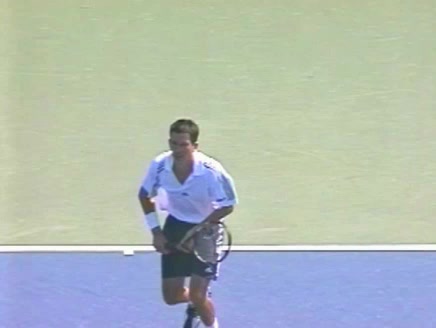
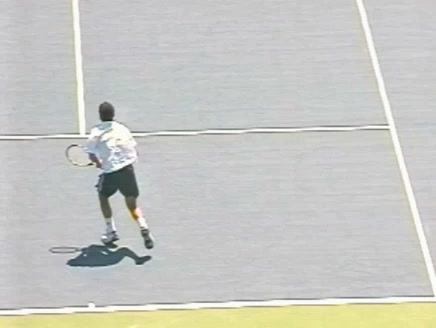
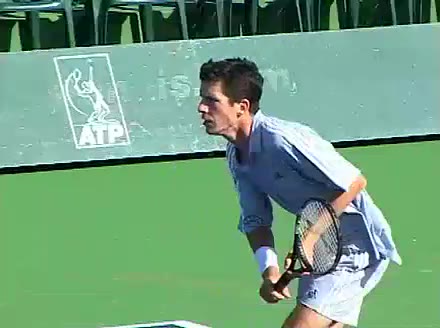
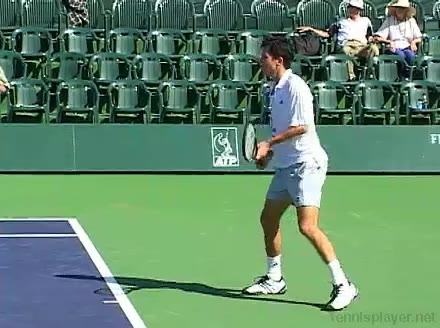
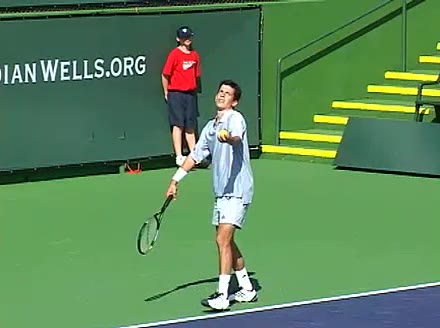
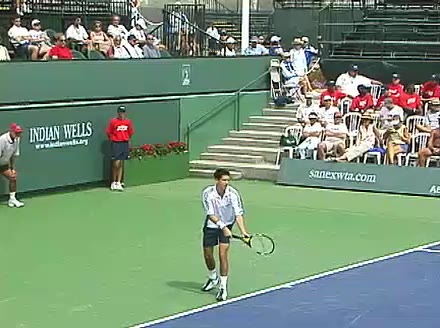
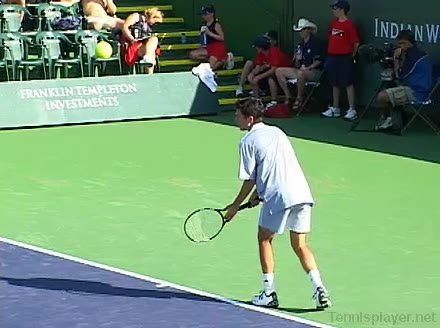
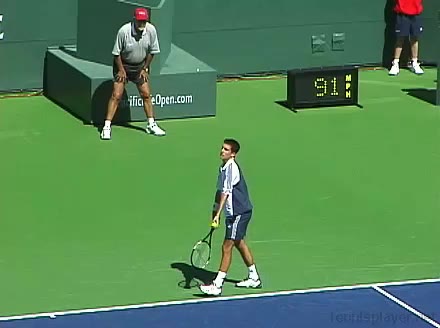
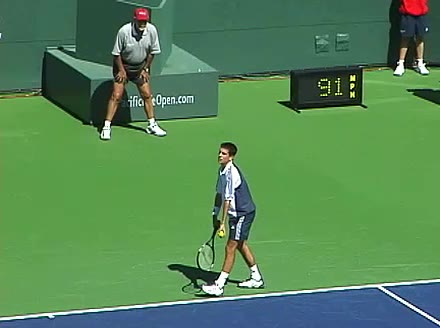
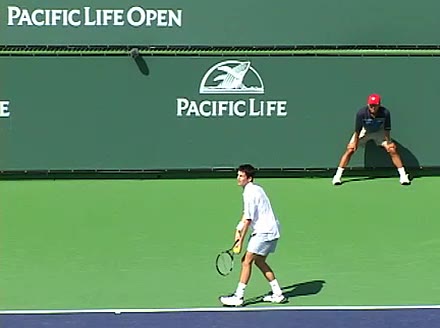
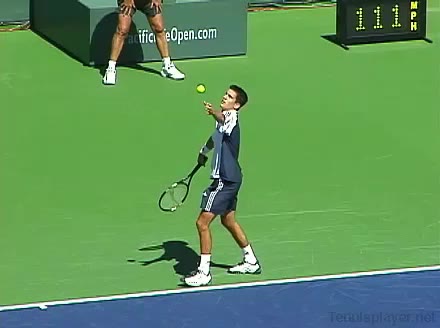
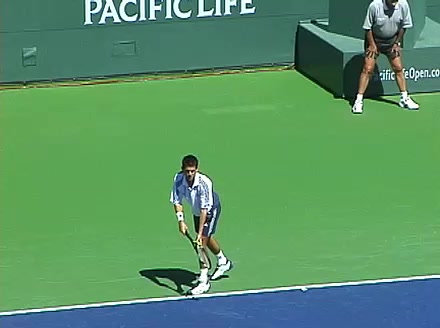
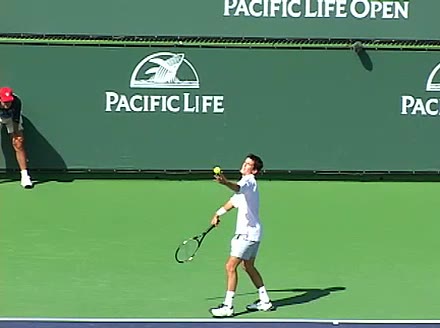
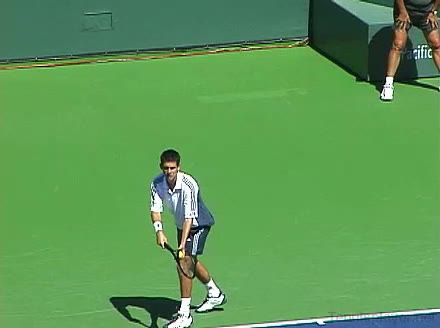
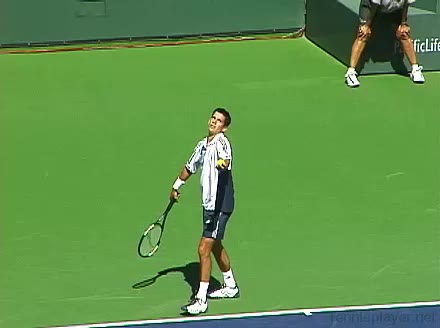
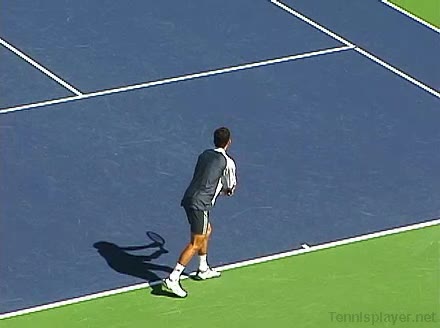
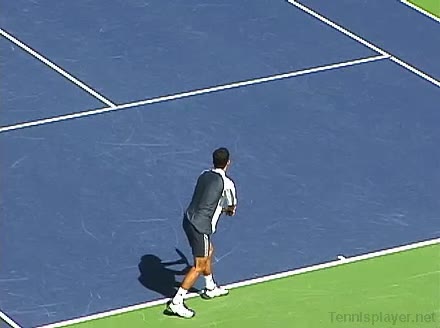
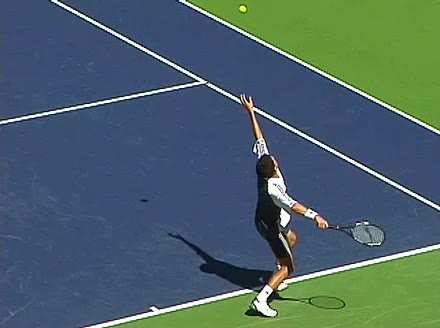
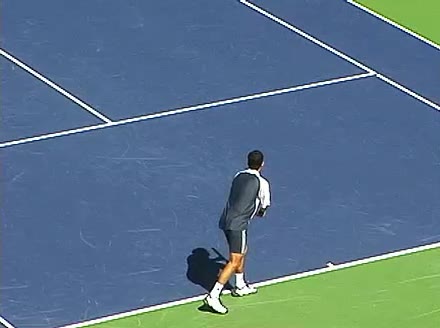
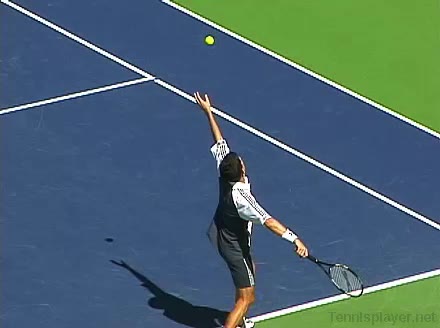
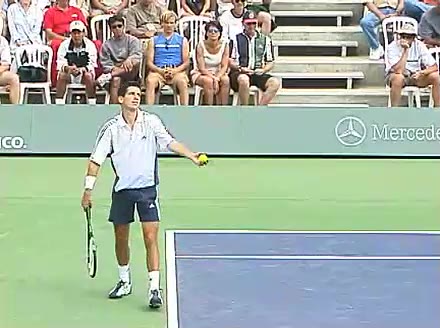
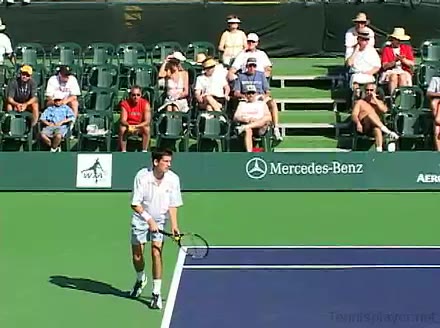
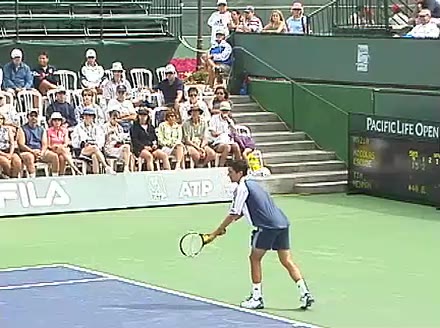
Henman
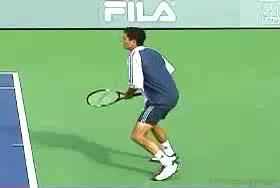
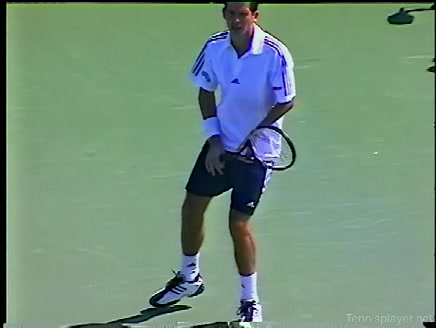
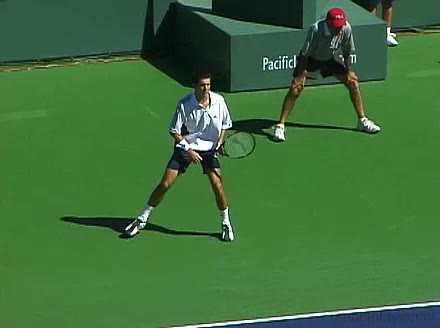
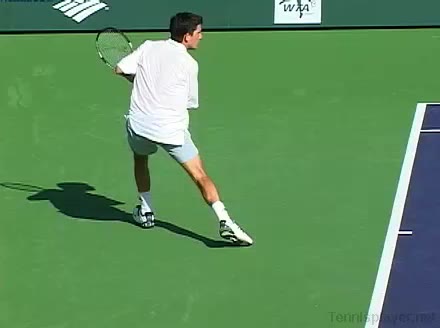
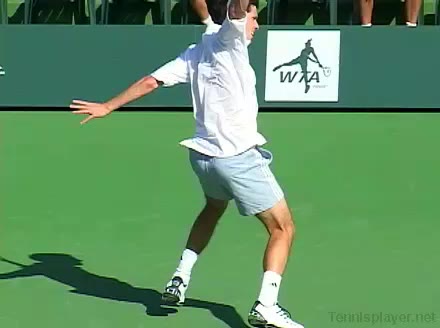
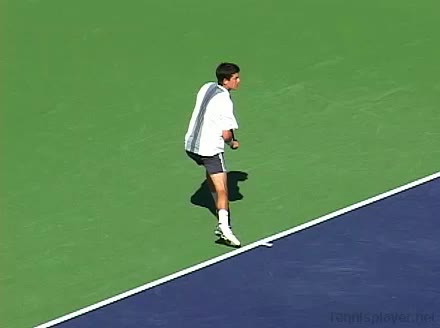
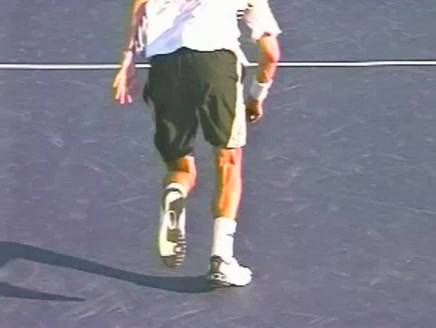
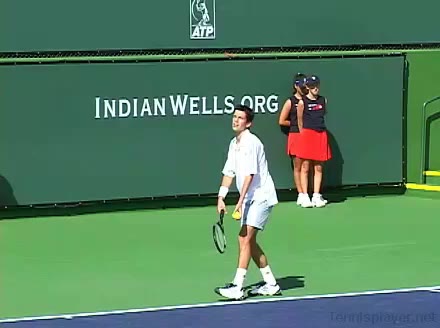
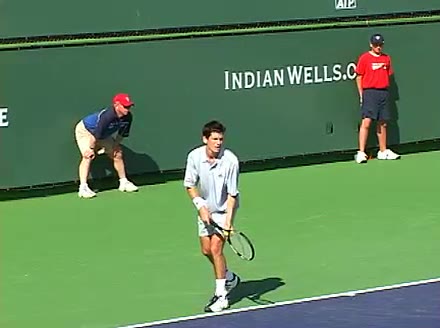
Henman's forehand from the Deuce side, filmed from CourtLevel. His hips stay relatively closed through the loading phase with a deep knee bend, then unwind as his legs drive up and into the court.
|
|
|
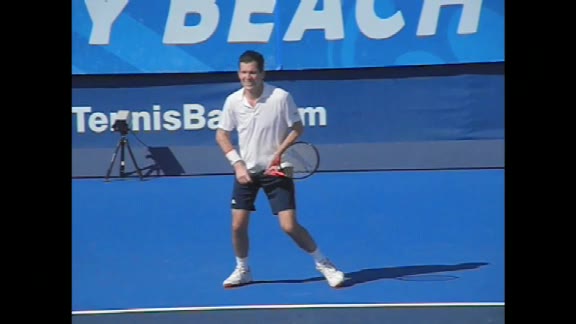
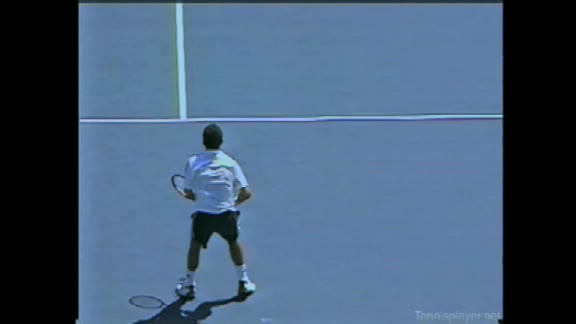
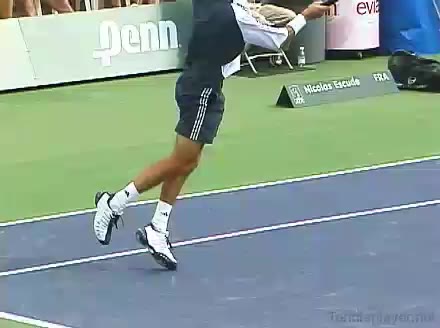
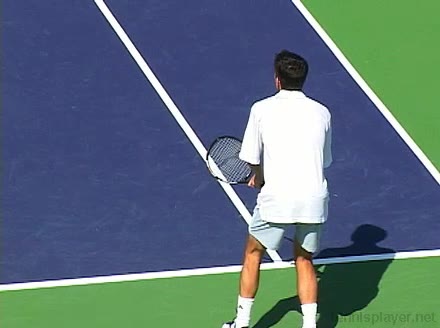
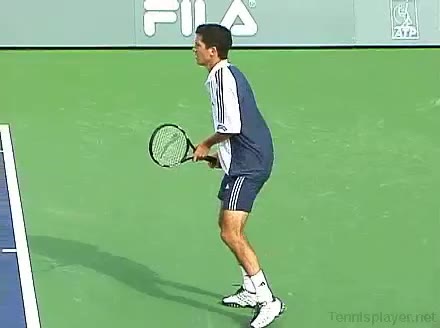
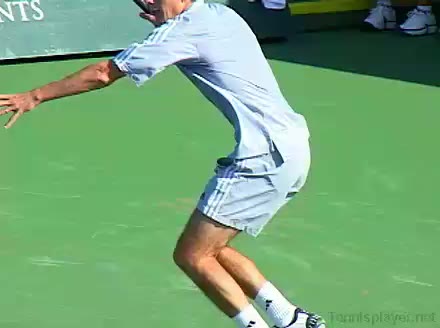
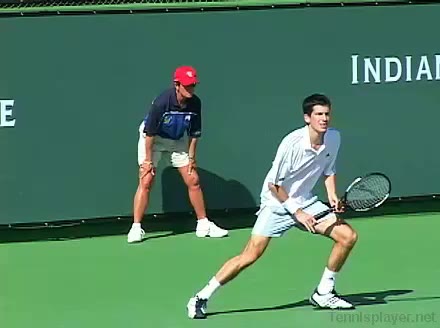
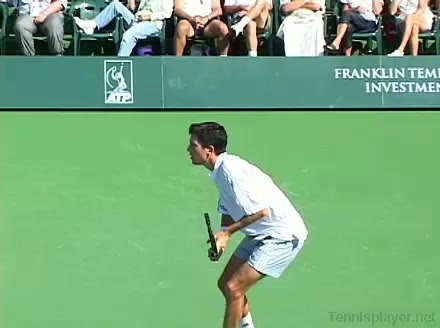
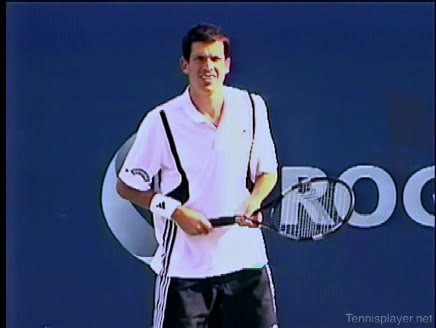
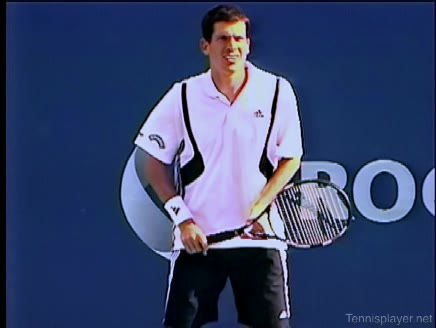
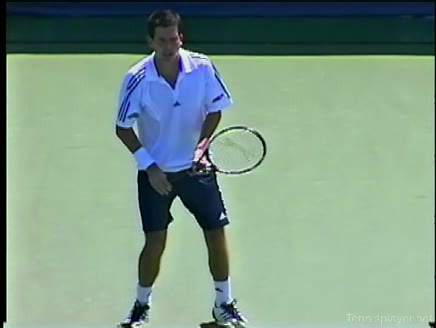
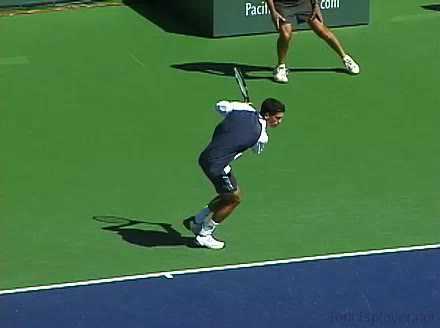
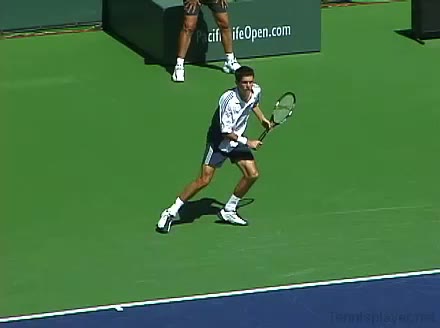
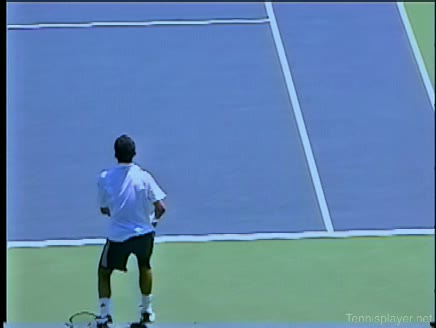
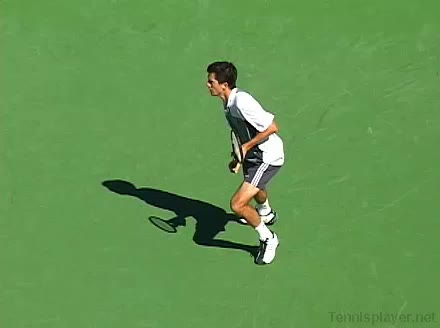
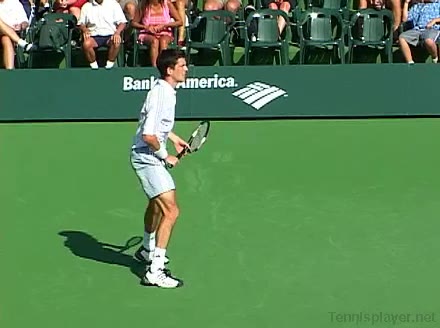
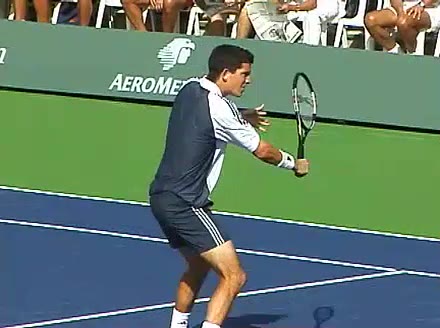
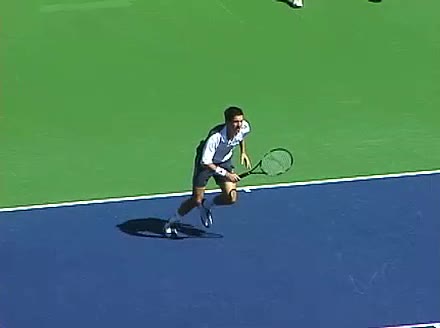
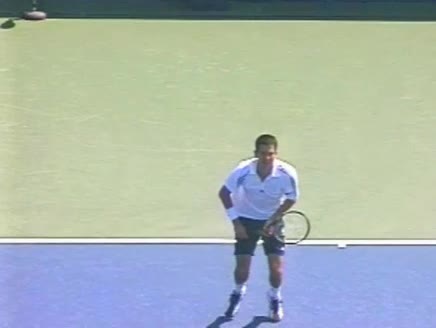
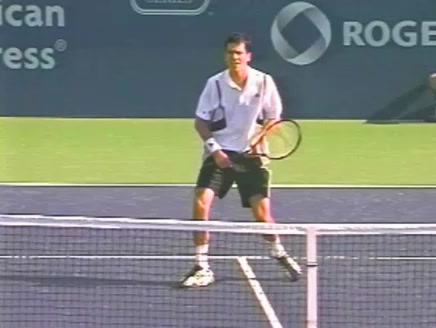
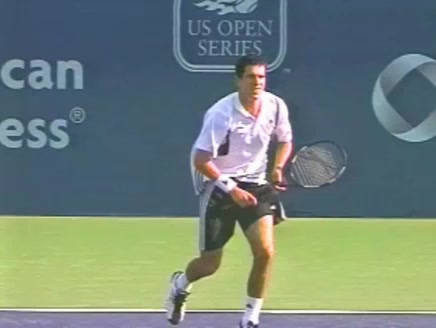
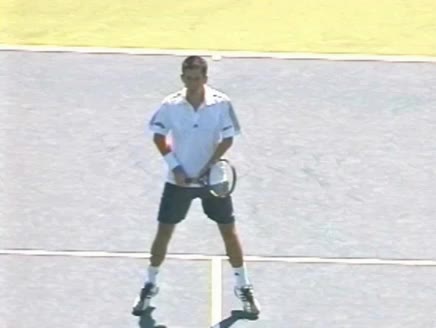
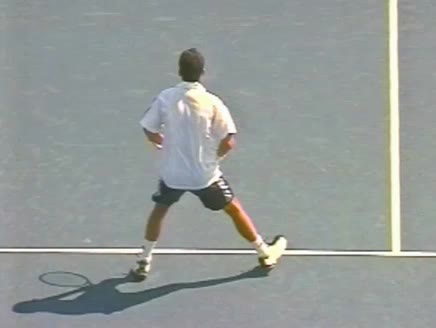
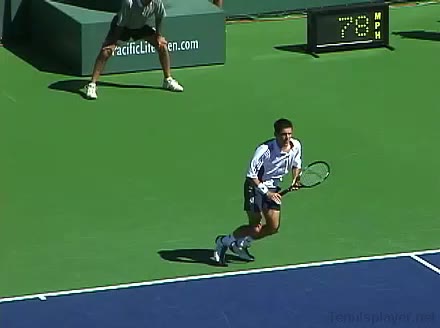
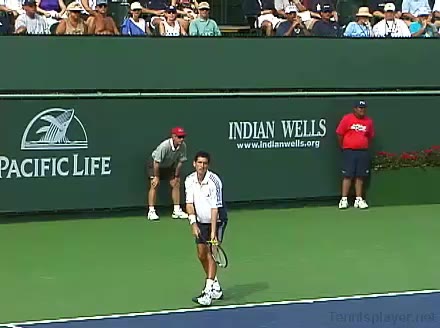
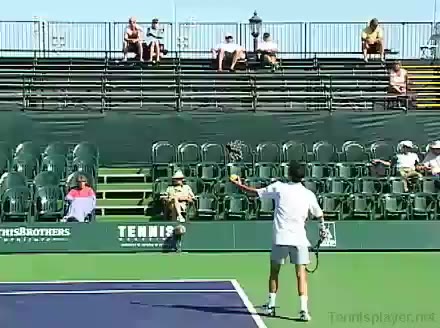
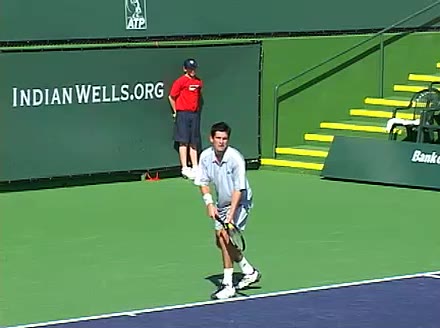
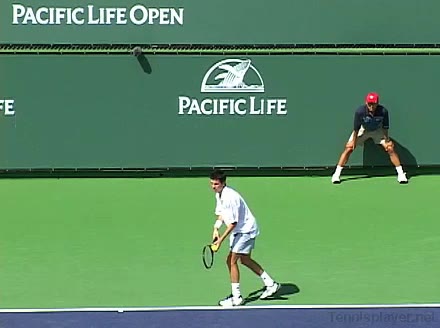
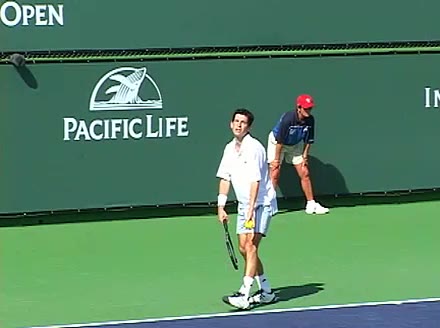
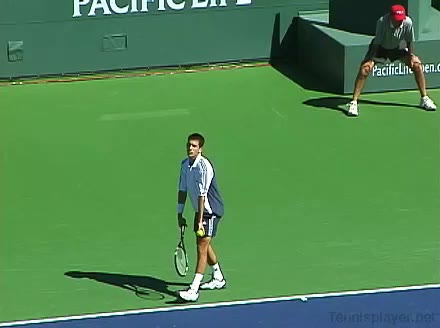
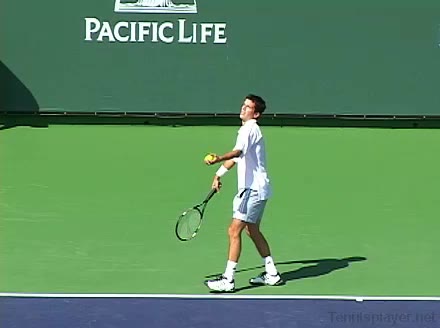
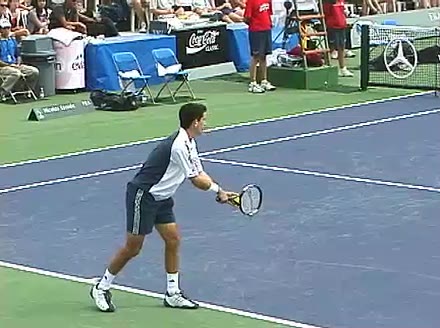
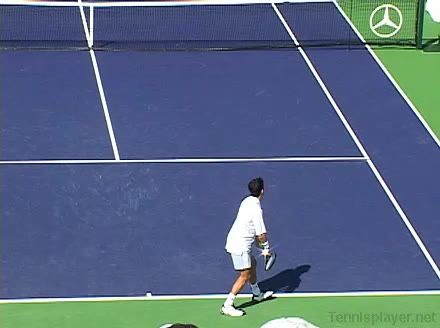
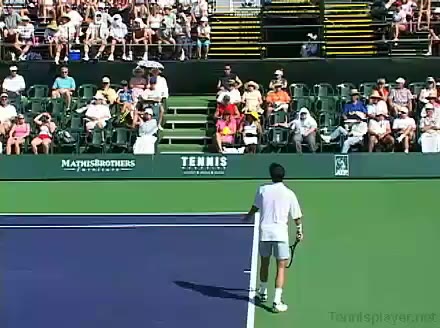
Henman Step It Up #6
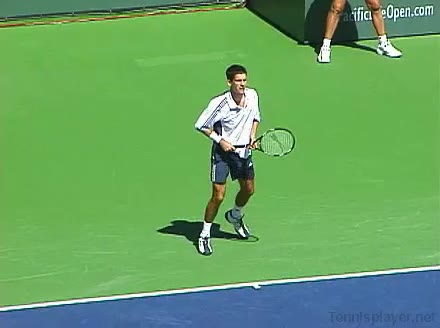
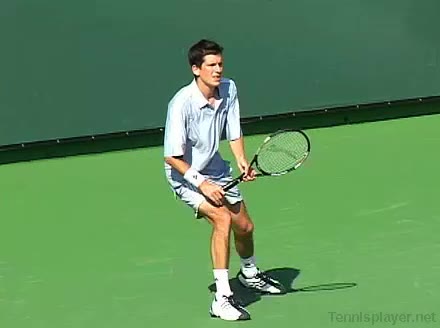
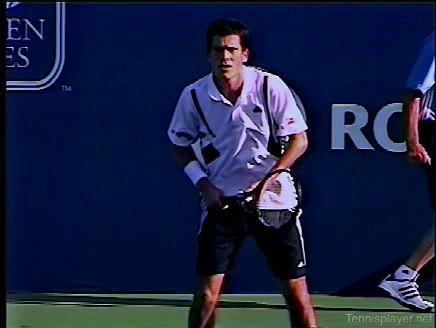
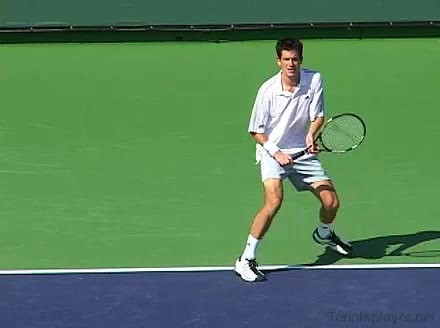
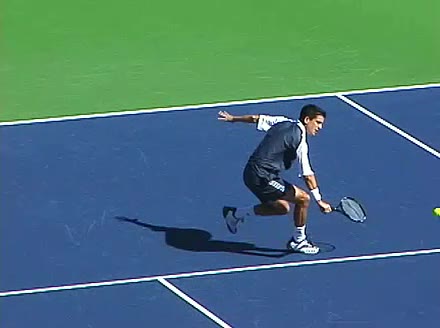
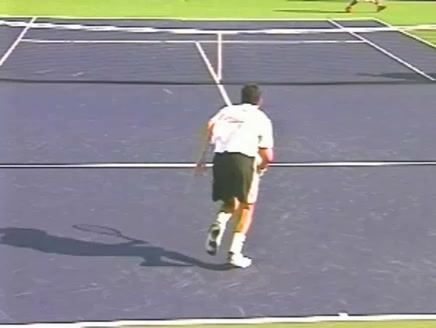
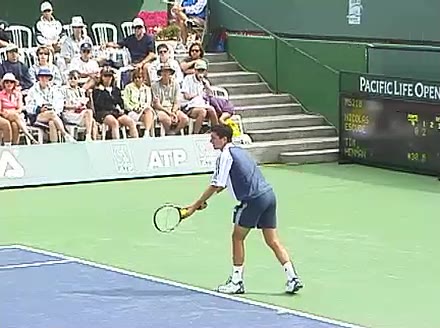
Tim Henman's mental game discussion from a neutral seated position, filmed from a front angle. His relaxed hip posture and grounded leg position emphasize a stable, composed base while talking about handling positive momentum.
|
|
5.7s |
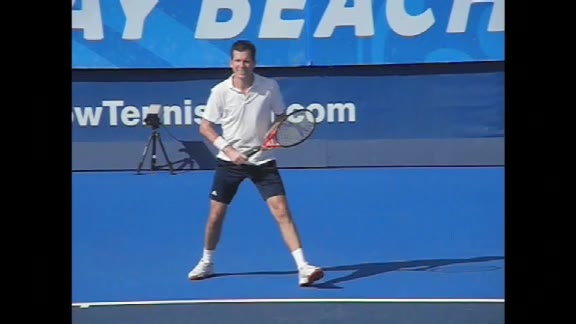
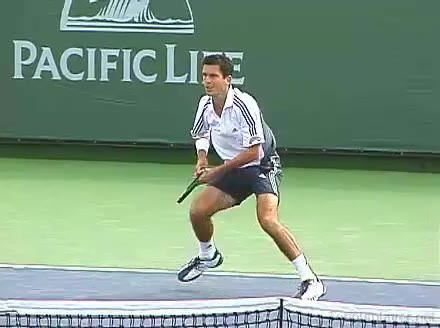
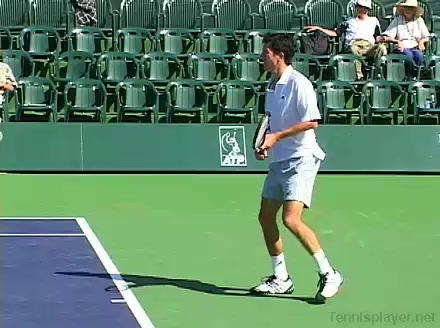
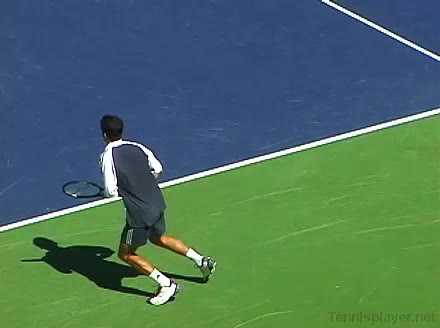
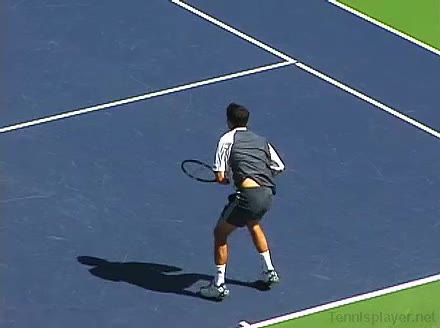
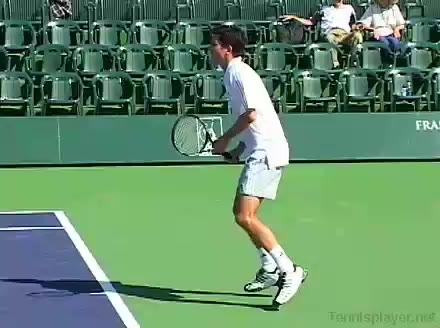
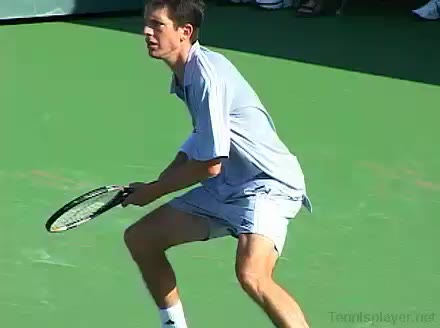
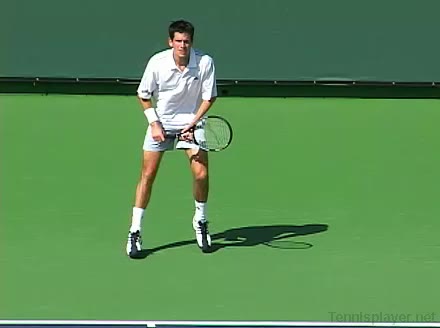
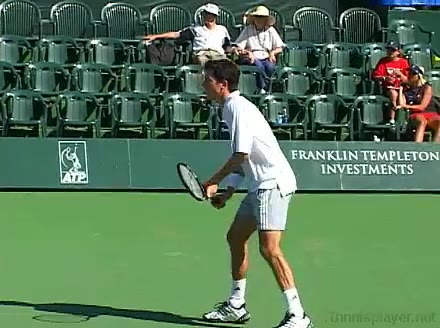
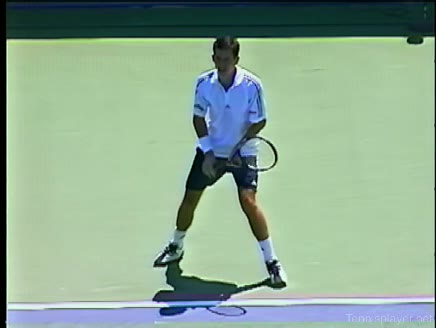
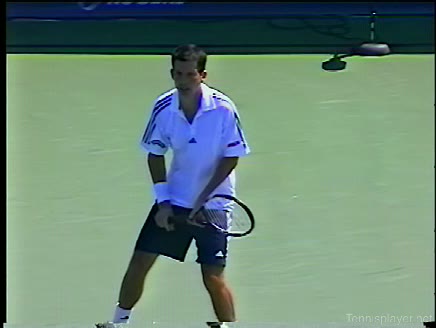
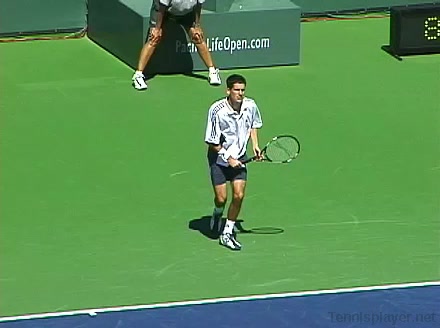
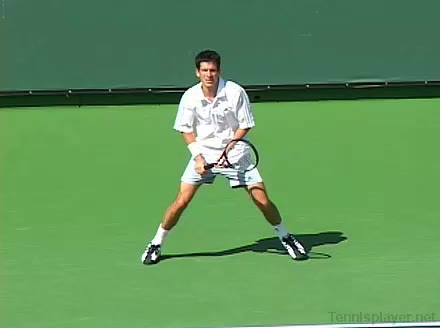
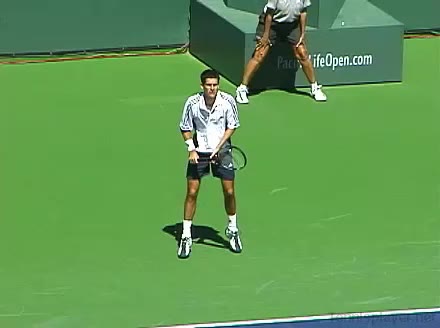
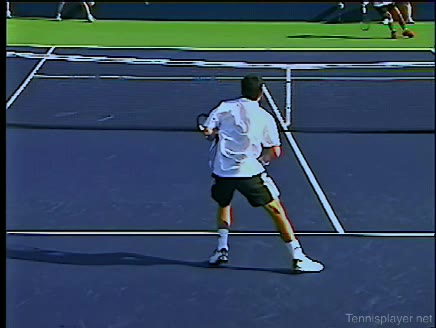
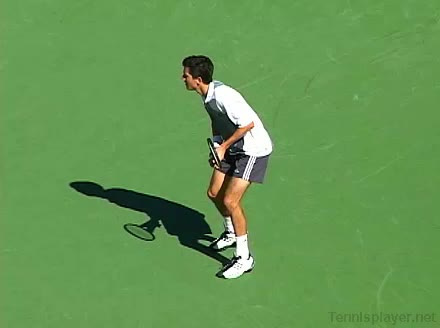
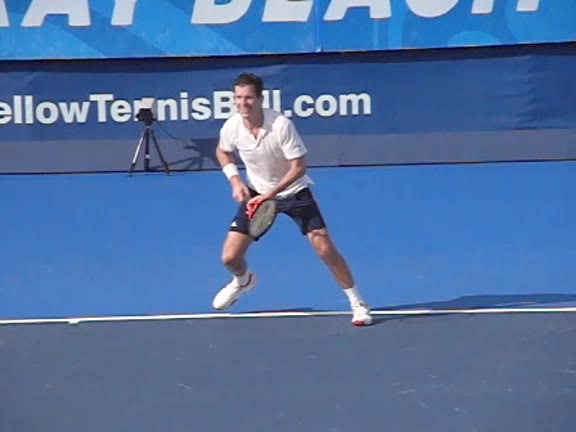
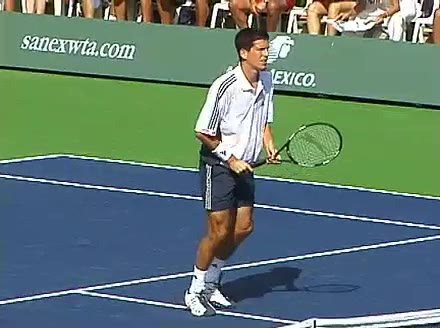
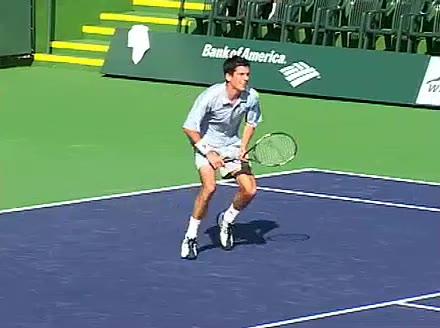
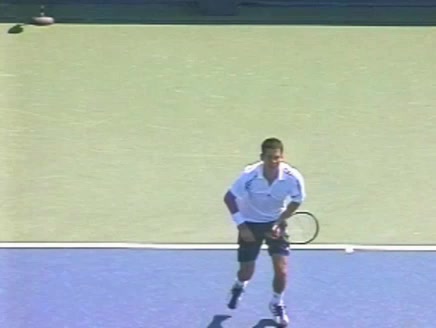
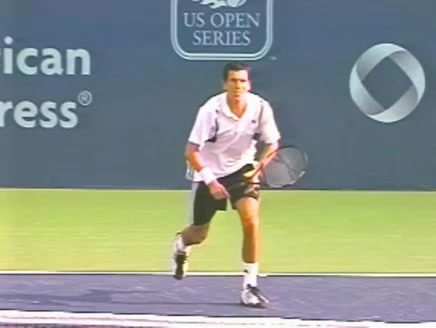
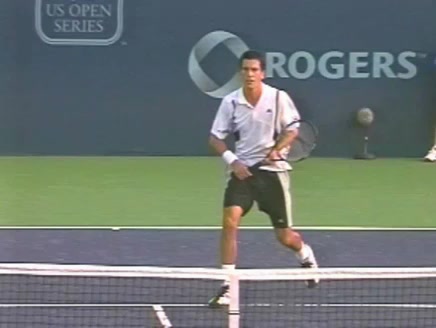
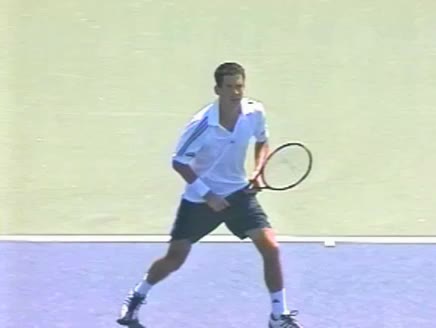
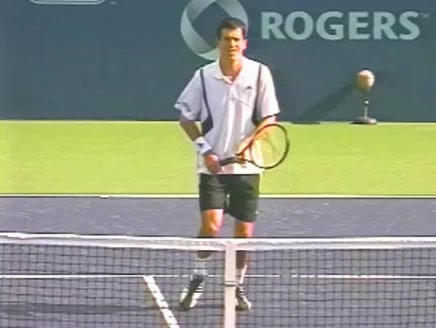
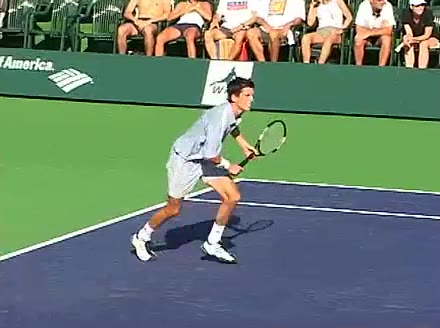
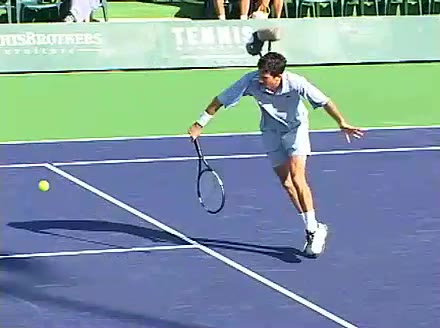
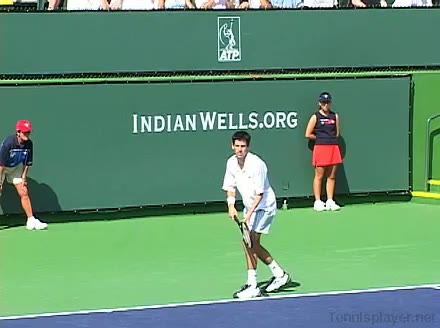
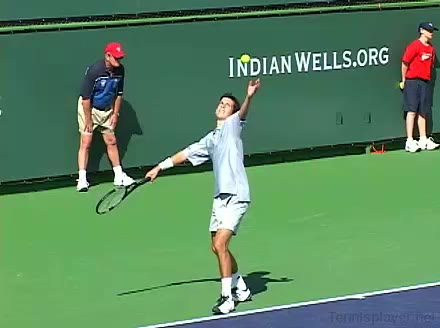
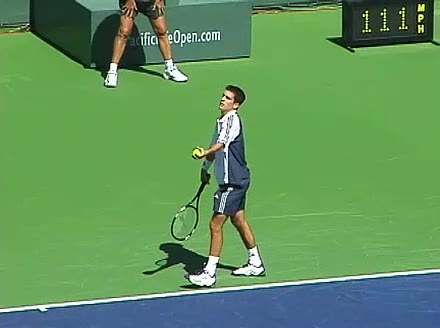
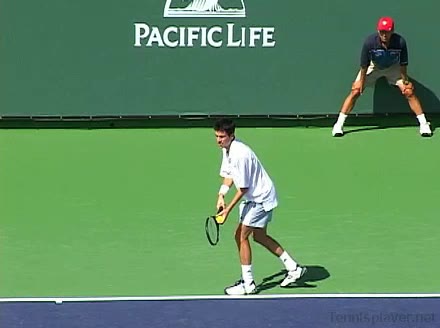
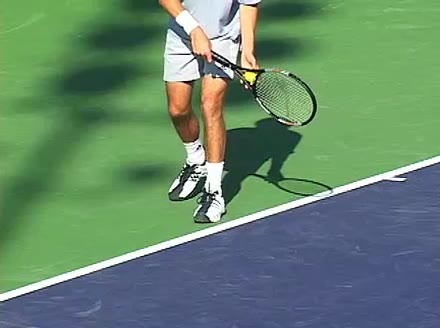
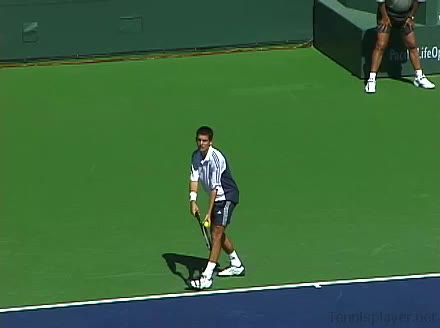
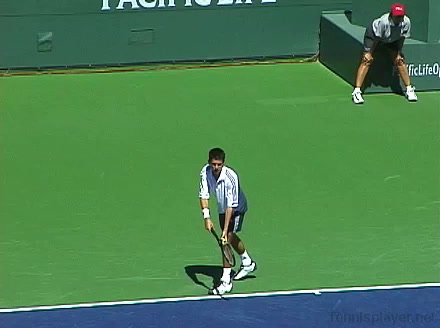
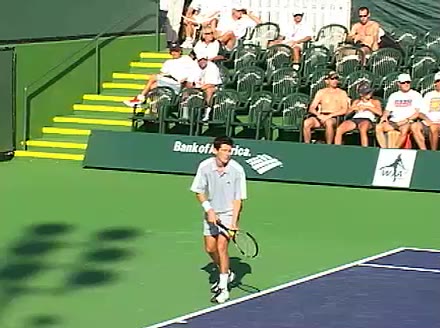
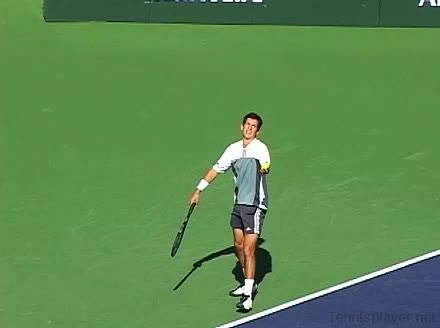
Picture Joint Items #2
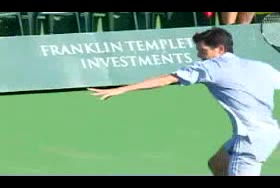
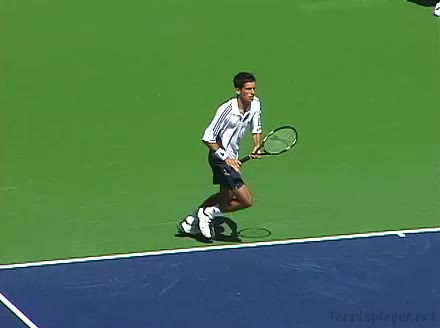
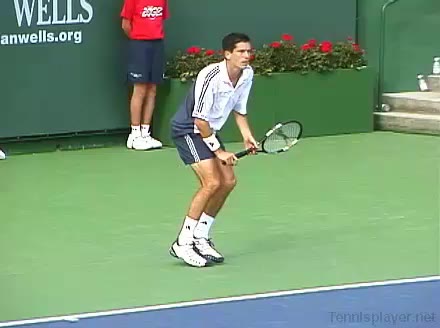
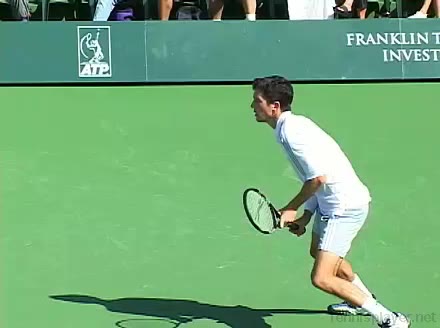
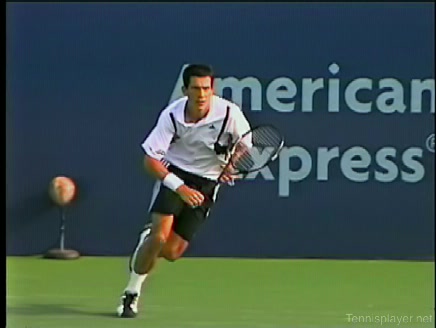
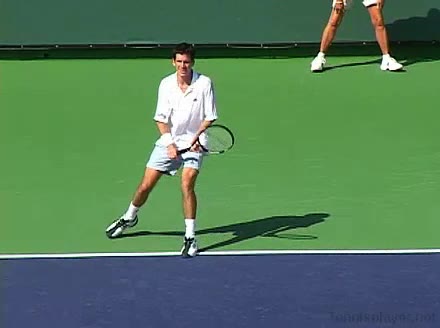
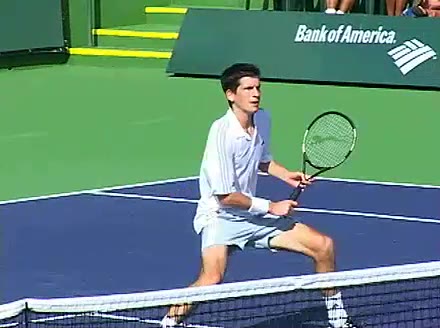
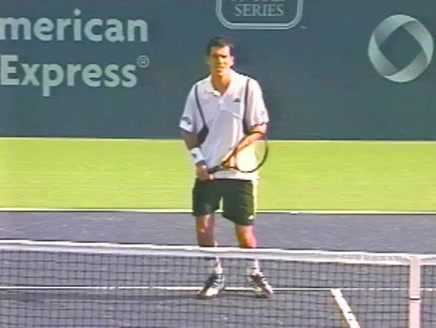
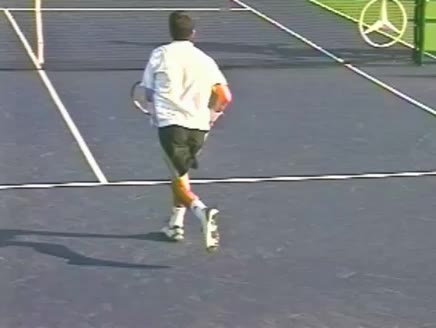
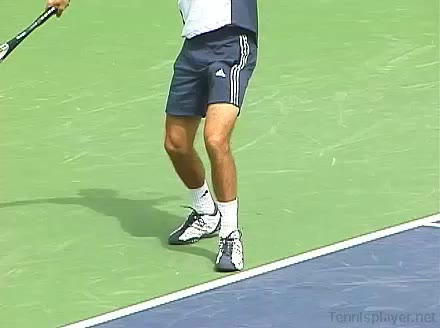
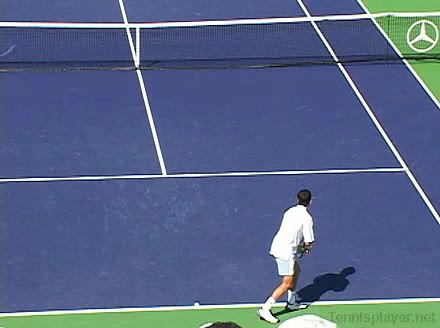
Tim Henman’s movement at the net from a central court position, filmed from a side angle. His quick split step just before the opponent strikes and the small adjustment steps into a neutral stance before each volley exchange are clearly visible from this view.
|
|
3s |
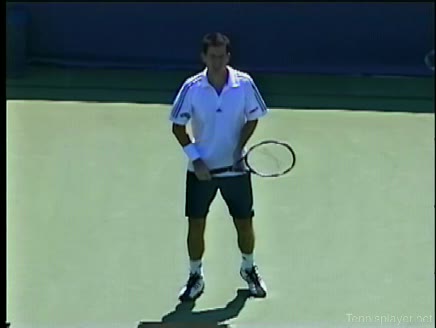
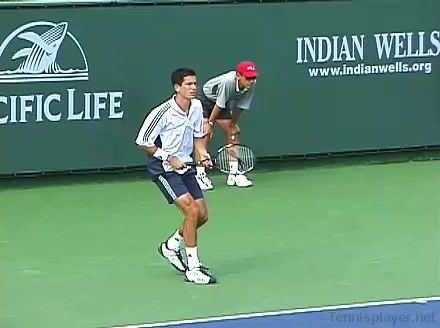
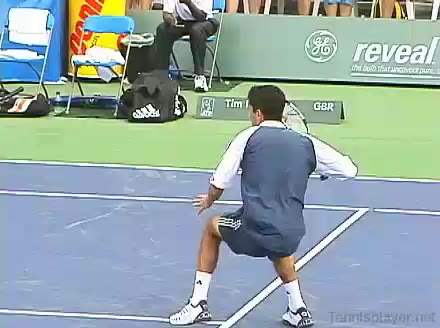
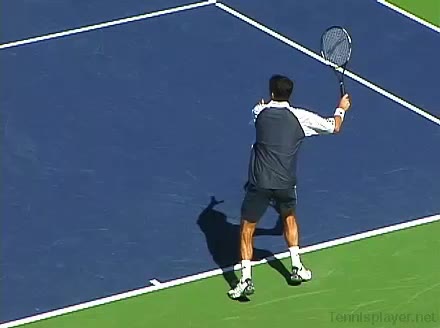
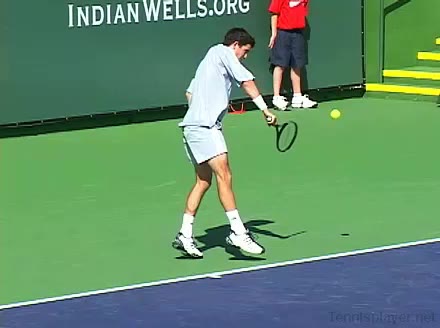
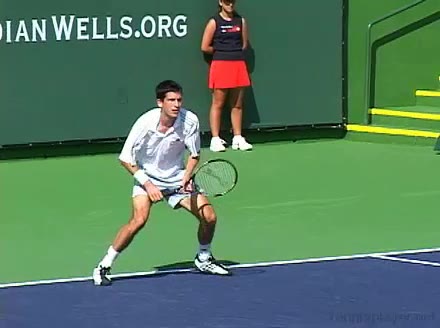
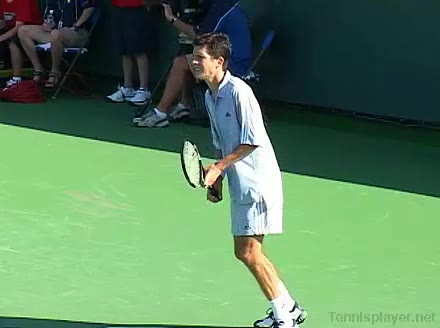
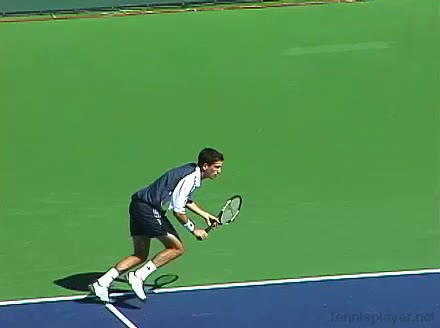
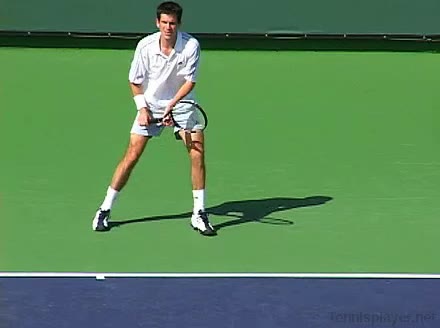
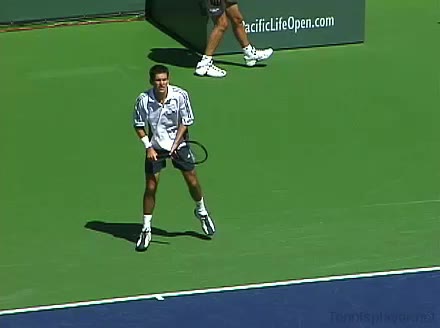
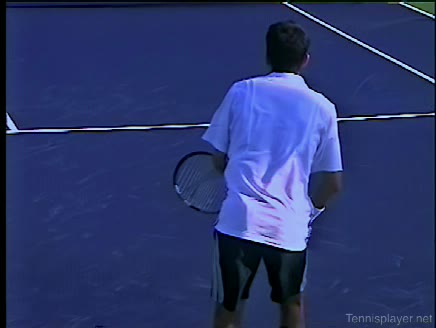
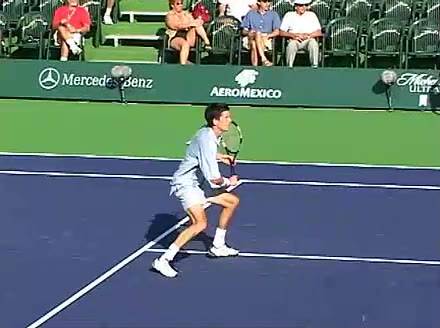
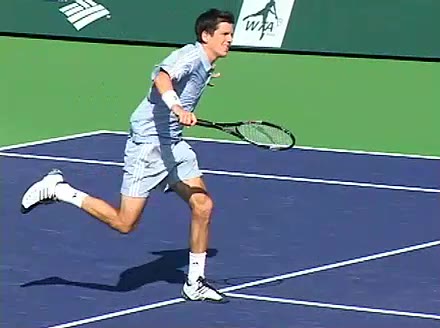
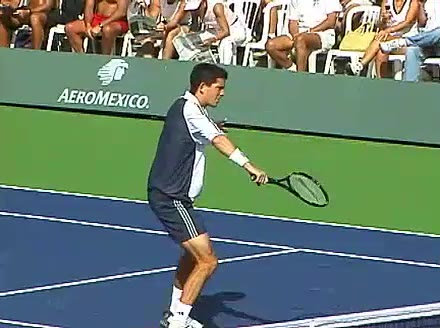
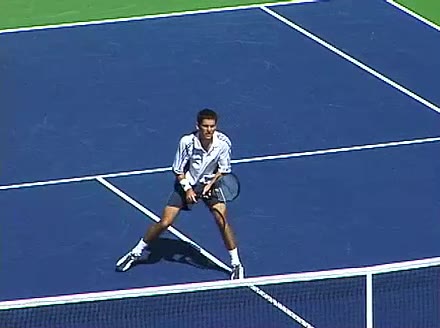
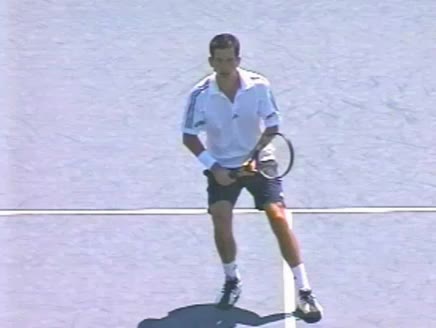
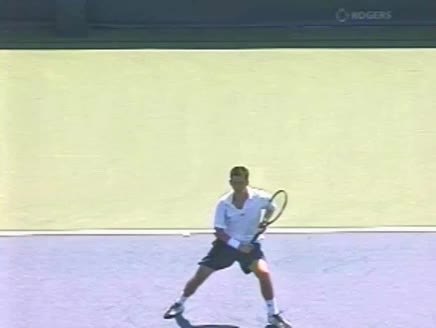
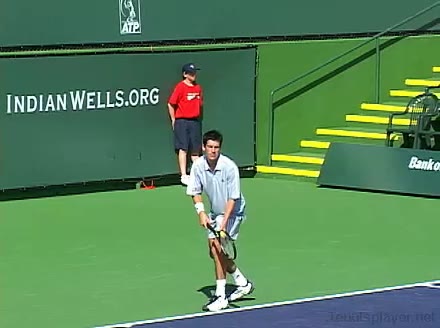
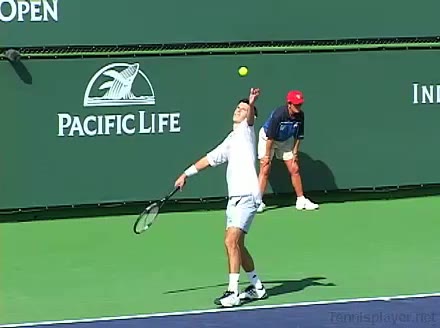
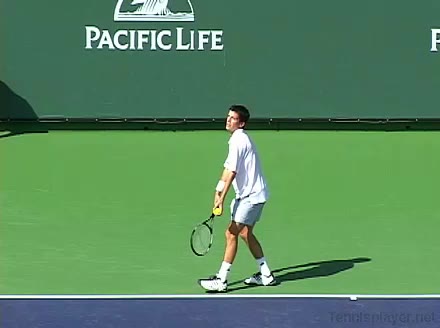
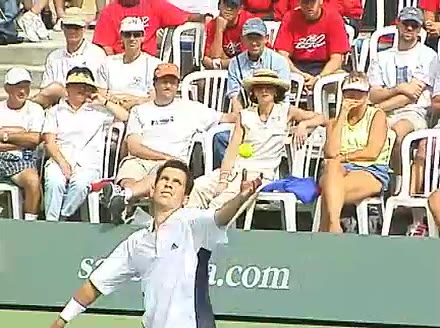
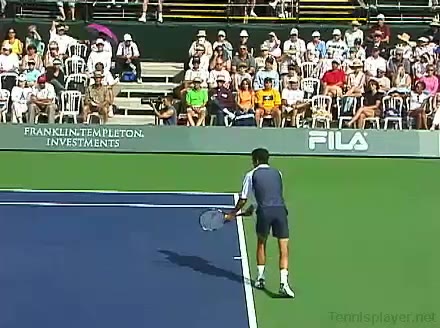
Tim Henman Turn Neutral Stance Vertical Finish
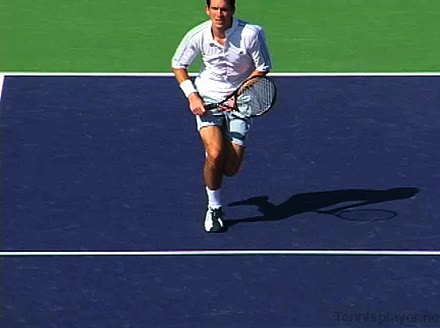
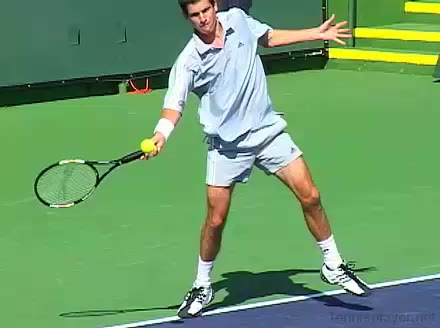
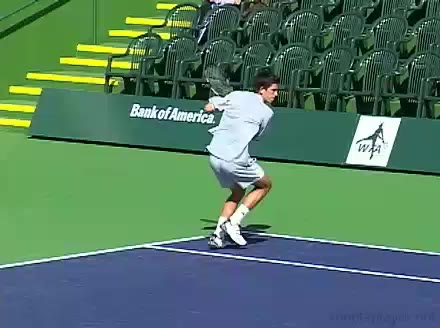
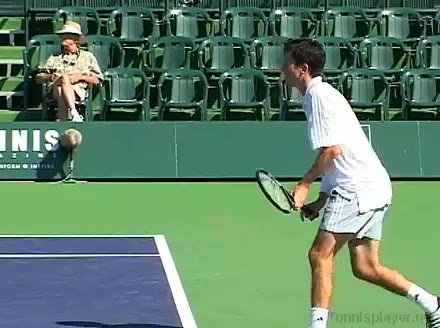
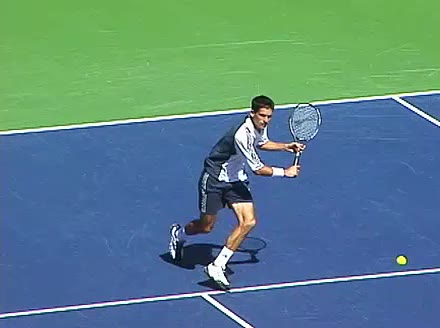
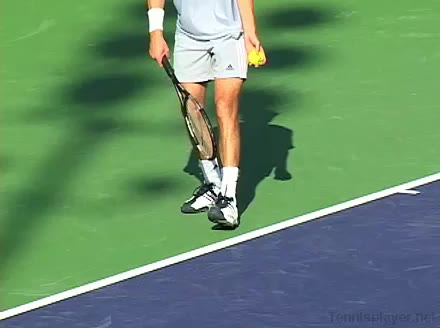
Tim Henman’s forehand from a neutral stance, filmed from a side comparison angle. His shoulders rotate well past 90 degrees relative to his hips on the unit turn, then the trunk uncoils ahead of the arm swing with a distinctly vertical, wrap-around finish.
|
|
13.9s |

Tim Henman Turn Semi Open Stance Vertical Finish
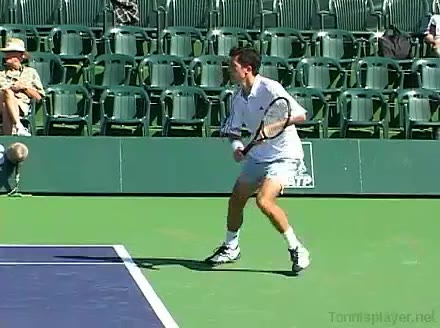
Tim Henman's forehand from a semi-open stance, filmed from a side-by-side comparison angle. His eastern forehand grip is clear, with a relaxed wrist that lags on the takeback and then pronates through contact into a high vertical finish.
|
|
9.1s |
8 Tim Henman Neutral Stance Front
Tim Henman's neutral-stance groundstroke from the center of the court, filmed from the front. His feet set parallel to the baseline with a small adjustment step before contact, and he pushes off the outside leg to recover quickly back toward his ready position.
|
|
20.8s |
9 Tim Henman Closed Stance Front
Tim Henman's forehand from a closed stance, filmed from the front. His shoulders and trunk are clearly seen coiling together as the front shoulder closes toward the net, then uncoiling in sequence with the hips during the forward swing.
|
|
21.7s |
Tim Henman Backhand Closed Stance Front
Tim Henman's backhand from a closed stance, filmed from the front. His shoulders turn significantly past perpendicular to the net on the unit turn, then the trunk uncoils first from the hips upward before the hitting shoulder comes through.
|
|
11.2s |
Tim Henman Backhand Neutral Stance Front
Tim Henman’s backhand from a neutral stance, filmed from the front. His follow-through finishes high with the racquet out in front as he transfers weight onto his front foot and quickly resets his non-hitting hand toward a ready position.
|
|
10.3s |

10 Tim Henman Open Stance Rear
Tim Henman’s forehand from the center of the baseline, filmed from the rear. His open stance is clear as he plants his outside foot first, then uses a small hop and crossover recovery step to get back toward the middle.
|
|
19s |
7 Tim Henman Neutral Stance Rear
Tim Henman's neutral-stance groundstroke from the center of the court, filmed from a rear angle. His follow-through finishes high with the racquet wrapping across his body as his weight transfers forward and he quickly recovers into a ready position.
|
|
11.8s |
FH Approach → BH Volley · Court-level-front
Tim Henman's forehand approach followed by a backhand volley from a neutral court position, filmed from a court-level front angle. His eastern forehand grip transitions into a continental grip on the backhand volley, with a noticeably firm wrist and minimal wrist hinge through contact.
|
|
4.4s |
FH Approach → FH Volley · Court-level-front
Tim Henman's forehand approach shot from a neutral court position, filmed from a court-level front angle. After contact his follow-through finishes high with the racket pointing toward the net as he transfers his weight forward and quickly brings both hands back toward a compact ready position for the forehand volley.
|
|
4.9s |
FH Approach → FH Volley → FH Volley · Court-level-front
Tim Henman’s forehand approach and forehand volley from the center of the court, filmed from a court-level front angle. His small adjustment steps set up a neutral-to-slightly-open stance on the approach, followed by a quick split-step and short shuffle into position for the volley.
|
|
8.8s |
FH Approach → FH Volley · Court-level-rear
Tim Henman's forehand approach shot from a neutral court position, followed by a forehand volley, filmed from a court-level rear angle. At contact on the approach, his racket face is slightly closed with the ball struck around waist height, and on the volley the racket stays firm in front of his body with a short, compact forward punch.
|
|
4.4s |
BH Approach → BH Volley · Court-level-side
Tim Henman’s backhand approach shot followed by a backhand volley from the deuce side, filmed from a court-level side angle. His continental grip stays constant through the approach into the volley, with a firm but relaxed wrist that remains stable through contact without excessive wrist snap.
|
|
6.3s |
FH Approach → BH Volley · Court-level-side
Tim Henman's forehand approach from the center of the court, filmed from a court-level side angle. After contact his follow-through finishes high with his weight driving forward into the court, and his non-hitting hand quickly returns in front of his body as he transitions into a compact ready position for the backhand volley.
|
|
5.6s |
FH Approach → FH Volley · Court-level-side
Tim Henman's forehand approach shot from the deuce side, followed by a forehand volley, filmed from a court-level side angle. His knees load deeply as he moves forward, and his hips stay slightly open toward the net to let his legs drive through the approach into a balanced volley position.
|
|
5.7s |
BH Approach → FH Volley · Front
Tim Henman's backhand approach shot followed by a forehand volley from the center of the court, filmed from the front. After contact he continues moving forward with his weight driving into the court, quickly bringing both hands back toward a compact ready position in front of his body for the next ball.
|
|
5s |
FH Approach → BH Volley · Front
Tim Henman's forehand approach followed by a backhand volley from a central position, filmed from the front. His shoulders rotate as a unit with the trunk on the forehand approach, then quickly de-coil to square the chest to the net before the backhand volley, showing a compact trunk uncoil timed just before contact.
|
|
5s |
FH Approach → FH Volley → FH Drop Volley · Front
Tim Henman’s forehand volley from the forecourt, filmed from the front. At contact his racket face is slightly open with the ball meeting the strings just in front of his body line, and the compact punchy swing path keeps the racket head stable through impact.
|
|
8.3s |
FH Approach → FH Volley · Front
Tim Henman's forehand approach shot from a central court position, filmed from the front. At contact his racket face is slightly closed with the ball struck around waist height, and the racket head accelerates forward on a relatively compact, linear swing path toward the net.
|
|
4.4s |
BH Return → Approach → Second Serve → FH Volley → OH · Deuce · Rear #2
Tim Henman's backhand return approach on a second serve from the deuce court, filmed from a rear angle. At contact his racket face is slightly closed with the ball meeting the strings around waist height, and the racket head accelerates forward on a compact swing path that quickly transitions into his move toward the net.
|
|
8.9s |
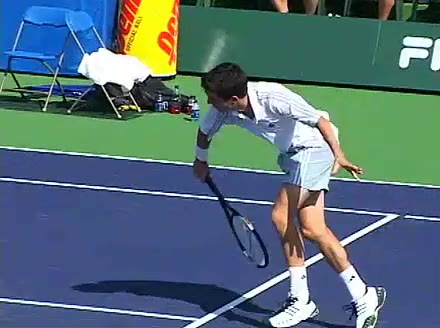
BH Slice → Approach → BH Volley · Rear
Tim Henman's backhand slice approach shot from a neutral court position, filmed from the rear. At contact his racket face is slightly open with the ball struck around waist height, and the racket travels on a pronounced high-to-low path creating noticeable backspin.
|
|
5.6s |
FH Approach → BH Volley · Rear
Tim Henman's forehand approach shot followed by a backhand volley from a neutral court position, filmed from a rear angle. His split-step precedes a quick adjustment shuffle into an open-stance forehand, followed by forward crossover steps that carry him into position for the one-handed backhand volley.
|
|
4.3s |
FH Approach → FH Half Volley → BH Volley · Rear
Tim Henman's forehand approach followed by a forehand half volley and backhand volley from the center of the court, filmed from the rear. His hips stay relatively low with a pronounced knee bend on the approach steps, then extend upward into the split step as his legs load to move forward into the volley.
|
|
8.3s |
FH Approach → FH Volley · Rear
Tim Henman's forehand approach shot from the center of the court, filmed from a rear angle. His eastern forehand grip is evident with a relaxed hand on the handle, and his wrist maintains a laid-back lag position before releasing into a subtle pronation through contact.
|
|
5.8s |
BH Slice → Approach → BH Volley · Side
Tim Henman's backhand slice approach shot from a neutral court position, filmed from the side. His continental grip is stable with a firm but relaxed wrist, and from this angle you can see the racket face stay slightly open with minimal wrist hinge through contact.
|
|
6.9s |
FH Approach → BH Drop Volley · Side
Tim Henman’s forehand approach shot from a neutral court position, filmed from the side. His footwork includes a quick adjustment shuffle into the ball followed by a forward-driving neutral stance that sets up his transition to the net.
|
|
6.2s |
FH Approach → BH Half Volley · Side
Tim Henman's forehand approach shot followed by a backhand half volley at the net from a neutral court position, filmed from the side. After contact on both shots his momentum carries him forward with his weight driving into the court, and he quickly recovers into a compact ready position with the non-hitting hand helping stabilize the racquet in front of his body.
|
|
6.5s |
FH Approach → BH Volley → BH Volley · Side
Tim Henman’s forehand approach from the deuce side, filmed from the side. His eastern forehand grip is firm with noticeable wrist lag on the forward swing that firms up into a stable, aligned wrist at contact before he transitions forward for the backhand volleys.
|
|
7.6s |
FH Approach → BH Volley → FH Volley · Side
Tim Henman's forehand approach shot followed by backhand and forehand volleys from a neutral court position, filmed from the side. At contact on the approach, his racket face stays slightly closed with the ball struck around waist height, and the racket head continues on a low-to-high path into his compact volley preparations.
|
|
7.3s |

FH Approach → BH Volley · Side
Tim Henman's forehand approach followed by a backhand volley from mid-court, filmed from the side. His shoulders rotate as a unit with the trunk on the forehand approach, then quickly uncoil and re-coil into a compact shoulder turn on the backhand volley, showing a clear sequential transfer from trunk rotation into the hitting arm.
|
|
6s |
BH Center · Court-level-front · Open
Tim Henman's backhand from the center of the court in an open stance, filmed from a front court-level angle. His feet stay slightly wider than shoulder-width with a small adjustment step into the shot, keeping his torso mostly square to the net throughout the swing.
|
|
2s |
BH Running · Court-level-front #1
Tim Henman’s running backhand from the ad side, filmed from a court-level front angle. His eastern one-handed backhand grip is clearly visible, with a firm but relaxed hand and a laid-back wrist that stays stable through contact before a subtle release toward the target.
|
|
3.1s |
BH Running · Court-level-front #2
Tim Henman’s running backhand from the center of the court, filmed from a court-level front angle. The racket meets the ball slightly in front of his body with a moderately closed face and a low-to-high swing path that accelerates the racket head through contact.
|
|
2.8s |
BH Running · Court-level-front #3
Tim Henman’s running backhand from the middle of the court, filmed from a court-level front angle. After contact, his one-handed backhand follow-through finishes out in front as his weight continues moving through the court and his non-hitting hand starts to return toward a ready position.
|
|
2.6s |

BH Wide · Court-level-front · Closed
Tim Henman's wide backhand from a closed stance on the ad side, filmed from a court-level front angle. After contact his one-handed backhand follow-through finishes out in front with the non-hitting hand extending back for counterbalance as he quickly recovers toward a neutral ready position.
|
|
2.9s |
BH Wide · Court-level-front
Tim Henman's backhand from the wide court position, filmed from a court-level front angle. His hips stay relatively closed with a pronounced knee bend on the outside leg, providing a stable base as he steps out wide to the ball.
|
|
3.3s |
BH Wide · Court-level-front #1
Tim Henman's backhand from the wide court position, filmed from a court_level front angle. His one-handed backhand contact is made slightly in front of his body with a noticeably open racket face, creating a skidding slice effect.
|
|
3s |
BH Wide · Court-level-front #2
Tim Henman's backhand from the wide position, filmed from court_level front. His initial split-step into a neutral stance transitions into a quick lateral shuffle, with his outside foot planting early to set up the one-handed backhand.
|
|
3.1s |
BH Wide Cross Court · Court-level-front
Tim Henman's backhand from the wide position, filmed from a court-level front angle. He plants his outside foot first into a slightly closed stance, then uses small adjustment steps to line up the one-handed backhand before recovering back toward the center.
|
|
3.3s |
BH Wide · Court-level-front · Open
Tim Henman's wide backhand from an open stance on the ad side, filmed from a court-level front angle. After contact his one-handed backhand follow-through finishes out in front with his non-hitting hand counterbalancing behind him as he recovers back toward a neutral ready position.
|
|
1.9s |

BH Center · Arm-action · Court-level-side #1
Tim Henman's backhand from the center of the court, filmed from a court-level side angle. His footwork features a small adjustment hop into a neutral stance, with his outside foot planting early to set the base for his one-handed backhand motion.
|
|
3.1s |
BH Center · Arm-action · Court-level-side #2
Tim Henman’s backhand from the center of the court, filmed from a court-level side angle. At contact his one-handed backhand shows a slightly open racket face with the ball meeting the strings around waist height as the racket tracks forward along a relatively flat path.
|
|
2.4s |
BH Center · Arm-action · Court-level-side #3
Tim Henman’s backhand from the center of the court, filmed from a court-level side angle. His hips stay relatively closed with a pronounced knee bend on the loading leg, and a subtle push up from the legs supports the rotation through contact.
|
|
3s |
BH Center · Court-level-side
Tim Henman's backhand from the center of the court, filmed from a court-level side angle. His hips stay relatively closed with a pronounced knee bend on the loading leg, and you can clearly see the rear leg driving through to support his one-handed backhand action.
|
|
5.1s |
BH Lob · Court-level-side
Tim Henman’s backhand lob from the baseline, filmed from a court-level side angle. His one-handed grip stays relatively firm in a continental position while the wrist lays back early and then subtly uncoils upward through contact to lift the ball.
|
|
3.1s |
BH Moves Back · Court-level-side #1
Tim Henman's backhand from the center of the baseline, filmed from a court-level side angle. As he moves back, he uses small adjustment steps to set up a neutral stance, planting his front foot just before contact to stay balanced despite retreating.
|
|
2.9s |
BH Moves Back · Court-level-side #2
Tim Henman's backhand from the center of the court, filmed from a court-level side angle. His one-handed grip stays relatively firm with a classic backhand orientation while the wrist remains stable and slightly laid back through contact, creating a controlled slice effect.
|
|
3.1s |
BH Running · Court-level-side
Tim Henman's running backhand from the side on the run, filmed from a court-level side angle. His hips stay relatively closed to the net while his outside knee bends deeply to load, with a strong lateral push from the outside leg driving him toward the ball.
|
|
2.9s |
BH Wide · Court-level-side · Closed
Tim Henman's wide backhand from a closed stance on the deuce side, filmed from a court-level side angle. From this side view, his shoulders turn well past perpendicular to the net and his trunk coils early, then uncoils in sequence from hips to torso to hitting arm through contact.
|
|
3.9s |
BH Center · Front · 125fps #1
Tim Henman's backhand from the center of the court, filmed from a front angle. After contact his one-handed backhand follow-through finishes out in front as his weight shifts slightly forward and he quickly brings both hands back toward a neutral ready position.
|
125 |
2.7s |

BH Center · Front · 125fps #2
Tim Henman's backhand from the center of the court, filmed from a front angle. His eastern one-handed backhand grip is clearly visible with a laid-back wrist and stable, firm wrist position through contact.
|
125 |
2.7s |
BH Center · Front · 125fps #3
Tim Henman's backhand from the center of the court, filmed from a front angle. His hips stay relatively closed with a noticeable knee bend on the loading leg, and he drives upward through the shot with a smooth extension of both legs.
|
125 |
2.8s |

BH Center · Front · 125fps #4
Tim Henman's backhand from the center of the court, filmed from a front angle. At contact his one-handed backhand shows a slightly open racket face with the ball struck around waist height, the racket moving on a compact, mostly linear path through the ball.
|
125 |
3.3s |
BH Center · Front · 125fps #5
Tim Henman's backhand from the center of the court, filmed from a front angle. His shoulders rotate as a single unit with the trunk into a compact coil on the take-back, then uncoil in sequence from hips to shoulders through contact, making the degree of upper-body turn easy to compare between preparation and follow-through.
|
125 |
2.7s |
BH Center · Front · 125fps #6
Tim Henman's backhand from the center of the court, filmed from a front angle. His initial split step into a neutral stance is followed by a small adjustment step and a stable front-foot plant that keeps his shoulders closed through contact.
|
125 |
2.8s |
BH Center · Front · 125fps #7
Tim Henman's backhand from the center of the court, filmed from a front angle. His shoulders rotate as a unit with the trunk into the backswing, then uncoil together through contact with minimal independent shoulder tilt, making the sequencing of upper-body rotation easy to distinguish in slow motion.
|
125 |
2.5s |
BH Short · Front · 125fps
Tim Henman's backhand from the center of the court, filmed from the front. His hips stay relatively closed to the net while his knees show a deep, symmetrical bend that loads both legs before he drives up and through the shot.
|
125 |
2.7s |
BH Wide · Arm-action · Front · 125fps
Tim Henman's backhand to a wide ball from a central position, filmed from the front. His initial split step leads into a quick lateral adjustment with a slightly open stance, and his weight transfers onto the outside leg before he recovers back toward the center.
|
125 |
2.6s |
BH Wide · Front · Closed · 125fps
Tim Henman's backhand from a wide position, filmed from the front. His shoulders rotate as a unit with the trunk into the takeback, then uncoil in sequence so the chest squares to the net slightly after the hitting shoulder initiates the forward motion.
|
125 |
2.8s |
BH Wide · Front · Closed · 125fps #2
Tim Henman's backhand from a wide position, filmed from the front. His one-handed backhand contact is made slightly in front of his body with the racket face moderately open, creating a clear slicing path through the ball.
|
125 |
2.9s |
BH Wide · Front · Open · 125fps
Tim Henman's backhand from the center in an open stance, filmed from the front at 125 fps. His follow-through finishes high with the hitting arm extending across his body while his weight shifts back toward the middle to recover into a ready position.
|
125 |
2.1s |
BH Center · Front
Tim Henman's backhand from the center of the court, filmed from the front. At contact his one-handed backhand has the racket face slightly closed with the ball meeting the strings around waist height, and the racket head accelerating forward on a straight, compact path through the hitting zone.
|
|
2.8s |
BH Half Volley · Front
Tim Henman's backhand from the front, filmed from a front court-level angle. His one-handed backhand contact point is slightly in front of his lead hip with the racket face subtly open, creating a skimming slice effect through the ball.
|
|
1.9s |
BH Lob · Front
Tim Henman's backhand lob from a neutral court position, filmed from the front. His shoulders rotate as a unit with the trunk on the takeback, then uncoil upward in sequence so the hitting shoulder lifts and extends to create the lob trajectory.
|
|
3.9s |
BH Running · Front #1
Tim Henman's running backhand from the center of the court, filmed from the front. After contact his one-handed follow-through finishes out in front with the non-hitting hand extending back for counterbalance as he quickly regains a neutral ready position.
|
|
3.8s |
BH Running · Front #2
Tim Henman's running backhand from the front, filmed from a front angle. His shoulders and trunk rotate as a unit with a pronounced upper-body tilt, then uncoil together through contact, making the sequencing of his torso rotation easy to see head-on.
|
|
3.6s |
BH Running · Front #3
Tim Henman's running backhand from the front, filmed from a front angle. At contact his one-handed backhand racket face stays slightly open with the ball meeting the strings around waist height as the racket tracks forward along a compact, controlled swing path.
|
|
2s |
BH Short Running · Front
Tim Henman's running backhand from the middle of the court, filmed from the front. His footwork features a quick adjustment shuffle into a slightly open stance, with small recovery steps continuing forward after contact.
|
|
2.6s |
BH Wide · Front · Closed #1
Tim Henman's backhand from the center in a closed stance, filmed from the front. His hips stay relatively closed to the net while his knees are noticeably flexed, giving a strong base as his legs drive laterally to reach the wide ball.
|
|
3s |
BH Wide · Front · Closed #2
Tim Henman’s wide backhand from the front, filmed from a front angle. His closed stance is clear as his hips stay more side-on to the net while his knees flex deeply on the outside leg to load before driving into the shot.
|
|
3.3s |
BH Wide Cross Court · Front
Tim Henman's backhand from the center of the court, filmed from the front. He uses a one-handed backhand stance with a small adjustment step out to the wide ball and then a couple of quick recovery steps back toward the middle after contact.
|
|
3.1s |
BH Wide Down The Line · Front #1
Tim Henman's backhand from the center, filmed from the front. His shoulders rotate as a unit with the trunk, showing a compact coil and uncoil where the lead shoulder stays slightly closed through contact before the torso unwinds toward the target.
|
|
3.2s |
BH Wide Down The Line · Front #2
Tim Henman's backhand from the front, filmed from a front angle. His eastern one-handed backhand grip is easy to see here, with the wrist laid back early and then staying firm through contact to guide the wide shot.
|
|
2.9s |
BH Wide Down The Line · Front #3
Tim Henman's backhand from the center, filmed from the front. His shoulders turn early with a pronounced upper-body coil, then his trunk uncoils ahead of the arm swing, making the separation between torso rotation and racquet release easy to see.
|
|
3.8s |
BH Wide · Front
Tim Henman's backhand from the center, filmed from the front. At contact his one-handed backhand is struck slightly in front of his body with the racket face slightly open, creating a low, skidding trajectory on the wide ball.
|
|
3.6s |
BH Wide · Front · Open
Tim Henman’s backhand from the center in an open stance, filmed from the front. His eastern one-handed backhand grip is clear, with a relaxed but firm wrist that stays laid back through the swing before subtly firming at contact.
|
|
2.9s |
BH Center · Arm-action · Rear · 125fps
Tim Henman's backhand from the center of the court, filmed from a rear angle. His hips stay relatively closed with a pronounced knee bend on the loading leg, and you can see the rear-leg drive initiating his rotation into the shot.
|
125 |
2.3s |
BH Moves Back · Rear · 125fps
Tim Henman’s backhand while moving back from a neutral position, filmed from the rear at 125 fps slow motion. From this angle, you can see his eastern one-handed backhand grip stay firm as his wrist remains relatively stable with a slight laid-back position through contact.
|
125 |
2.2s |
BH Running · Rear · 125fps #1
Tim Henman's running backhand from the rear, filmed from a high-speed 125 fps angle. The contact point is taken slightly in front of his body with the racket face moderately closed, and the swing path shows the racket accelerating upward through contact with noticeable racket head speed.
|
125 |
2.5s |
BH Running · Rear · 125fps #2
Tim Henman's running backhand from the Rear2 court position, filmed from a rear angle. His footwork features quick crossover steps to chase the ball wide before planting in a slightly open stance as he strikes, with a clear recovery step back toward the center visible.
|
125 |
2.4s |
BH Running · Rear · 125fps #3
Tim Henman's running backhand from a neutral position, filmed from a rear angle. After contact his one-handed backhand follow-through finishes around hip height while his non-hitting arm extends back for counterbalance as he regains a neutral, ready stance.
|
125 |
2.6s |
BH Short · Rear · 125fps
Tim Henman’s backhand from the center of the court, filmed from a rear angle. His footwork includes a small adjustment hop into a neutral stance followed by a controlled recovery step that readies him to move forward or laterally after contact.
|
125 |
3s |
BH Wide · Arm-action · Rear · 125fps
Tim Henman's wide backhand from the rear, filmed from a rear angle. The high-speed view makes the one-handed arm action clear, with the racket face slightly open at contact and the ball struck around waist height as the racket tracks out through the line of the shot.
|
125 |
2.7s |
BH Wide · Rear · Closed · 125fps
Tim Henman's wide backhand from a closed stance, filmed from a rear angle. His one-handed grip is firm with a clear continental orientation, and the slow motion makes the early wrist set and stable, slightly laid-back wrist position through contact easy to see.
|
125 |
2.5s |
BH Center · Rear #1
Tim Henman's backhand from the center of the court, filmed from a rear angle. His hips stay relatively closed with a pronounced knee bend on the loading leg, and you can see his back leg driving slightly up and through the shot as he extends.
|
|
2.7s |
BH Center · Rear #2
Tim Henman's backhand from the center of the court, filmed from a rear angle. His one-handed backhand grip is in a firm eastern backhand position, with a noticeable laid-back wrist creating lag before contact and a subtle tightening of the wrist as the racket moves through the ball.
|
|
3s |
BH Center · Rear #3
Tim Henman's backhand from the center of the court, filmed from a rear angle. His shoulders rotate as a unit with the trunk into a compact coil before contact, then uncoil with the chest staying relatively closed down the target line through the hit.
|
|
3.3s |
BH Moves Back · Rear
Tim Henman's backhand while moving back from a neutral position, filmed from the rear. The contact point is taken slightly in front of his body with the racket face moderately closed, and the swing path extends straight through the ball with noticeable racket head acceleration up and across the intended line of flight.
|
|
3.3s |
BH Running · Rear
Tim Henman's running backhand from the rear court position, filmed from a rear angle. His footwork features quick adjustment steps as he moves laterally, setting into a slightly open stance before contact and using a pronounced crossover recovery step back toward the center.
|
|
3s |
BH Wide Cross Court · Rear
Tim Henman’s wide backhand from the rear court position, filmed from a rear angle. After contact his one-handed backhand follow-through extends slightly across his body as his non-hitting hand counterbalances behind him, and he quickly recovers with small adjustment steps back toward a neutral ready position.
|
|
2.8s |
BH Wide · Rear
Tim Henman's backhand from a wide position, filmed from the rear. His one-handed follow-through finishes out to the side as he recovers with small adjustment steps, bringing his non-hitting hand back toward the racquet to re-form a balanced ready position.
|
|
3s |
Half Volley · Rear #0001
Tim Henman’s backhand half-volley from the center of the court, filmed from a rear angle. He takes a small adjustment hop into a slightly open stance with a short left-foot plant, then uses quick recovery steps to regain his ready position after contact.
|
|
8.9s |
BH Center · Side · Open
Tim Henman's backhand from the center of the court in an open stance, filmed from the side. His shoulders rotate early to set the racquet, then his trunk uncoils ahead of the arm swing, making the sequencing of torso rotation into contact easy to distinguish.
|
|
2.6s |
BH Center · Side
Tim Henman’s backhand from the center of the court, filmed from the side. His one-handed follow-through extends out toward the target before wrapping around his body, and he quickly brings both hands back to a neutral ready position as his weight finishes on his front foot.
|
|
2.9s |
BH Drop Volley · Side #1
Tim Henman's backhand drop volley from the net, filmed from the side. His continental grip stays relaxed with a slightly laid-back wrist, creating a soft, cushioned contact as the racquet face stays open through the ball.
|
|
4s |
BH Drop Volley · Side #2
Tim Henman's backhand drop volley from the net area, filmed from the side. His shoulders stay relatively square to the net while the trunk makes only a subtle coil, with a short uncoil driving the racquet face softly under the ball.
|
|
3.7s |
BH Moves Back · Side #1
Tim Henman's backhand while moving back from a neutral court position, filmed from the side. His hips stay relatively closed with a noticeable knee bend on the outside leg as he loads, then he pushes upward and slightly backward with his legs to stabilize while retreating.
|
|
2.8s |
BH Moves Back · Side #2
Tim Henman's backhand while moving back from the baseline, filmed from the side. His follow-through finishes high with the hitting arm extending slightly behind his body as he transfers weight onto the back foot before recovering toward a neutral ready position.
|
|
2s |
BH Wide · Side #1
Tim Henman's backhand from the wide position, filmed from the side. His eastern one-handed backhand grip is paired with a laid-back wrist that stays firm through contact, showing only a subtle release after the ball leaves the strings.
|
|
4s |
BH Wide · Side #2
Tim Henman's backhand from a wide position, filmed from the side. His eastern one-handed backhand grip is easy to see, with the wrist laid back and staying firm through contact rather than snapping or pronating.
|
|
2.9s |
BH Wide · Side #3
Tim Henman's wide backhand from the side, filmed from a side angle. His one-handed backhand contact is made slightly in front of his body with a moderately closed racket face, and the swing path is compact with the racket head staying below the ball through impact.
|
|
2.6s |
BH Volley #2019
Henman's backhand volley from a central net position, filmed from a front court-level angle. At contact the racket face is slightly open with the ball meeting the strings just in front of his body and around waist height, and the racket head moves forward with a compact, controlled punch.
|
|
582.9s |
BH Volley · Court-level-front #1
Tim Henman's backhand volley from a central net position, filmed from a court-level front angle. His follow-through finishes with the racquet head slightly up and in front while his weight moves through the volley, leaving him ready with both hands on the racquet for the next shot.
|
|
1.5s |
BH Volley · Court-level-front #2
Tim Henman's backhand volley from a central net position, filmed from a court-level front angle. His hips stay relatively square to the net with a subtle knee bend that lets him sink into a stable base before pushing slightly forward off the front leg into the volley.
|
|
2s |
BH Volley · Court-level-front #1
Tim Henman’s backhand volley from the center of the court, filmed from a court-level front angle. His feet stay in a compact, slightly staggered stance with a small adjustment step into the volley and a quick recovery step that brings him back to a neutral ready position.
|
|
1.9s |
BH Volley · Court-level-front #2
Tim Henman’s backhand volley from the center of the court, filmed from a court-level front angle. After contact his racquet continues slightly across his body as his weight moves forward, and he quickly brings both hands in front of his torso to re-establish a compact ready position for the next ball.
|
|
1.8s |
BH Volley · Court-level-front #3
Tim Henman’s backhand volley from the center during warmup, filmed from a court-level front angle. His footwork includes a small adjustment hop into a neutral stance with the front foot stepping diagonally toward the net before contact.
|
|
1.7s |
BH Volley · Court-level-side
Tim Henman's backhand volley from the net area, filmed from a court-level side angle. His knees stay flexed with a short, compact step toward the ball while his hips remain relatively square to the net, giving a stable base through contact.
|
|
2.7s |
BH Volley · Front #1
Tim Henman's backhand volley from the net, filmed from the front. His continental grip is clearly visible with a firm but relaxed wrist, staying stable through contact with only a slight opening of the racket face.
|
|
2.2s |
BH Volley · Front #2
Tim Henman's backhand volley from the center of the court, filmed from a front angle. At contact his racket face is slightly open with the ball meeting the strings just in front of his body, and the compact punching motion keeps the racket head moving directly through the line of the shot.
|
|
3s |
BH Volley · Front #3
Tim Henman's backhand volley from a central net position, filmed from the front. His hips stay relatively square to the net while his knees maintain a slight bend, giving him a stable, low base through the volley.
|
|
1.7s |
BH Volley · Front #4
Tim Henman's backhand volley from the front court position, filmed from a front angle. His shoulders stay relatively closed with a compact trunk rotation, and the uncoiling of his torso is tightly linked to the forward movement of his hitting arm through contact.
|
|
1.8s |
BH Volley · Front #5
Tim Henman's backhand volley from the front, filmed from a front angle. His continental grip is clearly visible, with a firm but relaxed wrist that stays stable through contact without excessive wrist snap.
|
|
2s |
BH Volley · Front #6
Tim Henman's backhand volley from the net area, filmed from the front. His follow-through finishes with the racket head slightly up and in front while his weight moves through the ball, leaving him ready with the non-hitting hand helping to center his upper body.
|
|
1.8s |
BH Volley · Front #7
Tim Henman's backhand volley from the front, filmed from a front angle. His shoulders stay relatively closed with a compact trunk rotation, and the upper body stays stable as the kinetic chain moves mainly through the arm and shoulder rather than a large torso uncoil.
|
|
3.2s |
BH Volley · Front #1
Tim Henman’s backhand volley from the front, filmed from a front angle. His hips stay relatively square to the net while his knees stay slightly flexed, giving a stable base as he steps forward into the volley with his front leg.
|
|
6.6s |
BH Volley · Front #3
Tim Henman’s backhand volley from the net, filmed from a front angle. His hips stay relatively square to the net while his knees are softly flexed, giving a stable lower-body base as he steps forward into the volley.
|
|
8.2s |
BH Volley · Front #0001
Tim Henman’s backhand volley from the net area, filmed from the front. His racket face is slightly open at contact with the ball meeting the strings just in front of his body at about waist height, with a compact forward punch and minimal backswing.
|
|
8.2s |

BH Volley · Front #0001
Tim Henman’s backhand volley from the net area, filmed from the front. His compact split step into a slightly open stance and short forward lunge toward the ball are clearly visible, followed by a small recovery step to re-center.
|
|
7.1s |

BH Volley · Front #0001
Tim Henman’s backhand volley from the net area, filmed from the front. His compact split step into a slightly open stance is followed by a short forward step with the front foot, enabling quick recovery back to a ready position.
|
|
8.5s |
BH Volley · Front #0001
Tim Henman’s backhand volley from the front court, filmed from the front. His follow-through finishes with the racquet head slightly up and in front while his weight transfers forward, quickly bringing both hands back toward a compact ready position.
|
|
7.6s |
BH Volley · Front #0001
Tim Henman’s backhand volley from the net, filmed from the front. His continental grip is clearly visible with a firm but relaxed hand on the handle, and his wrist stays stable with minimal break through contact.
|
|
7.3s |
BH Volley · Front #0001
Tim Henman’s backhand volley from the net area, filmed from a front angle. His compact split step into a slightly open stance is followed by a short forward adjustment step that keeps his weight moving through the volley.
|
|
7.3s |
BH Volley · Front #0001
Tim Henman’s backhand volley from the net area, filmed from the front. The racket face is slightly open at contact with the ball meeting the strings around waist height, and the compact punch-style swing path keeps the racket head moving directly through the contact line.
|
|
7.9s |
BH Volley · Front #0001
Tim Henman’s backhand volley from the front court, filmed from a front angle. His compact follow-through finishes slightly in front of his body as his weight moves forward and his non-hitting hand helps him recover quickly toward a ready position.
|
|
10.5s |
BH Volley · Front #0001
Tim Henman’s backhand volley from the net area, filmed from a front angle. His continental grip is firm with a slightly laid-back wrist, and you can clearly see minimal wrist snap as he blocks the ball with a stable racket face.
|
|
12.6s |
BH Volley · Front #0001
Tim Henman’s backhand volley from the front, filmed from a front court-level angle. His shoulders stay relatively square to the net with only a mild trunk rotation, making the short trunk coil and quick uncoil easy to see in relation to his compact forward step into the ball.
|
|
8.5s |
BH Volley · Front #0001
Tim Henman’s backhand volley from the net, filmed from the front. The racket face is slightly open at contact with the ball meeting the strings just in front of his body at around chest height, and the compact swing path keeps the racket head moving mostly forward with minimal backswing.
|
|
12.8s |
BH Volley · Front #0001
Tim Henman’s backhand volley from the net area, filmed from the front. His compact split step into a slightly open stance is followed by a short forward lunge, with a quick recovery step bringing him back toward a balanced ready position.
|
|
6.5s |
BH Volley · Front #0001
Tim Henman’s backhand volley from the net, filmed from a front angle. His continental grip is clearly visible with a firm but relaxed wrist, and the high-speed view makes the slight wrist firming at contact easy to see.
|
|
8.8s |

BH Volley · Front #0001
Tim Henman’s backhand volley from a central warmup position, filmed from a front warmup angle. At contact his racket face is slightly open with the ball meeting the strings around waist height, and the compact forward punch keeps the racket head moving straight through the line of the shot.
|
|
6.6s |
BH Volley · Front #0001
Tim Henman’s backhand volley warmup from a neutral court position, filmed from a front warmup angle. His knees stay softly flexed with a slight forward hip hinge, giving him a stable base as he steps into the volley with a short, compact leg drive.
|
|
7.1s |
BH Volley · Front #0001
Tim Henman’s backhand volley from a neutral warmup position, filmed from a front warmup angle. His continental grip is clearly visible with a firm but relaxed wrist, staying stable through contact with only a slight flexion to guide the ball.
|
|
7.9s |
BH Volley · Front #0001
Tim Henman’s backhand volley warmup from a central court position, filmed from a front warmup angle. His knees stay softly flexed with a slight forward hip hinge, giving him a stable base as he steps into each volley with a short, controlled stride.
|
|
8.6s |
BH Volley · Rear #0001
Tim Henman’s backhand volley from the center of the court, filmed from a rear angle. His continental grip stays firm with minimal grip change, and his wrist remains stable with almost no wrist break through contact.
|
|
8.5s |
BH Volley · Rear #0001
Tim Henman’s backhand volley from the center of the court, filmed from a rear angle. His hips stay relatively square to the net while his knees maintain a slight bend, giving a stable base with minimal lower-body rotation into the volley.
|
|
11.2s |
BH Volley · Rear #0001
Tim Henman’s backhand volley from the center of the court, filmed from a rear angle. His hips stay relatively square to the net while his knees remain slightly flexed, giving a stable base as he steps forward into the volley.
|
|
9.7s |
BH Volley · Rear #0001
Tim Henman’s backhand volley from the center of the court, filmed from a rear angle. At contact his racket face is slightly open with the ball meeting the strings just in front of his body and around waist height, and the compact swing path keeps the racket head moving mostly forward with minimal backswing.
|
|
8.6s |
BH Volley · Rear #0001
Tim Henman’s backhand volley from the center of the court, filmed from a rear angle. His continental grip is firm with a slightly laid-back wrist that stays stable through contact, showing minimal wrist flick.
|
|
8.7s |

BH Volley · Rear #0001
Tim Henman’s backhand volley from the center of the court, filmed from a rear angle. His continental grip is firm with a slightly laid-back wrist, and the racket face stays stable through contact with minimal wrist flick.
|
|
10.7s |
BH Volley · Rear #0001
Tim Henman’s backhand volley from the center of the court, filmed from a rear angle. His compact split-step leads into a short lateral adjustment and a slightly open stance as he moves forward to meet the ball in front of his body.
|
|
6.8s |
BH Volley · Side #1
Tim Henman's backhand volley from the net area, filmed from the side. His hips stay relatively square to the net while a pronounced knee bend and forward leg drive into the court are clearly visible during contact.
|
|
1.6s |
BH Volley · Side #2
Tim Henman’s backhand volley from the side, filmed from a side angle. His feet set in a neutral stance with a small adjustment step as he moves toward the ball, followed by a quick recovery step to stay ready for the next shot.
|
|
1.6s |
BH Volley · Side #3
Tim Henman's backhand volley from the side, filmed from a side angle. At contact his racket face is slightly open with the ball meeting the strings around waist height, and the compact punching motion keeps the racket head moving almost straight through the line of the incoming ball.
|
|
2.1s |
BH Volley · Side #4
Tim Henman's backhand volley from the net area, filmed from the side. His feet perform a small adjustment step into a slightly closed stance as he moves through the volley, with his back leg naturally trailing to aid forward momentum and quick recovery.
|
|
2.8s |
BH Volley · Side #5
Tim Henman's backhand volley from the side, filmed from a side angle. His shoulders stay slightly closed as the trunk rotates minimally through contact, with a compact upper-body motion that links a short coil to a quick, controlled uncoil into the ball.
|
|
2.3s |
OH → BH Volley · Side
Tim Henman's backhand volley from the net area, filmed from the side. His continental grip is clearly visible, with a firm but relaxed wrist that stays stable through contact without excessive wrist snap.
|
|
5.9s |
BH Drop Shot · Court-level-side
Tim Henman’s backhand drop shot from the center of the court, filmed from a court-level side angle. The racket face is noticeably open at contact with the ball taken slightly below net height, and the compact, decelerating swing path produces minimal racket head speed for a soft touch.
|
|
3.3s |
BH Slice → Drop Shot · Front
Tim Henman's backhand slice drop shot from a central position, filmed from the front. His neutral stance is evident as he plants his outside foot early, then takes a small adjustment step forward to stay balanced over the ball during the soft slicing motion.
|
|
2.7s |
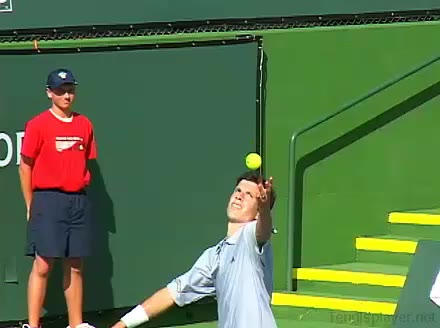
First Serve · Ad · Body-rotation · Court-level-front #1
Tim Henman’s first serve from the Ad court, filmed from a court-level front angle. His stance starts in a classic platform position, and you can clearly see the weight shift from back to front foot as his hips and shoulders uncoil into the court before landing on his front leg.
|
|
3.2s |
First Serve · Ad · Court-level-front #1
Tim Henman's first serve from the Ad court, filmed from a court-level front angle. His shoulders load with a pronounced sideways turn relative to the baseline before contact, then the trunk uncoils in sequence from hips to shoulders, giving a clear view of the upper-body rotation through the serve.
|
|
2.6s |
First Serve · Ad · Court-level-front #2
Tim Henman's first serve from the Ad court, filmed from a court-level front angle. At contact his racket face is slightly tilted upward with the ball struck just above eye level, and the racket head accelerates steeply up and through the ball along a pronounced pronation path.
|
|
3.4s |
First Serve Down The Middle · Ad · Court-level-front #1
Tim Henman's first serve from the Ad court down the middle, filmed from a court-level front angle. His shoulders and trunk show a pronounced coil during the toss, then uncoil in sequence from hips to shoulders as he drives up into the serve.
|
|
3.7s |
First Serve · Ad · Leg-action · Court-level-front #1
Tim Henman’s first serve from the Ad court, filmed from court-level front. At contact his racket face is slightly tilted upward with the ball struck just above full extension, and the racket head whips up and across his body on a pronounced upward swing path.
|
|
2.5s |
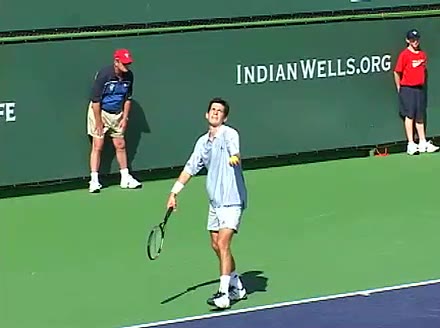
First Serve · Ad · Toss · Court-level-front #1
Tim Henman's first serve from the Ad court, filmed from a court-level front angle. After contact he lets his hitting arm finish down across his body while his weight lands on his front foot, quickly bringing both hands back toward a neutral ready position.
|
|
3.8s |
First Serve · Deuce · Arm-action · Court-level-front #1
Tim Henman's first serve from the Deuce side, filmed from a court-level front angle. His continental grip is firm with a relaxed wrist that pronates aggressively through contact, showing a distinct wrist snap just after impact.
|
|
2.3s |
First Serve · Deuce · Arm-action · Court-level-front #2
Tim Henman's first serve from the deuce court, filmed from a court-level front angle. From this view, you can clearly see his continental grip stay firm while his wrist pronates aggressively through contact, with only a subtle wrist snap at the end of the motion.
|
|
2.5s |
First Serve · Deuce · Arm-action · Court-level-front #3
Tim Henman's first serve from the deuce court, filmed from a court-level front angle. His legs load with a noticeable knee bend before driving upward, and his hips turn from a closed position into a more open alignment as he uncoils into the serve.
|
|
2.7s |
First Serve → BH Volley · Deuce · Court-level-front #1
Tim Henman’s backhand volley from the deuce side, filmed from a court-level front angle. His shoulders stay slightly closed to the net as the trunk makes a compact, minimal coil, with the uncoiling driven mostly by a short forward rotation of the torso synchronized with the punching motion of the arm.
|
|
4s |
First Serve → BH Volley · Deuce · Court-level-front #2
Tim Henman’s backhand volley from the deuce side, filmed from court-level front. His shoulders stay relatively closed to the net as the trunk makes a compact, minimal coil, with a subtle forward uncoil that links the shoulder line directly into the punching action of the volley.
|
|
4.5s |
First Serve · Deuce · Court-level-front #1
Tim Henman's first serve from the deuce court, filmed from a court-level front angle. His stance shows a solid platform base with a pronounced knee bend, and you can clearly see his front foot pivot inward as he drives up into the serve.
|
|
3.9s |
First Serve · Deuce · Court-level-front #1
Tim Henman's first serve from the deuce court, filmed from a court-level front angle. His continental grip is firm with a relaxed wrist that pronates aggressively through contact, creating a distinct wrist snap visible just after impact.
|
|
2.6s |
First Serve · Deuce · Court-level-front #2
Tim Henman's first serve from the deuce court, filmed from a court-level front angle. His continental grip stays firm with a noticeable relaxed wrist that pronates aggressively through contact, creating a distinct snap just after impact.
|
|
4.1s |
First Serve → FH Volley → BH Volley · Deuce · Court-level-front #1
Tim Henman’s forehand volley from the deuce court, filmed from a court-level front angle. His knees stay flexed with a subtle forward weight shift from back leg to front leg, while his hips remain relatively square to the net for a stable, compact volley stance.
|
|
7.1s |
First Serve → FH Volley · Deuce · Court-level-front #1
Tim Henman’s forehand volley from the deuce court, filmed from a court-level front angle. His knees stay flexed as he steps forward into the volley, with the hips remaining relatively square to the net to support a stable, compact leg drive through the ball.
|
|
4.4s |
First Serve · Deuce · Leg-action · Court-level-front #1
Tim Henman's first serve from the deuce court, filmed from a court-level front angle. His legs load with a noticeable knee bend before driving upward, and his hips stay relatively closed to the baseline until just after contact.
|
|
2.5s |
First Serve · Deuce · Leg-action · Court-level-front #2
Tim Henman's first serve from the deuce court, filmed from a court-level front angle. After contact he lands on his front leg with his back leg kicking back for balance, then quickly regathers his feet into a compact ready position to move forward.
|
|
2.9s |
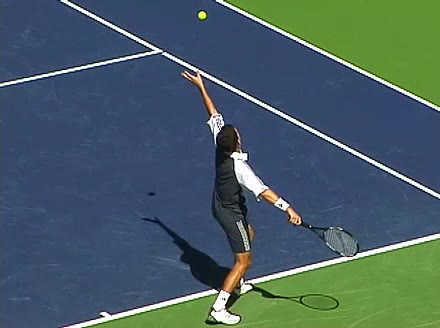
First Serve · Ad · Body-rotation · Court-level-side #1
Tim Henman's first serve from the Ad court, filmed from a court-level side angle. His shoulders load with a pronounced turn away from the court before uncoiling in sequence with the trunk, making the degree of upper-body rotation and its timing relative to leg drive clearly visible.
|
|
2.7s |
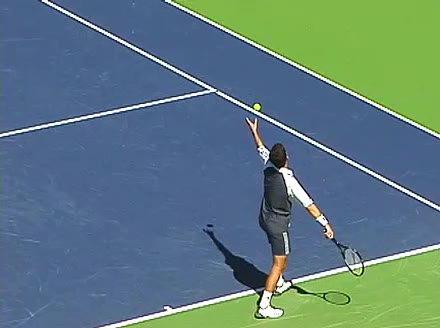
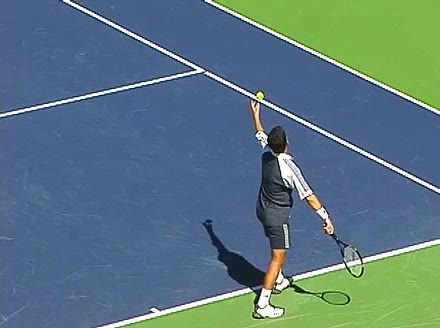
First Serve · Deuce · Toss · Court-level-side #1
Tim Henman's first serve from the deuce side, filmed from a court-level side angle. His motion shows a deep knee bend in the loading phase with the hips driving up and into the court as he extends into the serve.
|
|
3.4s |
First Serve · Ad · Arm-action · Front #1
Tim Henman's first serve from the Ad court, filmed from the front. His shoulders rotate as a unit with the trunk into a deep coil before uncoiling in sequence, with the tossing-side shoulder staying high as the hitting-side shoulder and torso drive up into contact.
|
|
3.3s |
First Serve → BH Half Volley · Ad · Front #1
Tim Henman's first serve from the Ad court, filmed from the front. At contact his racket face is slightly tilted upward with the ball struck just above head height, and the racket head accelerates steeply up and across the ball for a pronounced upward swing path.
|
|
4.7s |
First Serve → BH Volley → BH → OH · Ad · Front #1
Tim Henman’s backhand volley from the Ad side, filmed from the front. After contact he keeps the racquet head slightly out in front with the non-hitting hand helping to stabilize his upper body as he moves forward and quickly resets into a compact ready position near the net.
|
|
8.1s |
First Serve → BH Volley · Ad · Front #1
Tim Henman’s backhand volley from the Ad court, filmed from the front. His compact split step into a slightly open stance leads into a short forward step with the left leg as he punches through the volley and quickly readies his feet for the next move.
|
|
5s |
First Serve → BH Volley · Ad · Front #2
Tim Henman's backhand volley from the Ad side, filmed from the front. From this angle you can clearly see his continental grip stay firm with a stable wrist, creating only a subtle wrist layback as he meets the ball in front of his body.
|
|
4.4s |

First Serve · Ad · Body-rotation · Front #1
Tim Henman's first serve from the Ad court, filmed from the front. His follow-through brings his racket hand down across his body as his weight transfers into the court, quickly bringing both hands back toward a neutral ready position for an attacking move forward.
|
|
4.2s |
First Serve Down The Middle · Ad · Front #1
Tim Henman's first serve from the Ad court, filmed from the front. His shoulders and trunk show a pronounced coil during the toss, then uncoil in a clearly sequenced motion from hips through torso to shoulders as he drives up to contact.
|
|
3s |
First Serve Down The Middle · Ad · Front #2
Tim Henman's first serve from the Ad court down the middle, filmed from the front. From this angle you can clearly see his continental grip stay firm while his wrist pronates aggressively through contact, with a pronounced snap just after impact.
|
|
2.7s |
First Serve → FH Half Volley · Ad · Front #1
Tim Henman's first serve from the Ad court, filmed from the front. His legs load with a noticeable knee bend before driving upward, and his hips uncoil toward the target as he moves forward into the court for the follow-up forehand half volley.
|
|
4.5s |
First Serve → FH Volley · Ad · Front #1
Tim Henman's forehand volley from the ad court, filmed from a front angle. His shoulders stay relatively square to the net with only a mild trunk rotation, and the forward trunk lean links smoothly into the hitting shoulder for a compact, abbreviated kinetic chain.
|
|
5.4s |
First Serve → FH Volley · Ad · Front #2
Tim Henman's forehand volley from the Ad court, filmed from a front angle. After contact he finishes with the racquet slightly across his body while his non-hitting hand extends back for balance, and he quickly brings both hands in front to re-establish a compact ready position near the net.
|
|
5.4s |
First Serve → FH Volley · Ad · Front #3
Tim Henman's forehand volley from the Ad court, filmed from a front angle. After contact he finishes with the racquet head slightly across his body while his non-hitting hand helps him square up and recover quickly toward a compact ready position near the net.
|
|
4.7s |
First Serve → FH Volley · Ad · Front #4
Tim Henman's forehand volley from the Ad side, filmed from a front angle. At contact his racket face is slightly open with the ball meeting the strings just in front of his lead shoulder, and the compact punch keeps the racket head moving directly through the line of the shot.
|
|
4.5s |
First Serve → FH Volley · Ad · Front #5
Tim Henman's forehand volley from the Ad side, filmed from a front angle. His compact split step transitions quickly into a short diagonal step toward the net, setting up a slightly open stance as he punches through the volley.
|
|
4.2s |
First Serve · Ad · Front #1
Tim Henman's first serve from the Ad court, filmed from the front. After contact his weight drives into the court and he lands on his front leg with his non-hitting arm tucking in as he quickly begins to recover toward a ready position for a potential net approach.
|
|
3.3s |
First Serve · Ad · Front #2
Tim Henman's first serve from the Ad court, filmed from a front angle. His stance is relatively narrow with a pronounced knee bend, and you can see a clear front-leg drive up into the court that sets up an immediate forward push toward the net.
|
|
2.9s |
First Serve · Ad · Toss · Front #1
Tim Henman's first serve from the Ad court, filmed from the front. His shoulders and trunk coil noticeably away from the target during the toss, then uncoil in a smooth sequence with the torso rotating toward the net before arm acceleration.
|
|
3s |
First Serve Wide · Ad · Front #1
Tim Henman's first serve from the Ad court, hit wide and filmed from the front. At contact his racket face is slightly tilted upward with the ball struck just above head height, and the racket head accelerates steeply up and across the ball toward the wide target.
|
|
3.5s |
First Serve → BH Volley → BH Volley · Deuce · Front #1
Tim Henman’s backhand volley from the deuce side, filmed from the front. His knees are softly flexed with a slight forward weight shift, and his hips stay relatively square to the net as he steps into the volley with his front leg.
|
|
8s |
First Serve → BH Volley · Deuce · Front #1
Tim Henman’s backhand volley from the deuce side, filmed from the front. His continental grip is firm with a slightly laid-back wrist, and the front angle makes the stable, minimal wrist movement through contact easy to see.
|
|
4.6s |
First Serve → BH Volley · Deuce · Front #2
Tim Henman's backhand volley from the deuce side, filmed from a front angle. His shoulders stay relatively square to the net with a compact trunk rotation, and the forward uncoil of his torso is tightly linked to the hitting shoulder driving the racquet through the volley.
|
|
4s |
First Serve → BH Volley · Deuce · Front #3
Tim Henman’s backhand volley from the deuce court, filmed from a front angle. His hips stay relatively square to the net while his knees flex slightly, giving a stable, low base as he steps forward into the volley.
|
|
4.5s |
First Serve → BH Volley · Deuce · Front #4
Tim Henman’s backhand volley from the deuce court, filmed from a front angle. After contact his racquet finishes slightly in front with the non-hitting hand counterbalancing, and he quickly brings both hands toward a compact ready position as his weight continues moving forward into the court.
|
|
4.3s |
First Serve → BH Volley · Deuce · Front #5
Tim Henman's backhand volley from the deuce court, filmed from the front. At contact his racket face is slightly open with the ball meeting the strings around waist height, and the compact punch keeps the racket head moving directly through the line of the shot.
|
|
5s |
First Serve · Deuce · Body-rotation · Front #1
Tim Henman's first serve from the deuce court, filmed from the front. His front view shows a rhythmic knee bend into a platform stance followed by a pronounced shoulder and hip uncoil as he drives up into the ball.
|
|
3.5s |
First Serve Down The Middle · Deuce · Front #1
Tim Henman's first serve from the deuce court, filmed from the front. At contact, his racket face is slightly tilted upward with the ball struck just above head height, and the racket head accelerates steeply up and through the ball along the target line down the middle.
|
|
2.7s |
First Serve Down The Middle · Deuce · Front #2
Tim Henman's first serve from the deuce court, filmed from the front. His compact front-on stance shows a clear weight transfer onto the front foot before contact, with a small adjustment step bringing his back foot in to complete a controlled, balanced service motion.
|
|
2.8s |
First Serve → FH Drop Volley · Deuce · Front #1
Tim Henman's first serve from the deuce court, filmed from the front. His knees load deeply before upward drive, and his hips stay relatively closed toward the net until just after contact, when they unwind into the court.
|
|
6.3s |
First Serve → FH Volley · Deuce · Front #1
Tim Henman’s forehand volley from the deuce court, filmed from a front angle. His continental grip stays firm with minimal grip change and his wrist remains stable with only a slight forward snap at contact to guide the volley.
|
|
4.9s |
First Serve → FH Volley · Deuce · Front #2
Tim Henman’s forehand volley from the deuce court, filmed from a front angle. At contact his racket face is slightly open with the ball meeting the strings just in front of his body at around chest height, and the racket head moves minimally forward with a compact punching action.
|
|
5s |
First Serve · Deuce · Front #1
Tim Henman's first serve from the deuce court, filmed from the front. His knees dip into a deep bend before driving upward, and you can clearly see his hips stay relatively closed to the net until just after ball contact.
|
|
2.6s |
First Serve · Deuce · Front #2
Tim Henman's first serve from the deuce court, filmed from the front. His continental grip is evident with a firm but relaxed hand, and you can see clear wrist pronation through contact as the racquet face naturally closes toward the target.
|
|
2.6s |
First Serve · Deuce · Toss · Front #1
Tim Henman's first serve from the deuce side, filmed from the front. His shoulders rotate as a unit with the trunk during the toss and loading phase, creating a noticeable coil before uncoiling upward into contact.
|
|
2.8s |
First Serve · Deuce · Toss · Front #2
Tim Henman's first serve from the deuce court, filmed from the front. At contact his racket face is slightly tilted forward with the ball struck just above full extension, and the upward swing path produces noticeable racket head speed through the hitting zone.
|
|
3s |
First Serve Wide · Deuce · Front #1
Tim Henman's first serve wide from the Deuce court, filmed from the front. From this angle you can see his continental grip stay firm while his wrist pronates aggressively through contact, with a pronounced wrist snap directing the ball out wide.
|
|
3.8s |
First Serve Wide · Deuce · Front #2
Tim Henman's first serve wide from the Deuce court, filmed from a front angle. His continental grip is firm with a noticeable wrist pronation through contact, as the racket face turns outward toward the deuce-side sideline.
|
|
3.2s |
First Serve Wide · Deuce · Front #3
Tim Henman's first serve from the deuce court, filmed from the front. His hips stay relatively closed to the net during the knee bend, with a noticeable upward leg drive that uncoils the hips into the court toward the wide target.
|
|
3.4s |
First Serve Wide · Deuce · Front #5
Tim Henman's first serve from the deuce court, hit wide and filmed from the front. After contact his follow-through finishes across his body with his weight driving into the court, and he quickly regathers his non-hitting hand in front of his torso as he moves toward a ready position.
|
|
3.3s |
First Serve · Ad · Arm-action · Rear #1
Tim Henman's first serve from the Ad court, filmed from a rear angle. At contact his racket face is slightly tilted forward with the ball struck just above head height, and the arm action drives up and through the ball with noticeable racket head acceleration.
|
|
4.1s |
First Serve Down The Middle · Ad · Rear #1
Tim Henman's first serve from the Ad court down the middle, filmed from a rear angle. After contact, his racquet follow-through finishes across his body while his weight moves into the court, quickly bringing his non-hitting hand back to help him transition into a forward-ready position.
|
|
3.5s |
First Serve Down The Middle · Ad · Rear #2
Tim Henman's first serve from the Ad court down the middle, filmed from a rear angle. His footwork includes a controlled pinpoint stance with the back foot drawing up to the front before an explosive push up into the court and a small hop into his landing.
|
|
3.1s |
First Serve → FH Volley → OH · Ad · Rear #1
Tim Henman's forehand volley from the ad court, filmed from a rear angle. His shoulders stay relatively closed with a compact trunk rotation, and the uncoiling through contact is subtle, driven more by a slight upper-body turn than a large torso coil.
|
|
8s |
First Serve → FH Volley · Ad · Rear #1
Tim Henman's forehand volley from the Ad court, filmed from a rear angle. He takes a small adjustment hop into a neutral stance before the volley and then uses quick forward recovery steps to continue moving toward the net.
|
|
4.4s |
First Serve · Ad · Rear #1
Tim Henman's first serve from the Ad court, filmed from a rear angle. At contact his racket face is slightly tilted upward with the ball struck just above head height, and the racket head accelerates steeply up and through the ball along a pronounced inside-out service swing path.
|
|
2.7s |
First Serve Wide · Ad · Rear #1
Tim Henman's first serve from the Ad court, hit wide and filmed from a rear angle. His hips stay closed through the toss and loading phase, with a deep knee bend and strong upward leg drive that uncoils his hips into the court toward the wide target.
|
|
2.4s |
First Serve · Deuce · Arm-action · Rear #1
Tim Henman's first serve from the deuce court, filmed from a rear angle. His shoulders rotate as a unit with the trunk into a deep coil during the trophy phase, then uncoil sequentially from hips through torso to shoulders to drive the arm up into contact.
|
|
3.5s |
First Serve → BH Volley → FH Volley · Deuce · Rear #1
Tim Henman's forehand volley from the deuce side, filmed from a rear angle. At contact his racket face is slightly open with the ball struck just in front of his body, and the compact forward punch keeps the racket head traveling almost straight through the line of the shot.
|
|
7.2s |
First Serve → BH Volley · Deuce · Rear #1
Tim Henman's backhand volley from the deuce side, filmed from a rear angle. At contact his racket face is slightly open with the ball meeting the strings around waist height, and the compact punching motion keeps the racket head traveling firmly through the line of the shot.
|
|
4s |
First Serve Down The Middle · Deuce · Rear #1
Tim Henman's first serve from the deuce court, filmed from a rear angle. His shoulders and trunk coil strongly away from the target during the toss, then uncoil in a smooth sequence that brings the hitting shoulder through as the chest rotates square to the net at contact.
|
|
2.4s |
First Serve Down The Middle · Deuce · Rear #2
Tim Henman's first serve from the deuce court, filmed from a rear angle. His hips stay relatively closed through the trophy position before uncoiling as his back leg drives up and through the court, with a pronounced knee bend helping him load into the serve.
|
|
2.6s |
First Serve → FH Volley → BH → OH · Deuce · Rear #1
Tim Henman's forehand volley from the deuce court, filmed from a rear angle. After contact he drives his weight forward toward the net and quickly brings his racquet back to a compact ready position with his non-hitting hand helping to square his shoulders for the next shot.
|
|
6.8s |
First Serve → FH Volley → BH Volley · Deuce · Rear #1
Tim Henman's forehand volley from the deuce side, filmed from a rear angle. His shoulders stay slightly closed to the net as the trunk rotates just enough to align the hitting arm, with a compact uncoil that links the shoulder turn directly into the volleying motion.
|
|
5.9s |
First Serve → FH Volley · Deuce · Rear #1
Tim Henman's forehand volley from the deuce court, filmed from a rear angle. His small adjustment steps align his body into a slightly open stance as he moves forward, with a quick recovery step preparing him to continue closing toward the net.
|
|
5.3s |
First Serve → FH Volley · Deuce · Rear #2
Tim Henman's forehand volley from the deuce court, filmed from a rear angle. From behind you can see his continental grip stay stable with minimal wrist movement, the racquet face held slightly open through contact rather than snapping or pronating.
|
|
4.7s |
First Serve → FH Volley · Deuce · Rear #3
Tim Henman’s forehand volley from the deuce court, filmed from a rear angle. At contact his racket face is slightly open with the ball meeting the strings just in front of his body, and the compact punch motion keeps racket head speed controlled through a short forward path.
|
|
4.7s |
First Serve · Deuce · Rear #1
Tim Henman's first serve from the deuce court, filmed from a rear angle. After contact he lands on his front leg with his torso unwinding into the court, and his non-hitting arm drops back as he quickly regathers his feet into a compact ready position for an immediate move forward.
|
|
2.5s |
First Serve Wide · Deuce · Rear #1
Tim Henman's first serve from the deuce court, hit wide and filmed from a rear angle. After contact his racquet finishes across his body while his weight drives into the court, and he quickly brings both hands toward a neutral position as he readies for the next shot.
|
|
3s |
First Serve → BH Volley · Ad · Side #1
Tim Henman's backhand volley from the Ad side, filmed from a side angle. His knees are noticeably flexed as he moves into the volley, with a subtle hip hinge that keeps his hips stable and low through the shot.
|
|
4.3s |

First Serve → BH Volley · Ad · Side #2
Tim Henman’s backhand volley from the Ad side, filmed from a side angle. His continental grip is firm with minimal grip change and his wrist stays relatively firm through contact, with only a slight controlled flexion as the racquet moves through the ball.
|
|
4.5s |
First Serve → BH Volley · Ad · Side #3
Tim Henman's backhand volley from the Ad side, filmed from a side angle. His hips stay relatively closed to the net while a strong knee bend and forward leg drive into the court are clearly visible during contact.
|
|
4.5s |
First Serve → FH Volley · Ad · Side #1
Tim Henman's forehand volley from the Ad court, filmed from the side. At contact his racket face stays slightly open with the ball meeting the strings just in front of his lead hip, and the compact forward punch keeps the racket head moving almost straight through the line of the shot.
|
|
4.3s |
First Serve · Ad · Leg-action · Side #1
Tim Henman's first serve from the Ad court, filmed from the side. His continental grip stays steady while his wrist pronates sharply through contact, with a clear wrist snap visible as his racquet accelerates up and across the ball.
|
|
4s |
First Serve · Ad · Leg-action · Side #2
Tim Henman's first serve from the Ad court, filmed from the side. At contact his racket face is slightly tilted upward with the ball struck just above full extension, and the racket head accelerates steeply up and across his body to generate strong upward swing path.
|
|
3.4s |
First Serve · Ad · Leg-action · Side #3
Tim Henman's first serve from the Ad court, filmed from a side angle. His deep knee bend and strong upward leg drive into the court are clearly visible, with the hips uncoiling as he pushes off the ground toward the net.
|
|
3.1s |
First Serve · Ad · Side #1
Tim Henman's first serve from the Ad side, filmed from the side. His shoulders rotate well past perpendicular to the baseline on the trophy phase, then the trunk uncoils sequentially from hips to shoulders as he drives up into contact.
|
|
3.1s |
First Serve · Ad · Side #2
Tim Henman's first serve from the Ad side, filmed from the side. At contact his racket face is slightly tilted upward with the ball struck just above full extension, and the racket head accelerates steeply up and across his body along a pronounced pronation path.
|
|
3.3s |
First Serve · Ad · Side #3
Tim Henman's first serve from the Ad court side, filmed from a side angle. His hips load with a noticeable knee bend on the back leg before driving upward, and his front hip stays closed toward the court until just after contact.
|
|
2.9s |
First Serve · Ad · Toss · Side #1
Tim Henman's first serve from the ad court, filmed from the side. At contact his racket face is slightly tilted forward with the ball struck just above head height, and the upward swing path creates noticeable racket head speed through the hitting zone.
|
|
2.5s |
First Serve → BH Volley → BH Drop Volley · Deuce · Side #1
Tim Henman's backhand volley from the deuce side, filmed from the side. From this angle, his continental grip is evident with a firm but relaxed hand and minimal wrist movement, keeping the racquet head stable through contact for a controlled drop volley.
|
|
8.4s |
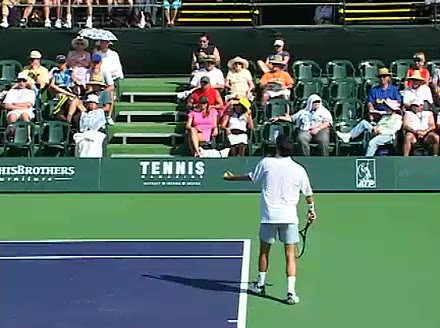
First Serve → BH Volley · Deuce · Side #1
Tim Henman's backhand volley from the deuce side, filmed from a side angle. His small adjustment steps set up a neutral stance with the outside foot planting just before contact, followed by a quick crossover recovery back toward the center of the court.
|
|
5.4s |
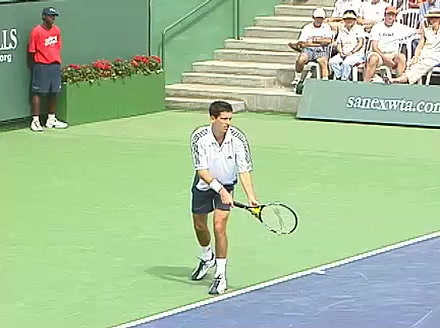
First Serve → BH Volley · Deuce · Side #2
Tim Henman's backhand volley from the deuce court, filmed from a side angle. He takes a small adjustment hop into a neutral stance before the volley, then uses a quick crossover recovery step toward the center of the court.
|
|
4.8s |
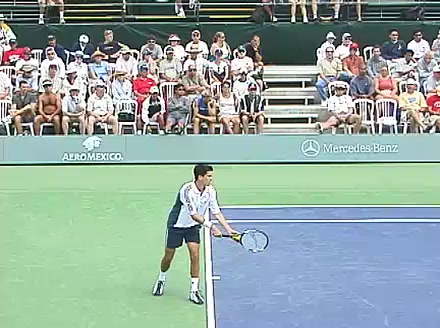
First Serve → BH Volley · Deuce · Side #3
Tim Henman's backhand volley from the deuce side, filmed from a side angle. His shoulders stay relatively closed through contact while the trunk rotates in a compact, connected motion from the legs upward, with a minimal uncoil that keeps the hitting arm and upper body moving as a single unit.
|
|
4.1s |
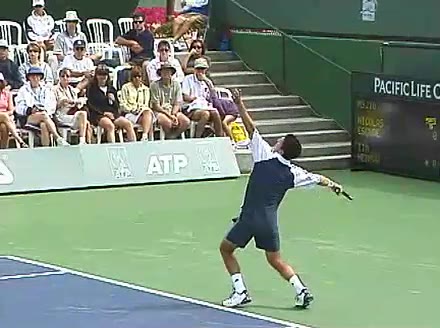
First Serve → BH Volley · Deuce · Side #4
Tim Henman's backhand volley from the deuce side, filmed from a side angle. After contact he extends the racquet forward with his hitting arm while his weight moves through the court and his non-hitting hand starts to come back toward a compact ready position.
|
|
4.4s |
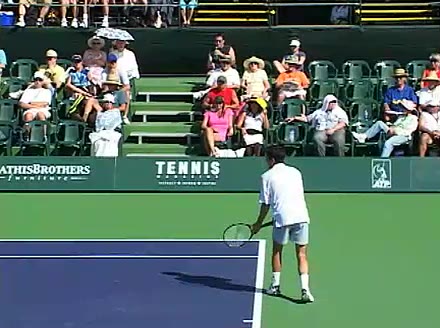
First Serve → BH Volley · Deuce · Side #5
Tim Henman's backhand volley from the deuce side, filmed from a side angle. After contact his racquet continues forward with a compact punch while his weight moves through the court and his non-hitting hand helps him quickly recover into a ready position near the net.
|
|
6.5s |
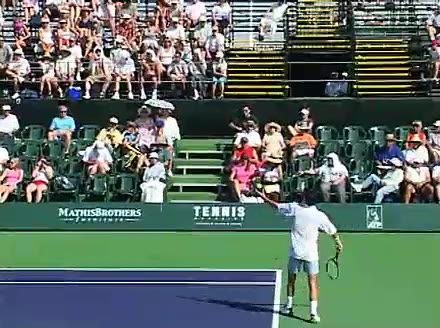
First Serve → BH Volley · Deuce · Side #6
Tim Henman's backhand volley from the deuce court, filmed from the side. After contact he drives his weight forward into the court and quickly brings both hands back toward a compact ready position for the next shot.
|
|
4.4s |
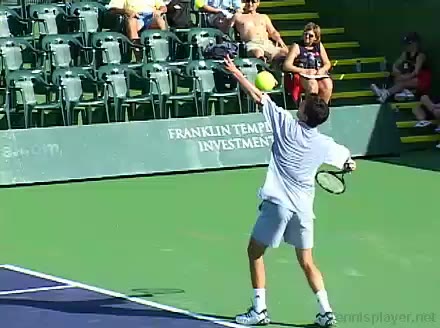
First Serve · Deuce · Body-rotation · Side #1
Tim Henman's first serve from the deuce court, filmed from the side. His follow-through carries his racket across his body as his weight drives into the court, quickly bringing his non-hitting hand back in front of his torso to transition toward a ready position for moving forward.
|
|
3s |
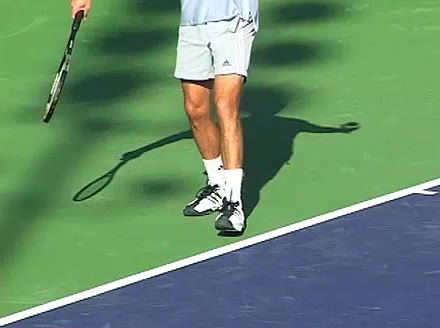
First Serve → FH Volley · Deuce · Side #1
Tim Henman’s forehand volley from the deuce court, filmed from the side. From this angle you can see his continental grip stay firm with minimal grip change and a stable wrist, with only a short, controlled wrist punch through contact.
|
|
5.3s |
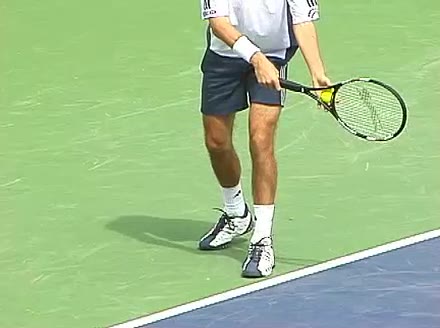
First Serve → FH Volley · Deuce · Side #2
Tim Henman's forehand volley from the deuce court, filmed from a side angle. His footwork shows a quick adjustment step into the volley with a slightly closed stance, followed by a small recovery step back toward the center of the court.
|
|
4.7s |
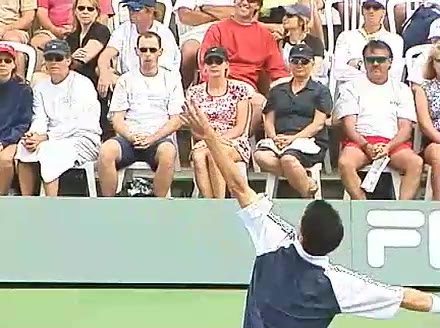
First Serve → FH Volley · Deuce · Side #3
Tim Henman's forehand volley from the deuce side, filmed from a side angle. He takes a small adjustment step with his right foot into a slightly open stance before contact, then uses a quick recovery step to move back toward the center of the court.
|
|
4.4s |
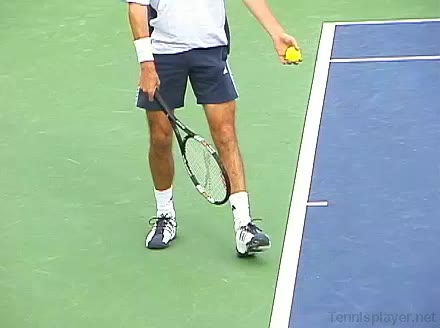
First Serve · Deuce · Leg-action · Side #1
Tim Henman's first serve from the deuce court, filmed from the side. His follow-through carries his momentum into the court with a pronounced front-leg drive, and he quickly brings both hands back toward a compact ready position for the next shot.
|
|
3.3s |
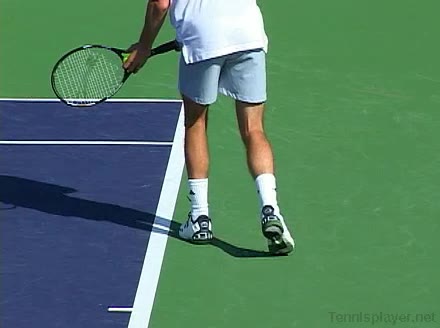
First Serve · Deuce · Leg-action · Side #2
Tim Henman's first serve from the deuce court, filmed from the side. His leg drive is clearly visible as he bends deeply on the back leg, then extends upward into the court with a pronounced forward landing to initiate recovery toward the net.
|
|
3.3s |
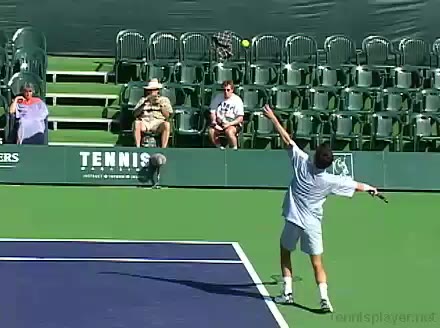
First Serve · Deuce · Side #1
Tim Henman's first serve from the deuce court, filmed from the side. His footwork shows a measured platform stance with a subtle weight transfer from back to front leg before landing on his front foot and taking an initial step forward into the court.
|
|
2.5s |
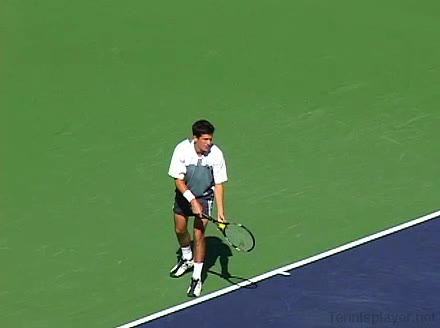
First Serve · Deuce · Side #2
Tim Henman's first serve from the deuce court, filmed from a side angle. His legs load with a deep knee bend before driving upward, and his hips rotate from a closed position into a fully opened stance toward the court during the swing.
|
|
2.8s |
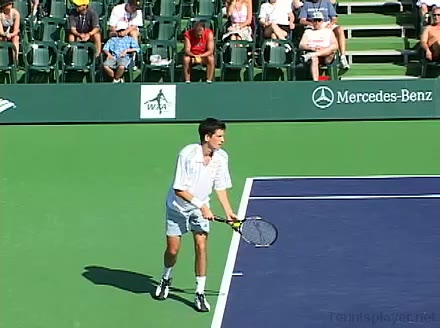
First Serve · Deuce · Side #3
Tim Henman's first serve from the deuce side, filmed from the side. After contact he drives his weight into the court and finishes with his tossing arm dropping quickly as he moves into a compact ready position for an immediate forward transition.
|
|
3.2s |
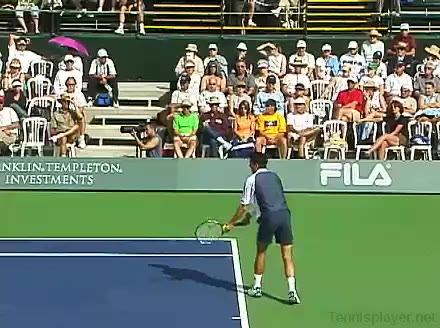
First Serve · Deuce · Side #4
Tim Henman's first serve from the deuce court, filmed from a side angle. His shoulders rotate deeply away from the court during the toss, creating a pronounced trunk coil that uncoils sequentially from hips to shoulders into the hitting phase.
|
|
2.8s |
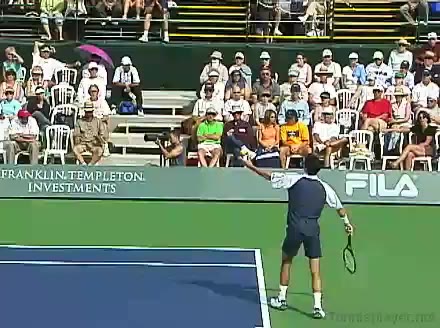
First Serve · Deuce · Toss · Side #1
Tim Henman's first serve from the deuce court, filmed from the side. At contact his racket face is nearly vertical with a slightly closed angle, meeting the ball at full extension just above head height with a pronounced upward swing path.
|
|
4.1s |
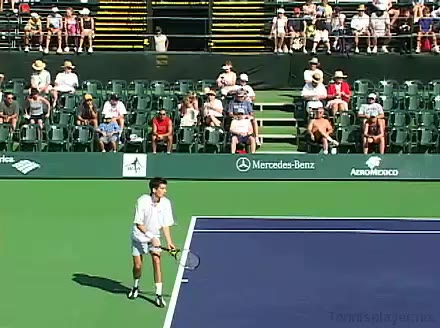
First Serve · Deuce · Toss · Side #2
Tim Henman's first serve from the deuce side, filmed from the side. His continental grip stays firm with minimal wrist flex, and you can see a delayed wrist pronation that snaps through just after contact.
|
|
2.8s |
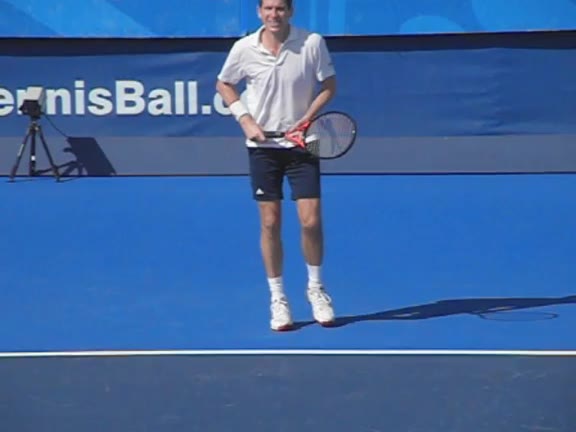
FH
Henman's forehand from a central baseline position, filmed from a front interactive forum angle. His eastern forehand grip is clear, with a relaxed wrist that stays laid back through the swing before a late, compact release at contact.
|
|
214.4s |
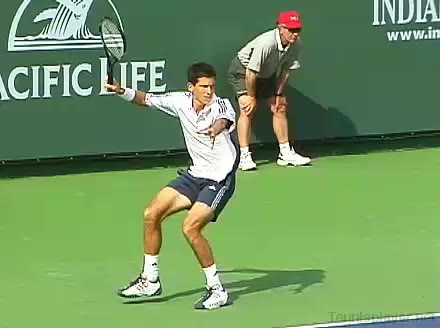
FH Center · Court-level-front #1
Tim Henman's forehand from the center of the court, filmed from a front court-level angle. His footwork features a small adjustment hop into a neutral stance followed by a quick recovery step that readies him to move forward or laterally after contact.
|
|
2.9s |
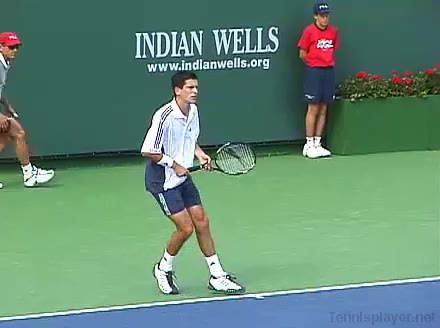
FH Center · Court-level-front #2
Tim Henman's forehand from the center of the court, filmed from a front court-level angle. His shoulders and trunk coil early with a pronounced upper-body turn, then uncoil in sequence so the torso begins rotating toward the target just before the arm and racquet accelerate through contact.
|
|
2.6s |
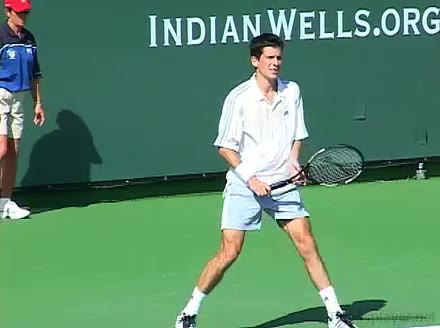
FH Center · Court-level-front #3
Tim Henman's forehand from the center of the court, filmed from a front court-level angle. His eastern-leaning forehand grip is paired with a relaxed wrist that sets into clear lag on the takeback before subtly unwinding into a compact pronation through contact.
|
|
3.1s |
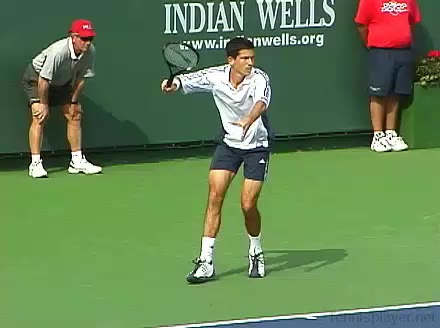
FH Inside In · Court-level-front #1
Tim Henman's forehand InsideIn from the center of the court, filmed from a court_level front angle. His shoulders rotate well past perpendicular to the net in the unit turn, then the trunk uncoils ahead of the arm swing so the hitting shoulder lags briefly behind the torso before contact.
|
|
2.9s |
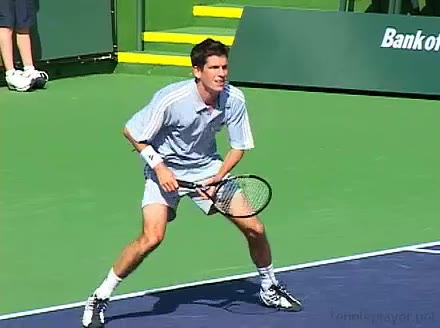
FH Inside In · Court-level-front #2
Tim Henman's forehand inside-in from the center of the court, filmed from a court-level front angle. His early split-step leads into a quick pivot and semi-open stance, with small adjustment steps before contact and a decisive crossover recovery toward the opposite sideline.
|
|
2.2s |
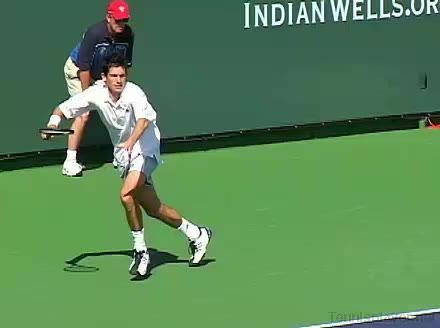
FH Running · Court-level-front #1
Tim Henman’s running forehand from the center of the court, filmed from a court-level front angle. After contact his follow-through finishes high across his body while his weight continues moving forward, and he quickly brings both hands back toward a neutral ready position for the next shot.
|
|
2.7s |
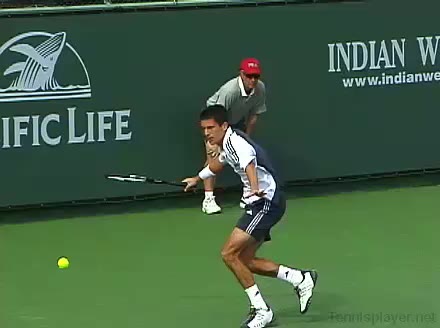
FH Running · Court-level-front #2
Tim Henman's running forehand from a neutral position, filmed from a court-level front angle. His eastern forehand grip is evident with a relaxed hand, and you can see pronounced wrist lag that unwinds into a compact snap just before contact.
|
|
2.6s |
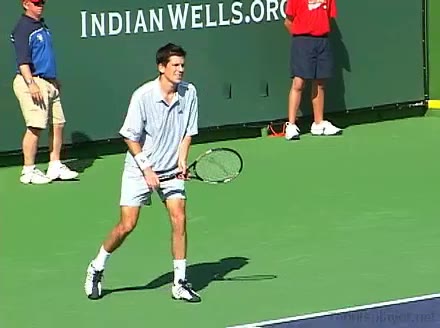
FH Running · Court-level-front #3
Tim Henman's running forehand from a neutral court position, filmed from a court-level front angle. At contact his racket face is slightly closed with the ball struck just in front of his lead hip, and the racket head whips upward on a low-to-high path to add topspin while he moves through the shot.
|
|
2.9s |
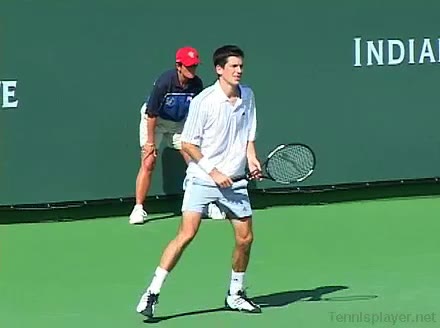
FH Wide · Court-level-front #1
Tim Henman's forehand from a wide position, filmed from a court_level front angle. At contact his racket face is slightly closed with the ball struck around waist height, and the racket head accelerates forward on a relatively compact, linear swing path.
|
|
3s |
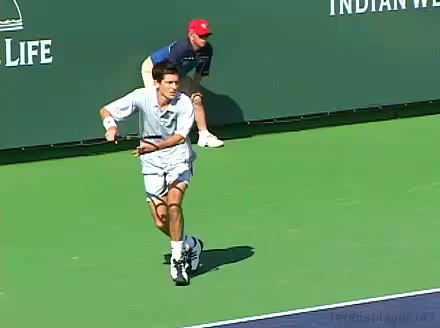
FH Wide · Court-level-front #2
Tim Henman’s forehand from the center of the court, filmed from a court_level front angle. After contact he lets his racquet wrap across his body while his weight moves into the court, quickly bringing both hands back toward a neutral ready position for the next shot.
|
|
2.8s |
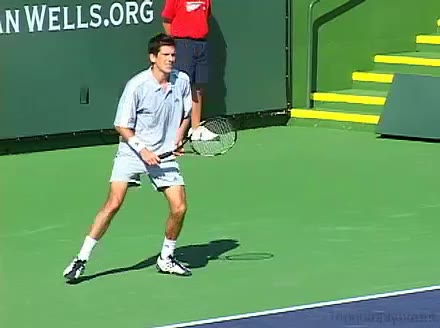
FH Wide · Court-level-front #3
Tim Henman’s forehand from the center of the court, filmed from a court_level front angle. His footwork includes a quick adjustment step out to the wide ball before planting in a semi-open stance and using a small recovery step to move back toward the middle.
|
|
2.7s |

FH Wide · Court-level-front #4
Tim Henman's forehand from a wide position, filmed from a court-level front angle. His semi-western grip is clear with the racket hand slightly under the handle, and there is pronounced wrist lag in the forward swing before a controlled, compact wrist snap at contact.
|
|
2.6s |
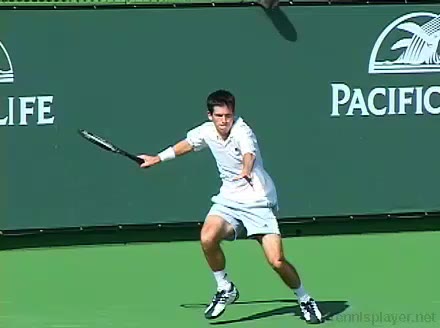
FH Wide · Court-level-front #5
Tim Henman's forehand from the center of the court, filmed from a court_level front angle. His hips stay relatively closed at the start with a noticeable knee bend, then drive into the shot as his legs push upward and forward toward the wide target.
|
|
3.6s |
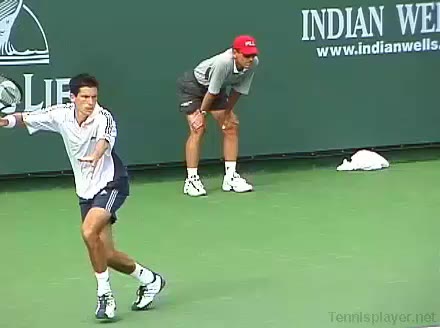
FH Wide · Court-level-front #6
Tim Henman's forehand from a wide position, filmed from a court-level front angle. After contact his follow-through finishes high across his body while his non-hitting hand extends back for balance as he recovers toward a neutral ready position.
|
|
2.6s |
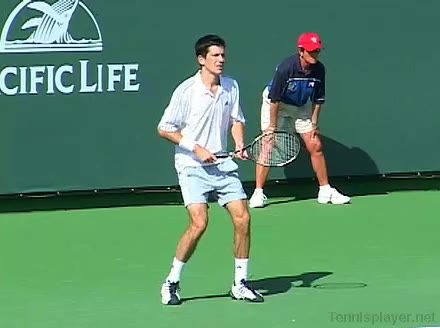
FH Half Volley Wide · Court-level-front #1
Tim Henman's forehand wide half-volley from the front court position, filmed from a court-level front angle. His hips stay relatively low with a pronounced knee bend as he lunges wide, and his outside leg drives laterally to stabilize his base through contact.
|
|
2.4s |
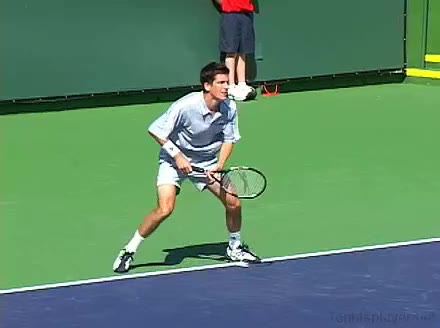
FH Half Volley Wide · Court-level-front #2
Tim Henman's forehand wide half-volley from the front court position, filmed from a court_level front angle. At contact his racket face is slightly open with the ball struck just below net height, and he shortens the swing path to keep the racket head stable through impact.
|
|
1.9s |
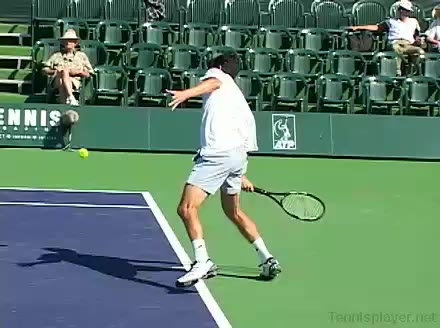
FH Center · Court-level-side #1
Tim Henman's forehand from the center of the court, filmed from a court-level side angle. His shoulders load with a pronounced turn relative to his hips before uncoiling in sequence, with the trunk rotation clearly driving the forward swing path.
|
|
2s |
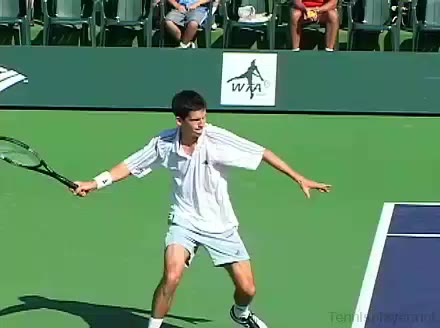
FH Center · Court-level-side #2
Tim Henman's forehand from the center of the court, filmed from a court-level side angle. His hips stay relatively closed through the loading phase with a noticeable knee bend, then unwind in sync with a strong leg drive into the court.
|
|
2.1s |
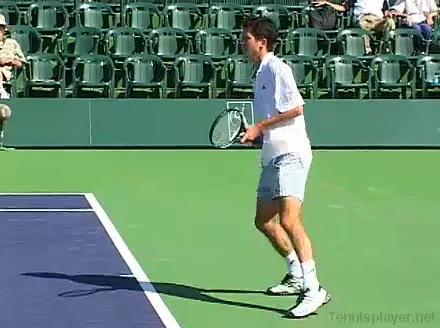
FH Half Volley Center · Court-level-side
Tim Henman's forehand half-volley from center court, filmed from a court-level side angle. The racket meets the ball just in front of his body with a slightly open face and a compact, abbreviated forward swing path to control the low contact.
|
|
2.2s |

FH Inside In · Court-level-side
Tim Henman's forehand Inside-In from the court level, filmed from the side. His eastern forehand grip is clear, with a relaxed hand and noticeable wrist lag that unwinds into a controlled, compact snap through contact.
|
|
2.4s |
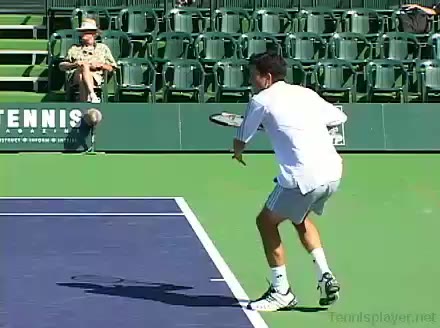
FH Inside Out · Court-level-side #1
Tim Henman’s forehand InsideOut from the center of the court, filmed from a court_level_side angle. At contact his racket face is slightly closed with the ball struck around waist height, and the racket head accelerates steeply upward along a low-to-high swing path.
|
|
2.7s |
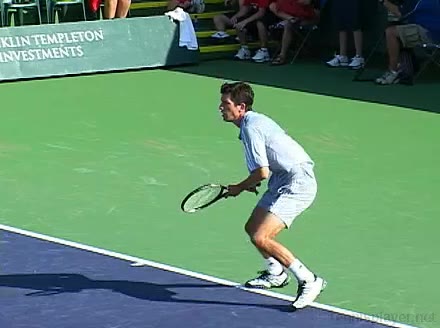
FH Inside Out · Court-level-side #2
Tim Henman's forehand InsideOut from the center of the court, filmed from a court_level_side angle. His eastern forehand grip is firm with noticeable wrist lag on the take-back that unwinds into a controlled pronation through contact.
|
|
2.3s |
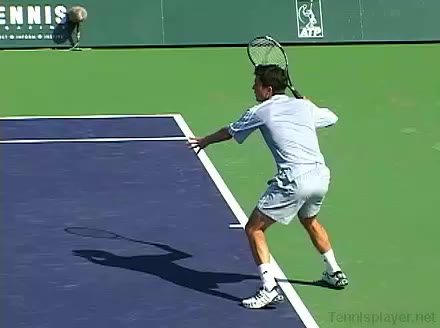
FH Inside Out · Court-level-side #3
Tim Henman's forehand inside-out from the center of the court, filmed from a court-level side angle. At contact his racket face is slightly closed with the ball meeting the strings just in front of his lead hip, and the racket head accelerates upward on a steep low-to-high path.
|
|
2.8s |
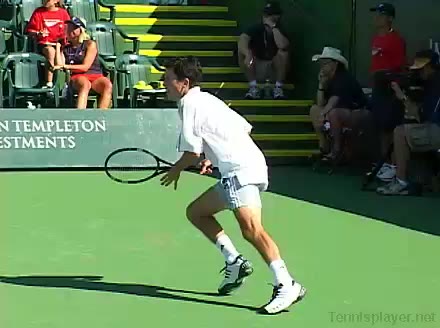
FH Lob · Court-level-side
Tim Henman's forehand lob from the baseline, filmed from a court-level side angle. His shoulders rotate as a unit with the trunk into a compact coil before the ball rises, then uncoil together in a smooth upward arc that extends the hitting arm and racquet path over the contact point.
|
|
3.7s |
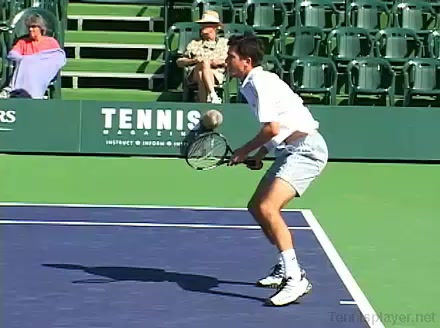
FH Moves Back · Court-level-side #1
Tim Henman's forehand while moving back from a neutral court position, filmed from a court-level side angle. His shoulders coil significantly with the hitting-side shoulder turning back early, then uncoil in sync with a pronounced trunk rotation that leads the arm through contact.
|
|
2.3s |
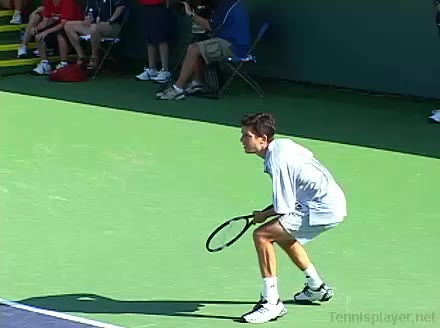
FH Moves Back · Court-level-side #2
Tim Henman's forehand while moving back from a neutral position, filmed from a court-level side angle. His footwork shows small adjustment hops as he retreats, setting up in a semi-open stance before pushing off the outside leg to recover toward the baseline.
|
|
3.9s |

FH Moves Back · Court-level-side #3
Tim Henman's forehand while moving back from a neutral court position, filmed from a court-level side angle. His hips stay relatively closed as he loads on the outside leg, with a noticeable knee bend and upward leg drive as he rotates through the shot.
|
|
1.9s |
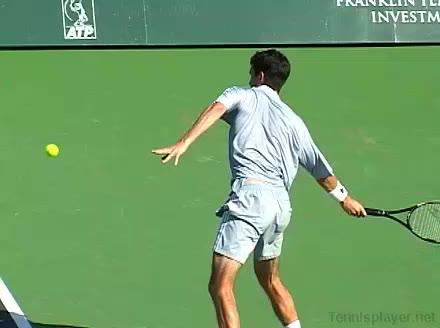
FH Moves Back · Court-level-side #4
Tim Henman's forehand while moving back from a neutral court position, filmed from a court level side angle. His hips stay relatively closed as he retreats, with a noticeable knee bend and rear-leg push-off to stabilize and transfer weight into the shot despite moving backward.
|
|
2.2s |
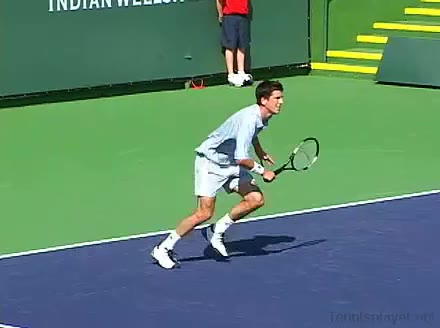
FH Short · Court-level-side #1
Tim Henman's forehand from the short court, filmed from a court-level side angle. His follow-through finishes high with the racket wrapping across his body as he transfers weight into the court and quickly recovers toward a neutral ready position.
|
|
3.3s |
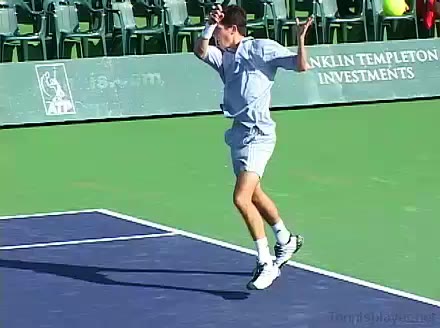
FH Short · Court-level-side #2
Tim Henman's forehand from the short court, filmed from a court-level side angle. His compact split step into a semi-open stance is followed by a small adjustment shuffle, and he finishes with a forward recovery step that keeps him moving into the court.
|
|
1.8s |
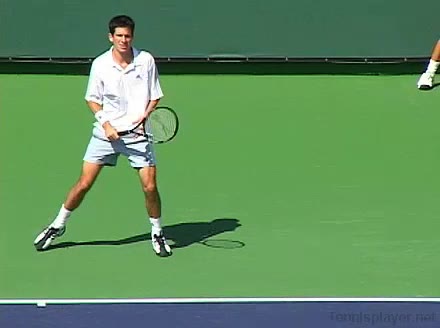
FH Center · Front #1
Tim Henman's forehand from the center of the court, filmed from the front. His compact split-step leads into a neutral stance, with small adjustment steps aligning his body so the hitting shoulder stays directly behind the contact point.
|
|
2.6s |
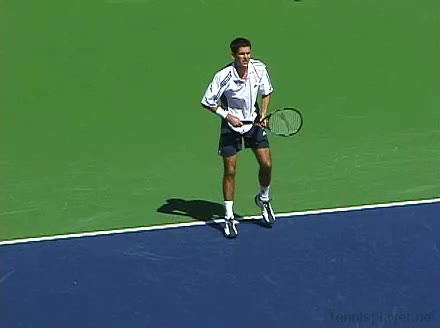
FH Center · Front #2
Tim Henman's forehand from the center of the court, filmed from the front. The racket face is slightly closed at a contact point around waist height, with the racket head accelerating low to high directly through the ball.
|
|
2.9s |
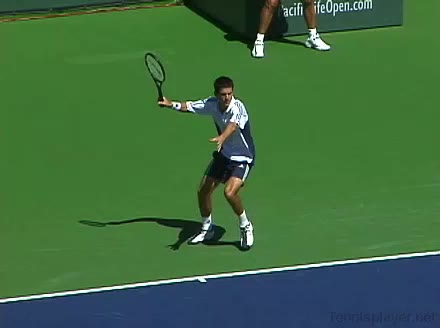
FH Center · Front #3
Tim Henman's forehand from the center of the court, filmed from the front. After contact his follow-through wraps across his body while his weight moves into the court, and he quickly brings both hands back toward a neutral ready position.
|
|
2.6s |

FH Half Volley Center · Front
Tim Henman's forehand half-volley from the center of the court, filmed from the front. His feet stay relatively narrow with a compact neutral stance as he takes a short adjustment step forward into the ball, minimizing recovery movement after contact.
|
|
1.7s |
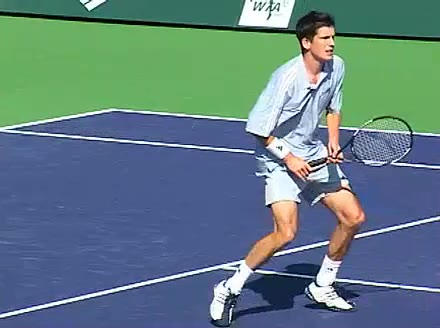
FH Drop Volley · Front
Tim Henman's forehand drop volley from the net, filmed from the front. His shoulders stay relatively square to the net with only a modest trunk coil, and the uncoiling is brief and compact as he softens the shot with minimal forward torso rotation.
|
|
4.3s |
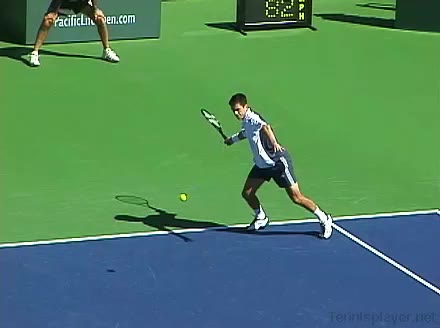
FH Inside In · Front #1
Tim Henman’s forehand from an inside-in position, filmed from the front. At contact his racket face is slightly closed with the ball struck around waist to mid-torso height, and the racket head accelerates steeply upward along an inside-out swing path.
|
|
2.1s |
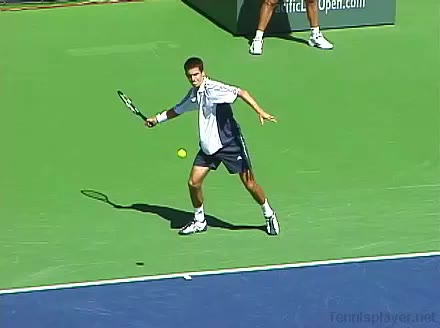
FH Inside In · Front #2
Tim Henman's forehand inside-in from the center of the court, filmed from the front. His contact point is slightly in front of his body with the racket face moderately closed, and the swing path drives up and through the ball with noticeable racket head acceleration.
|
|
2s |
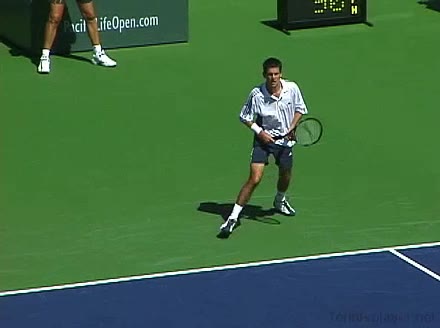
FH Inside In · Front #3
Tim Henman's forehand InsideIn from the center of the court, filmed from the front. His follow-through finishes high across his body with his weight moving into the court, and he quickly brings both hands back to a neutral ready position for recovery.
|
|
3.9s |
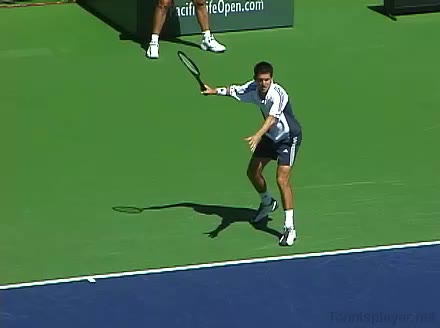
FH Inside In · Front #4
Tim Henman's forehand Inside-In from the center of the court, filmed from the front. His shoulders load with a pronounced turn relative to his hips before uncoiling in sequence, making the trunk rotation and timing of the upper-body release easy to distinguish.
|
|
2.7s |
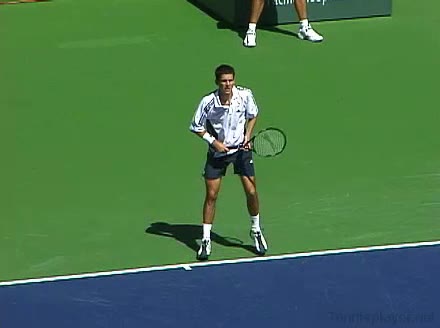
FH Inside In · Front #5
Tim Henman's forehand Inside-In from the center of the court, filmed from the front. His hips stay relatively closed at the start of the swing, with a noticeable knee bend and upward leg drive as the hips rotate through toward the Inside-In target.
|
|
2.3s |
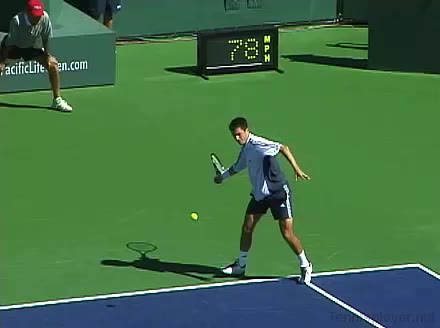
FH Inside In · Front #6
Tim Henman's forehand InsideIn from the center of the court, filmed from the front. His follow-through finishes high across his body with his weight transferring onto his front foot before he quickly resets his hands into a compact ready position.
|
|
2.2s |
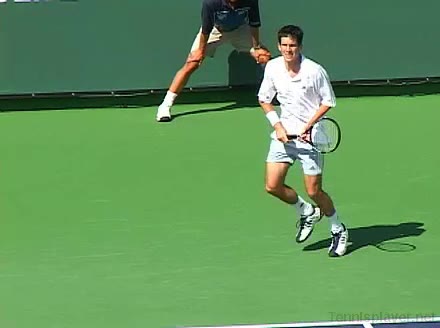
FH Inside In · Front #7
Tim Henman's forehand InsideIn from the center of the court, filmed from the front. His split-step leads into a quick pivot into a semi-open stance, with small adjustment steps before contact and a clear recovery step that brings him back toward the center.
|
|
2.4s |

FH Inside In · Front #8
Tim Henman's forehand InsideIn from the center of the court, filmed from a front angle. After contact his follow-through finishes high across his body while his non-hitting hand extends back for balance as he quickly recovers toward a neutral ready position.
|
|
2.1s |
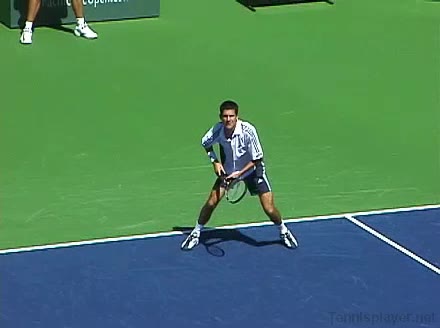
FH Inside In · Front #9
Tim Henman's forehand Inside-In from the center of the court, filmed from the front. At contact, his racket face is slightly closed with the ball struck around waist to chest height, and the racket head accelerates steeply upward along an inside-out swing path.
|
|
3.2s |
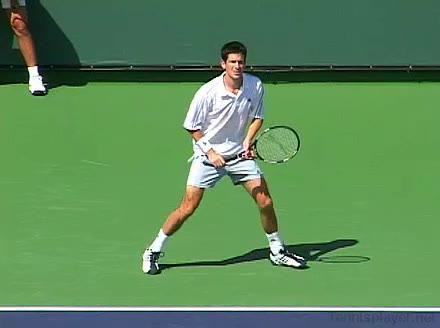
FH Inside Out · Front #1
Tim Henman's forehand inside-out from the center of the court, filmed from the front. After contact his follow-through finishes high across his body while his weight transfers onto his front foot, quickly bringing both hands back to a neutral ready position.
|
|
3.4s |
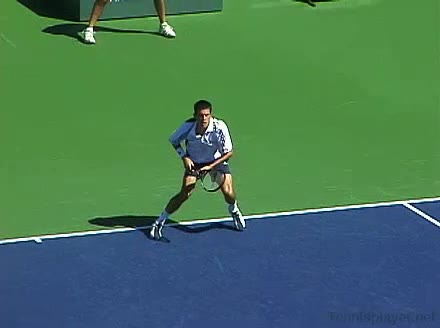
FH Inside Out · Front #2
Tim Henman's forehand InsideOut from the center of the court, filmed from the front. His hips load with a noticeable coil before unwrapping toward the target as his knees stay flexed and then extend into a strong forward leg drive.
|
|
2.2s |
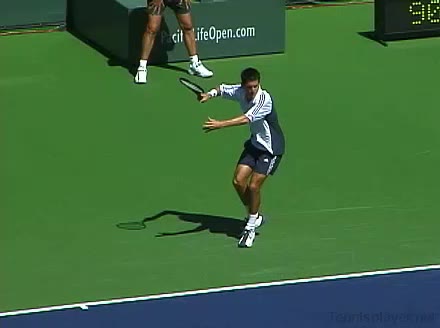
FH Inside Out · Front #3
Tim Henman's forehand from the center/inside-out position, filmed from the front. His semi-western grip is easy to see, with a pronounced wrist lag on the take-back that unwinds into a controlled, late wrist snap through contact.
|
|
2.6s |
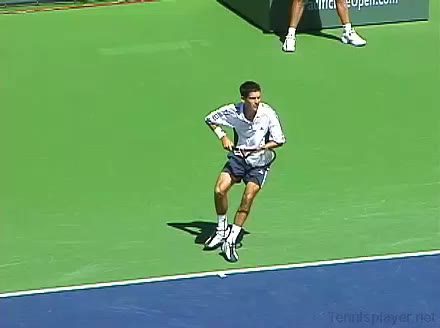
FH Inside Out · Front #4
Tim Henman's forehand InsideOut from the center of the court, filmed from a front angle. His hips stay relatively closed at the start with a noticeable knee bend, then rotate into the shot as his legs drive upward and forward through contact.
|
|
3s |
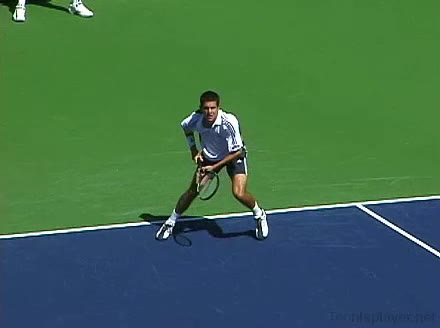
FH Inside Out · Front #5
Tim Henman's forehand InsideOut from the center of the court, filmed from the front. His shoulders and trunk coil significantly away from the target before uncoiling in sequence, with the front hip and chest rotating toward the ball just after the racquet drops into the slot.
|
|
2.1s |
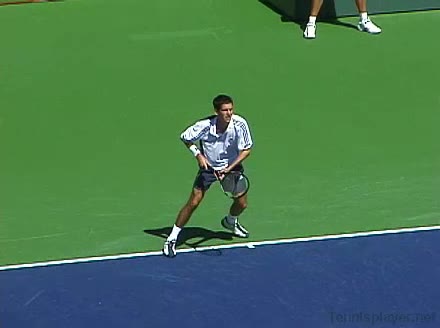
FH Inside Out · Front #6
Tim Henman's forehand InsideOut from the center of the court, filmed from the front. His follow-through finishes high across his body with his non-hitting hand retracting toward his torso as he quickly recovers into a balanced, forward-weighted ready position.
|
|
2.1s |
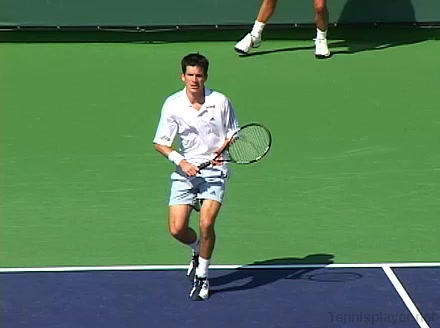
FH Running · Front #1
Tim Henman's running forehand from the center of the court, filmed from the front. After contact his follow-through wraps across his body while his non-hitting hand extends back for balance before he quickly regains a neutral ready position.
|
|
2.6s |
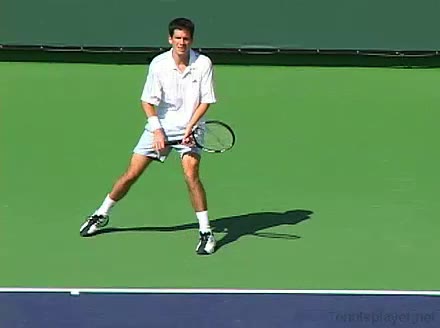
FH Running · Front #2
Tim Henman's running forehand from the front, filmed from a front angle. His semi-western grip is evident with a pronounced wrist lag on the forward swing that straightens into a firm, stable wrist position at contact.
|
|
2.7s |
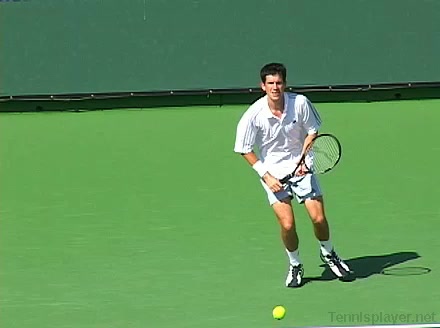
FH Running · Front #3
Tim Henman’s running forehand from the center of the court, filmed from the front. His footwork features quick adjustment steps into an open stance followed by a pronounced crossover recovery as he continues moving through the shot.
|
|
3.1s |
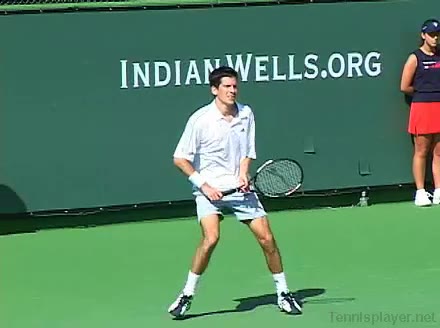
FH Running · Front #4
Tim Henman's running forehand from the center of the court, filmed from the front. His hips stay relatively closed as he drives off the outside leg, with a pronounced knee bend that loads into a forward push through contact.
|
|
2.8s |
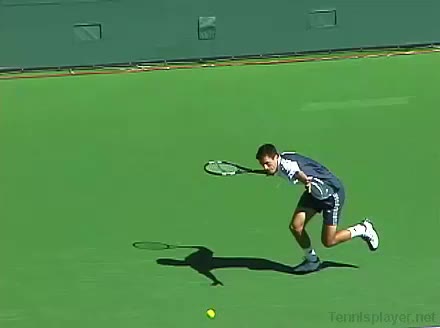
FH Running · Front #5
Tim Henman's running forehand from the center of the court, filmed from the front. His hips stay relatively closed as he chases the ball, with a pronounced knee bend on the outside leg providing the main push-off into the shot.
|
|
2.8s |
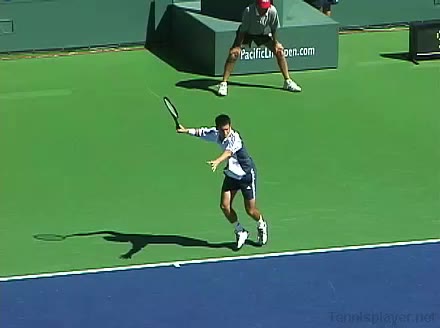
FH Short · Front #1
Tim Henman's forehand from the center of the court, filmed from the front. His shoulders rotate significantly past his hips on the unit turn, then his trunk uncoils ahead of the arm swing, making the sequential rotation through the torso easy to see.
|
|
2.4s |
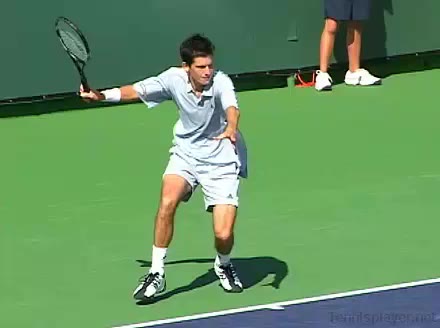
FH Short · Front #2
Tim Henman's forehand from the center of the court, filmed from the front. His eastern forehand grip is evident with a relaxed hand, and there is a clear wrist lag that releases into a compact, controlled snap at contact on the short ball.
|
|
2.3s |
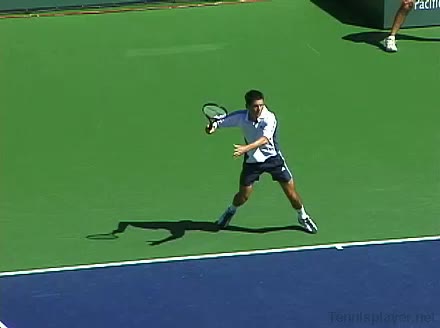
FH Short · Front #3
Tim Henman’s forehand from the center of the court, filmed from the front. His contact point is slightly in front of his body with the racket face moderately closed, and the swing path accelerates low to high through a compact, controlled follow-through.
|
|
2.7s |
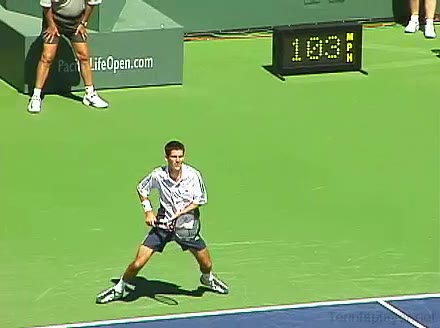
FH Short · Front #4
Tim Henman's forehand from the center court position, filmed from the front. His eastern forehand grip is evident with a relaxed hand on the handle, and there is a clear, controlled wrist lag that straightens into a firm, stable wrist at contact on the short ball.
|
|
2.9s |
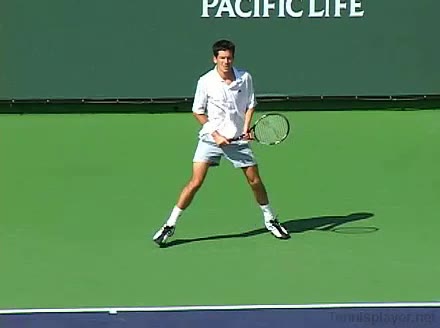
FH Wide · Front #1
Tim Henman's forehand from a wide position, filmed from the front. His shoulders rotate significantly past perpendicular to the net before uncoiling, with the trunk leading the swing and the hitting arm lagging slightly to complete the kinetic chain.
|
|
2.9s |
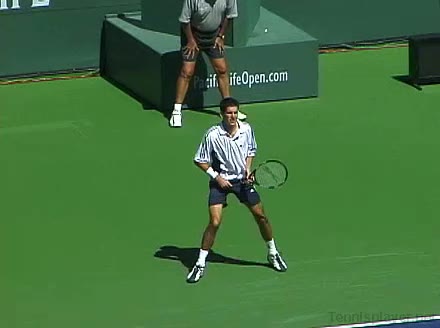
FH Wide · Front #2
Tim Henman's forehand from a wide position, filmed from the front. His hips stay relatively closed at the start with a noticeable knee bend on the outside leg, then rotate and drive forward as he pushes off the ground into contact.
|
|
2.7s |
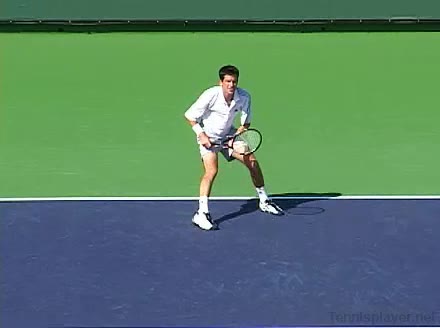
FH Wide · Front #3
Tim Henman's forehand from the center position, filmed from the front. His eastern-leaning forehand grip is paired with noticeable wrist lag on the takeback that straightens into a firm, stable wrist at contact on the wide ball.
|
|
2.4s |
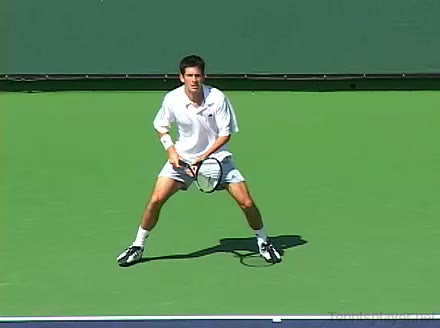
FH Wide · Front #4
Tim Henman's forehand wide from the front, filmed from a front angle. His shoulders turn well past perpendicular to the net before contact, with a noticeable trunk coil that uncoils ahead of the arm to initiate the forward swing.
|
|
3.1s |
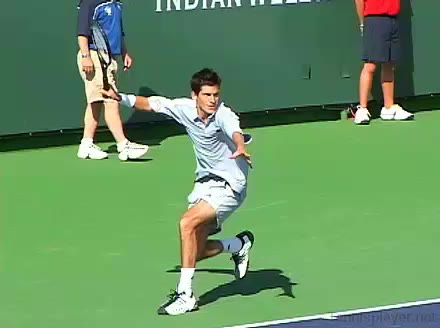
FH Wide · Front #5
Tim Henman's forehand from the center, filmed from the front. His shoulders coil significantly past his hips on the unit turn, then the trunk uncoils ahead of the arm swing, making the chest square to the net shortly after contact on this wide ball.
|
|
2.4s |
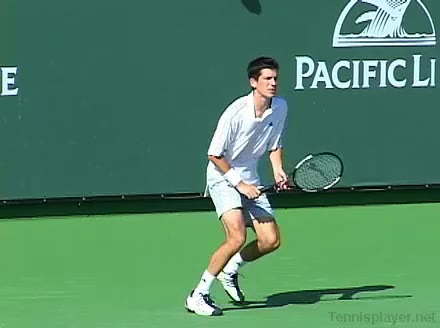
FH Wide · Front #6
Tim Henman's forehand from a wide position, filmed from the front. At contact his racket face is slightly closed with the ball struck around waist height, and the racket head accelerates steeply upward along an inside-out swing path.
|
|
2.9s |
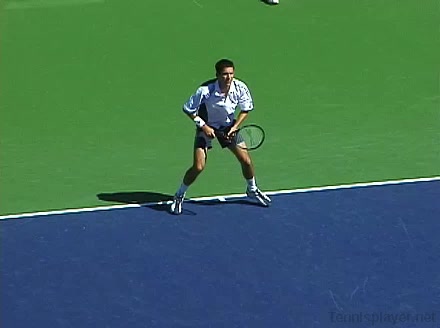
FH Wide · Front #7
Tim Henman's forehand from the center of the court, filmed from the front. After contact on the wide ball, his follow-through finishes high across his body while his non-hitting hand extends back to help him recover quickly toward a neutral ready position.
|
|
3s |
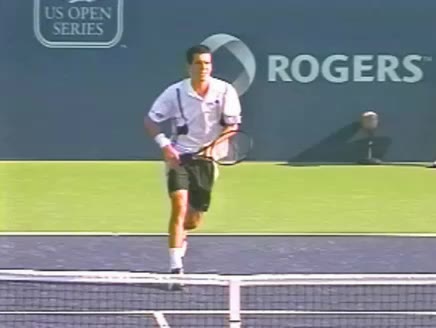
FH Drop Volley · Front #0001
Tim Henman’s forehand drop volley from the front court, filmed from the front. At contact the racket face is slightly open with the ball struck just below net height, and the compact swing path produces a soft, decelerated racket head through impact.
|
|
11.7s |
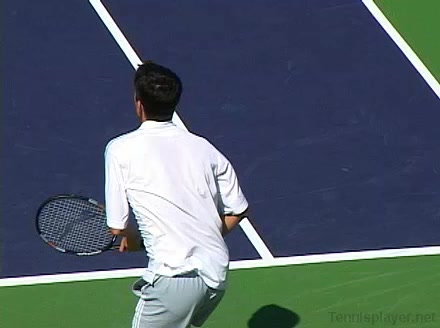
FH · Arm-action · Rear #1
Tim Henman's forehand from the center of the court, filmed from a rear angle. His shoulders and trunk rotate as a single unit on the unit turn, then uncoil in sequence with the hips to create a pronounced shoulder-over-hip alignment through contact.
|
|
2.5s |
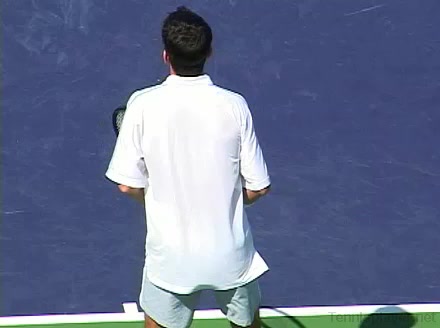
FH · Arm-action · Rear #2
Tim Henman’s forehand from the center of the court, filmed from a rear angle. His feet set into a neutral stance with a small adjustment step before contact, followed by a short recovery step that brings him back toward his ready position.
|
|
2.6s |
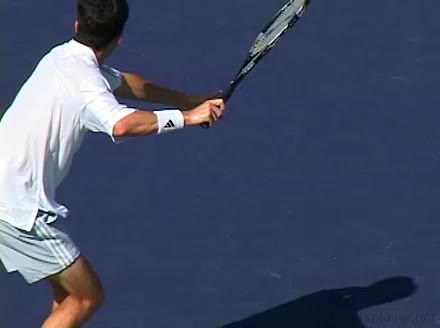
FH · Arm-action · Rear #3
Tim Henman's forehand from the center of the court, filmed from a rear angle. His follow-through finishes high across his body with the non-hitting arm counterbalancing behind him before he quickly recovers back into a neutral ready position.
|
|
3.2s |
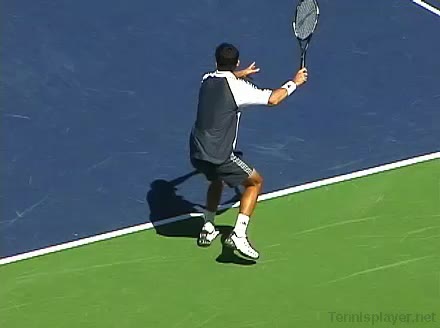
FH Center · Rear
Tim Henman's forehand from the center of the court, filmed from a rear angle. His shoulders rotate well past perpendicular to the net on the unit turn, with a noticeable stretch between his coiled trunk and delayed arm swing as he uncoils into contact.
|
|
2.6s |
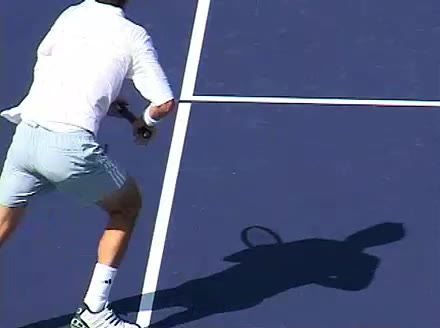
FH Half Volley · Rear
Tim Henman's forehand from the center of the court, filmed from the rear. His shoulders rotate well past perpendicular to the baseline on the backswing, then his trunk uncoils in a smooth sequence that clearly leads the arm and racquet through contact.
|
|
2.4s |
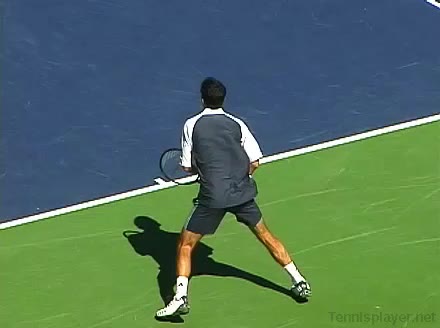
FH Inside In · Rear #1
Tim Henman's forehand InsideIn from a neutral position, filmed from a rear angle. His shoulders rotate well past 90 degrees in the backswing, then uncoil ahead of the hips so the trunk leads the racket into contact.
|
|
3.3s |
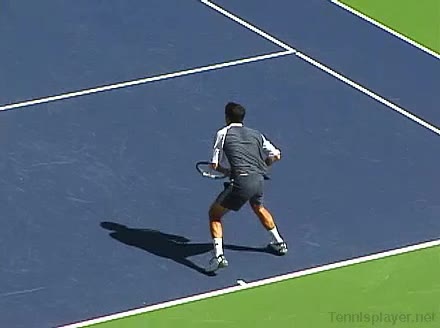
FH Inside In · Rear #2
Tim Henman's forehand Inside-In from the center of the court, filmed from a rear angle. His eastern forehand grip is paired with a pronounced wrist lag on the takeback that unwinds into a subtle pronation through contact.
|
|
2.1s |
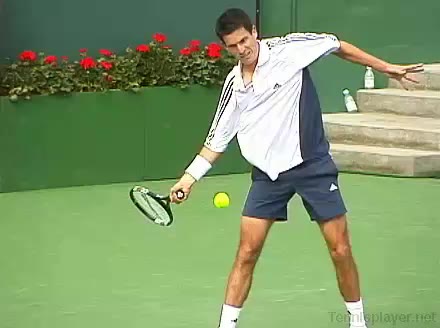
FH Inside In · Rear #3
Tim Henman's forehand InsideIn from a central baseline position, filmed from a rear angle. He uses a small split step into a semi-open stance, then performs a quick pivot and crossover step into the court before recovering back toward the center.
|
|
2.1s |
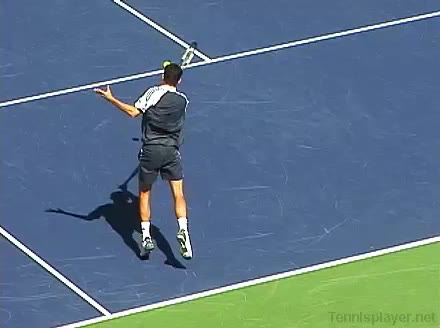
FH Inside In · Rear #4
Tim Henman's forehand InsideIn from a central court position, filmed from a rear angle. His hips stay relatively closed through the loading phase with a pronounced knee bend, then unwind in sync with a strong rear-leg drive into the court.
|
|
1.9s |
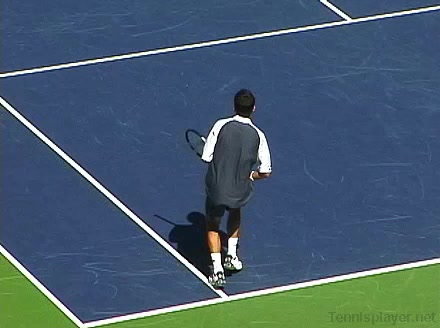
FH Inside In · Rear #5
Tim Henman's forehand InsideIn from a neutral court position, filmed from a rear angle. His hips stay relatively closed during the unit turn before driving forward, with a noticeable knee bend that loads the back leg and then extends into the court through contact.
|
|
2.8s |
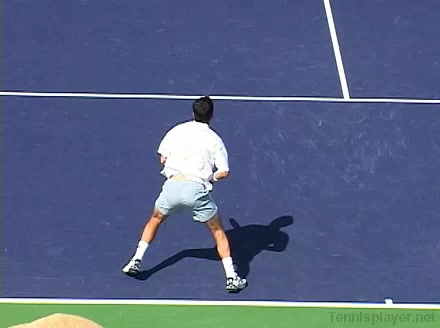
FH Inside Out · Rear #1
Tim Henman's forehand InsideOut from the center of the court, filmed from a rear angle. He uses a semi-open stance with small adjustment steps before contact, then takes a pronounced crossover recovery step to move back toward the middle.
|
|
2.2s |
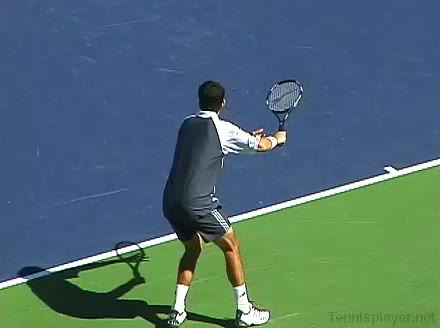
FH Inside Out · Rear #2
Tim Henman's forehand InsideOut from the center of the court, filmed from a rear angle. His shoulders rotate well past 90 degrees relative to his hips on the unit turn, then the trunk uncoils sequentially from pelvis to ribcage to shoulder as he drives through the InsideOut contact.
|
|
2.6s |
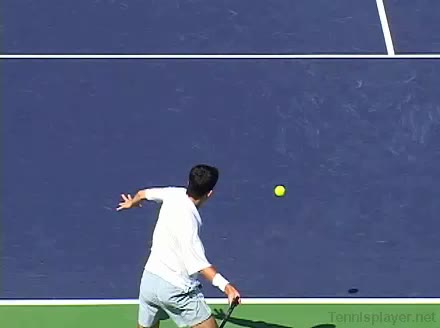
FH Inside Out · Rear #3
Tim Henman's forehand InsideOut from the center of the court, filmed from a rear angle. He uses a small adjustment hop into an open stance and then pivots his right foot to load before taking a couple of quick recovery steps back toward the middle.
|
|
2.2s |

FH Lob · Rear
Tim Henman's forehand lob from the center of the court, filmed from a rear angle. His eastern forehand grip is paired with a relaxed wrist that stays laid back on the upward swing, adding subtle wrist extension just before contact to lift the ball over the opponent.
|
|
3.3s |
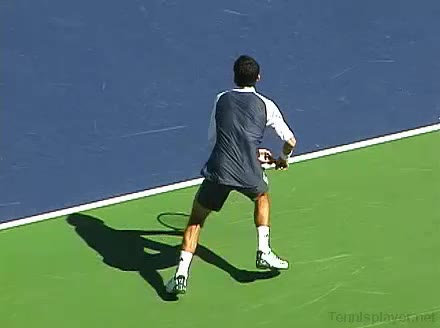
FH Running · Rear #1
Tim Henman’s running forehand from the center of the court, filmed from a rear angle. At contact his racket face is slightly closed with the ball struck around waist height, and his racket head accelerates steeply upward along a low-to-high path.
|
|
3.3s |
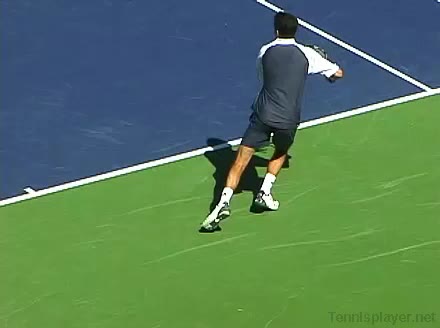
FH Running · Rear #2
Tim Henman's running forehand from a neutral court position, filmed from the rear. His footwork features a quick adjustment shuffle into a semi-open stance followed by crossover recovery steps that carry him back toward the center after contact.
|
|
3s |
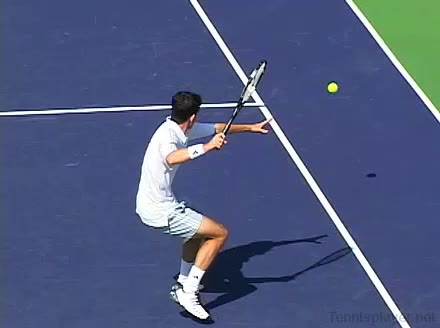
FH Short · Rear #1
Tim Henman's forehand from the center of the court, filmed from a rear angle. At contact his racket face is slightly closed with the ball meeting the strings around waist to mid-torso height, and the racket head accelerates upward along a low-to-high swing path.
|
|
3s |
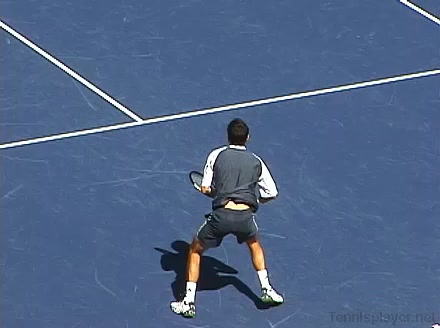
FH Short · Rear #2
Tim Henman's forehand from the center of the court, filmed from a rear angle. He uses a small adjustment hop into a semi-open stance, then takes a couple of quick recovery steps back toward the middle after contact.
|
|
2.3s |
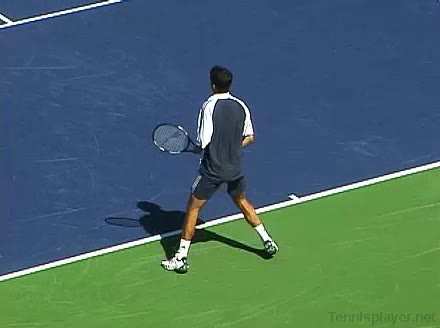
FH Wide · Rear #1
Tim Henman's forehand from a wide position, filmed from a rear angle. After contact his follow-through wraps high across his body while his weight continues moving toward the court, and he quickly brings both hands back toward a neutral ready position as he recovers.
|
|
2.7s |

FH Wide · Rear #2
Tim Henman's forehand from a wide position, filmed from a rear angle. His shoulders turn well past perpendicular to the baseline on the unit turn, with a pronounced trunk coil that uncoils sequentially from hips to shoulders through contact.
|
|
2.5s |
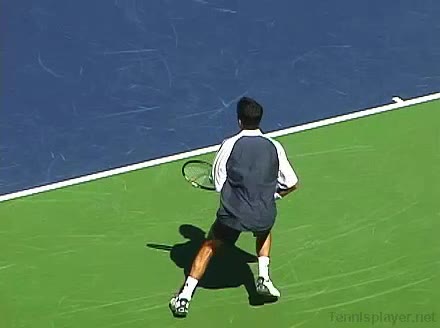
FH Wide · Rear #3
Tim Henman's forehand from a wide position, filmed from a rear angle. His hips stay relatively closed through the loading phase with a noticeable knee bend, then unwind as his legs drive up and into the court during the forward swing.
|
|
2.8s |
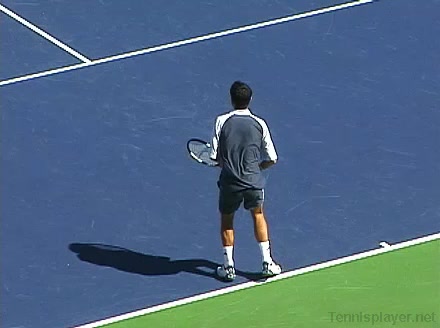
FH Wide · Rear #4
Tim Henman’s forehand from a wide position, filmed from a rear angle. His footwork features a quick adjustment shuffle outward followed by an open-stance plant, with a pronounced recovery step that starts bringing him back toward the center after contact.
|
|
2.6s |
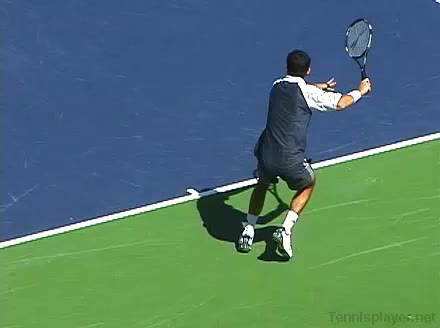
FH Wide · Rear #8
Tim Henman’s forehand from a wide position, filmed from a rear angle. He uses a quick adjustment shuffle outward after the split-step before planting in an open stance to load on the outside leg for the wide ball.
|
|
2.4s |
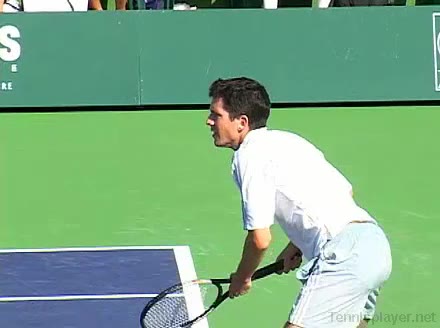
FH · Arm-action · Side #1
Tim Henman's forehand from a central baseline position, filmed from the side. His footwork features a small adjustment hop into a neutral stance, with a clear weight transfer from the back foot to the front foot as he steps into the ball.
|
|
2.1s |
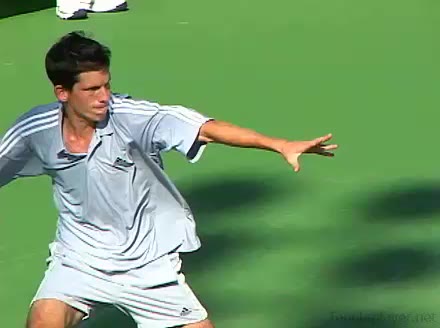
FH · Arm-action · Side #2
Tim Henman's forehand from a neutral court position, filmed from the side. His hips stay relatively closed at the start of the swing, with a noticeable knee bend and then an upward leg drive that extends through contact.
|
|
2.3s |
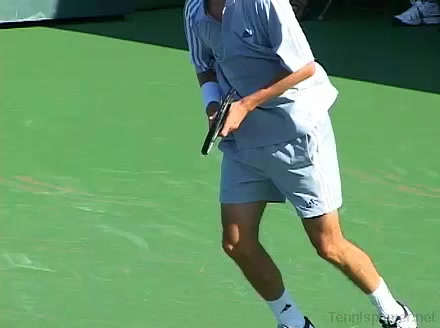
FH · Arm-action · Side #3
Tim Henman's forehand from the middle of the court, filmed from the side. At contact his racket face is slightly closed with the ball struck around waist height, and the forward swing shows a smooth, continuous acceleration through the hitting zone.
|
|
2.4s |
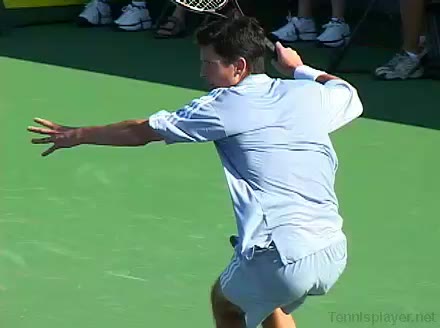
FH · Arm-action · Side #4
Tim Henman's forehand from a neutral position, filmed from the side. His eastern-leaning forehand grip is paired with a noticeable wrist lag on the forward swing that straightens through contact without excessive wrist snap.
|
|
2.7s |
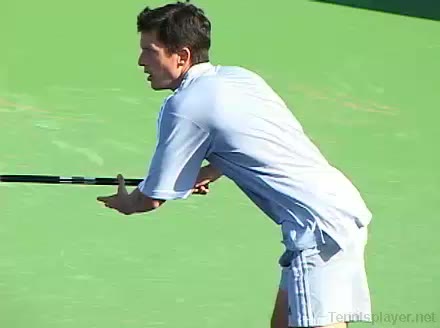
FH · Arm-action · Side #5
Tim Henman's forehand from a neutral court position, filmed from the side. His hips stay relatively closed through the loading phase with a noticeable knee bend, then unwind in sync with a strong leg drive into the court.
|
|
2.6s |
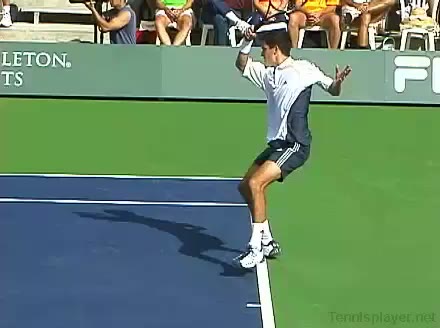
FH Half Volley Center · Side #1
Tim Henman's forehand half-volley from the center of the court, filmed from the side. The racket face is slightly open at a low contact point just in front of his body, with a short, compact swing path that keeps the ball low off the bounce.
|
|
1.9s |
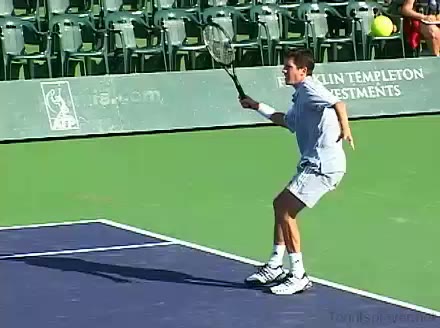
FH Half Volley Center · Side #2
Tim Henman's forehand half-volley from a central court position, filmed from the side. His eastern forehand grip stays relatively firm while the wrist remains stable with only a subtle forward flexion right at contact to soften the half-volley.
|
|
2s |
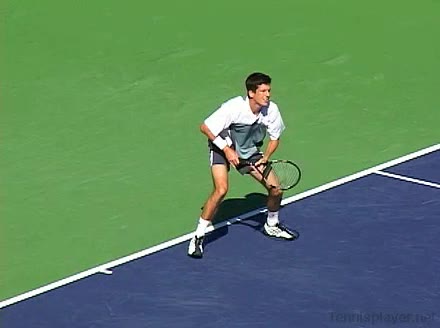
FH Center · Side #1
Tim Henman's forehand from the center of the court, filmed from the side. His hips load with a noticeable coil as his knees flex, then uncoil with a forward leg drive that pushes his weight through the shot.
|
|
2.8s |

FH Center · Side #2
Tim Henman's forehand from the center of the court, filmed from the side. After contact his follow-through wraps across his body with his weight transferring onto his front foot, and he quickly brings both hands back toward a neutral ready position for recovery.
|
|
2.7s |
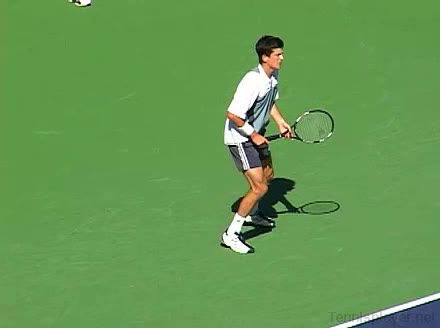
FH Center · Side #3
Tim Henman's forehand from the center of the court, filmed from the side. From this angle, you can see a relaxed eastern forehand grip with pronounced wrist lag on the forward swing that straightens into a firm, stable wrist at contact.
|
|
2.7s |
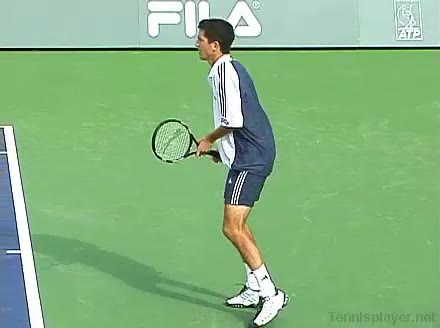
FH Center · Side #4
Tim Henman's forehand from the center of the court, filmed from the side. After contact his follow-through finishes high with the racquet wrapping across his body as he transfers weight onto his front foot and quickly returns the non-hitting hand to help reestablish a neutral ready position.
|
|
2.4s |
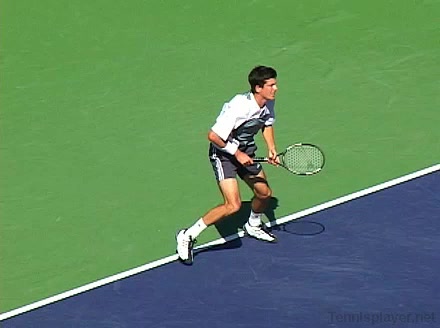
FH Moves Back · Side #1
Tim Henman's forehand while moving back from a neutral position, filmed from the side. The side view makes it clear that he contacts the ball slightly in front of his body with a moderately closed racket face and a low-to-high swing path that accelerates the racket head through contact.
|
|
2s |
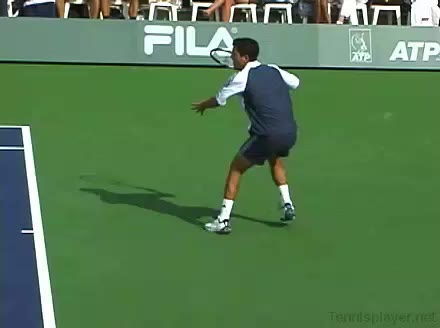
FH Moves Back · Side #2
Tim Henman's forehand while moving back from a neutral position, filmed from the side. His eastern forehand grip is clear, with noticeable wrist lag on the take-back that unwinds into a compact, controlled pronation through contact.
|
|
3s |
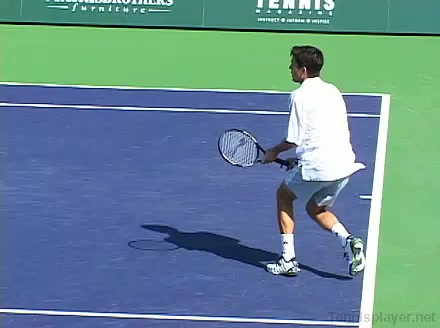
FH Moves Back · Side #3
Tim Henman's forehand while moving back from a neutral position, filmed from the side. His follow-through wraps over his shoulder as his weight shifts slightly backward, and he quickly brings both hands back toward his torso to re-establish a compact ready position.
|
|
3s |
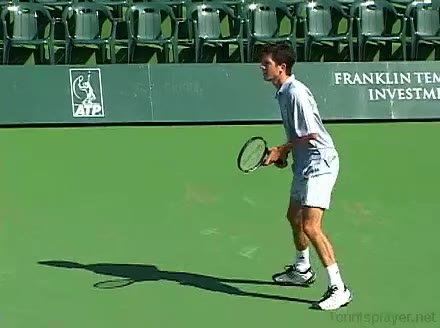
FH Running · Side #1
Tim Henman's running forehand from the side, filmed from a side angle. His shoulders load with a pronounced turn relative to his hips before uncoiling in sync with his forward step, making the trunk rotation and sequencing through contact easy to distinguish.
|
|
3.3s |
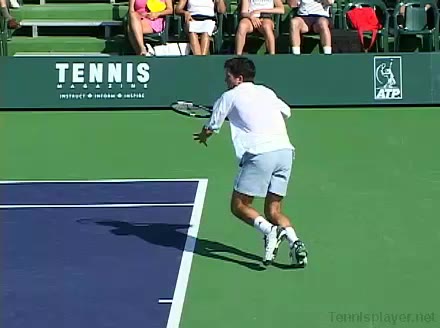
FH Running · Side #2
Tim Henman's running forehand from the side, filmed from a side angle. His shoulders rotate well past perpendicular to the net during the unit turn, then the trunk uncoils ahead of the arm swing, showing clear separation between upper body rotation and the racket release.
|
|
2.9s |
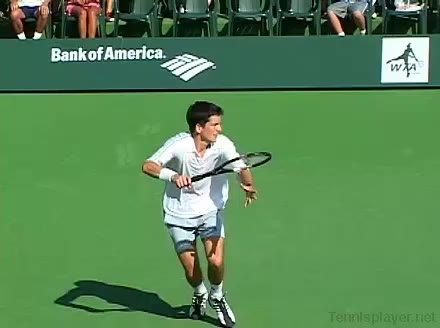
FH Running · Side #3
Tim Henman’s running forehand from the side, filmed from a side angle. At contact his racket face is slightly closed with the ball struck around waist height, and the racket head accelerates steeply upward along a low-to-high path.
|
|
2.7s |
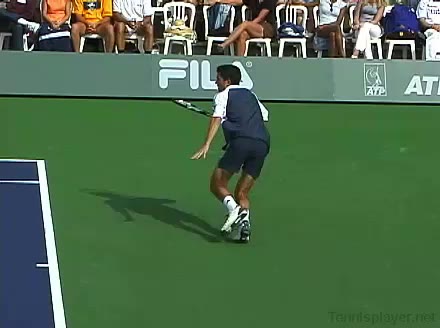
FH Running · Side #4
Tim Henman's running forehand from the deuce side, filmed from the side. After contact he lets the racquet wrap across his body while his non-hitting arm extends back for counterbalance before he gathers his feet into a compact recovery stance.
|
|
3.2s |
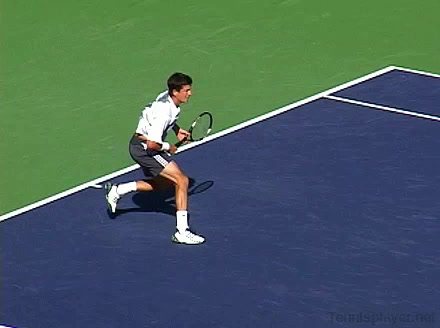
FH Short · Side #1
Tim Henman's forehand from the side, filmed from the Side angle. His shoulders rotate well past perpendicular to the net on the unit turn, then the trunk uncoils ahead of the arm to initiate the forward swing.
|
|
2.1s |
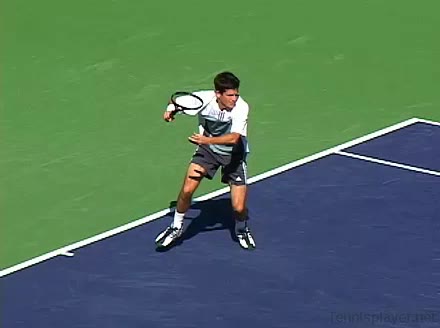
FH Short · Side #2
Tim Henman's forehand from the middle of the court, filmed from the side. His eastern-leaning forehand grip is paired with a noticeable wrist lag on the forward swing that unwinds into a compact, controlled wrist snap through contact.
|
|
2.7s |
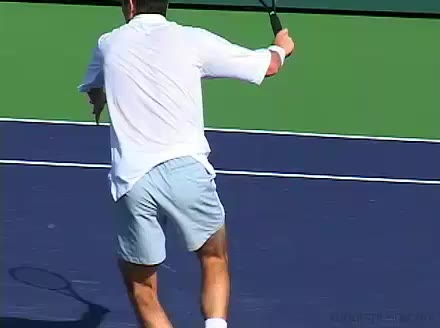
FH Short · Side #3
Tim Henman's forehand from the side, filmed from the side. His hips stay relatively closed through the load with a deep knee bend, then unwind as his rear leg drives forward into the court.
|
|
2.8s |
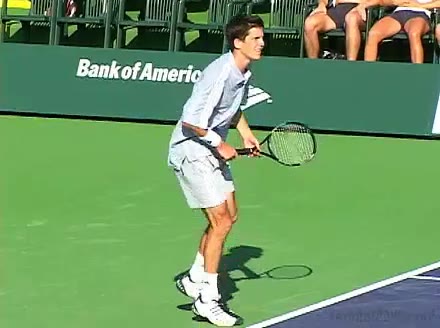
FH Short · Side #4
Tim Henman's forehand from the middle of the court, filmed from the side. His follow-through finishes high with the racquet wrapping across his body while his weight moves forward into the court, bringing him quickly back into a neutral ready position.
|
|
2.8s |
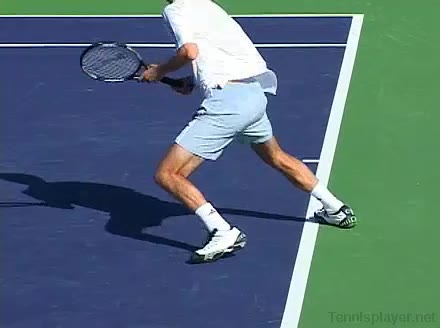
FH Short · Side #5
Tim Henman's forehand from the side, filmed from the side angle. His hips stay relatively closed through the loading phase with a noticeable knee bend, then unwind as his legs drive upward and forward into the shot.
|
|
3s |
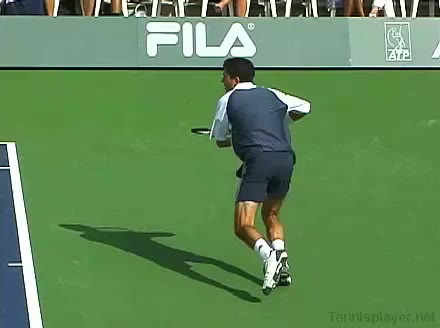
FH Half Volley Wide · Side
Tim Henman's forehand wide half-volley from the side, filmed from a side angle. His continental grip is clearly visible with a firm but relaxed hand, and there is minimal wrist snap at contact as he keeps the wrist stable to control the low, skidding ball.
|
|
3.3s |
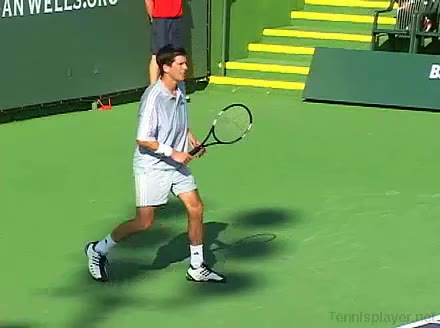
FH Wide · Side #1
Tim Henman's forehand from a wide position, filmed from the side. His shoulders rotate well past perpendicular to the net on the unit turn, then the trunk uncoils ahead of the arm swing, making the sequential rotation through hips, torso, and shoulders easy to distinguish.
|
|
2.9s |
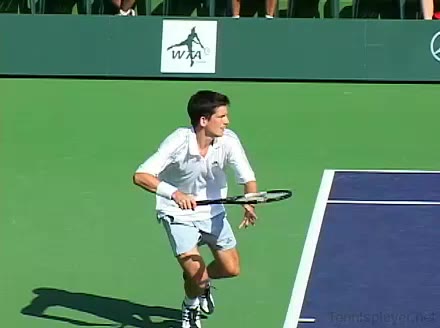
FH Wide · Side #2
Tim Henman's forehand from a wide position, filmed from the side. His eastern forehand grip is evident with a relaxed hand, and you can see a pronounced wrist lag that unwinds into a subtle forward snap right at contact.
|
|
2.9s |
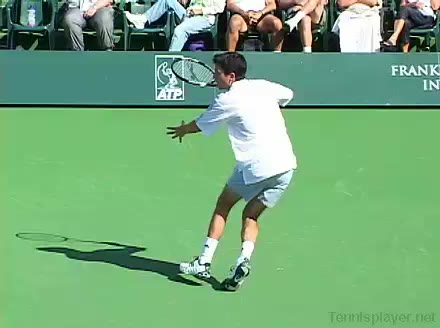
FH Wide · Side #3
Tim Henman’s forehand from the deuce side, filmed from the side. His footwork includes a quick adjustment step out to the wide ball followed by an open-stance base, with a clear recovery step starting back toward the court after contact.
|
|
2.7s |
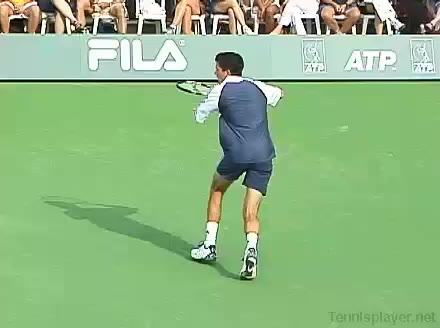
FH Wide · Side #4
Tim Henman's forehand from the deuce court, filmed from the side. At contact his racket face is slightly closed with the ball meeting the strings around waist height, and the racket head accelerates forward on a low-to-high path that extends well through the court.
|
|
2.9s |
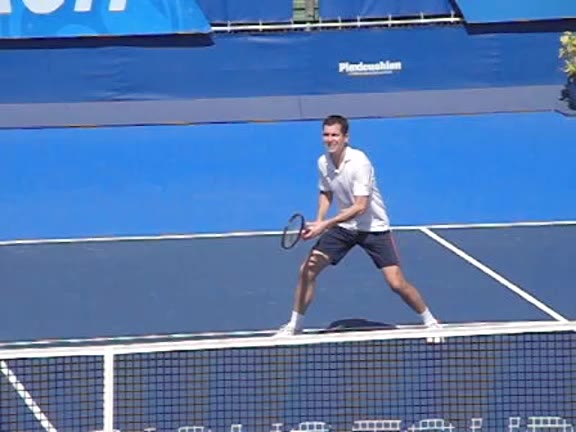
FH Volley #2019
Henman's forehand volley from the net on the deuce side, filmed from a front court-level angle. After contact his racquet finishes slightly across his body while his weight continues moving forward, and he quickly brings both hands back toward the racquet to re-establish a compact ready position.
|
|
325.2s |
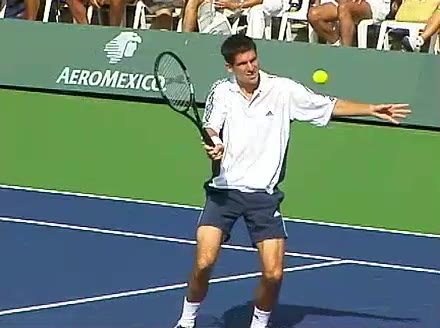
FH Volley · Court-level-front
Tim Henman’s forehand volley from the center of the court, filmed from a court-level front angle. His racket face stays slightly open at contact with the ball meeting the strings just in front of his lead hip, creating a compact punch with minimal backswing.
|
|
1.8s |
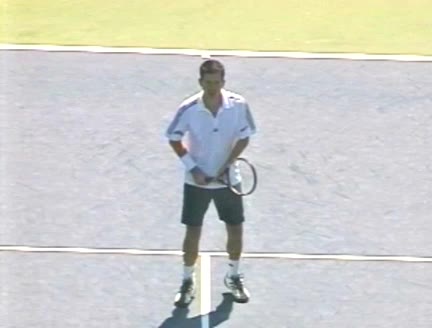
FH Volley · Front
Tim Henman’s forehand volley from the front, filmed from a front angle. His follow-through finishes with the racquet head high in front of his body as he quickly brings both hands back toward a compact ready position for the next shot.
|
|
7.2s |
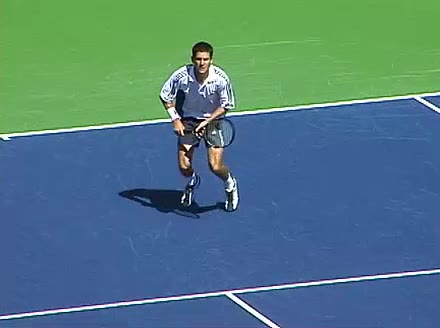
FH Volley · Front #1
Tim Henman's forehand volley from the net, filmed from the front. His compact split step into a slightly open stance is followed by a short forward step with the front foot, giving a clear view of his quick recovery adjustment back toward the center of the court.
|
|
2.5s |

FH Volley · Front #2
Tim Henman's forehand volley from the front, filmed from a front angle. His shoulders stay relatively square to the net with only a modest trunk rotation, and the kinetic chain shows a compact upper-body unit turn that uncoils mainly through the shoulders rather than a large torso twist.
|
|
2.8s |
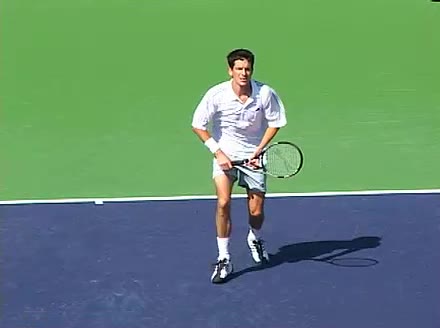
FH Volley · Front #3
Tim Henman's forehand volley from the net area, filmed from the front. His continental grip is firm with a slightly laid-back wrist that stays stable through contact, creating a compact punch without excessive wrist snap.
|
|
1.9s |
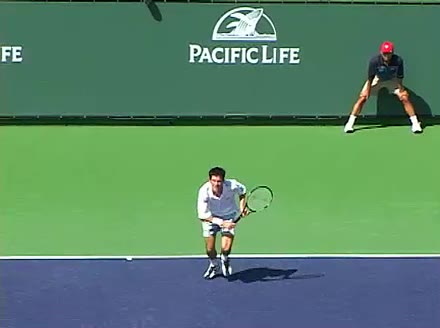
FH Volley · Front #4
Tim Henman's forehand volley from the front of the court, filmed from a front angle. After contact his racquet finishes slightly across his body while his weight moves forward into the court, and he quickly brings both hands in front of his torso to reset into a compact ready position.
|
|
1.9s |
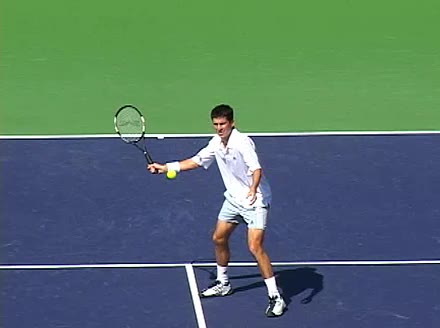
FH Volley · Front
Tim Henman's forehand volley from the net, filmed from the front. His follow-through finishes with the racquet head slightly across his body as he quickly regains a compact ready position with the non-hitting hand returning toward the throat of the racquet.
|
|
1.8s |
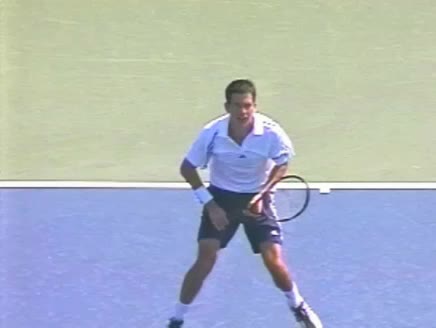
FH Volley · Front #0001
Tim Henman’s forehand volley from the center of the court, filmed from the front. His continental grip is clearly visible with a firm but relaxed hand, and the limited wrist movement at contact shows a stable, slightly laid-back wrist rather than an active wrist snap.
|
|
8.3s |
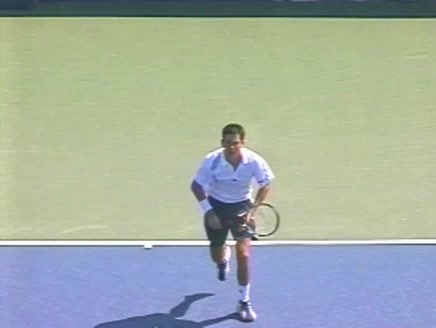
FH Volley · Front #0001
Tim Henman’s forehand volley from the front, filmed from a front camera angle. His hips stay relatively square to the net while his knees flex slightly, with a short forward leg drive as he steps into the volley.
|
|
7.4s |
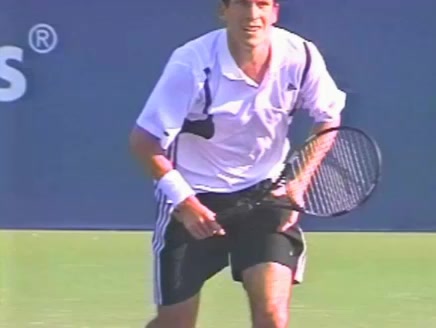
FH Volley · Front #0001
Tim Henman’s forehand volley from the net, filmed from the front. His follow-through finishes high with the racquet in front of his body while his non-hitting hand stays back for balance as he quickly recovers toward a ready position.
|
|
9.2s |
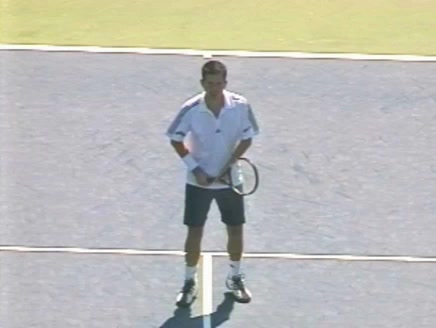
FH Volley · Front #0001
Tim Henman’s forehand volley warmup from a central court position, filmed from a front warmup angle. His shoulders stay relatively square to the net with only a mild trunk rotation, and the forward uncoiling of the torso initiates just before the arm extends through contact.
|
|
7.2s |
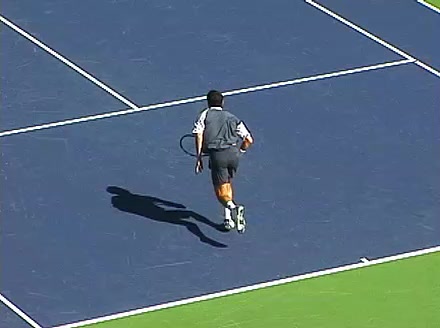
FH Volley · Rear #1
Tim Henman's forehand volley from the center of the court, filmed from a rear angle. His hips stay relatively square to the net while his knees maintain a slight bend, giving him a stable, low base as he moves forward into the volley.
|
|
1.9s |
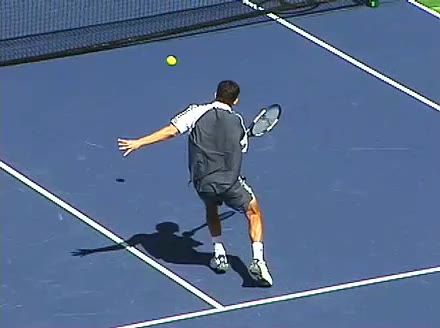
FH Volley · Rear #2
Tim Henman's forehand volley from the net area, filmed from a rear angle. His hips stay relatively square to the net while his knees maintain a slight bend, with a short, compact leg drive that keeps his lower body stable through the volley.
|
|
1.9s |
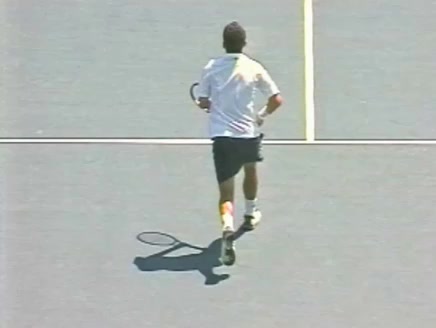
FH Volley · Rear #0001
Tim Henman’s forehand volley from the center of the court, filmed from a rear angle. At contact his racket face is slightly open with the ball meeting the strings just in front of his lead hip, and the compact forward punch keeps the racket head traveling almost straight through the line of the shot.
|
|
9.8s |
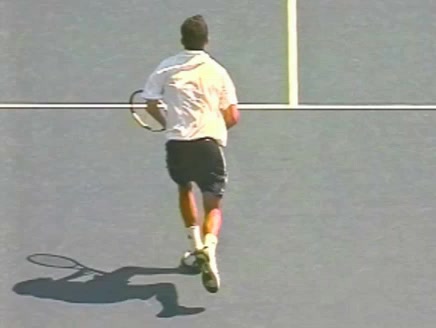
FH Volley · Rear #0001
Tim Henman’s forehand volley from the center of the court, filmed from a rear angle. His continental grip stays firm with minimal wrist movement, keeping the wrist slightly laid back through contact for a stable, compact volley.
|
|
7s |
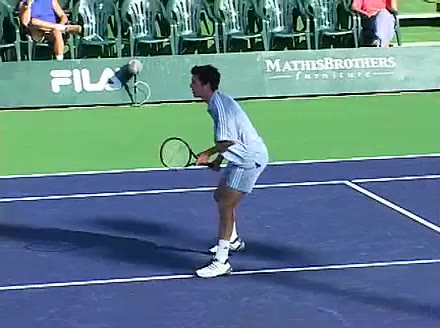
FH Volley · Side #1
Tim Henman's forehand volley from the net area, filmed from the side. His continental grip stays firm with minimal wrist movement, keeping the racquet face stable through contact.
|
|
2.4s |

FH Volley · Side #2
Tim Henman's forehand volley from the net area, filmed from the side. His follow-through finishes slightly across his body with his weight moving forward into the court, and his non-hitting hand extends back to aid balance as he quickly recovers toward a ready position.
|
|
2.7s |
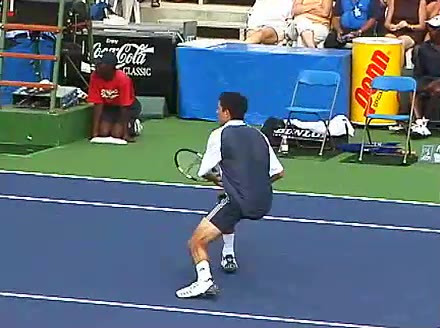
FH Volley · Side #3
Tim Henman's forehand volley from the net area, filmed from the side. At contact his racket face is slightly open with the ball meeting the strings just in front of his body, and the compact forward punch keeps the racket head traveling almost straight through the ball with minimal backswing.
|
|
2.3s |
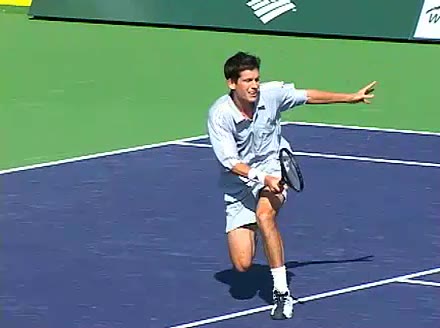
FH Volley · Side #4
Tim Henman's forehand volley from the net area on the deuce side, filmed from the side. His continental grip is firm with a slightly laid-back wrist, and the racket face stays stable through contact with minimal wrist movement.
|
|
1.7s |

FH Volley · Side #5
Tim Henman's forehand volley from the net area, filmed from the side. His compact split step transitions quickly into a short lateral adjustment and a slightly open stance as he meets the ball in front of his body.
|
|
2.3s |
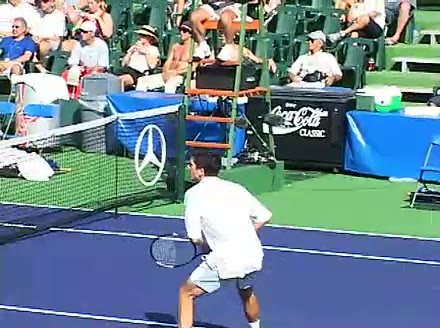
OH · Court-level-rear
Tim Henman's overhead from the center of the court, filmed from a court-level rear angle. His racket contacts the ball well above head height with a slightly pronated racket face and a steep, downward swing path that accelerates the racket head through contact.
|
|
4.3s |
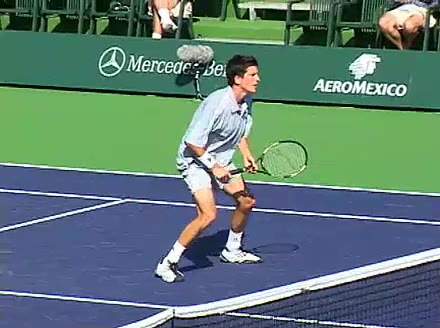
BH → OH · Front
Tim Henman's overhead from the net area, filmed from the front. He sets his feet with a slight staggered stance under the ball and takes a small adjustment hop before planting and swinging, then lands on his front foot ready to recover forward.
|
|
3.3s |
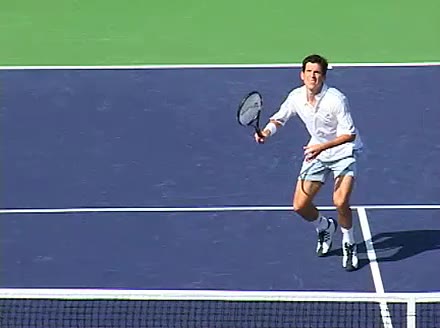
OH · Front
Tim Henman's overhead from the net area, filmed from the front. His hips stay relatively square to the net while a strong knee bend and leg drive upward support his weight transfer into the overhead motion.
|
|
2.9s |
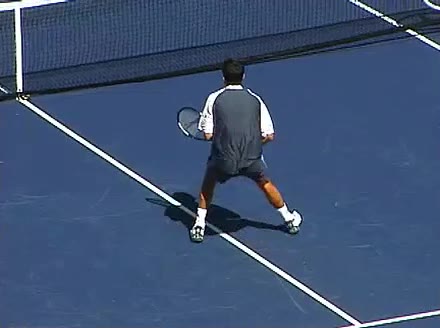
BH → OH · Rear
Tim Henman's overhead from the center of the court, filmed from a rear angle. His shoulders rotate as a single unit with the trunk during the trophy phase, then uncoil together upward so the hitting shoulder rises clearly above the non-hitting side through contact.
|
|
2.7s |
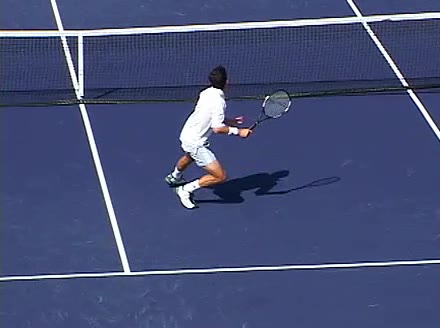
OH · Rear #1
Tim Henman's overhead from the center of the court, filmed from a rear angle. After contact he lands with his weight moving forward and quickly brings both hands back to a neutral ready position in front of his body.
|
|
3.4s |
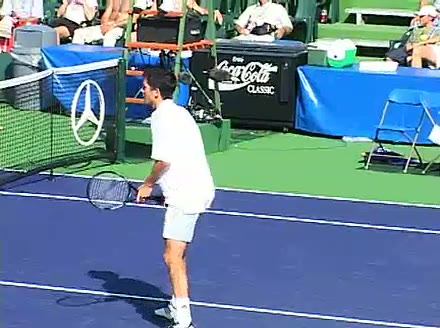
OH · Rear #2
Tim Henman's overhead from the center of the court, filmed from a rear angle. At contact his racket face is slightly closed with the ball struck well above head height, and the racket head accelerates steeply upward through the hitting zone.
|
|
4.3s |
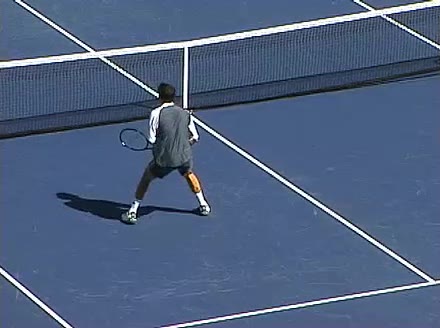
OH · Rear #3
Tim Henman's overhead from the center of the court, filmed from a rear angle. His knees dip slightly before extension and his hips drive upward and forward together, giving a clear view of how his leg drive supports the upward motion into the overhead.
|
|
3.6s |
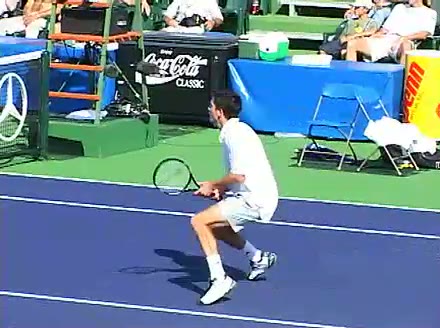
BH → OH · Side
Tim Henman's overhead from the center of the court, filmed from the side. His continental grip is firm with a slightly laid-back wrist that pronates sharply through contact to direct the ball downward.
|
|
2.6s |
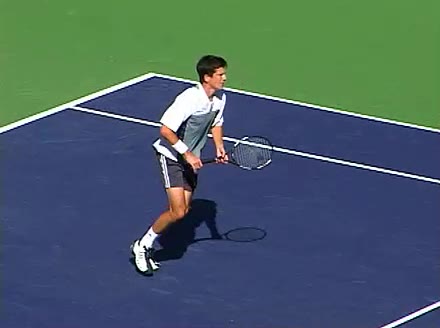
OH · Side
Tim Henman's overhead from the net area, filmed from the side. After contact he lands with his weight moving slightly forward and quickly brings both hands back toward a compact ready position to recover for the next shot.
|
|
6.1s |
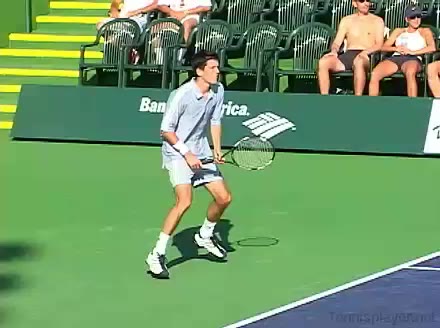
BH Return Slice 1st Serve · Ad · Court-level-front #1
Tim Henman's first serve return backhand slice from the Ad court, filmed from court-level front. His early split-step into a compact neutral stance sets up a short diagonal adjustment step toward the ball before he carves the slice and takes a small recovery step back toward the center.
|
|
2.9s |
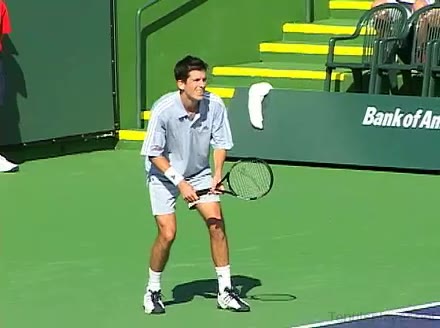
BH Return Slice 1st Serve · Ad · Court-level-front #2
Tim Henman's backhand slice return of first serve from the Ad court, filmed from a court-level front angle. After contact his racket finishes out in front with the left arm counterbalancing behind him as he transfers weight forward and quickly recovers toward a compact ready position.
|
|
3.3s |
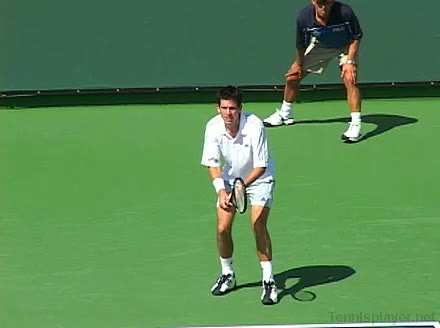
BH Return Slice 2nd Serve · Ad · Court-level-front #1
Tim Henman's second serve from the Ad court, filmed from a front court-level angle. At contact his racket face is slightly open with the ball struck just above head height, creating visible topspin-kick action up and into the box.
|
|
4s |
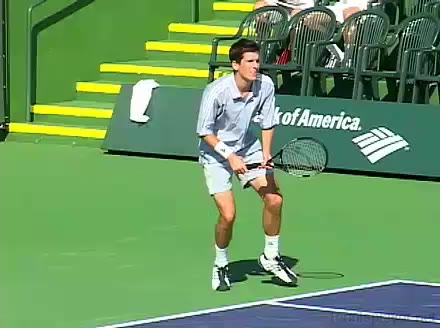
BH Return Slice 2nd Serve · Ad · Court-level-front #2
Tim Henman's second serve return backhand slice from the Ad court, filmed from a front court-level angle. His hips stay relatively closed to the net with a pronounced knee bend on the outside leg, giving a low, stable base as he carves through the slice.
|
|
4.2s |
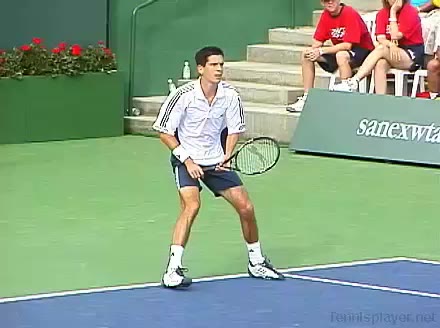
BH Return Slice 2nd Serve · Ad · Court-level-front #3
Tim Henman's second serve return backhand slice from the Ad side, filmed from a court-level front angle. His shoulders turn early with a pronounced upper-body coil, then the trunk uncoils in sync with the hitting arm to keep the slice compact and controlled through contact.
|
|
3s |
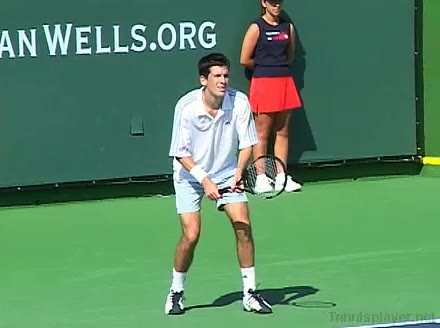
BH Return Slice 2nd Serve · Ad · Court-level-front #4
Tim Henman's second serve from the Ad side, filmed from a court-level front angle. His continental grip is firm with a slightly laid-back wrist that pronates smoothly through contact to impart spin and control.
|
|
2.9s |
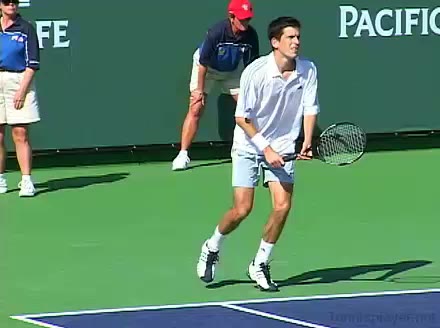
BH Return Slice 2nd Serve → BH Volley · Deuce · Court-level-front #2
Tim Henman's backhand volley return from the deuce side, filmed from court-level front. His shoulders stay slightly closed to the net as the trunk rotates minimally, with a compact uncoil that links a short shoulder turn to a stable upper body through contact.
|
|
5.8s |
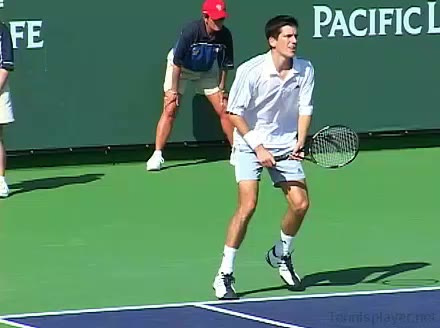
BH Return Slice 2nd Serve · Deuce · Court-level-front #1
Tim Henman's second serve return backhand slice from the deuce court, filmed from court-level front. His early split step into a neutral stance sets up a compact lateral adjustment step toward the ball before a small recovery step readies him for the next shot.
|
|
2.6s |
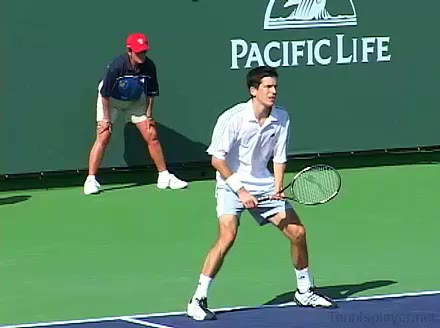
BH Return Slice 2nd Serve · Deuce · Court-level-front #2
Tim Henman's second serve from the deuce side, filmed from a court-level front angle. At contact his racket face is slightly closed with the ball struck just above shoulder height, and the upward brushing motion accelerates the racket head to impart clear topspin and kick.
|
|
2.3s |
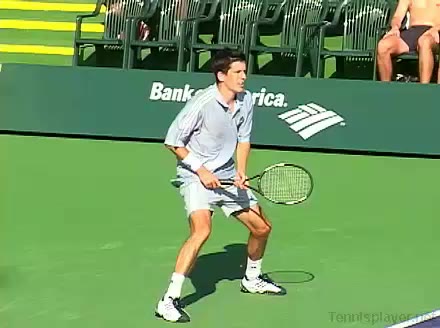
FH Return 1st Serve · Ad · Court-level-front #1
Tim Henman's first serve from the Ad court, filmed from a court-level front angle. His continental grip is firm with a slightly relaxed wrist, allowing a clear pronation of the forearm and wrist through contact.
|
|
2.4s |
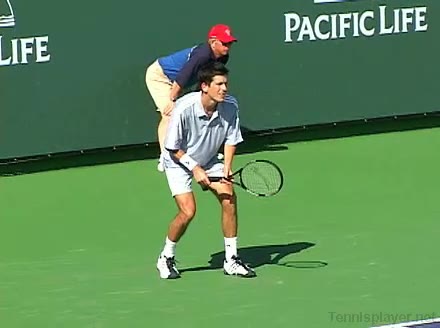
FH Return 1st Serve · Deuce · Court-level-front #1
Tim Henman's first serve from the deuce court, filmed from a court-level front angle. At contact his racket face is slightly tilted upward with the ball struck just above full extension, and the racket head accelerates steeply up and across the ball along a pronounced pronation-driven swing path.
|
|
2.9s |
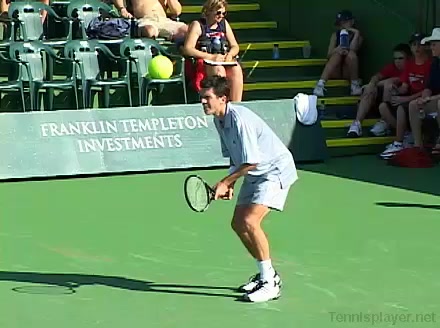
FH Return 1st Serve · Deuce · Court-level-front #2
Tim Henman's first serve from the deuce court, filmed from a court-level front angle. At contact his racket face is slightly tilted upward with the ball struck just above full extension, and the racket head accelerates steeply up and across the ball along a pronounced pronation-driven swing path.
|
|
3s |
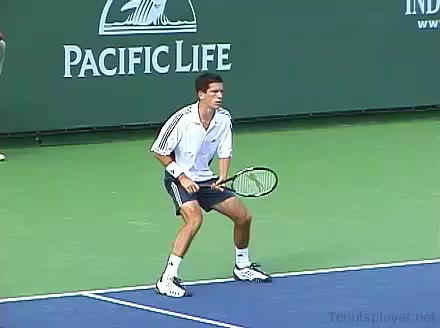
FH Return 2nd Serve · Deuce · Court-level-front #2
Tim Henman's second serve from the deuce side, filmed from a court-level front angle. His continental grip stays relaxed with a noticeable wrist pronation through contact, as the racket face moves from slightly closed to more neutral toward the target.
|
|
2.7s |
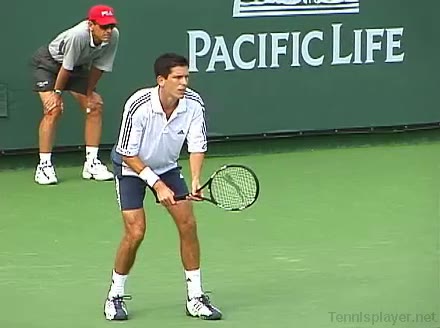
FH Return 2nd Serve · Deuce · Court-level-front #1
Tim Henman's second serve from the deuce side, filmed from a court-level front angle. His knees flex deeply during the loading phase and then extend upward into the hit, with the hips driving forward into the court to initiate leg-driven momentum.
|
|
2.4s |
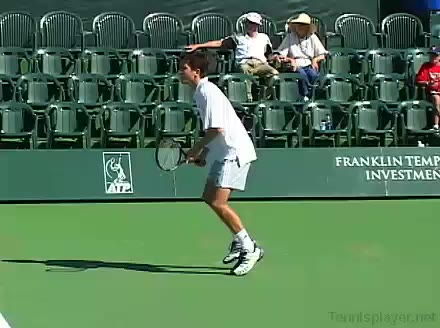
BH Return Slice 1st Serve · Deuce · Court-level-side #1
Tim Henman’s first serve return backhand slice from the deuce court, filmed from a court-level side angle. His knees stay flexed through the split step and early unit turn, with the right hip slightly closed as the right leg plants and stabilizes for the slicing motion.
|
|
2.9s |
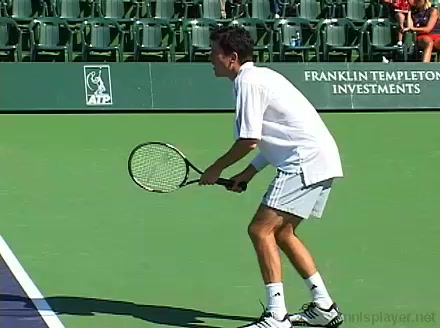
BH Return Slice 2nd Serve · Ad · Court-level-side #2
Tim Henman’s backhand slice return of a second serve from the Ad court, filmed from a court-level side angle. At contact his racket face is slightly open with the ball struck around waist height, and the racket head travels on a downward, slightly forward path to produce underspin.
|
|
3s |
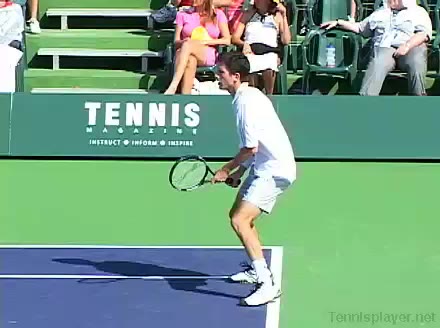
BH Return Slice 2nd Serve · Deuce · Court-level-side #1
Tim Henman’s second serve from the deuce side, filmed from a court-level side angle. At contact his racket face is slightly closed with the ball struck just above shoulder height, and the upward brushing swing path generates noticeable racket head speed for spin.
|
|
2.4s |
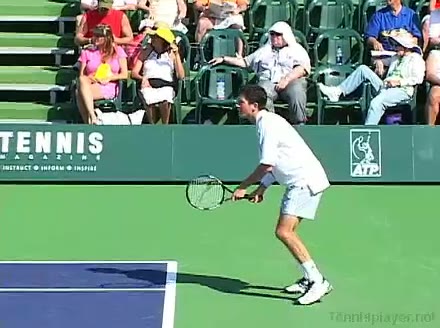
BH Return Slice 2nd Serve · Deuce · Court-level-side #2
Tim Henman’s second serve from the deuce court, filmed from a court-level side angle. His continental grip is clearly visible with a relaxed hand, and the side view makes the wrist pronation and subtle snap through contact easy to see.
|
|
2.9s |
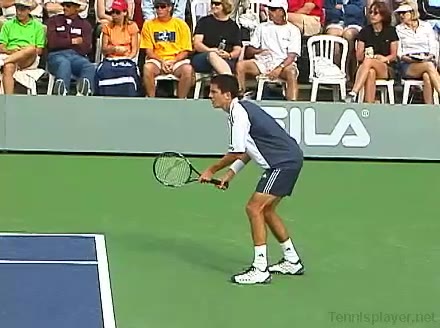
BH Return Slice 2nd Serve · Deuce · Court-level-side #3
Tim Henman's second serve from the deuce side, filmed from a court-level side angle. His knees dip noticeably during the loading phase, with a strong upward leg drive that extends his hips fully into the court after contact.
|
|
2.6s |
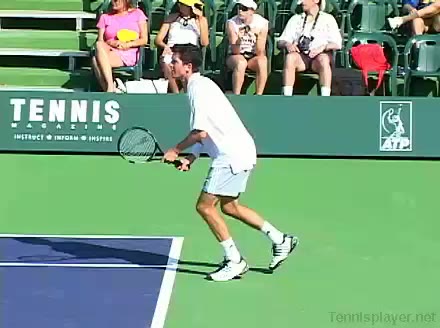
BH Return Slice 2nd Serve · Deuce · Court-level-side #5
Tim Henman's second serve return backhand slice from the deuce court, filmed from a court-level side angle. His continental grip is evident with a firm but relaxed hand, and the wrist stays laid back through contact with minimal flick, creating a stable slicing motion.
|
|
2.8s |

BH Slice → Return 1st Serve · Court-level-side #1
Tim Henman’s first serve return backhand slice from the center of the court, filmed from a court-level side angle. His continental grip stays firm with a slightly laid-back wrist, creating a stable racket face through contact with minimal wrist deviation.
|
|
3s |
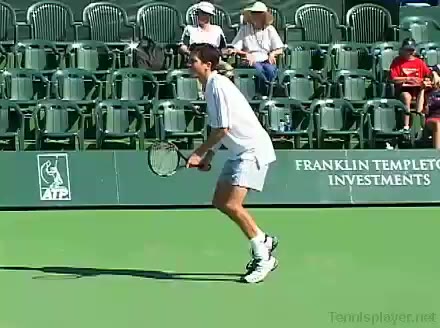
FH Return 1st Serve · Deuce · Court-level-side #1
Tim Henman's first serve from the deuce court, filmed from a court-level side angle. His legs show a pronounced knee bend during the loading phase, with strong upward leg drive that helps his hips extend and rotate into the court.
|
|
2.8s |
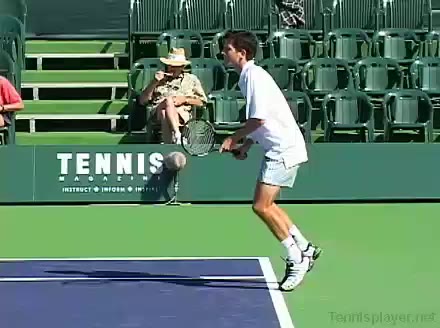
FH Return 1st Serve · Deuce · Court-level-side #2
Tim Henman's first serve from the deuce court, filmed from a court-level side angle. His shoulder line rotates significantly away from the court during the trophy phase, then the trunk uncoils in sync with the upward drive of the legs to transfer momentum into the hitting arm.
|
|
3.4s |
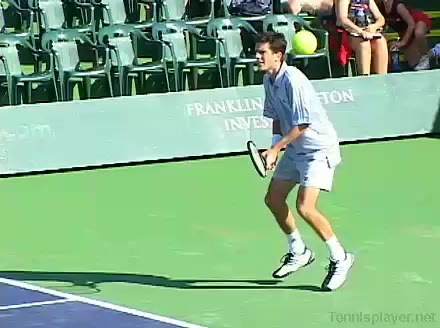
BH Return 1st Serve · Deuce · Front #1
Tim Henman's first serve return from the deuce side, filmed from the front. After contact he lets the racquet continue across his body while his weight shifts forward and he quickly brings both hands back toward a compact ready position for the next shot.
|
|
2.6s |

BH Return Slice 1st Serve · Ad · Front #1
Tim Henman's first-serve return backhand slice from the Ad court, filmed from the front. His hips stay relatively closed with a pronounced knee bend on the outside leg, giving a low, stable base as he drives forward into the sliced return.
|
|
3s |
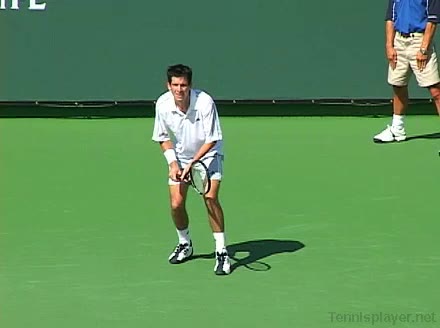
BH Return Slice 1st Serve · Ad · Front #2
Tim Henman's first serve return from the Ad court, filmed from the front. His shoulders stay relatively closed as he coils on the return, then his trunk unwinds in sync with the hitting arm to drive the sliced backhand through contact.
|
|
2.7s |
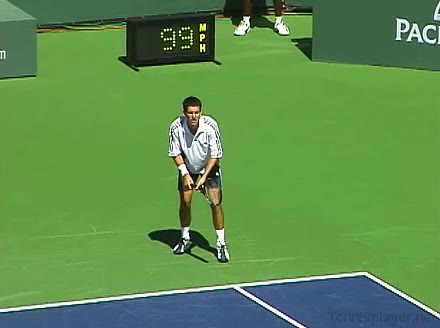
BH Return Slice 1st Serve · Ad · Front #3
Tim Henman's first serve from the Ad court, filmed from the front. His continental grip is clearly visible with a relaxed hand, and you can see distinct wrist pronation through contact as the racquet face squares to the target.
|
|
3.2s |
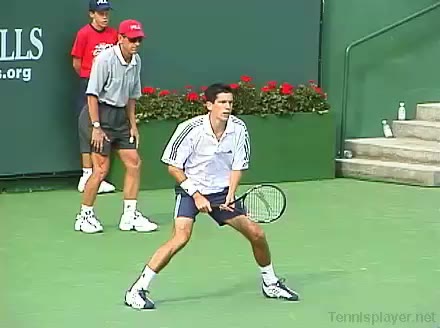
BH Return Slice 1st Serve · Ad · Front #4
Tim Henman's backhand slice return of first serve from the Ad court, filmed from the front. After contact his racquet finishes out in front with the left arm counterbalancing behind, and he quickly brings both hands toward the center of his body as he steps back into a compact ready position.
|
|
2.4s |

BH Return Slice 1st Serve · Deuce · Front #1
Tim Henman's first serve from the deuce court, filmed from the front. His continental grip stays firm with a relaxed wrist, allowing a clear pronation through contact as the racket face squares to the ball.
|
|
2.6s |
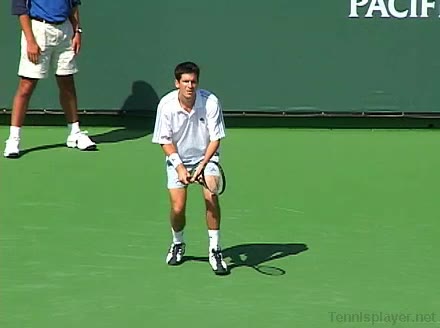
BH Slice → First Serve · Deuce · Front #2
Tim Henman's first serve from the deuce court, filmed from the front. At contact, his racket face is slightly tilted upward with a fully extended arm, and the ball meets the strings just above head height, emphasizing a fast upward pronation through the strike.
|
|
2.6s |
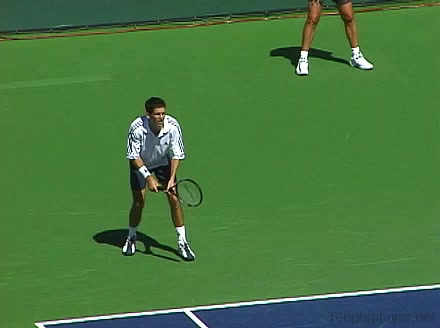
BH Return Slice 1st Serve · Deuce · Front #3
Tim Henman's first serve return backhand slice from the deuce court, filmed from the front. His initial split-step is followed by a small lateral adjustment and a neutral stance, with a quick recovery step back toward the center after contact.
|
|
3.2s |
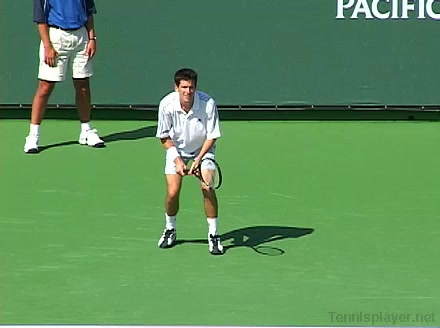
BH Return Slice 1st Serve · Deuce · Front #4
Tim Henman's first serve from the deuce court, filmed from the front. His continental grip stays firm with minimal grip change, and you can see his wrist pronate strongly through contact to drive the serve into the box.
|
|
2.6s |
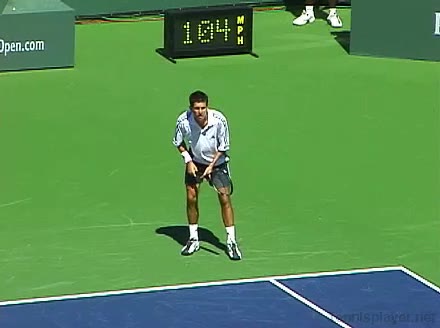
BH Return Slice 2nd Serve → FH Volley · Ad · Front #2
Tim Henman's forehand volley return of a second serve from the Ad court, filmed from a front angle. He takes a small split step into a neutral stance, then uses a short forward step with his right foot to move through the volley while keeping his weight transitioning toward the net.
|
|
5.2s |
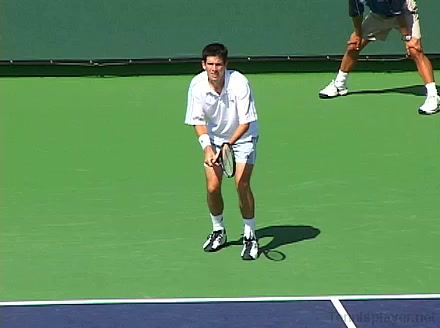
BH Return Slice 2nd Serve · Ad · Front #1
Tim Henman's second serve from the Ad side, filmed from the front. His knees load deeply before contact and his hips stay relatively closed, driving upward through the legs to initiate the serve motion.
|
|
3s |
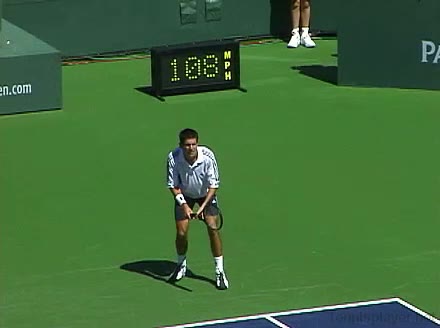
BH Return Slice 2nd Serve · Ad · Front #2
Tim Henman's second serve from the Ad court, filmed from the front. At contact, his racket face is slightly closed with the ball struck just above head height, and the upward swing path creates visible topspin and kick.
|
|
3s |
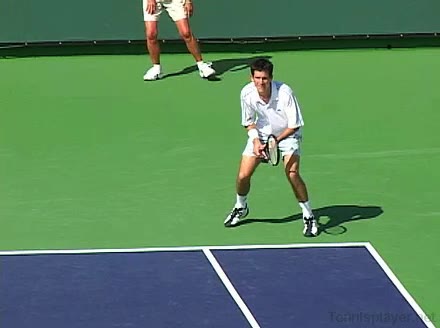
BH Return Slice 2nd Serve · Ad · Front #3
Tim Henman's second serve return backhand slice from the Ad court, filmed from the front. After contact he extends the racquet forward with a long, low slice follow-through while his non-hitting hand helps him rotate back into a balanced, ready position.
|
|
4.2s |
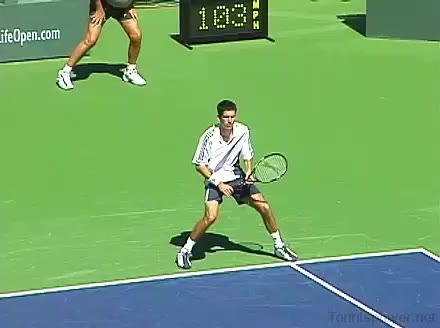
BH Return Slice 2nd Serve · Ad · Front #4
Tim Henman’s second serve from the Ad court, filmed from the front. His continental grip is clearly visible, with a relaxed wrist that pronates through contact and a distinct wrist snap driving up and across the ball.
|
|
2.6s |
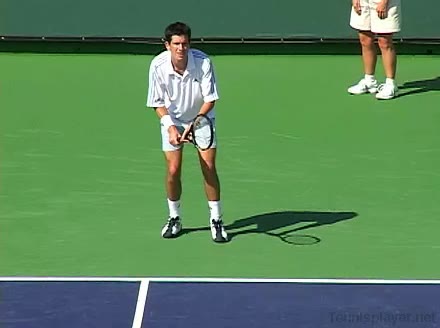
BH Return Slice 2nd Serve · Deuce · Front #1
Tim Henman's second serve return from the deuce court, filmed from the front. His shoulders stay relatively closed through the initial unit turn, with a subtle trunk coil that uncoils in sync with his hitting arm to guide the slice-style backhand return.
|
|
2.8s |
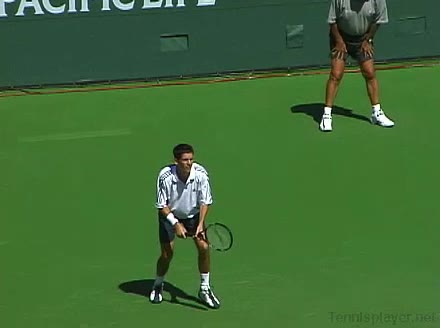
BH Return Slice 2nd Serve · Deuce · Front #2
Tim Henman's second serve return backhand slice from the deuce court, filmed from the front. After contact he extends the racquet forward with a long one-handed slice follow-through while his weight shifts into the court and his non-hitting hand settles near his torso as he prepares to recover.
|
|
2.7s |
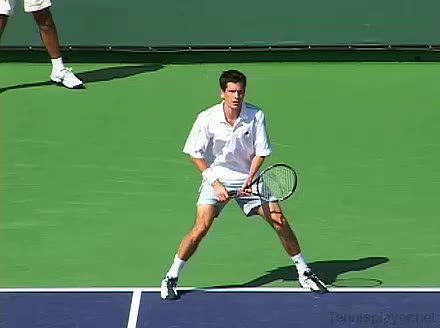
BH Return Slice 2nd Serve · Deuce · Front #3
Tim Henman's second serve return backhand slice from the deuce court, filmed from the front. His footwork includes a compact split step into a small diagonal adjustment, setting up a slightly open stance that lets him stay light on his toes and ready to recover forward or laterally.
|
|
2.6s |
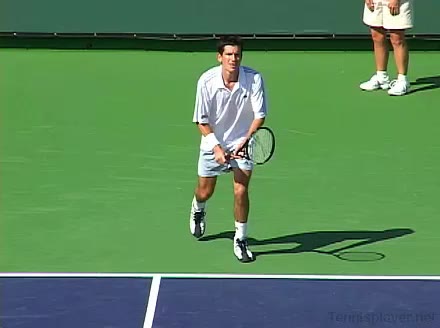
BH Return Slice 2nd Serve → OH · Deuce · Front #2
Tim Henman's second serve from the deuce court, filmed from the front. His hips stay relatively closed through the toss and loading phase, with a noticeable knee bend and upward leg drive as he extends into the serve.
|
|
6s |
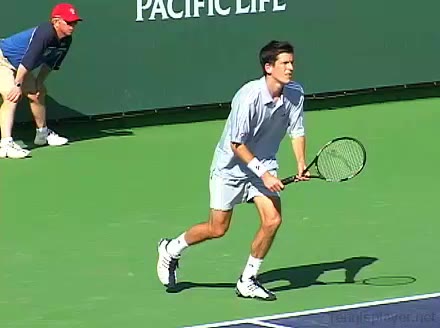
BH Return Slice 2nd Serve → Return · Deuce · Front #2
Tim Henman's second serve from the deuce court, filmed from the front. His knees load deeply before the toss, and you can see his hips stay relatively closed to the baseline until he drives upward with the legs into the serve.
|
|
2.7s |
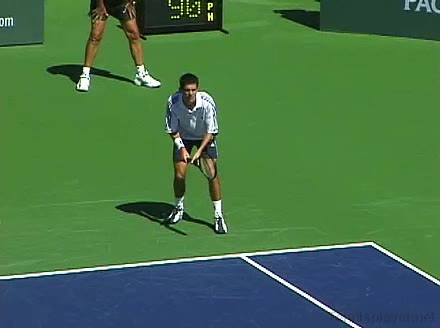
BH Slice → Return 1st Serve · Ad · Front #1
Tim Henman's backhand slice return of first serve from the Ad court, filmed from the front. At contact his racket face is slightly open with the ball meeting the strings around waist height, and the racket path moves down and through the court with a controlled, compact motion.
|
|
3.2s |
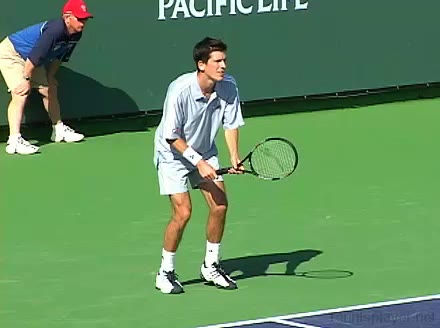
BH Slice → Return 1st Serve · Deuce · Front #1
Tim Henman's backhand slice return of first serve from the deuce court, filmed from the front. After contact his racket finishes out in front with the non-hitting hand extending back for balance as he steps forward and quickly brings the racquet back to a neutral ready position.
|
|
3.8s |
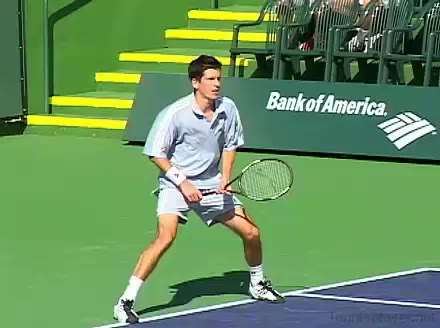
BH Slice → Return 2nd Serve · Ad · Front #2
Tim Henman's backhand slice return of a second serve from the Ad court, filmed from the front. His shoulders and trunk show an early unit turn with a pronounced upper-body tilt, then unwind in a compact sequence that keeps the chest slightly closed through contact to stabilize the one-handed slice.
|
|
2.8s |
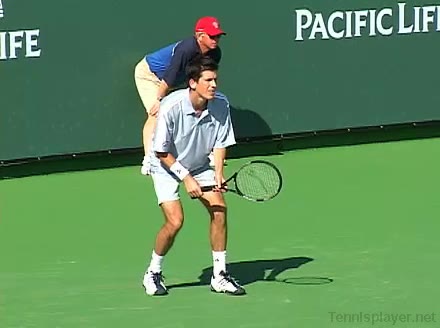
BH Slice → Return 2nd Serve · Deuce · Front #2
Tim Henman's second serve return backhand slice from the deuce side, filmed from the front. At contact his racket face is slightly open with the ball meeting the strings around waist height, and the racket moves on a downward, slightly forward path creating a clear slicing action.
|
|
3.2s |
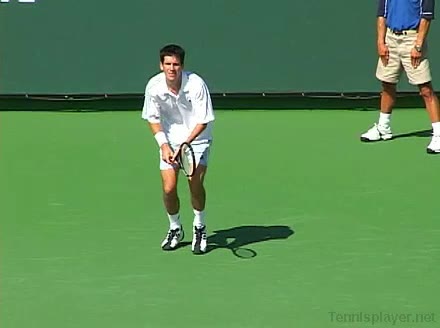
FH Return 1st Serve · Ad · Front #1
Tim Henman’s first serve from the Ad court, filmed from the front. At contact his racket face is slightly tilted upward with the ball struck just above head height, and the racket head accelerates steeply up and across the ball along a pronounced pronation path.
|
|
2.4s |
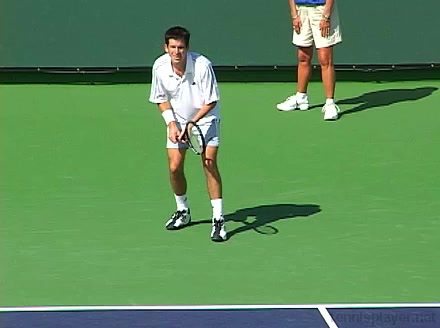
FH Return 1st Serve · Ad · Front #2
Tim Henman's first serve from the Ad side, filmed from the front. His front-facing stance detail shows a pronounced knee bend into a pinpoint stance before driving upward, followed by a small, quick adjustment step with his back foot to recover toward the center.
|
|
2.5s |
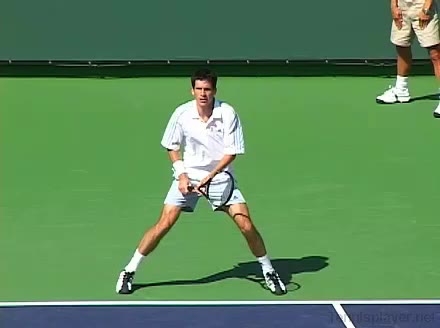
FH Return 1st Serve · Ad · Front #3
Tim Henman's first serve return from the Ad court, filmed from the front. After contact his racquet follow-through finishes across his body while his weight transfers into the court, quickly bringing both hands back to a neutral ready position for the next shot.
|
|
2.8s |
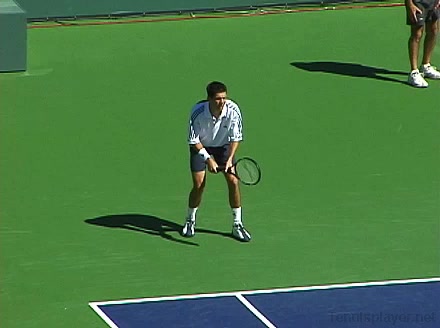
FH Return 1st Serve · Deuce · Front #1
Tim Henman's first serve from the deuce side, filmed from the front. His follow-through finishes across his body with his weight moving into the court, and his non-hitting hand quickly returns toward his torso as he transitions into a ready position for the next shot.
|
|
2.6s |
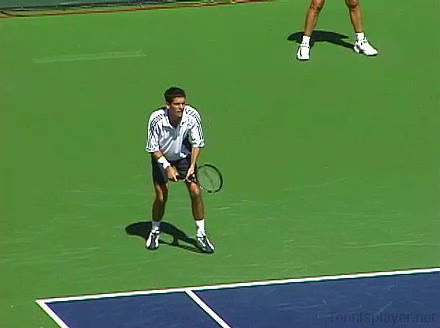
FH Return 1st Serve · Deuce · Front #2
Tim Henman's first serve from the deuce court, filmed from the front. His continental grip is firm with minimal grip change and his wrist pronates aggressively through contact, with the racquet face clearly turning outward after impact.
|
|
2.9s |
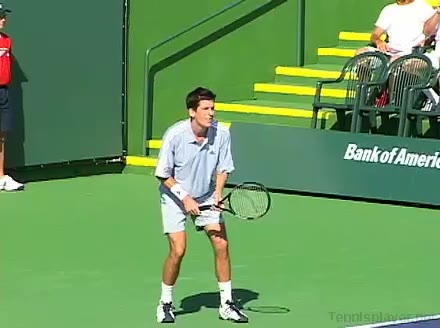
FH Return 2nd Serve · Ad · Front #1
Tim Henman's second serve from the Ad court, filmed from the front. His shoulders and trunk show a compact but distinct coil during the ball toss, with a clear uncoiling sequence that starts from the hips and trunk before the arm whips up into contact.
|
|
2.8s |
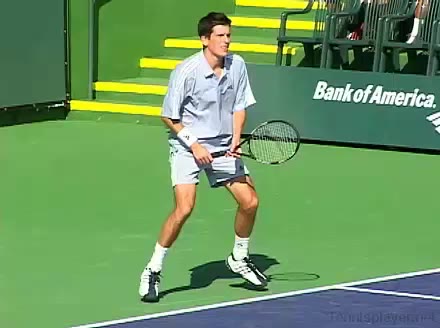
FH Return 2nd Serve · Ad · Front #2
Tim Henman’s second serve from the Ad court, filmed from the front. His hips stay relatively closed through the toss with a deep knee bend, then drive upward together as his legs extend into the court.
|
|
2.6s |
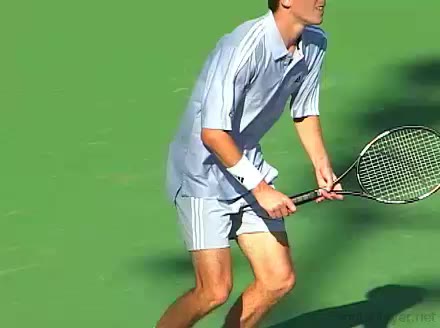
FH Return 2nd Serve → BH Drop Volley · Deuce · Front #2
Tim Henman's forehand return of second serve from the deuce court, filmed from the front. After contact he continues his forward momentum into the court with his non-hitting hand extending slightly for balance before he settles into a compact ready position near the net.
|
|
7.1s |
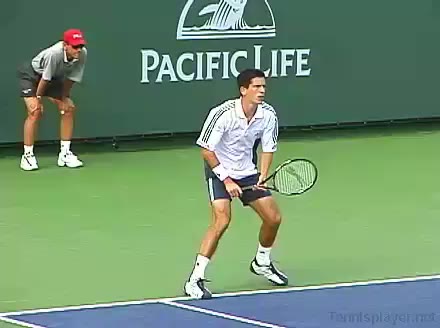
FH Return 2nd Serve → BH Volley · Deuce · Front #2
Tim Henman's backhand volley return from the deuce side, filmed from the front. His shoulders stay relatively square to the net with a compact trunk rotation, and the forward uncoil of his torso is tightly linked to the shoulder line moving through the volley.
|
|
5.6s |
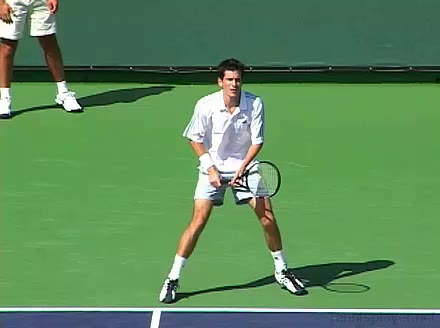
FH Return 2nd Serve · Deuce · Front #1
Tim Henman's second serve from the deuce court, filmed from the front. At contact his racket face is slightly closed with the ball struck just above head height, creating a clear upward brushing path that accelerates the racket head through the ball.
|
|
2.6s |
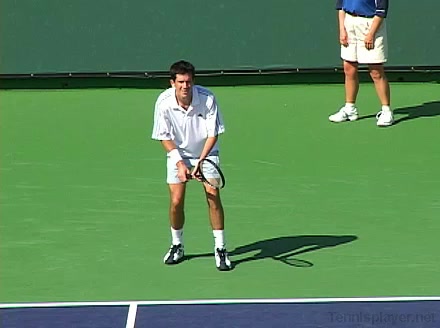
FH Return 2nd Serve · Deuce · Front #2
Tim Henman's second serve return from the deuce side, filmed from the front. His split-step is timed just before the opponent’s contact, leading into a small adjustment hop into a neutral stance before he plants and drives into the return.
|
|
3.1s |

FH Return Slice 1st Serve · Deuce · Front #1
Tim Henman’s first serve return slice from the deuce court, filmed from the front. From this angle you can see his compact split-step into a small lateral adjustment, setting up a slightly open stance as he leans into the sliced forehand return.
|
|
3.2s |
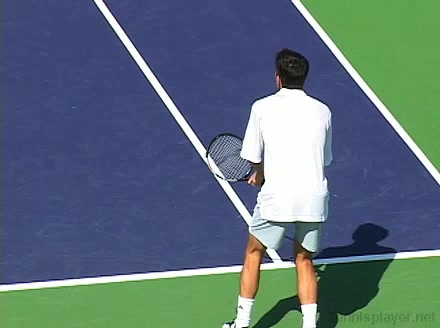
BH Return 1st Serve · Deuce · Rear #1
Tim Henman's first serve return from the deuce court, filmed from a rear angle. His shoulders and trunk coil early against the incoming serve, then uncoil in a compact, sequenced motion that keeps his torso aligned slightly closed through contact before rotating through the finish.
|
|
2.8s |
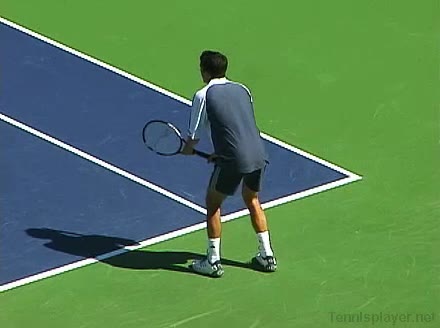
BH Return 2nd Serve · Deuce · Rear #2
Tim Henman's second serve from the deuce side, filmed from a rear angle. From this view you can see his continental grip stay firm while his wrist pronates smoothly through contact to add spin and control.
|
|
2.9s |
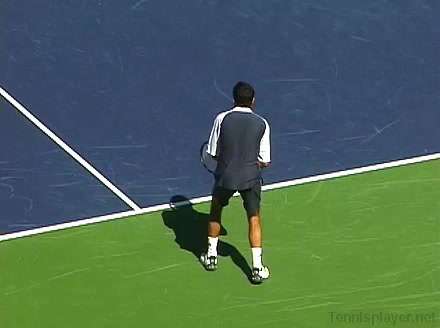
BH Return Slice 1st Serve · Ad · Rear #1
Tim Henman's first serve return backhand slice from the Ad court, filmed from a rear angle. His hips stay relatively closed with a pronounced knee bend on the outside leg, giving a stable base before he drives up and through the slice.
|
|
3.3s |
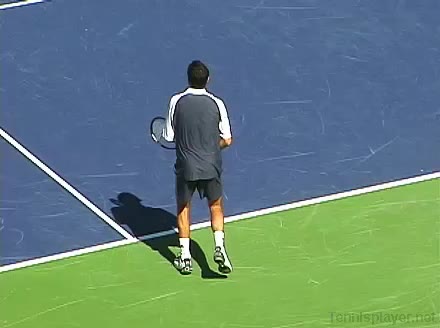
BH Return Slice 1st Serve · Ad · Rear #2
Tim Henman’s first serve from the Ad court, filmed from a rear angle. At contact his racket face is slightly closed with the ball struck just above head height, and the racket head accelerates up and across his body along a pronounced diagonal swing path.
|
|
3.2s |
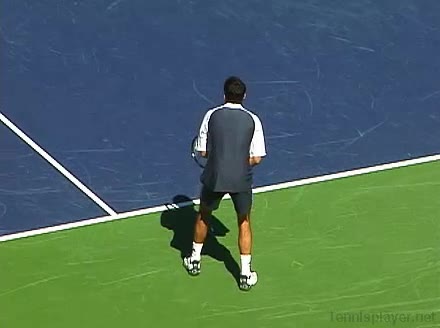
BH Return Slice 1st Serve · Ad · Rear #3
Tim Henman’s first serve return backhand slice from the Ad court, filmed from a rear angle. His split-step is timed just before the opponent’s contact, leading into a small pivot and neutral stance as he slices and then takes a couple of quick recovery steps back toward the center.
|
|
2.8s |
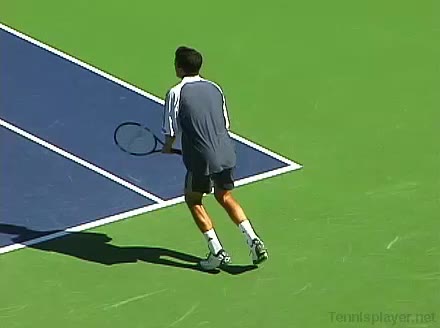
BH Return Slice 1st Serve · Deuce · Rear #1
Tim Henman's first serve from the deuce court, filmed from a rear angle. His legs load with a pronounced knee bend before driving upward, and his hips rotate fully toward the court as he uncoils into the serve.
|
|
3s |
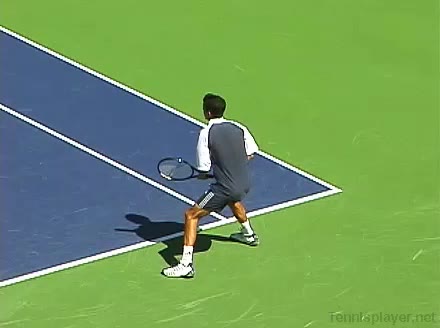
BH Return Slice 1st Serve · Deuce · Rear #2
Tim Henman's first serve return backhand slice from the deuce court, filmed from a rear angle. He uses a small adjustment hop into a neutral stance before the slice, then takes a couple of quick recovery steps back toward the center to stay balanced for the next shot.
|
|
2.7s |
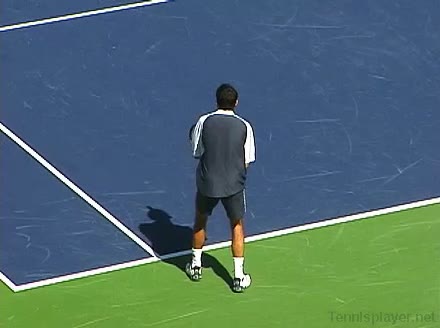
BH Return Slice 2nd Serve → FH Volley · Ad · Rear #2
Tim Henman's forehand volley return of a second serve from the Ad court, filmed from a rear angle. From this view you can see his continental grip stay firm with minimal grip change and a stable wrist, with almost no wrist snap through contact to keep the volley compact and controlled.
|
|
5.2s |
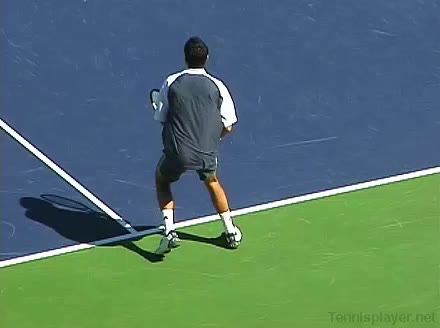
BH Return Slice 2nd Serve · Ad · Rear #1
Tim Henman's second serve from the Ad court, filmed from a rear angle. His shoulders and trunk coil noticeably away from the court during the toss, then uncoil in sequence so that the trunk rotation leads the arm swing into contact.
|
|
3s |
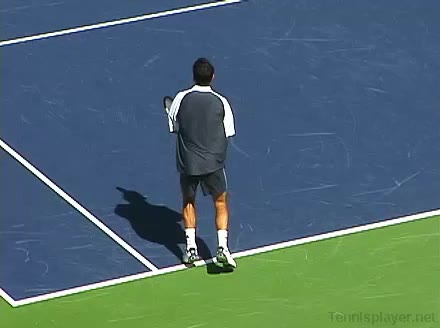
BH Return Slice 2nd Serve · Ad · Rear #2
Tim Henman's second serve return backhand slice from the Ad court, filmed from a rear angle. His compact split step into a slightly open stance leads into a small lateral adjustment and a controlled recovery step back toward the center.
|
|
2.6s |

BH Return Slice 2nd Serve · Ad · Rear #3
Tim Henman's second serve from the Ad court, filmed from a rear angle. His continental grip is clearly visible with a relaxed hand, and the wrist pronates smoothly through contact to add spin and control to the serve.
|
|
2.8s |
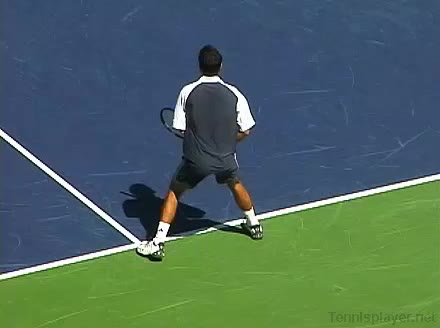
BH Return Slice 2nd Serve · Ad · Rear #4
Tim Henman's second serve return backhand slice from the Ad court, filmed from a rear angle. His hips stay relatively closed with a pronounced knee bend on the outside leg, creating a stable base before he drives slightly forward through the shot.
|
|
2.6s |
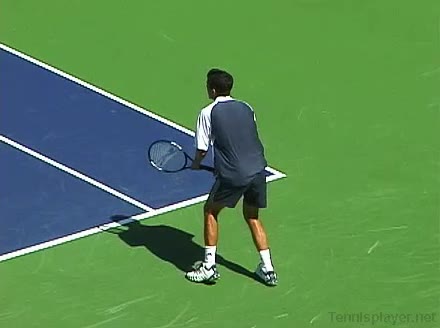
BH Return Slice 2nd Serve · Deuce · Rear #1
Tim Henman's second serve from the deuce court, filmed from a rear angle. His legs load with a noticeable knee bend before driving upward, and his hips stay relatively closed to the baseline through contact.
|
|
2.5s |
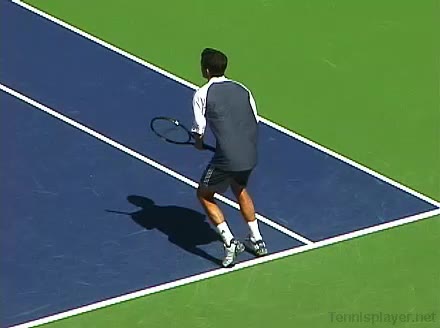
BH Return Slice 2nd Serve · Deuce · Rear #2
Tim Henman's second serve from the deuce court, filmed from a rear angle. His footwork includes a compact pinpoint stance with a small hop into the court after contact, setting up an efficient first recovery step toward the baseline.
|
|
2.6s |
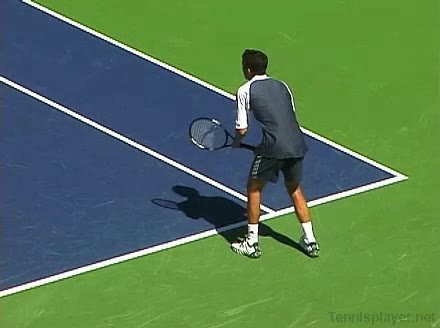
BH Return Slice 2nd Serve · Deuce · Rear #3
Tim Henman's second serve from the deuce court, filmed from a rear angle. After contact he lands into the court with his weight moving forward, bringing his non-hitting hand back toward his body as he quickly resets into a compact ready position for the next shot.
|
|
2.7s |
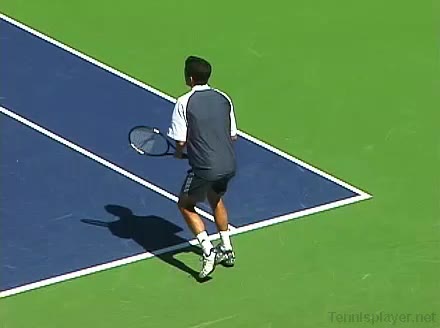
BH Return Slice 2nd Serve · Deuce · Rear #4
Tim Henman's backhand slice return of a second serve from the deuce court, filmed from a rear angle. After contact his racket finishes out in front with the non-hitting arm extending back for counterbalance as he transfers his weight forward and quickly recovers toward a neutral ready position.
|
|
2.9s |
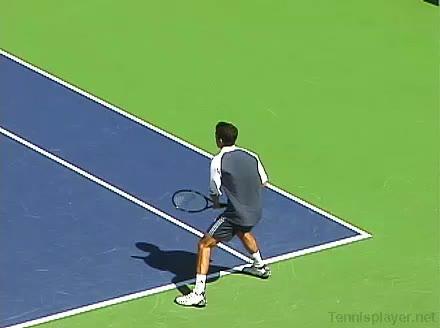
FH Return 1st Serve · Deuce · Rear #1
Tim Henman's first serve from the deuce court, filmed from a rear angle. From this view you can see his continental grip stay firm while his wrist pronates aggressively through contact, with only a subtle wrist snap as he finishes toward the target.
|
|
2.5s |
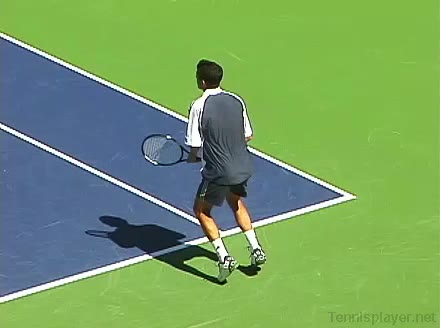
FH Return 1st Serve · Deuce · Rear #2
Tim Henman's first serve from the deuce court, filmed from a rear angle. His shoulder line rotates well past 90 degrees relative to the baseline, creating a pronounced trunk coil that uncoils sequentially from hips to shoulders into the contact.
|
|
2.9s |
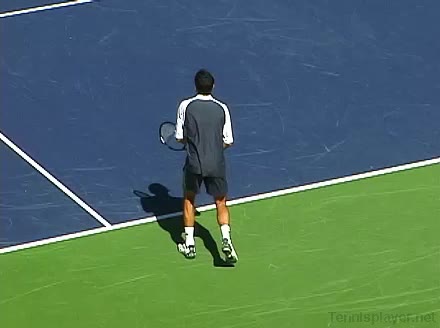
FH Return 2nd Serve · Ad · Rear #2
Tim Henman's forehand return of second serve from the Ad court, filmed from a rear angle. He uses a small split-step into a semi-open stance, then takes quick adjustment steps to align his body before transferring weight into the return.
|
|
2.7s |
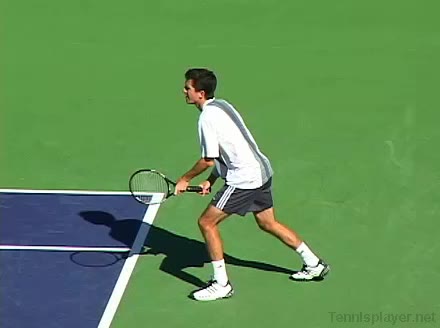
BH Return 1st Serve · Deuce · Side #1
Tim Henman's first serve from the deuce side, filmed from the side. His shoulders coil deeply with a pronounced trunk rotation during the trophy phase, then uncoil sequentially from hips to shoulders as he drives up into the ball.
|
|
2.9s |
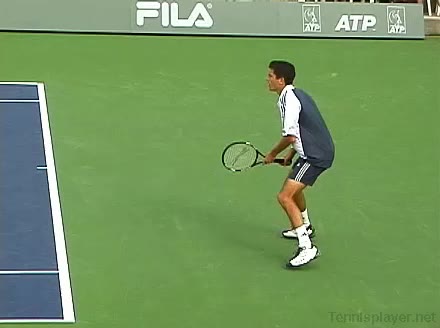
BH Return Slice 1st Serve · Ad · Side #1
Tim Henman's first serve from the Ad side, filmed from the side. His shoulders load with a pronounced upper-body coil relative to the hips before uncoiling in sequence, making the trunk rotation and shoulder-over-shoulder action especially clear.
|
|
3s |
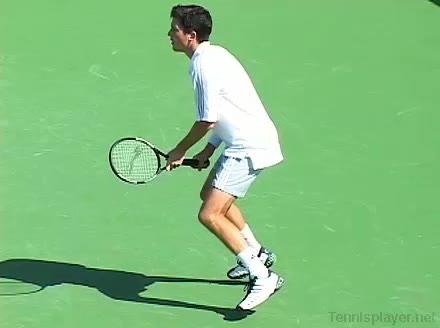
BH Return Slice 1st Serve · Ad · Side #2
Tim Henman's first serve from the Ad court, filmed from the side. At contact his racket face is slightly closed with the ball struck just in front of his body at full extension, showing a pronounced upward swing path and high racket head speed through the hitting zone.
|
|
3.2s |
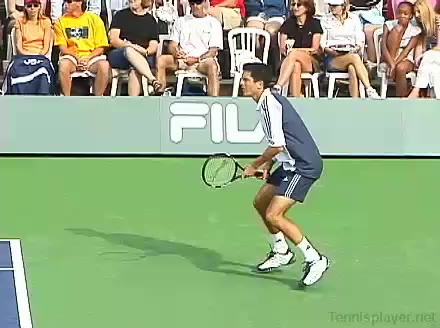
BH Return Slice 1st Serve · Deuce · Side #1
Tim Henman's first serve from the deuce court, filmed from a side angle. At contact his racket face is slightly closed with the ball struck just above head height, and the racket head accelerates upward along a pronounced pronation-driven swing path.
|
|
2.9s |
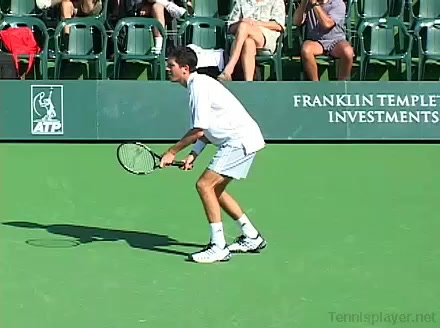
BH Return Slice 1st Serve · Deuce · Side #2
Tim Henman's one-handed backhand slice return of first serve from the deuce court, filmed from the side. His follow-through stays compact with the racket finishing in front as he quickly recovers his stance and brings his non-hitting hand back toward the handle to reset for the next shot.
|
|
2.7s |
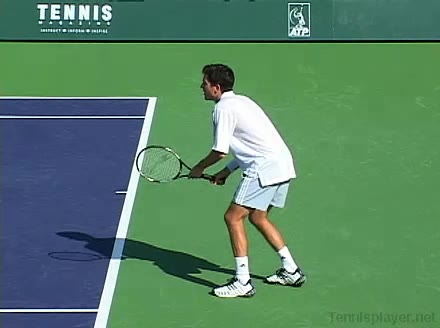
BH Return Slice 2nd Serve · Ad · Side #1
Tim Henman’s second serve from the Ad court, filmed from the side. After contact he lets his hitting arm decelerate naturally while his weight moves into the court, finishing in a balanced stance that readies him to move forward for the next ball.
|
|
2.9s |
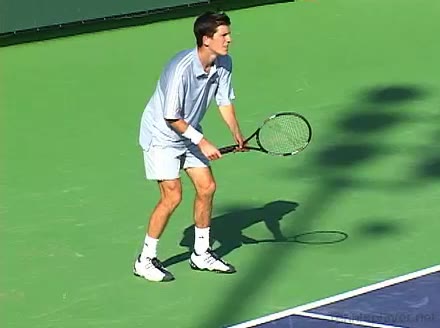
BH Return Slice 2nd Serve · Ad · Side #2
Tim Henman's second serve from the Ad side, filmed from the side. After contact he lands into the court with his weight moving forward, his non-hitting hand settling near his torso as he quickly brings the racquet down and readies his upper body for the next shot.
|
|
2.5s |
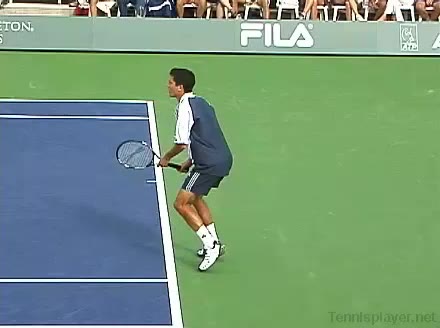
BH Return Slice 2nd Serve · Ad · Side #3
Tim Henman’s second-serve return backhand slice from the Ad side, filmed from the side. His early split step into a closed stance and small adjustment steps set up a stable base before he slices and then takes a quick recovery step back toward the center.
|
|
2.9s |
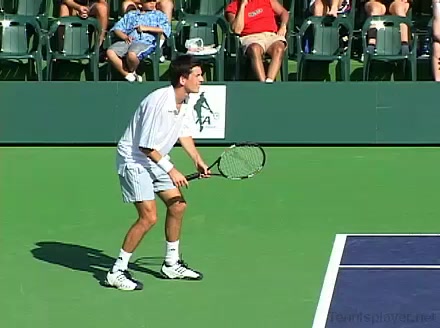
BH Return Slice 2nd Serve · Ad · Side #4
Tim Henman's second serve return backhand slice from the Ad court, filmed from the side. His shoulders rotate early as he coils the trunk on the unit turn, then uncoil in a compact, sequenced motion that keeps the hitting shoulder slightly below the non-hitting shoulder through contact.
|
|
2.9s |
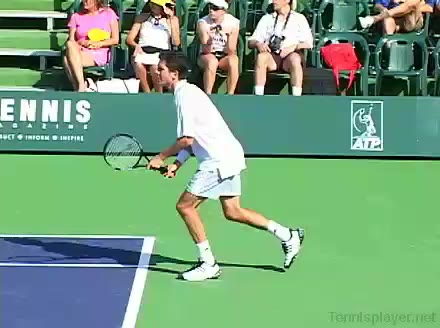
BH Return Slice 2nd Serve → BH → OH → OH · Deuce · Side #2
Tim Henman's backhand slice return of second serve from the deuce court, filmed from the side. His split-step is timed just before contact and he uses a small lateral adjustment step into a slightly closed stance before carving the one-handed slice.
|
|
9.6s |
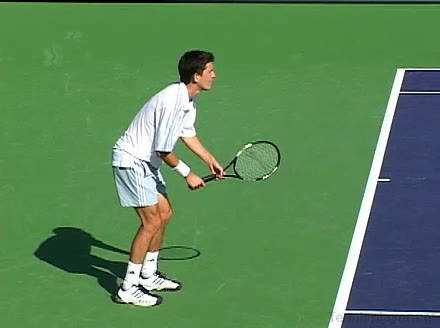
BH Return Slice 2nd Serve · Side #4
Tim Henman’s second serve return backhand slice from the deuce court, filmed from a side court-level angle. His shoulders rotate early to set the racquet path, with a noticeable trunk coil that then uncoils in sync with his forward weight transfer through contact.
|
|
2.6s |
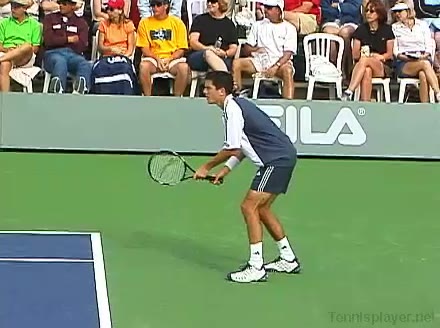
BH Return Slice 2nd Serve → FH Volley · Deuce · Side #2
Tim Henman’s forehand volley from the deuce court, filmed from the side. His shoulders stay slightly closed as the trunk rotates just enough to set the racquet path, with a compact uncoil through contact that keeps the upper body stable through the kinetic chain.
|
|
4.9s |
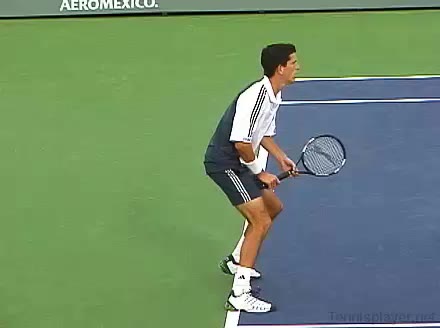
BH Return Slice 2nd Serve → OH · Deuce · Side #2
Tim Henman's backhand slice return of a second serve from the deuce side, filmed from the side. After contact he extends the racquet forward with a long, low slice follow-through while his weight continues moving into the court, quickly bringing his non-hitting hand back to the racquet for the recovery split-step.
|
|
5.2s |
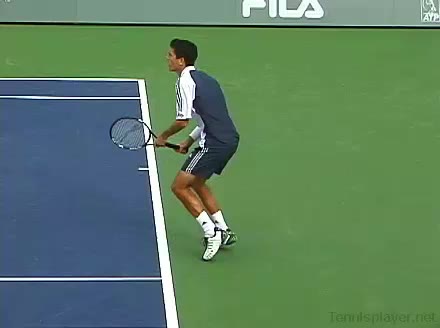
BH Slice → Return 2nd Serve → BH Volley · Ad · Side #2
Tim Henman's backhand volley return of a second serve from the Ad court, filmed from the side. His hips stay relatively closed to the net with a pronounced knee bend on the outside leg, giving a low, stable base as he moves into the slice volley.
|
|
6.1s |
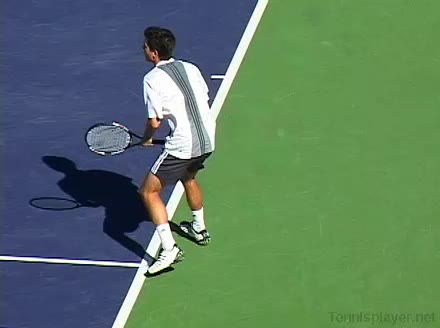
BH Slice → Return 2nd Serve · Ad · Side #2
Tim Henman’s second serve from the Ad court, filmed from the side. His continental grip stays stable with a relaxed hand, and the side angle makes the upward wrist pronation and subtle snap through contact clearly visible.
|
|
3.2s |
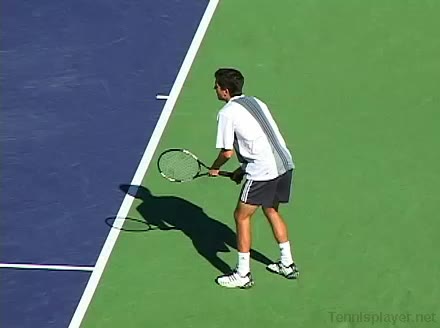
BH Slice → Return 2nd Serve · Ad · Side #2
Tim Henman's second serve return backhand slice from the ad court, filmed from the side. His early split step into a slightly open stance leads into a compact lateral adjustment step, with a small recovery step forward to be ready to move toward the net.
|
|
3.7s |
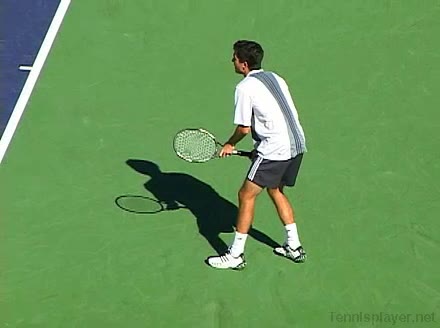
FH Return 1st Serve · Ad · Side #1
Tim Henman's first serve from the Ad court, filmed from the side. His hips load with a pronounced knee bend and upward leg drive, clearly showing how the back hip leads the rotation into the court.
|
|
2.6s |
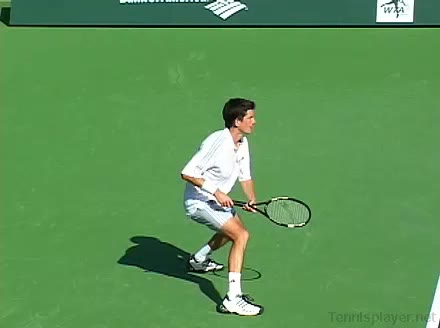
FH Return 1st Serve · Deuce · Side #1
Tim Henman's first serve return from the deuce court, filmed from the side. His follow-through brings the racquet across his body as his weight transfers into the court, quickly bringing both hands back to a compact ready position for the next shot.
|
|
2.5s |
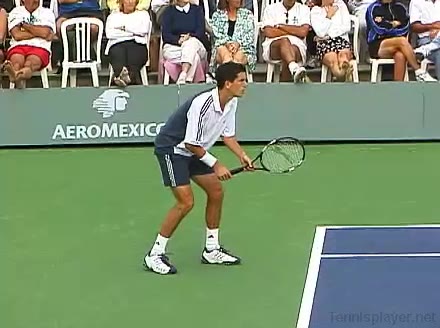
FH Return 2nd Serve → BH Volley → BH Volley · Ad · Side #2
Tim Henman's backhand volley return of a second serve from the ad side, filmed from the side. His hips stay relatively closed to the net while a pronounced knee bend and forward leg drive into the court are clearly visible on contact.
|
|
7.6s |
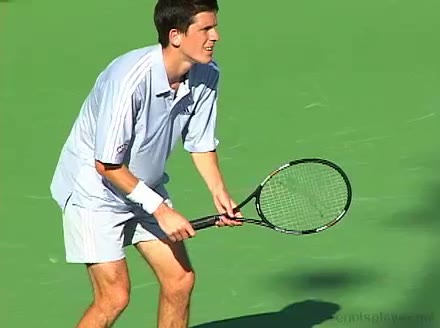
FH Return 2nd Serve · Deuce · Arm-action · Side #2
Tim Henman's second serve return from the deuce court, filmed from the side. His compact split step into a semi-open stance sets up a short adjustment step forward as he plants his front foot just before initiating the arm swing.
|
|
2.4s |
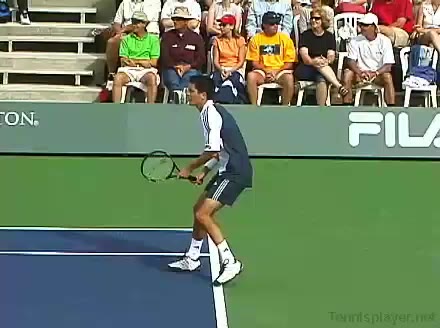
FH Return 2nd Serve · Deuce · Side #1
Tim Henman's second serve from the deuce side, filmed from a side angle. His legs load with a noticeable knee bend before driving up into the serve, and his hips rotate from a closed to more open position as he uncoils into contact.
|
|
2.9s |
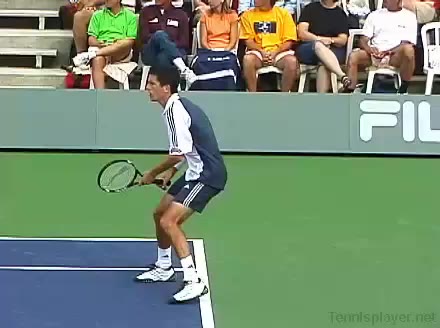
FH Return 2nd Serve · Deuce · Side #2
Tim Henman's second serve return from the deuce side, filmed from the side. After contact his follow-through brings the racquet across his body while his weight transfers into the court, finishing with both hands settling into a compact ready position for the next shot.
|
|
2.8s |
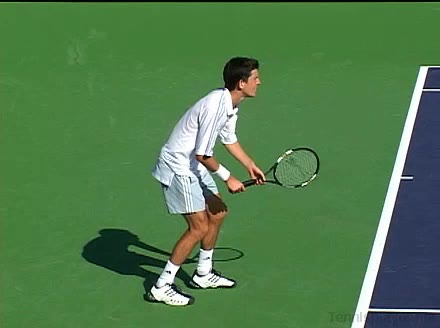
FH Return 2nd Serve · Deuce · Side #3
Tim Henman's second serve from the deuce side, filmed from a side angle. His shoulders and trunk show a pronounced coiling during the trophy position, then uncoil in a clearly sequenced motion from hips through torso to shoulder as he drives up into the serve.
|
|
2.6s |
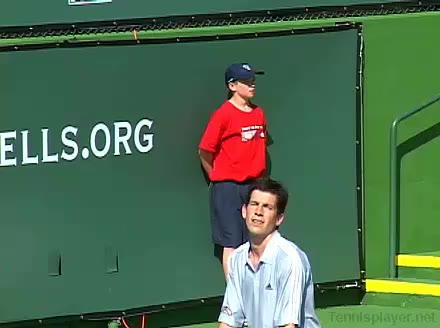
Second Serve · Ad · Arm-action · Court-level-front #1
Tim Henman's second serve from the Ad court, filmed from a court-level front angle. His shoulders stay relatively closed through the toss and early racquet drop, then uncoil in sync with his trunk rotation so the hitting shoulder drives up and through the ball.
|
|
3.3s |
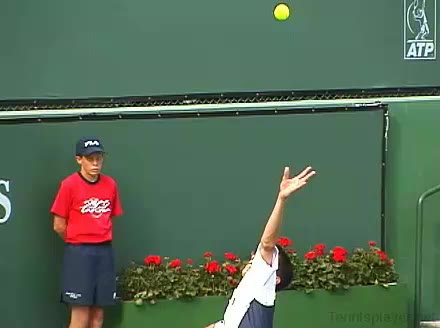
Second Serve · Ad · Arm-action · Court-level-front #2
Tim Henman's second serve from the Ad court, filmed from a court-level front angle. His racket face stays slightly closed at contact with the ball struck just above shoulder height, and the upward swing path creates visible spin-oriented racket head speed.
|
|
2.7s |
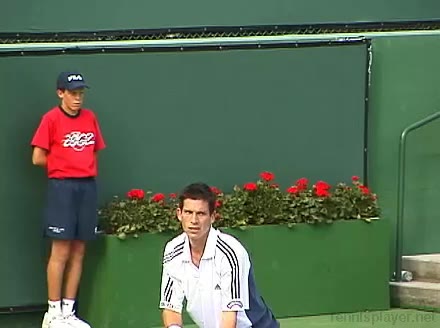
Second Serve · Ad · Arm-action · Court-level-front #3
Tim Henman's second serve from the Ad court, filmed from a court-level front angle. His continental grip is firm with a relaxed wrist that pronates smoothly through contact, with a distinct upward wrist snap to add spin and control on the second serve.
|
|
2.9s |
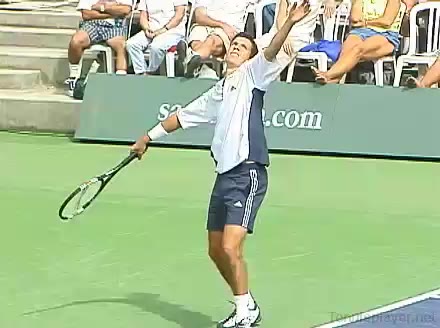
Second Serve · Ad · Body-rotation · Court-level-front #2
Tim Henman's second serve from the Ad court, filmed from a front court-level angle. His hips load in a slightly closed position with a deep knee bend, then uncoil upward as his legs drive through the court into the court on contact.
|
|
3.1s |
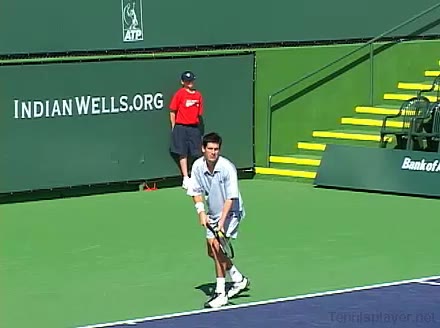
Second Serve · Ad · Court-level-front #1
Tim Henman's second serve from the Ad court, filmed from court-level front. His front-on stance makes it easy to see his rhythmic knee bend into the trophy position and the small adjustment steps with his back foot before driving up to the ball.
|
|
3.4s |
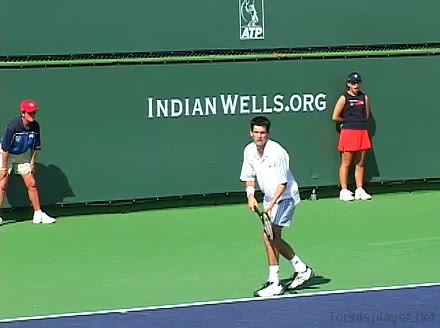
Second Serve · Ad · Court-level-front #2
Tim Henman's second serve from the Ad court, filmed from a court-level front angle. His continental grip is firm with a relaxed wrist that pronates smoothly through contact, showing a clear wrist snap just after impact.
|
|
3.4s |
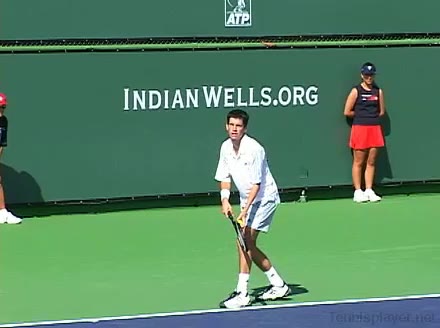
Second Serve Down The Middle · Ad · Court-level-front #1
Tim Henman's second serve from the Ad court down the middle, filmed from a court-level front angle. His continental grip is firm with a relaxed wrist that pronates smoothly through contact, showing a late wrist snap just after he strikes the ball.
|
|
2.9s |
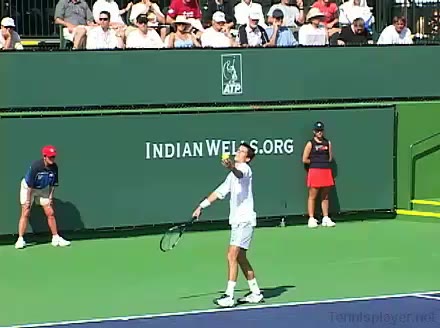
Second Serve Down The Middle · Ad · Court-level-front #2
Tim Henman's second serve from the Ad court down the middle, filmed from a court-level front angle. At contact his racket face is only slightly closed with the ball struck just above shoulder height, and the upward swing path creates visible topspin for a safer second serve trajectory.
|
|
3.3s |
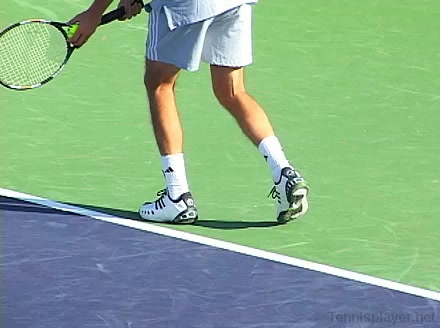
Second Serve · Ad · Leg-action · Court-level-front #2
Tim Henman's second serve from the Ad court, filmed from a court-level front angle. His shoulder line stays relatively closed through the toss and initial knee bend, then the trunk uncoils in sync with the upward arm swing to create a smooth, continuous kinetic chain into contact.
|
|
3.4s |
Second Serve · Deuce · Arm-action · Court-level-front #1
Tim Henman's second serve from the deuce side, filmed from a court-level front angle. At contact his racket face is slightly closed with the ball struck just above head height, and the upward swing path creates clear racket head acceleration through the hitting zone.
|
|
3.3s |
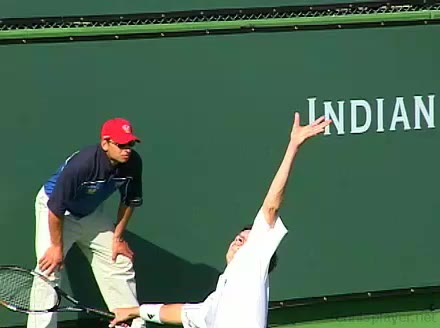
Second Serve · Deuce · Arm-action · Court-level-front #2
Tim Henman's second serve from the deuce side, filmed from a court-level front angle. His hips stay relatively closed to the court through the knee bend, with an upward leg drive that straightens the front leg as he uncoils into the serve.
|
|
2.9s |

Second Serve · Deuce · Court-level-front #1
Tim Henman's second serve from the deuce court, filmed from a court-level front angle. After contact his racket finishes across his body while his weight moves into the court, and he quickly brings both hands back toward a neutral ready position for the next shot.
|
|
3.4s |
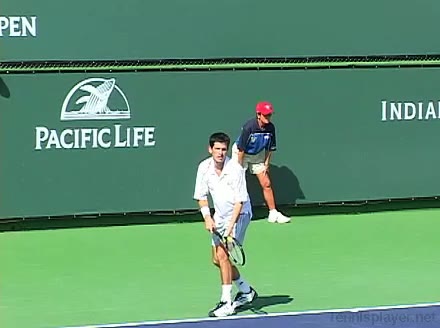
Second Serve · Deuce · Court-level-front #2
Tim Henman's second serve from the deuce court, filmed from a court-level front angle. After contact he lets his hitting arm finish naturally across his body while his weight moves into the court, quickly bringing both hands back to a neutral ready position for the next shot.
|
|
3.3s |
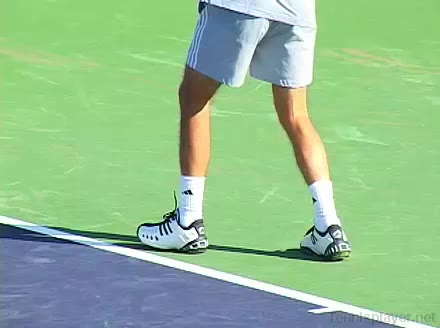
Second Serve · Deuce · Leg-action · Court-level-front #1
Tim Henman's second serve from the deuce side, filmed from a court-level front angle. His hips stay relatively closed through the toss and loading phase, with a noticeable knee bend and upward leg drive contributing to his upward extension into the ball.
|
|
3.4s |
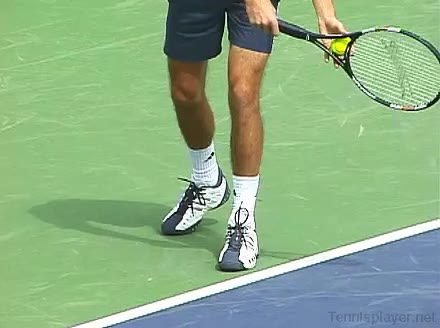
Second Serve · Deuce · Leg-action · Court-level-front #2
Tim Henman's second serve from the deuce court, filmed from a court-level front angle. His front-on leg action shows a pronounced knee bend and upward drive into the court, with his back leg swinging through to aid forward momentum toward the baseline.
|
|
3.3s |
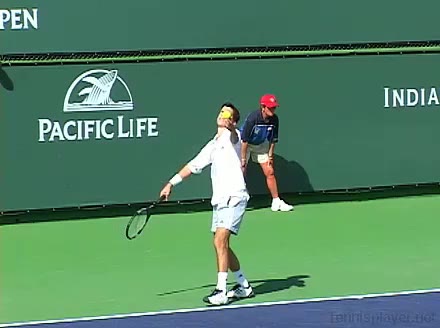
Second Serve Wide · Deuce · Court-level-front #1
Tim Henman’s second serve wide from the deuce court, filmed from a court-level front angle. His feet set in a neutral stance before he drives up into the serve, with a small adjustment step of the back foot helping him align toward the wide target.
|
|
3.3s |
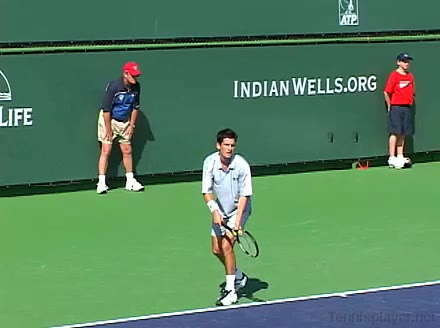
Second Serve Wide · Deuce · Court-level-front #2
Tim Henman's second serve from the deuce side out wide, filmed from a court-level front angle. His shoulders rotate as a unit with the trunk on the toss, then uncoil smoothly through contact with a noticeable delay between trunk rotation and the racket arm accelerating up to the ball.
|
|
3.3s |
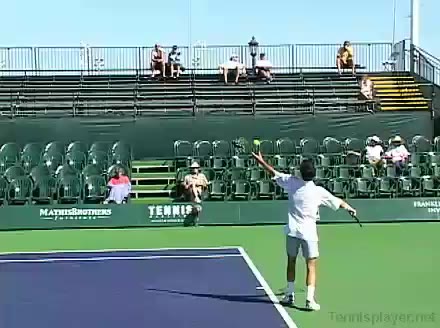
Second Serve · Ad · Toss · Court-level-side #2
Tim Henman's second serve from the Ad court, filmed from a court-level side angle. His stance is slightly staggered with a pronounced knee bend, and you can clearly see his rhythmic weight transfer from back foot to front foot as he drives up into the toss.
|
|
3.2s |
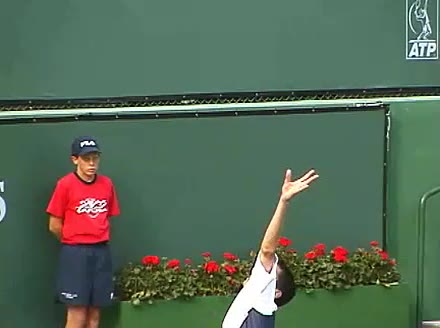
Second Serve → BH Volley · Ad · Front #2
Tim Henman's backhand volley from the Ad side, filmed from the front. His shoulders stay relatively square to the net with only a mild trunk rotation, and you can clearly see the chest stay stable as the hitting-side shoulder moves slightly forward through contact.
|
|
4.8s |
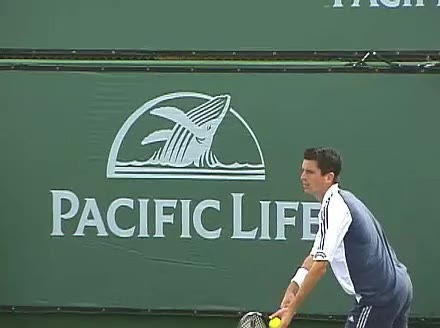
Second Serve · Ad · Body-rotation · Front #2
Tim Henman's second serve from the Ad court, filmed from the front. At contact his racket face is slightly closed with the ball struck just above head height, and you can clearly see the upward brushing swing path creating spin as the racket accelerates through the hitting zone.
|
|
2.8s |
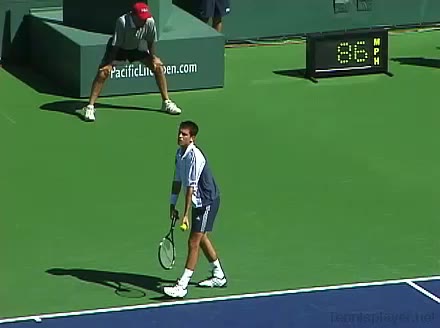
Second Serve Down The Middle · Ad · Front #1
Tim Henman's second serve from the Ad court down the middle, filmed from the front. His hips stay relatively closed to the baseline through the toss with a pronounced knee bend, then drive upward as his back leg extends to initiate the serve action.
|
|
3.5s |

Second Serve Down The Middle · Ad · Front #2
Tim Henman’s second serve from the ad court down the middle, filmed from the front. His front-facing stance makes it easy to see his rhythmic knee bend and upward drive, along with a small hop into the court that sets up his first recovery steps toward a potential net approach.
|
|
3.5s |
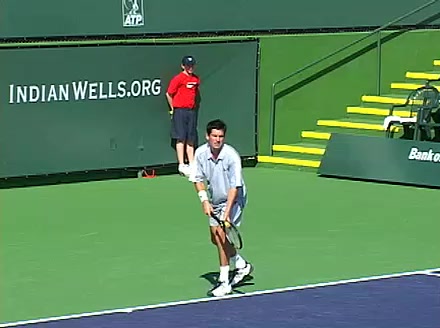
Second Serve · Ad · Front #2
Tim Henman's second serve from the Ad side, filmed from the front. His continental grip is firm with a relaxed wrist that pronates smoothly through contact, showing a distinct wrist snap just after the ball leaves the strings.
|
|
4.6s |
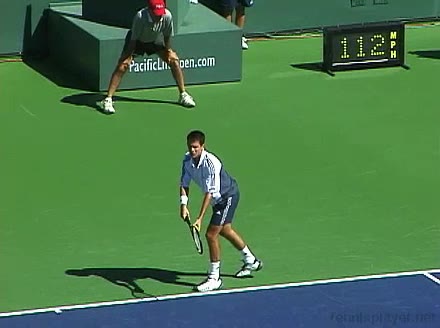
Second Serve · Ad · Front #1
Tim Henman's second serve from the Ad court, filmed from the front. His knees are deeply flexed during the loading phase, and you can clearly see his hips drive upward and slightly into the court as he pushes off the ground.
|
|
3.3s |
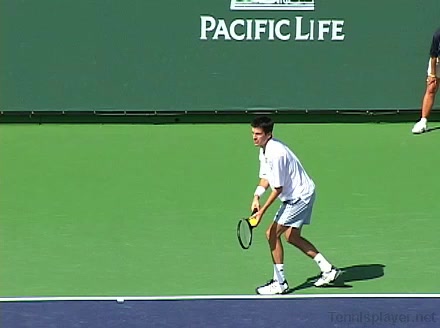
Second Serve · Ad · Front #2
Tim Henman's second serve from the ad court, filmed from a front angle. He uses a controlled platform stance with a rhythmic knee bend, and his front-foot step into the court after contact sets up an immediate forward move toward the net.
|
|
3.1s |
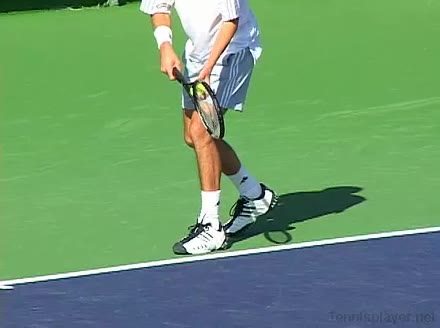
Second Serve · Ad · Leg-action · Front #2
Tim Henman's second serve from the Ad court, filmed from the front. At contact his racket face is slightly closed with the ball struck just above head height, and you can clearly see the upward brushing path and acceleration of the racket head through the ball.
|
|
3.4s |
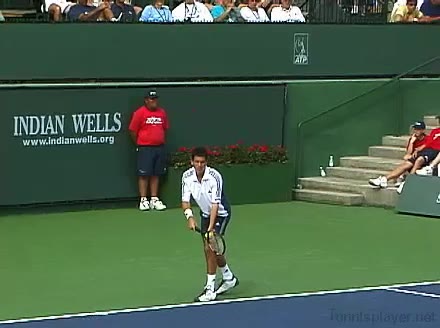
Second Serve · Ad · Toss · Front #2
Tim Henman's second serve from the Ad court, filmed from the front. After contact he brings his back leg through into the court and lets his tossing arm drop naturally as he settles quickly into a balanced, ready position for the next ball.
|
|
3.3s |
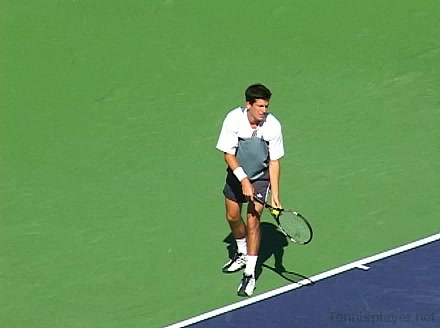
Second Serve · Deuce · Body-rotation · Front #2
Tim Henman's second serve from the deuce court, filmed from the front. His shoulder line turns noticeably away from the target before contact and then uncoils in sequence with his trunk, making the degree of upper-body rotation and its timing in the kinetic chain easy to compare between the loading and hitting phases.
|
|
3s |

Second Serve Down The Middle · Deuce · Front #1
Tim Henman's second serve from the deuce court, filmed from the front. At contact, his racket face is slightly closed with the ball struck just above head height, and the upward swing path creates visible topspin/kick action on the serve.
|
|
3.1s |
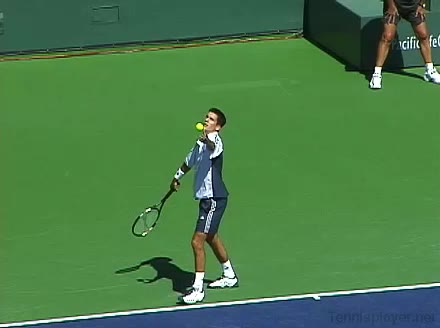
Second Serve Down The Middle · Deuce · Front #2
Tim Henman's second serve from the deuce side, filmed from the front. His continental grip stays firm with a relaxed wrist that pronates smoothly through contact to direct the ball down the middle.
|
|
3.4s |
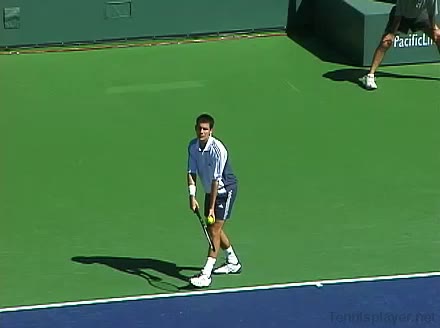
Second Serve · Deuce · Front #1
Tim Henman's second serve from the deuce court, filmed from a front angle. His shoulders and trunk rotate together into a compact coil during the toss, then uncoil in a smooth, sequential motion that brings the hitting shoulder through before the trunk squares to the net.
|
|
3.5s |
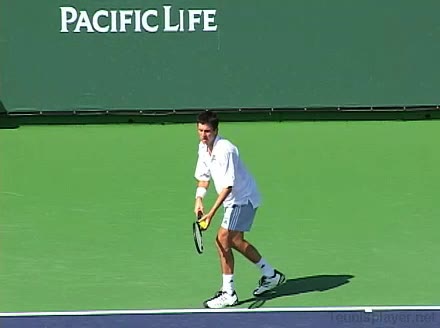
Second Serve · Deuce · Front #2
Tim Henman's second serve from the deuce court, filmed from the front. At contact his racket face is slightly closed with the ball struck just above head height, and the upward brushing swing path creates clear topspin and kick.
|
|
3.4s |
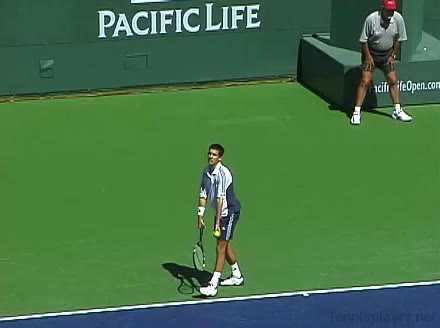
Second Serve · Deuce · Toss · Front #1
Tim Henman's second serve from the deuce side, filmed from the front. His knees sink into a noticeable bend during the loading phase, with his hips staying relatively closed to the baseline before driving upward into the serve.
|
|
3.4s |
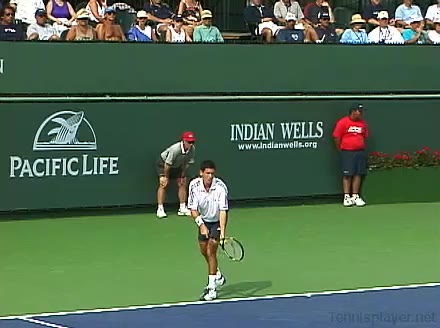
Second Serve · Deuce · Toss · Front #2
Tim Henman's second serve from the deuce court, filmed from the front. His continental grip stays relaxed with a visible loose wrist during the toss and early motion, tightening only just before contact to control pronation through the ball.
|
|
3.3s |
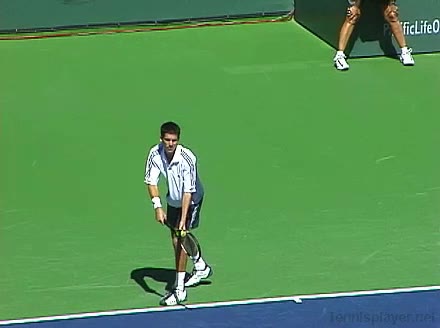
Second Serve Wide · Deuce · Front #1
Tim Henman's second serve out wide from the deuce court, filmed from the front. His front-facing footwork shows a small adjustment hop into a balanced stance before the toss, with his back leg driving up and through the court to aid forward momentum.
|
|
3.3s |
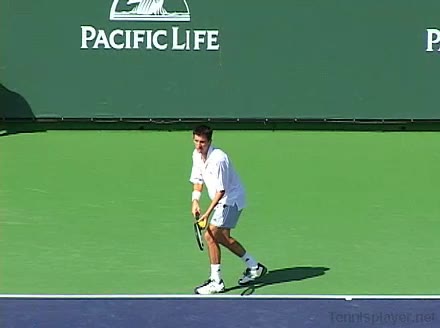
Second Serve Wide · Deuce · Front #2
Tim Henman's second serve out wide from the Deuce court, filmed from the front. After contact he lands balanced on his front foot with his non-hitting arm dropping naturally as he quickly brings the racquet down and readies his upper body to move into the court.
|
|
3.3s |
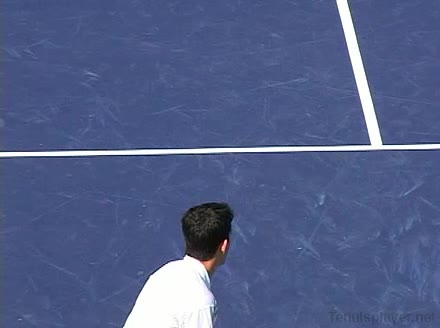
Second Serve · Ad · Arm-action · Rear #2
Tim Henman's second serve from the Ad court, filmed from a rear angle. His follow-through leaves his hitting arm relaxed across his body while his weight moves into the court, quickly bringing his non-hitting hand back toward a ready position for the next shot.
|
|
3.5s |
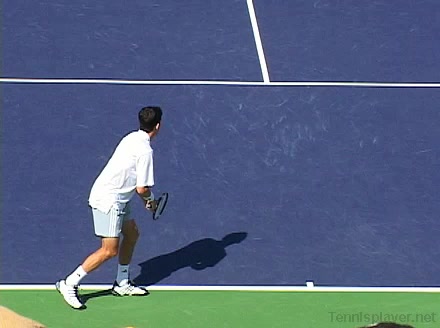
Second Serve · Ad · Body-rotation · Rear #2
Tim Henman's second serve from the Ad court, filmed from a rear angle. From this view, you can see his continental grip stay stable while his wrist pronates smoothly through contact to direct the serve into the body.
|
|
3.4s |
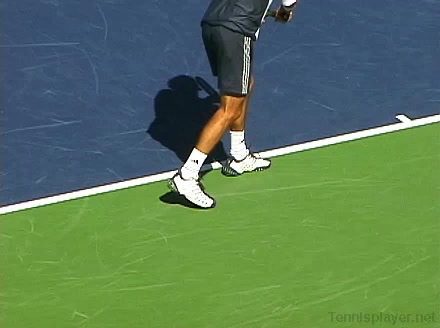
Second Serve · Ad · Leg-action · Rear #2
Tim Henman's second serve from the Ad court, filmed from a rear angle. His continental grip is steady with minimal grip change, and the rear view makes the upward wrist pronation and subtle wrist snap at contact clearly visible.
|
|
3.3s |
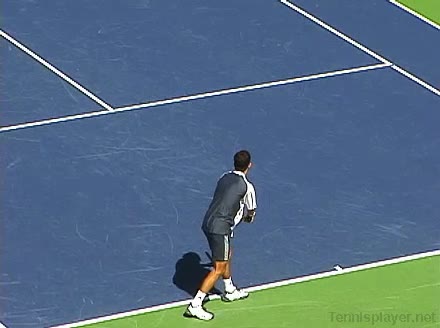
Second Serve · Ad · Rear #1
Tim Henman's second serve from the Ad court, filmed from a rear angle. After contact he lets his hitting arm finish across his body while his weight moves into the court, quickly bringing both hands back to the racket as he recovers toward a ready position.
|
|
2.6s |
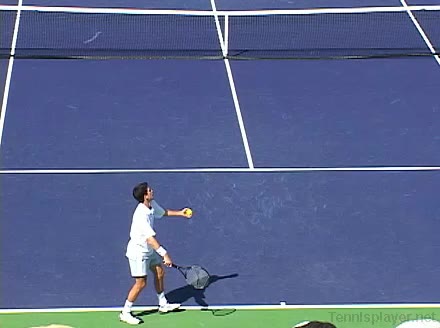
Second Serve · Ad · Rear #2
Tim Henman's second serve from the Ad court, filmed from a rear angle. His continental grip remains steady with a relaxed hand, and the rear view makes the subtle wrist pronation through contact clearly visible.
|
|
3.6s |

Second Serve Wide · Ad · Rear #1
Tim Henman's second serve from the Ad court, hit wide and filmed from a rear angle. His shoulders and trunk show a pronounced coil during the trophy position, then uncoil in sequence from hips to shoulders to arm as he rotates into the wide serve.
|
|
3s |
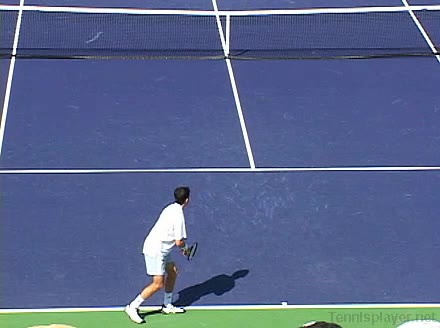
Second Serve Wide · Ad · Rear #2
Tim Henman's second serve from the Ad court, hit wide and filmed from a rear angle. His hips stay relatively closed through the toss and loading phase, with a noticeable knee bend and upward leg drive that brings the back hip through as he extends into the court.
|
|
3.6s |

Second Serve Wide · Ad · Rear #3
Tim Henman's second serve from the Ad court, hit wide and filmed from a rear angle. After contact he lands balanced on his front foot with his non-hitting hand dropping naturally as he recovers toward a neutral ready position.
|
|
3.6s |
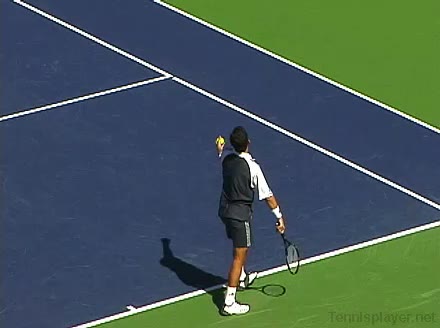
Second Serve · Deuce · Rear #1
Tim Henman's second serve from the deuce court, filmed from a rear angle. His hips stay relatively closed through the toss and loading phase, with a noticeable knee bend and upward leg drive as he uncoils into the court.
|
|
2.6s |
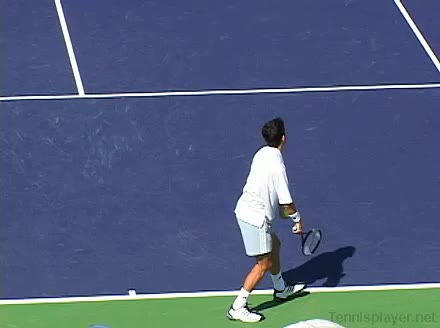
Second Serve · Deuce · Rear #2
Tim Henman's second serve from the deuce court, filmed from a rear angle. From this view you can see his continental grip stay relatively relaxed while his wrist pronates smoothly through contact to add spin and control.
|
|
3.7s |
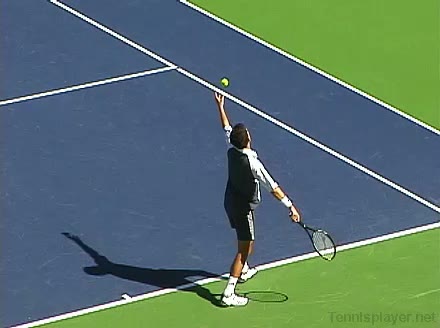
Second Serve · Deuce · Rear #3
Tim Henman's second serve from the deuce side, filmed from a rear angle. His footwork includes a compact pinpoint stance with a clear weight transfer onto the front foot as he drives up into the serve and lands slightly inside the court for quicker recovery.
|
|
3.1s |
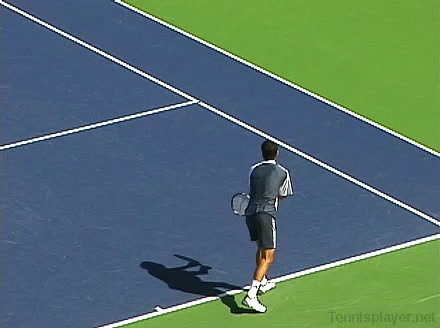
Second Serve · Deuce · Toss · Rear #2
Tim Henman's second serve from the deuce court, filmed from a rear angle. After contact he lands into the court with his weight moving forward and his tossing arm dropping back down as he brings both hands together into a compact ready position for the next shot.
|
|
3s |
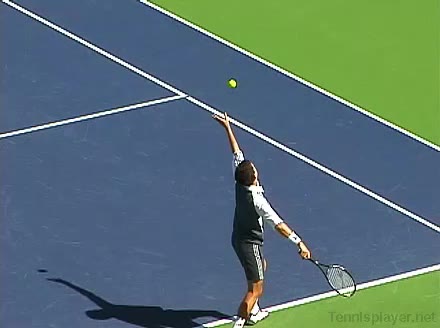
Second Serve Wide · Deuce · Rear #2
Tim Henman's second serve from the deuce court, hit wide and filmed from a rear angle. At contact his racket face is slightly closed with the ball struck just above head height, and the upward swing path and moderate racket head speed emphasize spin and control over pace.
|
|
3s |
Second Serve · Ad · Arm-action · Side #2
Tim Henman's second serve from the Ad court, filmed from the side. His hips stay relatively closed to the court as his knees load deeply, then drive upward to initiate a smooth hip uncoiling into the serve.
|
|
3.5s |
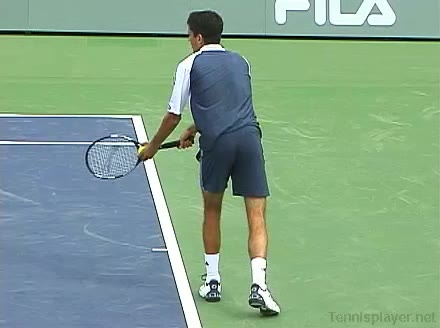
Second Serve · Ad · Body-rotation · Side #1
Tim Henman's second serve from the Ad court, filmed from the side. At contact his racket face is slightly closed with the ball struck just above head height, and you can see his racket whipping up and across the ball on a pronounced upward swing path.
|
|
3.4s |
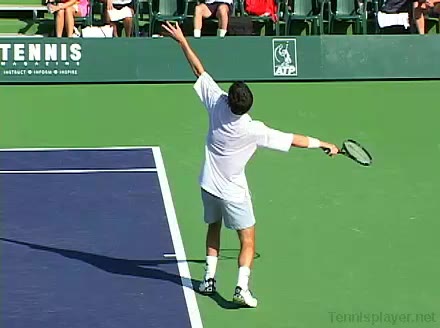
Second Serve · Ad · Body-rotation · Side #2
Tim Henman's second serve from the Ad court, filmed from the side. His continental grip is firm with a relaxed wrist that pronates smoothly through contact, showing a distinct wrist snap as he drives up and into the ball.
|
|
3.2s |
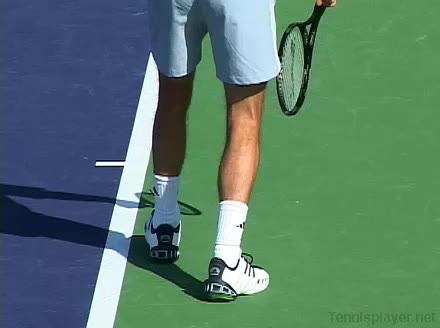
Second Serve · Ad · Leg-action · Side #2
Tim Henman's second serve from the Ad side, filmed from the side. His leg action is clearly visible as he loads deeply on his back leg before driving up into the court with a pronounced knee bend and forward landing step.
|
|
3.4s |
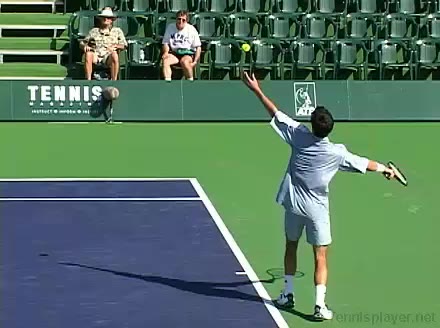
Second Serve · Ad · Side #1
Tim Henman's second serve from the Ad court side, filmed from a side angle. His shoulders and trunk coil noticeably during the trophy phase, then uncoil in a smooth, sequential motion that brings the hitting shoulder up and through the ball.
|
|
3.3s |
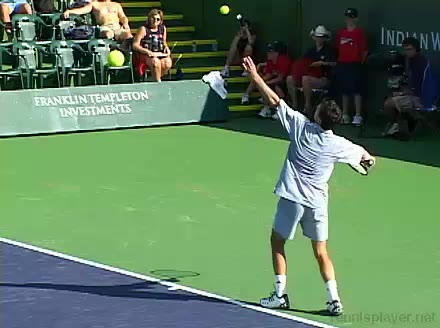
Second Serve · Ad · Side #2
Tim Henman's second serve from the Ad side, filmed from the side. His shoulders rotate well past perpendicular to the baseline in the trophy position, then uncoil in sequence with his trunk leading the motion before the arm whips up to contact.
|
|
3s |
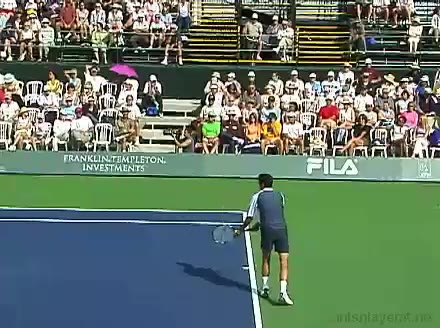
Second Serve · Ad · Toss · Side #2
Tim Henman's second serve from the Ad court, filmed from the side. His feet stay grounded longer during the toss with a pronounced knee bend, and you can clearly see his weight transfer from back to front foot as he drives up into the serve.
|
|
3.2s |
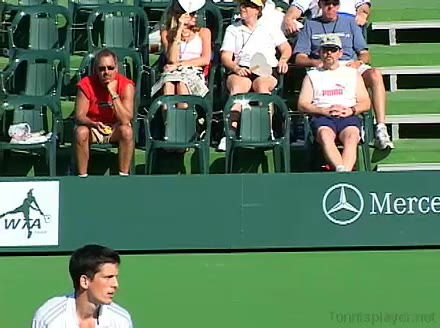
Second Serve · Deuce · Arm-action · Side #1
Tim Henman's second serve from the deuce court, filmed from the side. His stance stays mostly neutral with a pronounced knee bend, and you can clearly see his front foot pivot and weight transfer forward into the court as he drives up to the ball.
|
|
3s |

Second Serve · Deuce · Arm-action · Side #2
Tim Henman's second serve from the deuce court, filmed from the side. After contact his hitting arm extends fully toward the target while his weight moves into the court, and he quickly regathers both hands on the racquet as he transitions into a compact ready position for the next shot.
|
|
3.8s |
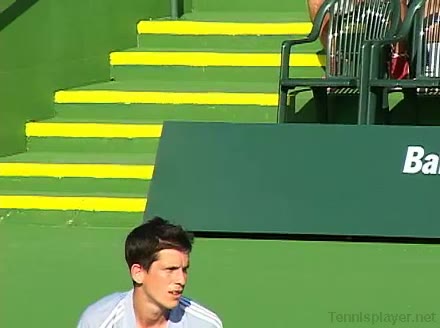
Second Serve · Deuce · Arm-action · Side #3
Tim Henman's second serve from the deuce side, filmed from a side angle. His stance starts in a balanced platform position, and you can clearly see the weight transfer from back foot to front foot as he drives up into the serve before landing slightly inside the court.
|
|
3.5s |
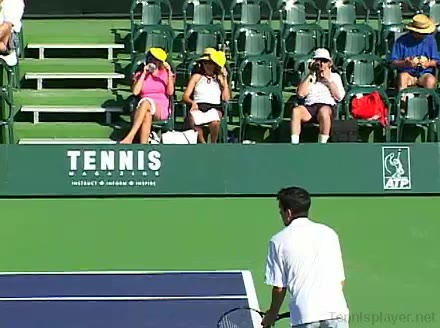
Second Serve · Deuce · Arm-action · Side #4
Tim Henman's second serve from the deuce court, filmed from the side. His stance transitions from a balanced platform position into a pronounced knee bend and upward leg drive, with a clear weight transfer from back foot to front foot before landing inside the court.
|
|
3.4s |
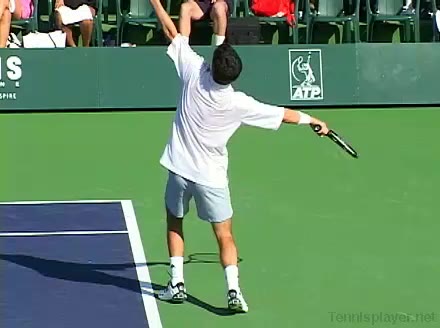
Second Serve · Deuce · Body-rotation · Side #2
Tim Henman's second serve from the deuce side, filmed from the side. His hips load by turning away from the court with a deep knee bend, then uncoil as his back leg drives up and through into the court.
|
|
2.8s |
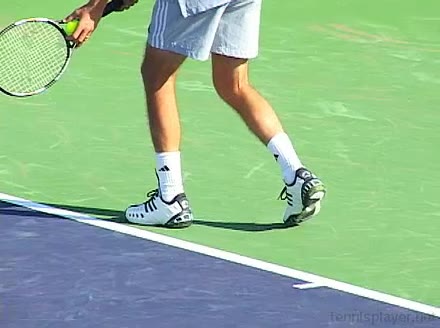
Second Serve · Deuce · Leg-action · Side #2
Tim Henman's second serve from the deuce side, filmed from the side. His shoulders turn gradually as the tossing arm rises, then his trunk uncoils in sync with leg drive, making the lateral tilt of his upper body and timing of torso rotation easy to distinguish.
|
|
3.4s |
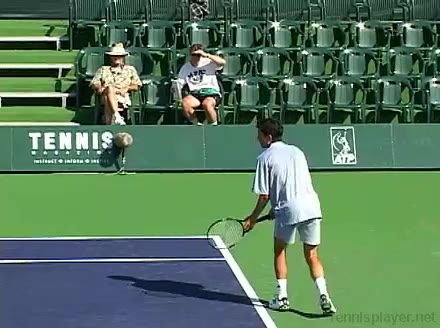
Second Serve · Deuce · Side #1
Tim Henman's second serve from the deuce side, filmed from a side angle. At contact his racket face is slightly closed with the ball struck just above head height, and the upward brushing swing path creates visible topspin and kick.
|
|
3.3s |
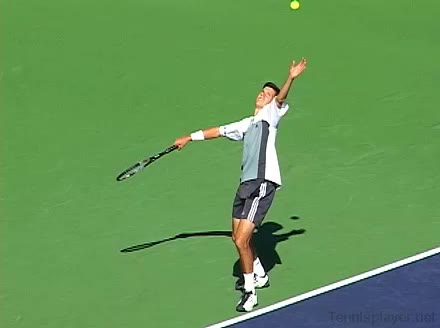
Second Serve · Deuce · Side #2
Tim Henman's second serve from the deuce side, filmed from a side angle. His knees load deeply before upward drive and his hips stay relatively closed to the baseline until just after contact, emphasizing leg-driven lift more than aggressive hip rotation.
|
|
3.2s |

BH Slice Center · Court-level-front · Closed
Tim Henman’s backhand slice from the center in a closed stance, filmed from a court-level front angle. His one-handed backhand uses a firm continental grip with noticeable wrist stability, keeping the racket face slightly open through contact without excessive wrist movement.
|
|
2.5s |
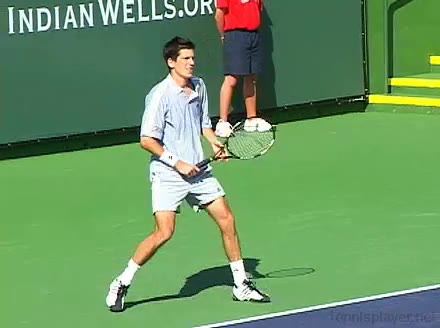
BH Slice Center · Court-level-front #1
Tim Henman's backhand slice from the center of the court, filmed from a front court-level angle. After contact he extends the racquet forward with a long, low follow-through while his non-hitting hand stays back for counterbalance as he recovers toward a neutral ready position.
|
|
3.1s |
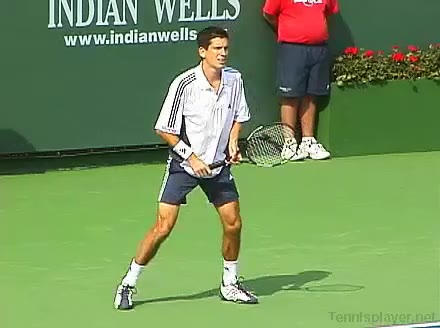
BH Slice Center · Court-level-front #2
Tim Henman's backhand slice from the center of the court, filmed from a front court-level angle. His stance stays mostly neutral with a slight shoulder turn, and his small adjustment steps set up a stable base before he carves through the slice.
|
|
3.1s |
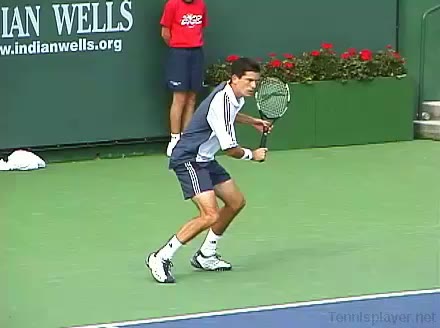
BH Slice Center · Court-level-front #3
Tim Henman’s backhand slice from the center of the court, filmed from a front court-level angle. His continental grip is clearly visible, with a firm but relaxed wrist that stays laid back through the swing and then slightly firms up just before contact.
|
|
2.7s |
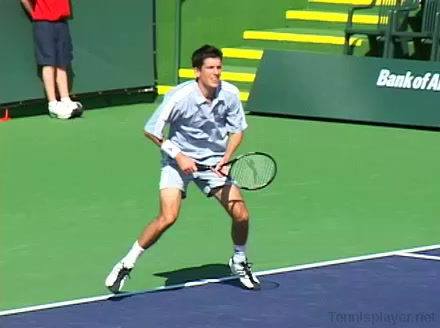
BH Slice Moves Back · Court-level-front #1
Tim Henman's backhand slice while moving back from a neutral court position, filmed from a court-level front angle. His continental grip is firm with a slightly open racket face, and the wrist stays laid back with minimal hinge through contact to keep the slice compact and controlled.
|
|
2.4s |
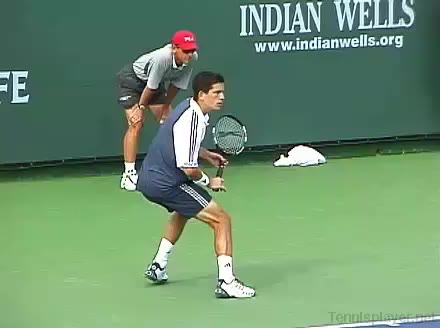
BH Slice Moves Back · Court-level-front #2
Tim Henman's backhand slice while moving back from a neutral court position, filmed from a court-level front angle. His follow-through finishes high with the racquet face slightly open as his weight shifts onto the outside leg, and he quickly brings both hands back toward a compact ready position for the next shot.
|
|
3.3s |
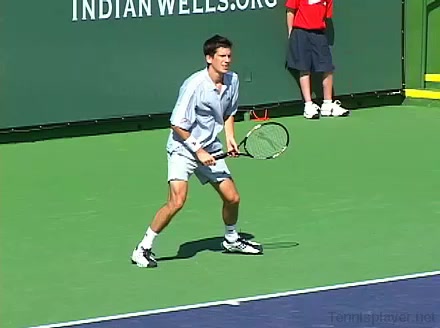
BH Slice Running · Court-level-front
Tim Henman's running backhand slice from a neutral court position, filmed from a court-level front angle. His footwork features quick adjustment steps into a slightly closed stance, with his outside leg planting firmly before he glides through the slice and recovers toward the center.
|
|
3.3s |
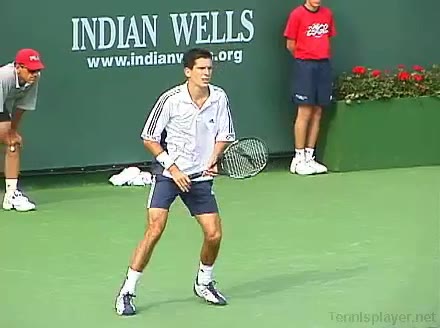
BH Slice Short · Court-level-front
Tim Henman's backhand slice from the middle of the court, filmed from a front court-level angle. His footwork features a small adjustment step into a neutral stance, with his front foot planting early to support a low, skidding slice.
|
|
3s |
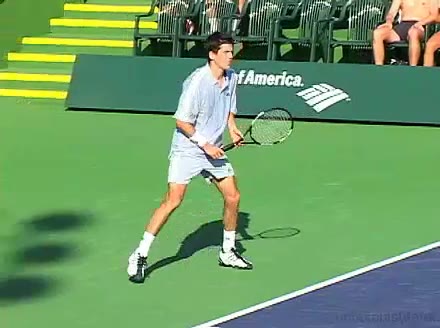
BH Slice Wide · Court-level-front · Closed
Tim Henman's one-handed backhand slice wide from a closed stance, filmed from a court-level front angle. At contact his racket face is slightly open with the ball struck around waist height, and the racket head travels on a distinctly downward, carving path through the shot.
|
|
3.3s |
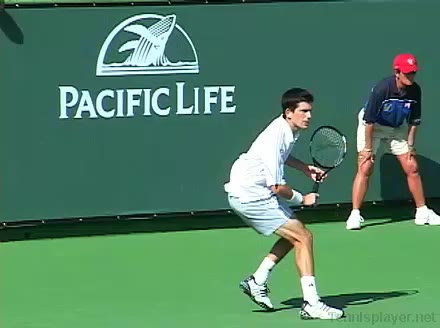
BH Slice Wide · Court-level-front #1
Tim Henman's one-handed backhand slice from a wide position, filmed from a court-level front angle. His continental grip stays firm with a slightly laid-back wrist, creating a stable racket face through contact with minimal wrist deviation.
|
|
2.9s |
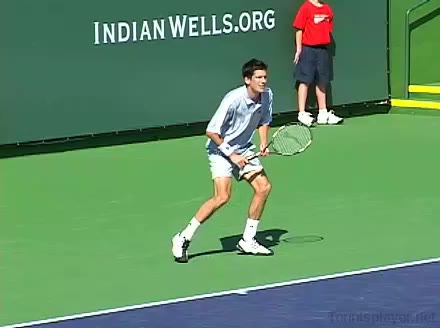
BH Slice Wide · Court-level-front #2
Tim Henman's backhand slice from a wide position, filmed from a court-level front angle. His shoulders stay closed longer than his hips on the takeback, then the trunk uncoils gradually through contact with a subtle right-shoulder drop that matches the low, skidding slice trajectory.
|
|
3s |
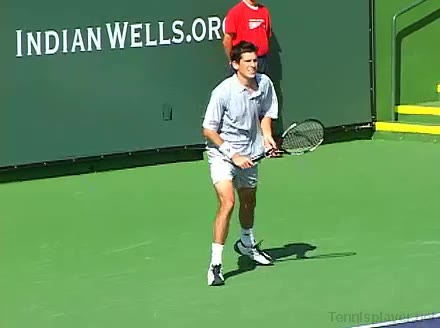
BH Slice Wide · Court-level-front #3
Tim Henman's backhand slice from a wide position, filmed from a court-level front angle. His continental grip is firm with a slightly laid-back wrist, maintaining consistent wrist angle through contact to keep the slice low and controlled.
|
|
2.7s |
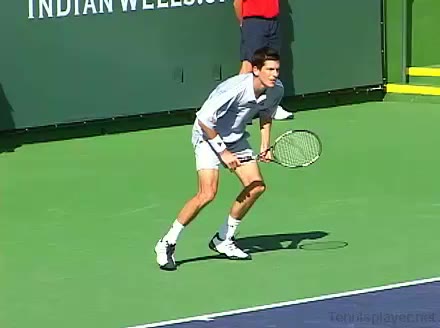
BH Slice Wide · Court-level-front #4
Tim Henman's backhand slice from a wide position, filmed from a court-level front angle. His hips stay relatively closed to the net while a pronounced knee bend on the outside leg supports a low, skidding slice trajectory.
|
|
3.3s |
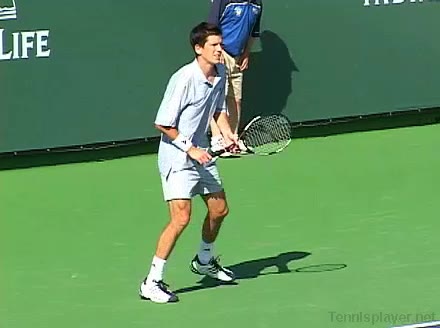
BH Slice Wide · Court-level-front #5
Tim Henman's backhand slice from a wide position, filmed from a court-level front angle. His follow-through finishes with the racquet face slightly open and out in front while his weight transfers onto his front foot, helping him recover quickly back toward a neutral ready position.
|
|
2.9s |
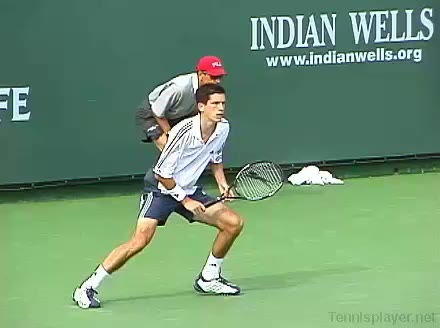
BH Slice Wide · Court-level-front #6
Tim Henman's backhand slice from a wide position, filmed from a court-level front angle. His footwork features a small adjustment hop into a neutral stance, with his outside leg planting early to support the slicing motion before he brings the back leg through for recovery.
|
|
3.5s |
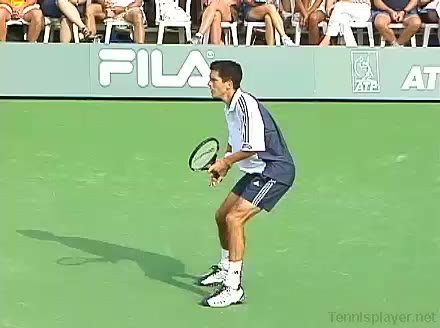
BH Slice Center · Court-level-side #1
Tim Henman's backhand slice from the center of the court, filmed from a court-level side angle. His shoulders rotate early to set the racquet face, then the trunk uncoils in a controlled, continuous motion that sequences smoothly from upper body to arm through contact.
|
|
3.3s |

BH Slice Center · Court-level-side #2
Tim Henman's backhand slice from the center of the court, filmed from a court-level side angle. His knees stay flexed through the loading phase while his hips remain relatively closed, creating a stable base as he drives his weight forward into the slice.
|
|
3.2s |
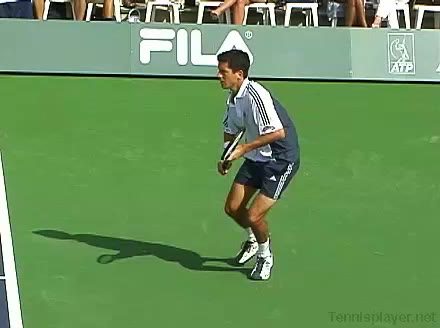
BH Slice Center · Court-level-side #3
Tim Henman's backhand slice from the center of the court, filmed from a court-level side angle. After contact his racquet extends forward with a low, skimming follow-through while his non-hitting arm stays back for counterbalance as he regains a neutral ready position.
|
|
2.6s |
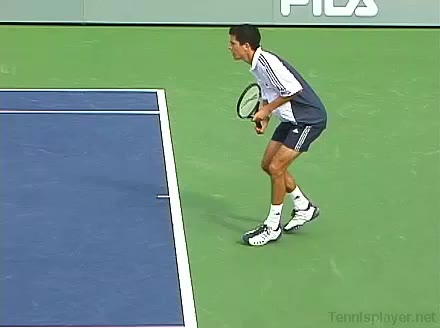
BH Slice Center · Court-level-side · Open
Tim Henman's backhand slice from the center in an open stance, filmed from a court-level side angle. His shoulders and trunk show a pronounced early turn with the chest almost perpendicular to the net, then a controlled uncoil that keeps the shoulders slightly closed through contact to stabilize the slicing motion.
|
|
2.9s |
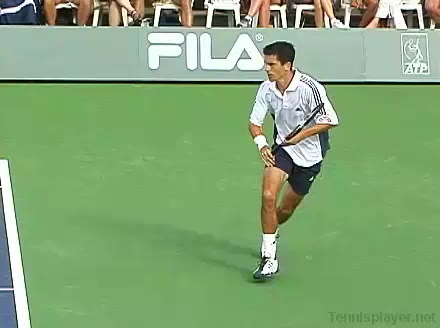
BH Slice Running · Court-level-side #1
Tim Henman's running backhand slice from the deuce side, filmed from a court-level side angle. At contact his racket face is slightly open with the ball struck around waist height, and the downward, elongated swing path creates a low, skidding trajectory.
|
|
3s |

BH Slice Running · Court-level-side #2
Tim Henman's running backhand slice from a neutral position, filmed from a court-level side angle. His outside leg plants deeply with a pronounced knee bend while his hips stay relatively closed, allowing him to stay low through the slice as he moves laterally.
|
|
3.3s |
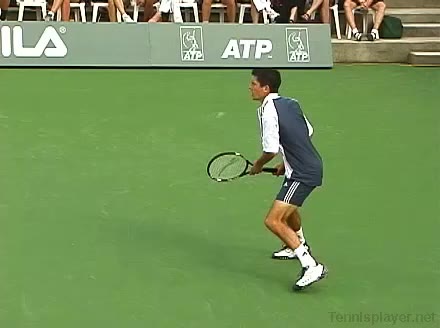
BH Slice Running · Court-level-side #3
Tim Henman's running backhand slice from the deuce side, filmed from a court-level side angle. His shoulders stay markedly closed with a pronounced upper-body tilt as the trunk coils against the forward-moving lower body, then gradually uncoils through contact to keep the slice low and controlled while on the run.
|
|
3.5s |
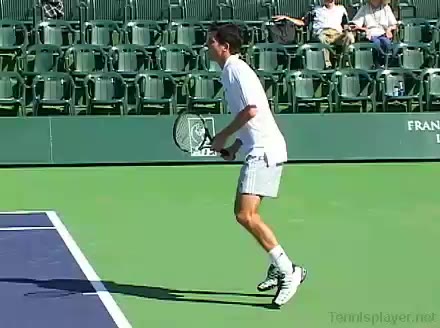
BH Slice Short · Court-level-side #1
Tim Henman's backhand slice from the short court, filmed from a court-level side angle. His continental grip is clearly visible, with a firm but relaxed wrist that stays laid back through the swing and only subtly straightens through contact.
|
|
3.3s |
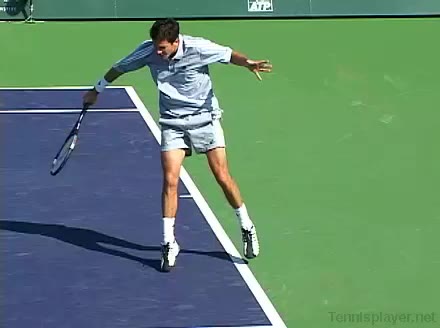
BH Slice Short · Court-level-side #2
Tim Henman's backhand slice from the short court, filmed from a court-level side angle. His shoulders rotate early as the trunk coils on the takeback, then uncoil in a measured sequence that keeps the hitting shoulder slightly below the non-hitting shoulder through contact.
|
|
1.9s |
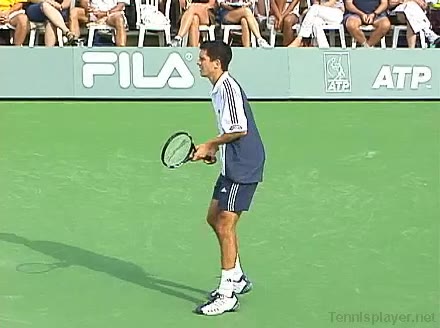
BH Slice Wide · Court-level-side
Tim Henman's backhand slice from a wide position, filmed from a court-level side angle. The racket face stays slightly open at contact with the ball struck around waist height, and the racket travels on a distinctly downward, skimming path through the shot.
|
|
3.4s |
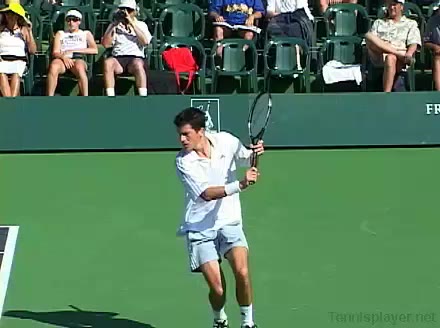
BH Slice Wide · Court-level-side #1
Tim Henman's one-handed backhand slice from a wide position, filmed from a court-level side angle. From this side view, his continental grip and laid-back wrist are evident, with the racket face staying slightly open through contact as the wrist remains firm and stable.
|
|
2.4s |
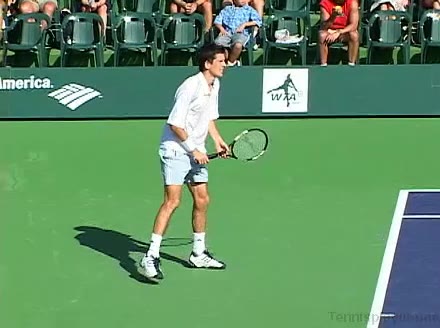
BH Slice Wide · Court-level-side #2
Tim Henman's backhand slice from a wide position, filmed from a court-level side angle. After contact his racquet finishes out in front with the non-hitting arm extending back for counterbalance as he transfers weight forward into a compact recovery step toward the center.
|
|
3.3s |
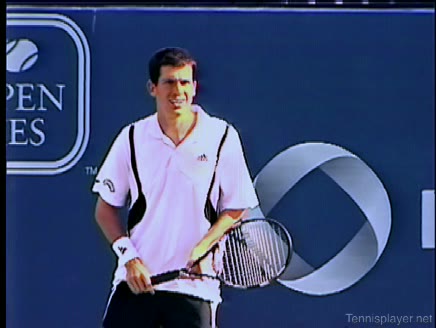
BH Slice Center · Arm-action · Front · 125fps
Tim Henman's backhand slice from the center of the court, filmed from the front. His continental grip is clearly visible, and the slow motion makes it easy to see the firm but relaxed wrist with minimal flexion as the racket glides through the ball.
|
125 |
3s |
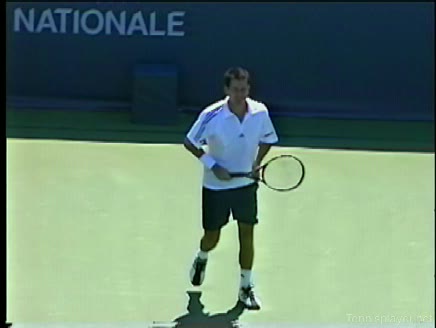
BH Slice Center · Front · 125fps
Tim Henman's backhand slice from the center of the court, filmed from the front at 125 fps. His shoulders rotate as a unit with the trunk into a compact coil, then uncoil in a measured sequence where the upper torso leads the racquet arm through contact.
|
125 |
2.9s |
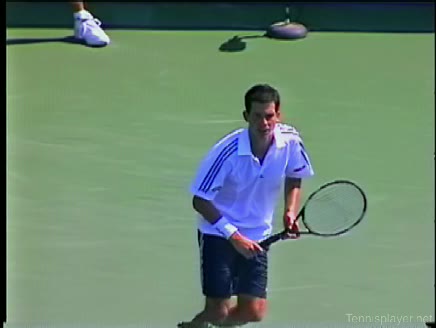
BH Slice Moves Back · Front · 125fps #1
Tim Henman's backhand slice while moving back from the baseline, filmed from the front. His shoulders stay markedly closed with a pronounced upper-body tilt, and the trunk uncoils late in the swing, giving a clear view of how his torso rotation trails the initial shoulder turn.
|
125 |
2.5s |
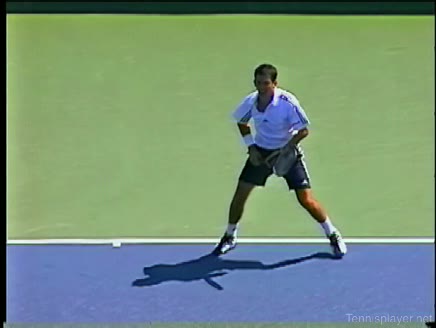
BH Slice Moves Back · Front · 125fps #2
Tim Henman’s backhand slice while moving back from a neutral position, filmed from the front at 125 fps. His continental grip stays firm with a slightly laid-back wrist, and you can clearly see the controlled, minimal wrist movement through contact to keep the slice stable.
|
125 |
2.7s |
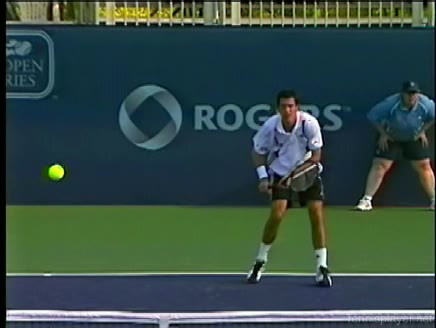
BH Slice Moves Back · Front · 125fps #3
Tim Henman's backhand slice while moving back from a neutral court position, filmed from a front angle. His shoulders stay closed longer than his hips as he retreats, with a pronounced upper-trunk tilt to his left that sets up a late uncoiling through contact.
|
125 |
2.1s |
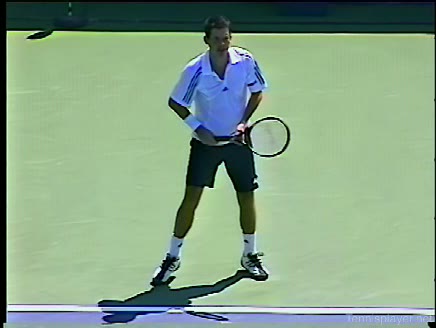
BH Slice Running · Front · 125fps #1
Tim Henman's running backhand slice from the front court position, filmed from a front angle. At contact his racket face is slightly open with the ball struck around waist height, and the racket travels on a distinct high-to-low path that keeps the head stable through impact.
|
125 |
2.9s |
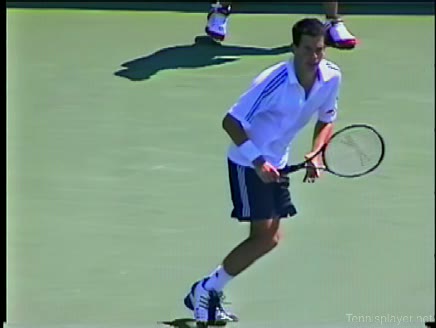
BH Slice Running · Front · 125fps #2
Tim Henman’s running backhand slice from the front, filmed from a court-level front angle in high-speed 125 fps. His hips stay relatively closed to the net while his outside leg plants with a pronounced knee bend, creating a low, stable base as he carves through the slice.
|
125 |
2.2s |
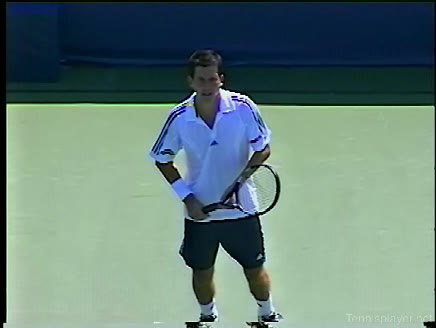
BH Slice Running · Front · 125fps #3
Tim Henman's running backhand slice from the middle of the court, filmed from a front angle. His footwork shows quick adjustment steps into a slightly closed stance, with his outside leg planting firmly before he carves the slice and then uses small recovery steps to regain court position.
|
125 |
2.9s |
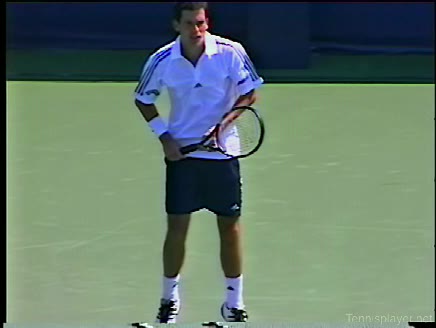
BH Slice Running · Front · 125fps #4
Tim Henman’s running backhand slice from the front, filmed from a court-level front angle. The racket face is noticeably open at contact with the ball taken around waist height, and the racket head tracks forward with a slightly downward path to impart underspin.
|
125 |
2.6s |
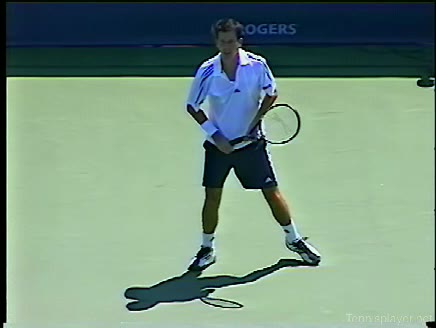
BH Slice Running · Front · 125fps #5
Tim Henman’s running backhand slice from the front, filmed from a court-level front angle in high-speed 125 fps. At contact his racket face is noticeably open with the ball struck around waist height, and the racket head moves on a pronounced high-to-low path creating clear underspin.
|
125 |
2.8s |
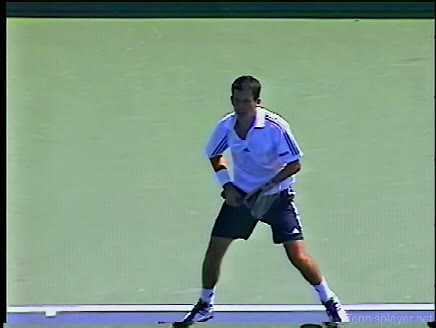
BH Slice Short · Arm-action · Front · 125fps
Tim Henman's backhand slice from the middle of the court, filmed from a front angle. His continental grip stays firm with minimal grip change, and you can see a stable wrist with slight laid-back extension maintained through contact to keep the racket face open.
|
125 |
2.5s |
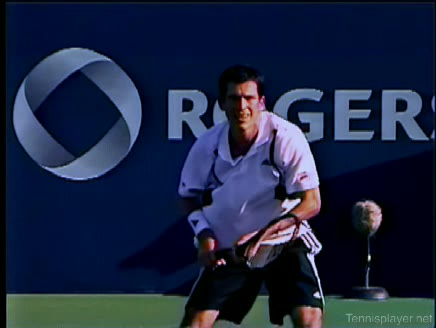
BH Slice Short · Arm-action · Front · 125fps
Tim Henman’s backhand slice from a central position, filmed from the front. His hips stay relatively closed to the net while his knees maintain a moderate bend, with the front leg bracing and the back leg lightly loading to support the compact arm action through the slice.
|
125 |
2s |
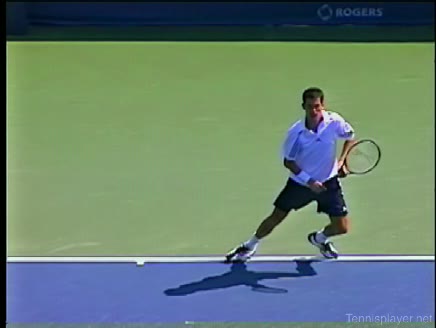
BH Slice Short · Front · 125fps
Tim Henman's backhand slice from the center of the court, filmed from the front. His stance stays mostly neutral with a pronounced shoulder turn, and his small adjustment steps set up a stable base before he slices through the ball.
|
125 |
2.2s |
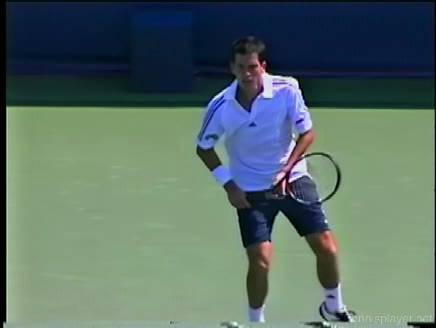
BH Slice Wide · Arm-action · Front · 125fps #2
Tim Henman's backhand slice from a wide position, filmed from the front. His hips stay relatively closed to the net while his knees maintain a moderate bend, giving a stable base as his weight shifts onto the outside leg during the slice.
|
125 |
2.8s |
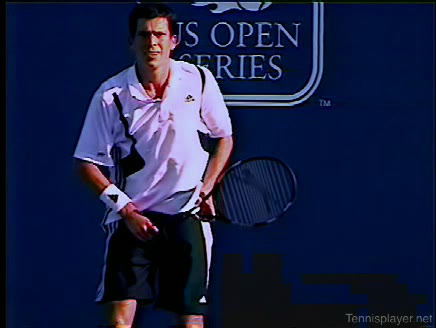
BH Slice Wide · Arm-action · Front · 125fps #1
Tim Henman’s backhand slice from a wide position, filmed from the front. His hips stay relatively closed with a pronounced knee bend on the outside leg, giving a stable base as he steps out wide and drives through the shot.
|
125 |
2.9s |
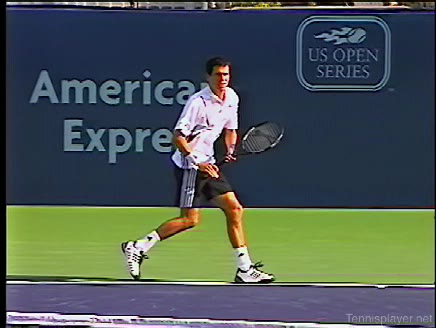
BH Slice Wide · Front · Closed · 125fps #1
Tim Henman’s backhand slice from a wide position in a closed stance, filmed from the front at 125 fps. His racket face is slightly open at contact with the ball around waist height, and the downward, slightly forward swing path is clearly visible.
|
125 |
2.3s |
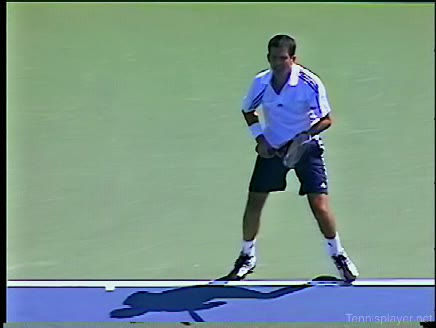
BH Slice Wide · Front · Closed · 125fps #2
Tim Henman's backhand slice hit wide from a closed stance, filmed from the front at 125 fps slow motion. His feet show a clear step-behind pattern into the closed stance, with a small adjustment step afterward to begin recovering back toward the center.
|
125 |
2.7s |
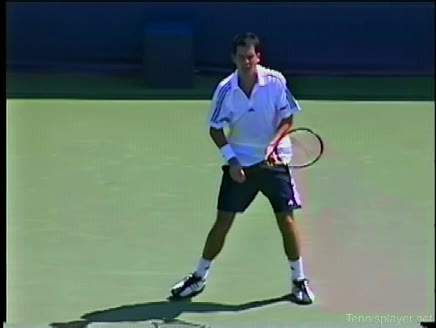
BH Slice Wide · Front · 125fps #1
Tim Henman's backhand slice from a wide position, filmed from the front. His hips stay relatively closed with a pronounced knee bend on the outside leg, creating a low, stable base as he steps out wide to the ball.
|
125 |
2.9s |
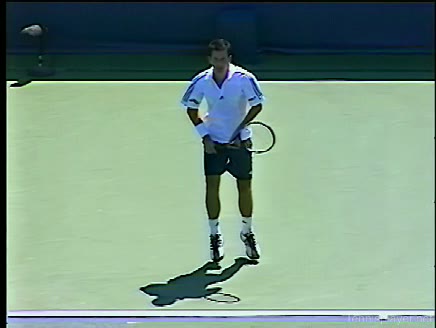
BH Slice Wide · Front · 125fps #2
Tim Henman’s backhand slice from a wide position, filmed from the front. His eastern backhand grip stays firm with a slightly laid-back wrist, and you can clearly see the racket face held stable through contact with minimal wrist roll.
|
125 |
2.3s |
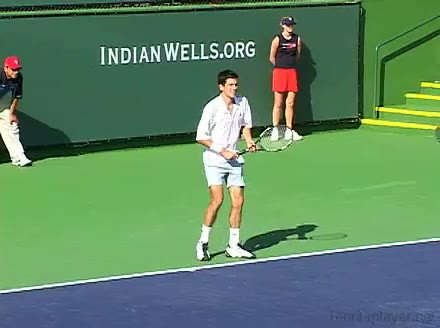
BH Slice · Arm-action · Front
Tim Henman's backhand slice from a central position, filmed from the front. The racket face is noticeably open at contact with the ball around waist height, and the swing path moves down and through with a firm, extended hitting arm.
|
|
2.9s |
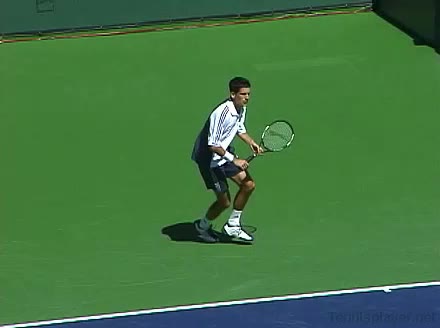
BH Slice Center · Front #1
Tim Henman's backhand slice from the center of the court, filmed from the front. His shoulders stay relatively closed with a pronounced upper-body tilt, and the trunk uncoils gradually through contact, giving a clear view of how the torso rotation lags slightly behind the initial shoulder turn.
|
|
2.8s |
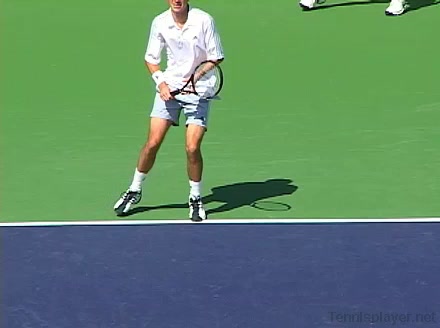
BH Slice Center · Front #2
Tim Henman's backhand slice from the center of the court, filmed from the front. At contact his racket face is slightly open with the ball struck around waist height, and the racket travels on a steep downward path that keeps the strings moving through the ball with a compact follow-through.
|
|
2.8s |
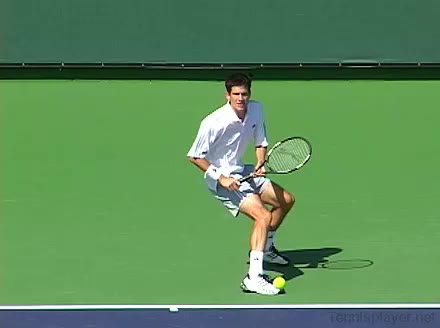
BH Slice Moves Back · Front
Tim Henman's backhand slice while moving back from a neutral court position, filmed from the front. His shoulders turn slightly past perpendicular to the net while the trunk stays compact, then uncoils in sync with the hitting arm to keep the slice trajectory low and controlled.
|
|
4.3s |
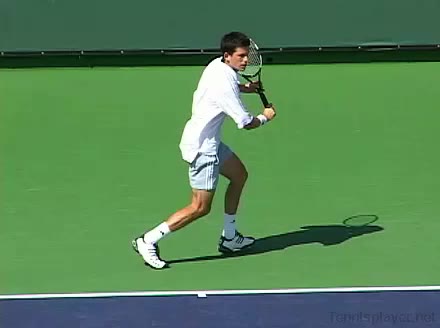
BH Slice Running · Front · Closed
Tim Henman's running one-handed backhand slice from a neutral court position in a closed stance, filmed from the front. After contact his racket continues on a low, extended path while his non-hitting arm counterbalances behind him as he regains his footing and starts to square up into a ready position.
|
|
2.6s |
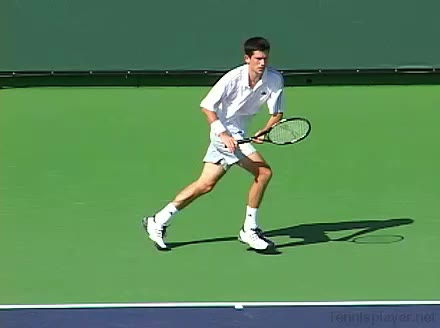
BH Slice Running · Front #1
Tim Henman's running backhand slice from the center of the court, filmed from the front. His footwork features quick adjustment steps into a slightly open stance, with a pronounced last plant on the outside leg before he carves the slice and continues his recovery.
|
|
2.9s |
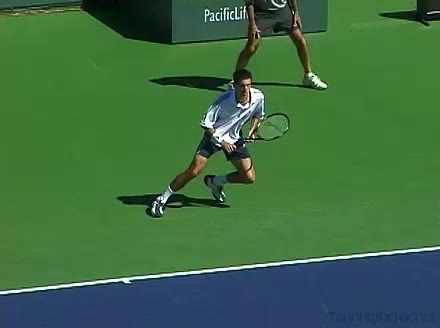
BH Slice Running · Front #2
Tim Henman’s running backhand slice from the front of the court, filmed from a front angle. After contact his racquet finishes out in front while his non-hitting arm extends back for counterbalance, and he quickly regains a neutral ready position with his weight moving back toward center.
|
|
3s |
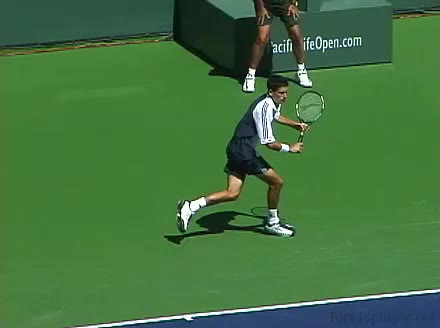
BH Slice Running · Front #3
Tim Henman's running backhand slice from the front court position, filmed from the front. His shoulders rotate early to set the racket face, then the trunk uncoils in a compact, slightly open alignment that stays stable through contact despite his forward momentum.
|
|
2.7s |
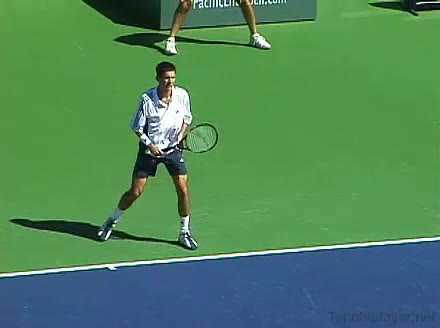
BH Slice Running · Front #4
Tim Henman’s running backhand slice from the front court position, filmed from a front angle. His continental grip stays firm with minimal grip change while the wrist remains laid back through the swing, creating a stable, slightly open racket face at contact.
|
|
2.9s |
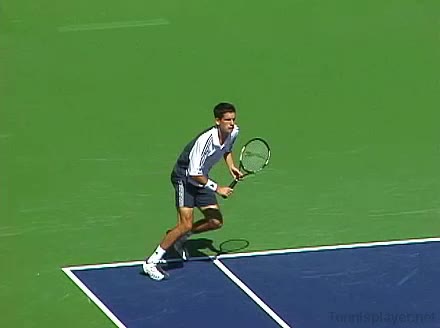
BH Slice Short · Front #1
Tim Henman's backhand slice from the middle of the court, filmed from the front. His hips stay relatively closed to the net while a pronounced knee bend and forward leg drive help him stay low through contact on the slice.
|
|
2.9s |
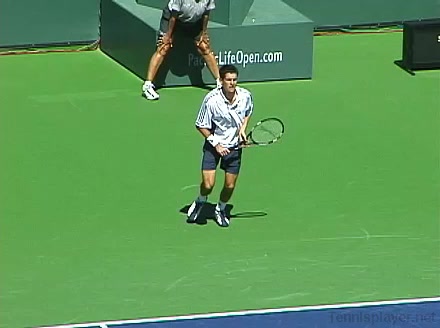
BH Slice Short · Front #2
Tim Henman's backhand slice from the center, filmed from the front. The racket face is noticeably open at a contact point around waist height, with a distinct downward and slightly forward swing path through the ball.
|
|
2.6s |
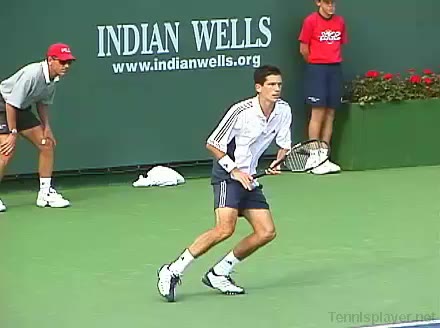
BH Slice Wide · Front · Closed #1
Tim Henman's backhand slice from a wide position on the court, filmed from the front. His closed stance is clear in the way his front hip stays pointed more toward the sideline while his knees are flexed, giving a stable base for the slicing motion.
|
|
3.2s |
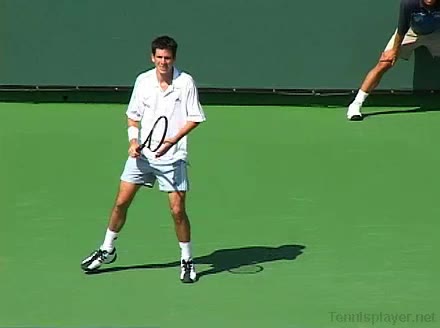
BH Slice Wide · Front · Closed #2
Tim Henman's one-handed backhand slice wide from a closed stance, filmed from the front. At contact, his racket face is slightly open with the ball struck around waist height as the racket moves on a distinctly downward and forward cutting path.
|
|
3.2s |
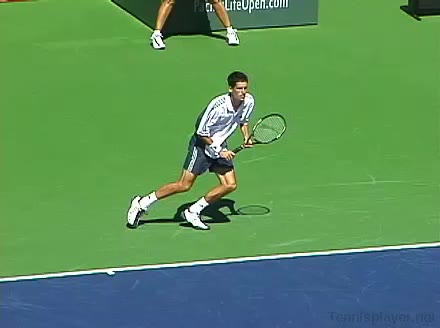
BH Slice Wide Cross Court · Front #1
Tim Henman's backhand slice from a wide position, filmed from the front. His shoulders stay relatively closed through contact while the trunk uncoils gradually, showing a delayed chest rotation toward the net after the racquet has already started its forward path.
|
|
3s |
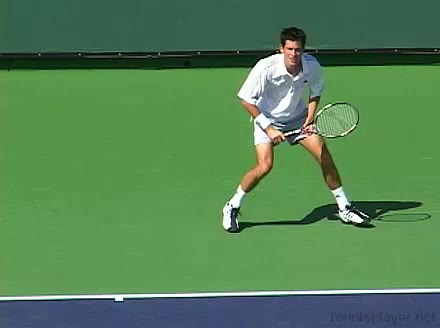
BH Slice Wide Down The Line · Front #1
Tim Henman's backhand slice from a wide position, filmed from the front. His footwork features a quick adjustment step out to the ball followed by a slightly closed stance, with his weight moving forward into the shot before a small recovery step back toward the center.
|
|
3.3s |
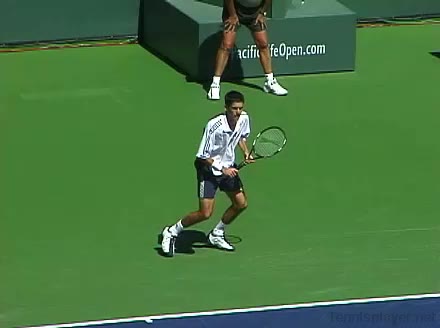
BH Slice Wide Down The Line · Front #2
Tim Henman's backhand slice from a wide position, filmed from the front. His shoulders turn slightly closed with a noticeable trunk tilt to the hitting side, and the uncoiling of his torso stays compact to keep the racquet face stable through the slice.
|
|
2.9s |
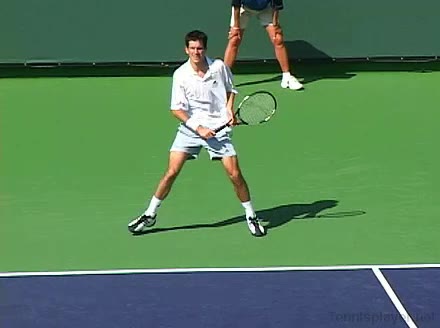
BH Slice Wide Down The Line · Front #3
Tim Henman's backhand slice from a wide position, filmed from the front. His follow-through finishes with the racquet face slightly open in front of his body as he transfers weight onto his front foot and quickly recovers toward a neutral ready position.
|
|
2.8s |
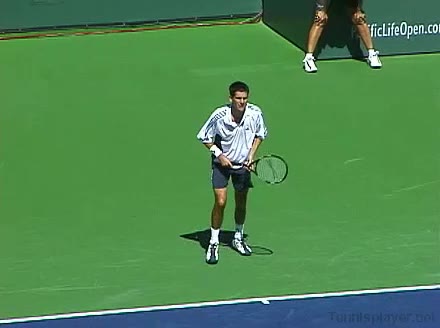
BH Slice Wide · Front
Tim Henman's backhand slice from a wide position, filmed from the front. His hips stay relatively closed with a pronounced knee bend on the outside leg, giving him a low, stable base as he carves the slice out wide.
|
|
3.3s |
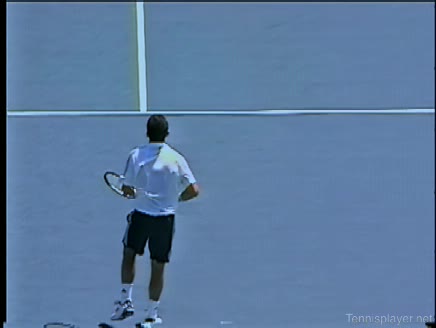
BH Slice Center · Rear · 125fps #1
Tim Henman’s backhand slice from the center of the court, filmed from a rear angle. His footwork includes a small adjustment hop into a closed stance, with a smooth crossover step through the shot and a quick recovery step back toward the middle.
|
125 |
2.8s |
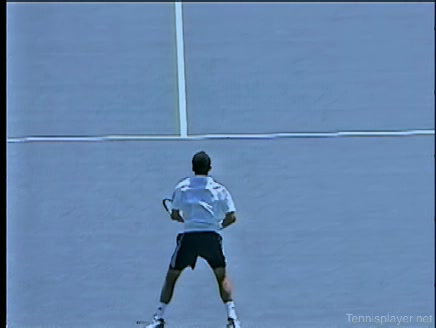
BH Slice Center · Rear · 125fps #2
Tim Henman's backhand slice from center court, filmed from a rear angle. His shoulders turn early to set the racquet path, with a pronounced upper-body tilt and controlled trunk rotation that unwinds gradually through contact.
|
125 |
2.2s |

BH Slice Center · Rear · 125fps #3
Tim Henman's backhand slice from the center of the court, filmed from a rear angle. His hips stay relatively closed with a pronounced knee bend on the outside leg, creating a low, stable base as he drives slightly forward through the slice.
|
125 |
2.6s |
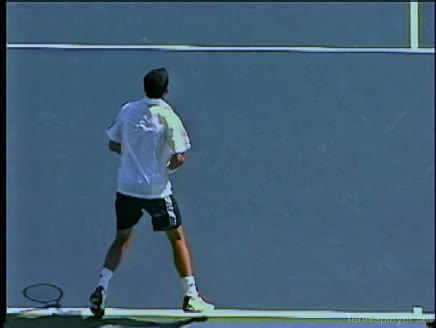
BH Slice Center · Rear · 125fps #4
Tim Henman's backhand slice from the center of the court, filmed from a rear angle in high-speed 125 fps slow motion. After contact, his racket finishes slightly in front of his body with the non-hitting hand extending back for counterbalance as he recovers toward a neutral ready position.
|
125 |
2.1s |
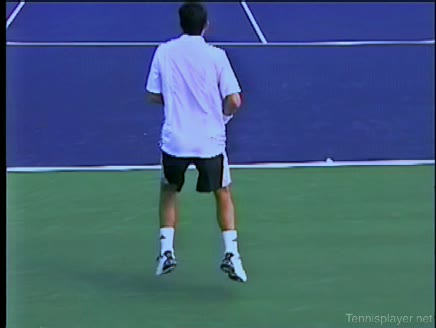
BH Slice Moves Back · Rear · 125fps #1
Tim Henman’s backhand slice while moving back from a neutral court position, filmed from a rear angle. His racket face is markedly open at contact with the ball struck around waist height, and the high-speed footage makes the downward, slightly across-the-body cutting motion of the racket head clearly visible.
|
125 |
2.8s |
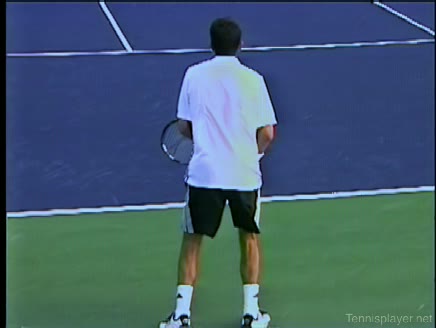
BH Slice Moves Back · Rear · 125fps #2
Tim Henman's backhand slice while moving back from a neutral court position, filmed from a rear angle. The racket face is noticeably open at contact with the ball taken around waist height, and the swing path travels on a pronounced downward-to-forward arc that keeps the racket head speed controlled through impact.
|
125 |
2.8s |
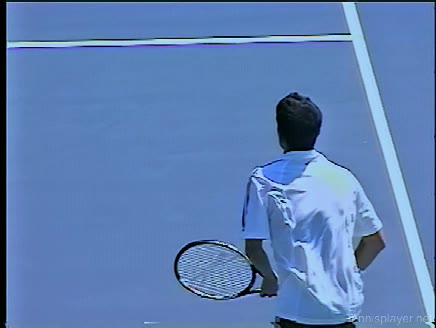
BH Slice Running · Arm-action · Rear · 125fps #1
Tim Henman's running backhand slice from a neutral court position, filmed from a rear angle in high-speed 125 fps. After contact his hitting arm extends fully through the line of the shot while his non-hitting arm counterbalances behind him, and he quickly regathers his feet into a compact ready position for the next ball.
|
125 |
2.7s |
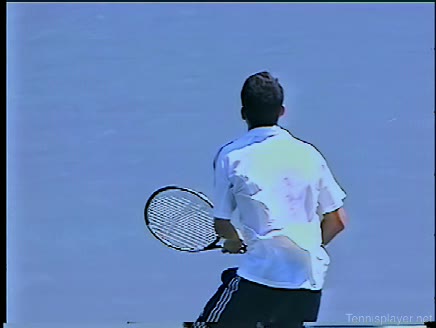
BH Slice Running · Arm-action · Rear · 125fps #2
Tim Henman’s running backhand slice from a neutral rear court position, filmed from a rear angle in high-speed 125 fps. After contact his hitting arm extends fully through the ball while his non-hitting arm counterbalances behind him, and he quickly brings both hands back toward his center to regain a compact ready position.
|
125 |
2.7s |
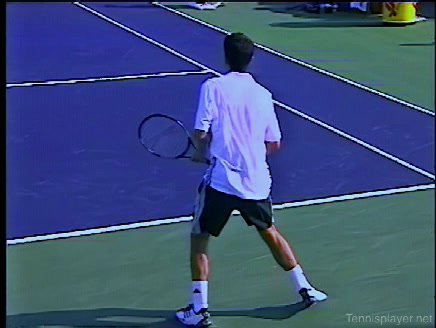
BH Slice Running · Rear · Closed · 125fps
Tim Henman's running backhand slice from the rear court, filmed from a rear angle in 125 fps slow motion. His closed stance is clear as his right foot crosses behind while moving wide, with quick adjustment steps before and a pronounced recovery step back toward the center after contact.
|
125 |
3.1s |
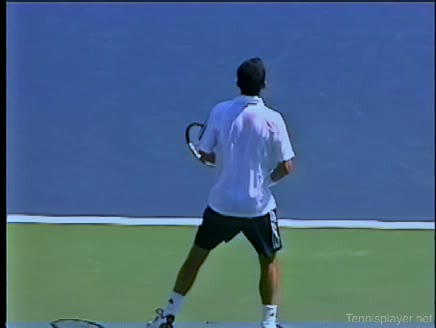
BH Slice Running · Rear · 125fps #1
Tim Henman’s running backhand slice from the Rear1 position, filmed from a rear angle. His hips stay relatively closed to the baseline while his outside knee bends deeply to support a low, skimming slice as his legs drive laterally toward the ball.
|
125 |
2.9s |
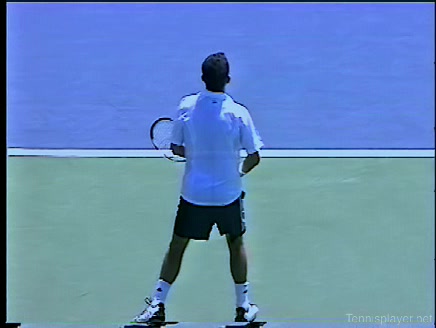
BH Slice Running · Rear · 125fps #2
Tim Henman's running backhand slice from a neutral court position, filmed from a rear angle in high-speed slow motion. His footwork shows a quick adjustment with small choppy steps into a slightly open stance, followed by a pronounced crossover recovery step back toward the center.
|
125 |
2.8s |

BH Slice Running · Rear · 125fps #3
Tim Henman's running backhand slice from the Rear 3 position, filmed from a rear angle. The racket face is noticeably open at contact with the ball taken around hip height, and the swing path moves down and through with a controlled, moderate racket head speed.
|
125 |
3.1s |
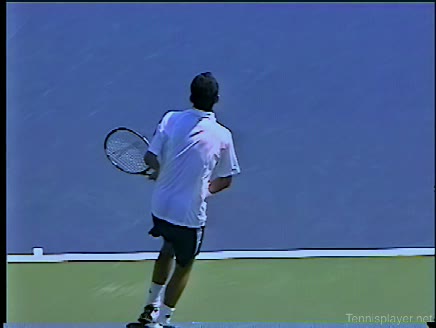
BH Slice Running · Rear · 125fps #4
Tim Henman's running backhand slice from a neutral court position, filmed from a rear angle. His eastern backhand grip stays firm while the wrist remains laid back, with a subtle downward knife-like motion through contact clearly visible in slow motion.
|
125 |
2.9s |
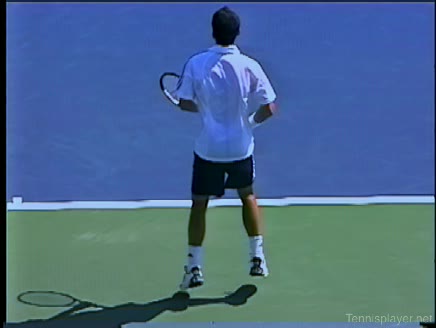
BH Slice Running · Rear · 125fps #5
Tim Henman’s running backhand slice from a neutral court position, filmed from a rear angle. After contact his racquet finishes out in front with the hitting arm extended while his weight continues moving through the shot into a balanced, sideways-on recovery stance.
|
125 |
2.9s |
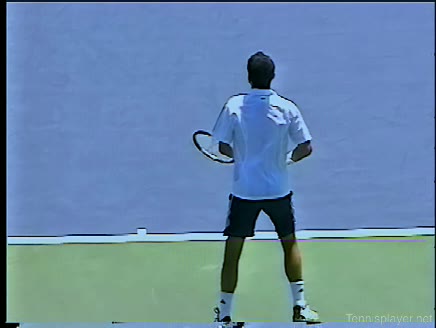
BH Slice Running · Rear · 125fps #6
Tim Henman's running backhand slice from a neutral court position, filmed from a rear angle. His shoulders rotate significantly with a pronounced upper-body coil, then uncoil in sequence as the trunk stays relatively closed through contact to keep the slice trajectory stable.
|
125 |
2.9s |
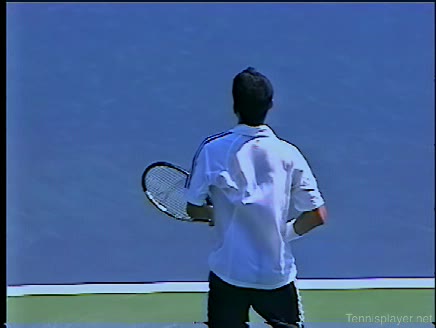
BH Slice Short · Arm-action · Rear · 125fps
Tim Henman’s backhand slice from the center of the court, filmed from a rear angle. His one-handed backhand grip stays in a firm continental position while the wrist remains relatively stable with a subtle laid-back angle through contact to keep the slice compact and controlled.
|
125 |
2.7s |
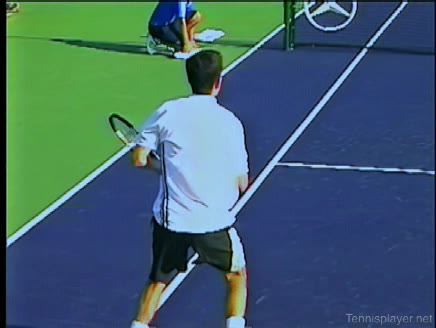
BH Slice Short Cross Court · Rear · 125fps #1
Tim Henman's backhand slice from the center of the court, filmed from a rear angle. His shoulders turn early with a pronounced upper-body coil, and the trunk uncoils smoothly through contact, with the chest staying slightly closed toward the sideline as the racquet tracks along the short cross-court line.
|
125 |
2.9s |
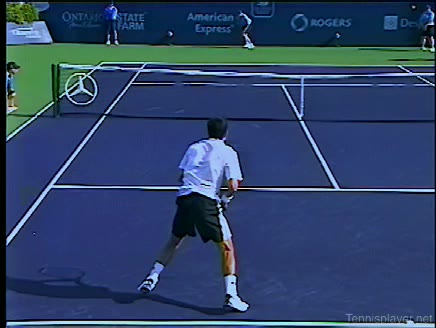
BH Slice Short Cross Court · Rear · 125fps #2
Tim Henman’s backhand slice from the deuce side, filmed from a rear angle in high-speed 125 fps slow motion. His racket face stays noticeably open at contact with the ball taken around waist height, and the racket travels on a pronounced high-to-low path that keeps the slice short and low cross-court.
|
125 |
2.5s |
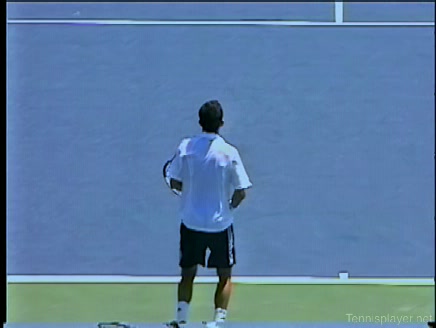
BH Slice Short Down The Line · Rear · 125fps #1
Tim Henman’s backhand slice down the line from a central baseline position, filmed from a rear angle in high-speed 125 fps slow motion. His footwork includes a small adjustment hop into a neutral stance, with his back leg stepping behind to load before he carves the slice and then takes a couple of recovery steps back toward the center.
|
125 |
2.4s |
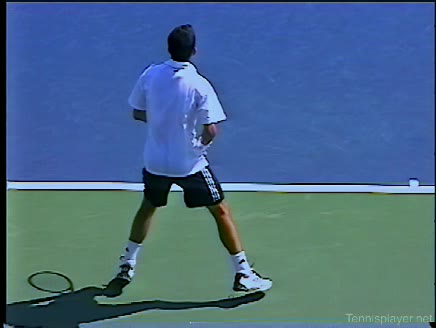
BH Slice Short Down The Line · Rear · 125fps #2
Tim Henman's backhand slice from the center of the court, filmed from a rear angle in high-speed 125 fps slow motion. After contact his racket continues on a slightly upward and forward arc while his left arm extends back for counterbalance, and he quickly brings both hands toward a compact ready position as his weight moves subtly forward.
|
125 |
2.2s |
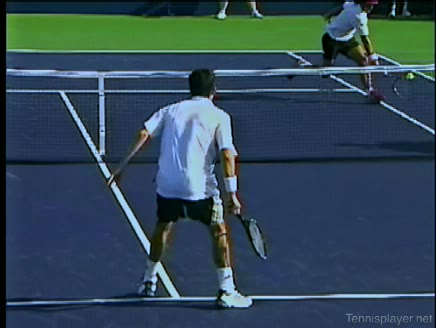
BH Slice Short Down The Line · Rear · 125fps #3
Tim Henman's backhand slice down the line from a neutral position, filmed from a rear angle in high-speed 125 fps. His shoulders rotate early to set the racket face, then the trunk uncoils in a controlled, gradual sequence that keeps the chest slightly closed through contact.
|
125 |
3.6s |
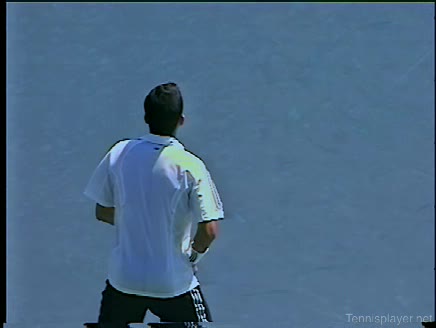
BH Slice Short · Rear · 125fps #1
Tim Henman's backhand slice from a neutral position, filmed from a rear angle. His hips stay relatively closed to the baseline while a pronounced knee bend on the outside leg supports a low, stable base through the slicing motion.
|
125 |
2.2s |
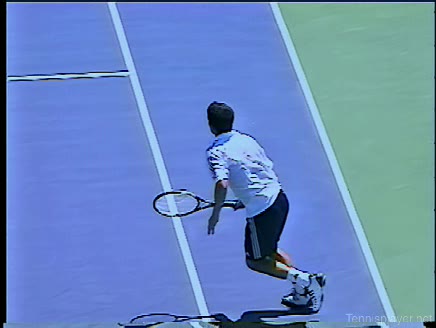
BH Slice Short · Rear · 125fps #2
Tim Henman’s backhand slice from a neutral court position, filmed from a rear angle in high-speed slow motion. After contact his racquet finishes slightly out in front with the non-hitting arm extending back for counterbalance as he recovers smoothly into a ready position.
|
125 |
2.3s |
BH Slice Wide · Arm-action · Rear · 125fps
Tim Henman's backhand slice from a wide position, filmed from a rear angle. His shoulders rotate early as the trunk coils against the hips, then uncoil in a measured sequence so the hitting shoulder leads the racquet through contact while the upper torso stays relatively closed.
|
125 |
2.3s |
BH Slice Wide · Arm-action · Rear · 125fps #2
Tim Henman’s backhand slice from a wide position, filmed from a rear angle. From this view, his continental grip stays firm while the wrist remains laid back through the swing, with a subtle downward knife-like action at contact.
|
125 |
2.2s |
BH Slice Wide · Arm-action · Rear · 125fps #3
Tim Henman’s backhand slice from a wide position, filmed from a rear angle. His footwork includes a small adjustment step out toward the ball followed by a closed-stance plant, with his weight transferring onto the front foot as he swings.
|
125 |
2.8s |

BH Slice Wide · Rear · 125fps #1
Tim Henman's backhand slice from a wide position, filmed from a rear angle. His follow-through extends out toward the sideline with the non-hitting arm counterbalancing behind him before he recovers back toward the center in a compact ready position.
|
125 |
2.6s |
BH Slice Wide · Rear · 125fps #2
Tim Henman's backhand slice from a wide position, filmed from a rear angle. His follow-through finishes with the racquet hand traveling out toward the target while his weight transfers to the front foot, quickly bringing both hands back toward a neutral ready position.
|
125 |
2.9s |
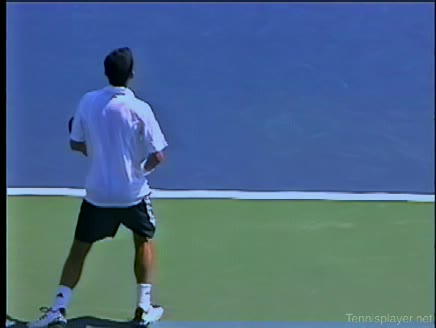
BH Slice Wide · Rear · 125fps #3
Tim Henman's backhand slice from a wide position, filmed from a rear angle. His continental grip is clearly visible, with a firm but relaxed hand and a stable wrist that stays laid back through contact to keep the racket face consistently open.
|
125 |
2.8s |
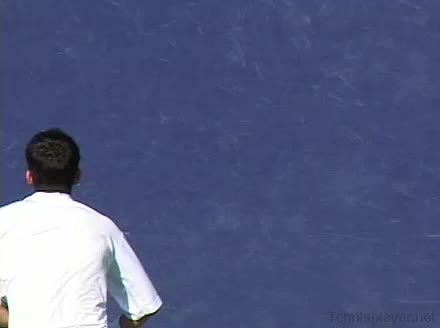
BH Slice · Arm-action · Rear
Tim Henman's backhand slice from a central court position, filmed from the rear. His follow-through finishes with the racquet hand traveling out in front while his non-hitting arm counterbalances behind him, setting him up to recover smoothly back toward a neutral ready position.
|
|
3.1s |
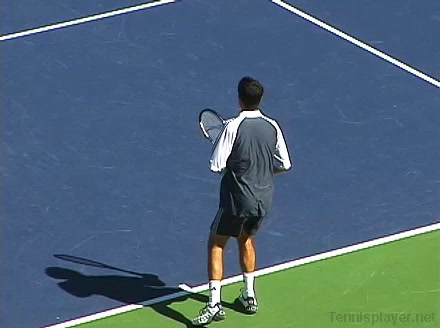
BH Slice Center · Rear #1
Tim Henman's backhand slice from the center of the court, filmed from a rear angle. He sets up in a neutral stance with a small adjustment step before the swing, then uses a couple of quick recovery steps to return to his ready position after contact.
|
|
3.3s |
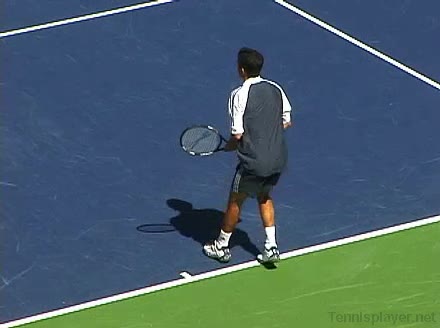
BH Slice Center · Rear #2
Tim Henman's backhand slice from the center of the court, filmed from a rear angle. His racket face is slightly open at contact with the ball around waist height, and the racket moves on a pronounced high-to-low path that keeps the shot low and skidding.
|
|
2.9s |
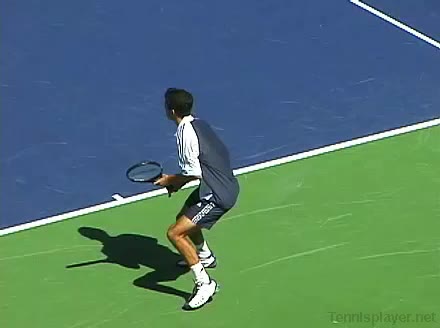
BH Slice Moves Back · Rear #1
Tim Henman's backhand slice while moving back from a neutral court position, filmed from the rear. His footwork features small adjustment steps as he retreats and sets up in a slightly open stance, with his weight shifting onto the outside leg before slicing through the ball.
|
|
3s |
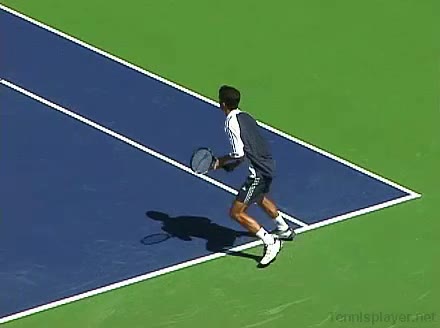
BH Slice Moves Back · Rear #2
Tim Henman's backhand slice while moving back from a neutral position, filmed from a rear angle. The racket face stays noticeably open at contact with the ball taken around waist height, and the swing path is predominantly downward with a controlled, decelerating follow-through.
|
|
3.7s |
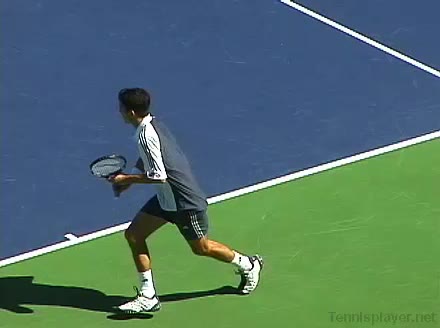
BH Slice Running · Rear #1
Tim Henman's running backhand slice from the Rear court position, filmed from a rear angle. At contact his racket face is slightly open with the ball struck around waist height, and the racket head traces a distinctly downward cutting path through the ball.
|
|
2.7s |
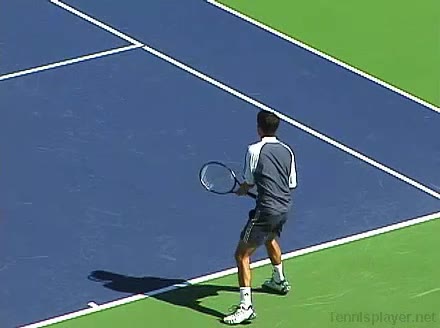
BH Slice Running · Rear #2
Tim Henman's running backhand slice from a neutral court position, filmed from the rear. His one-handed slice uses a continental grip with a noticeably firm wrist that stays laid back through contact, minimizing wrist hinge for a stable, skidding ball.
|
|
3.3s |
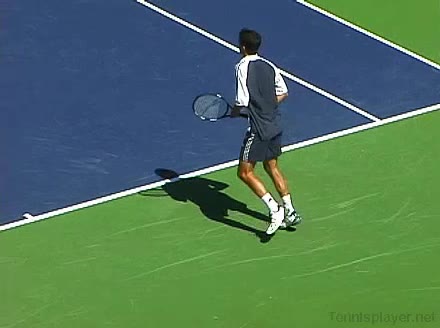
BH Slice Running · Rear #3
Tim Henman's running backhand slice from the Rear side, filmed from a rear angle. His hips stay relatively closed to the baseline while his outside knee bends deeply to support a long, low stride into the shot.
|
|
2.6s |

BH Slice Running · Rear #4
Tim Henman's running backhand slice from the rear court, filmed from a rear angle. His hips stay relatively closed to the baseline while his outside leg plants and bends deeply, providing a stable base as he reaches and carves through the slice.
|
|
3.4s |
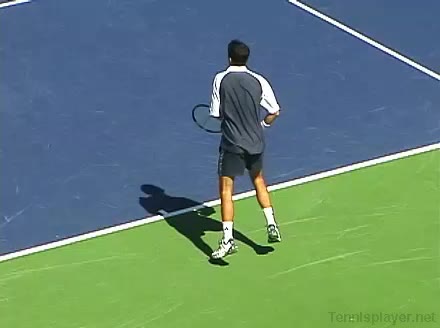
BH Slice Short Down The Line · Rear
Tim Henman's backhand slice down the line from a neutral position, filmed from the rear. His follow-through finishes with the racquet hand extended out front while his weight transfers onto the front foot, quickly bringing his non-hitting hand back to center as he recovers toward a ready position.
|
|
3s |
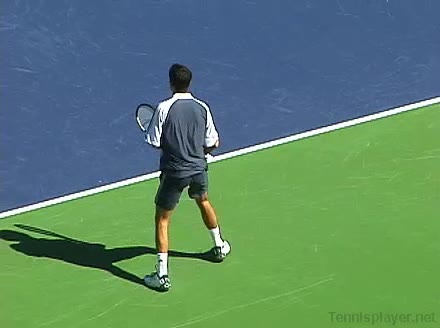
BH Slice Short · Rear #1
Tim Henman's backhand slice from the center of the court, filmed from a rear angle. His continental grip stays firm with a slightly laid-back wrist, creating a stable racket face through contact.
|
|
2.9s |
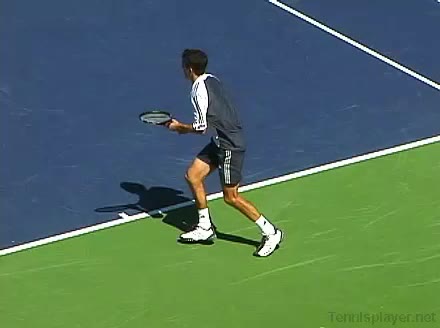
BH Slice Short · Rear #2
Tim Henman's backhand slice from the center of the court, filmed from a rear angle. His shoulders rotate early to set the racquet path, with a pronounced upper-body tilt and controlled trunk uncoil driving the slicing motion through contact.
|
|
2.6s |

BH Slice Wide · Rear · Closed
Tim Henman's one-handed backhand slice from a wide position in a closed stance, filmed from the rear. From this angle you can clearly see his continental grip stay firm while his wrist remains stable with a subtle laid-back angle through contact to keep the slice low and controlled.
|
|
2.8s |
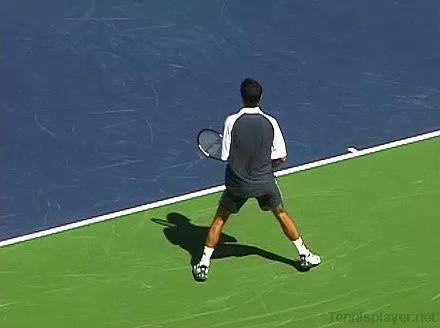
BH Slice Wide Cross Court · Rear #1
Tim Henman's backhand slice from a wide court position, filmed from a rear angle. His shoulders rotate as a unit with the trunk on the takeback, then uncoil in a controlled sequence with the hitting shoulder leading slightly ahead of the hips through contact.
|
|
2.8s |
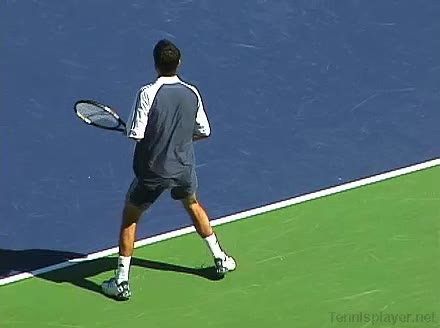
BH Slice Wide Cross Court · Rear #2
Tim Henman's backhand slice from a wide court position, filmed from a rear angle. His footwork features a quick adjustment step out toward the sideline followed by a closed stance, with a clear recovery step back toward the center after contact.
|
|
2.9s |
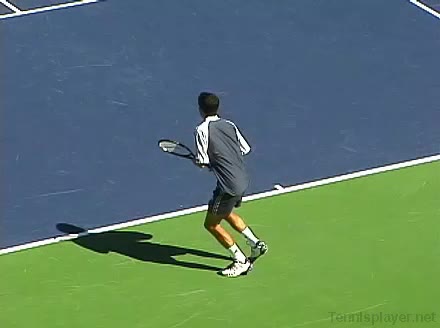
BH Slice Wide Cross Court · Rear #3
Tim Henman's backhand slice from a wide position, filmed from a rear angle. His footwork features a quick adjustment step out toward the sideline and a slightly closed stance, with a pronounced recovery step back toward the center after contact.
|
|
3s |
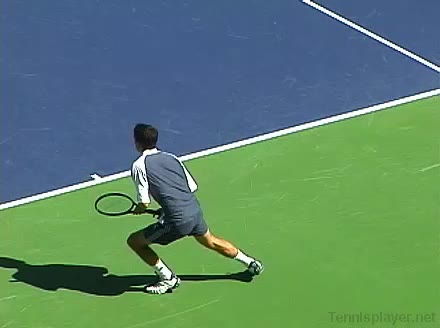
BH Slice Wide · Rear · Open
Tim Henman's backhand slice from an open stance, hit to a wide target, filmed from a rear angle. At contact his racket face is slightly open with the ball struck around waist height, and the racket path moves on a clear high-to-low arc that keeps the head stable through impact.
|
|
3s |
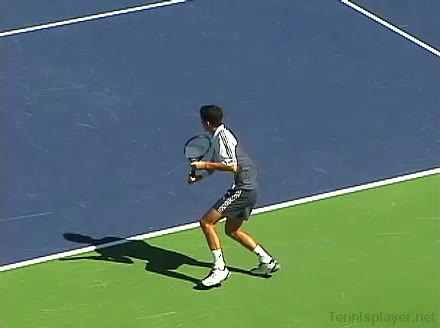
BH Slice Wide · Rear #1
Tim Henman's backhand slice from a wide position, filmed from a rear angle. His follow-through extends out toward the sideline with his non-hitting arm counterbalancing behind him before he recovers back toward the center.
|
|
2.6s |
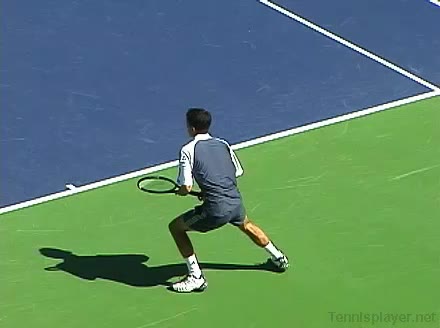
BH Slice Wide · Rear #2
Tim Henman's one-handed backhand slice from a wide position, filmed from a rear angle. From this view, his continental grip is evident with a firm but relaxed hand, and his wrist stays laid back through the swing with a subtle downward carve at contact to keep the slice low.
|
|
2.9s |
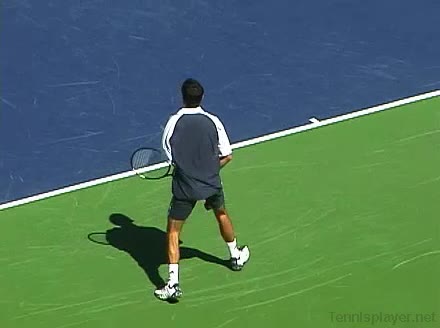
BH Slice Wide · Rear #3
Tim Henman's backhand slice from a wide position, filmed from a rear angle. His hips stay relatively closed with a pronounced knee bend on the outside leg, providing a stable base as he carves around the ball.
|
|
2.7s |
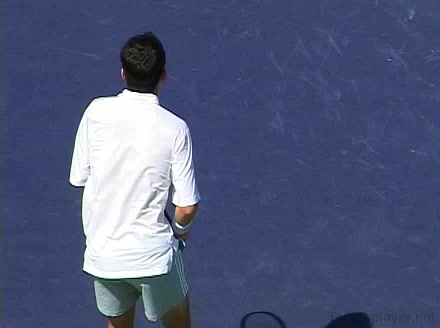
BH Slice Wide · Rear #4
Tim Henman’s backhand slice from a wide position, filmed from a rear angle. After contact, his racquet finishes slightly out in front as his weight recovers back toward center, with his non-hitting arm extending behind him to aid his upper body rotation into a ready position.
|
|
3.2s |
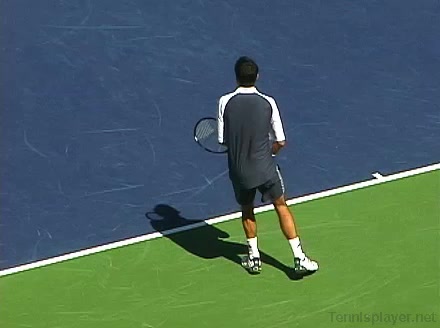
BH Slice Wide · Rear #5
Tim Henman's backhand slice from a wide position, filmed from a rear angle. His shoulders turn significantly sideways to the baseline, with a pronounced trunk coil that then uncoils smoothly as the racquet tracks along a low, skimming path through the slice.
|
|
2.8s |
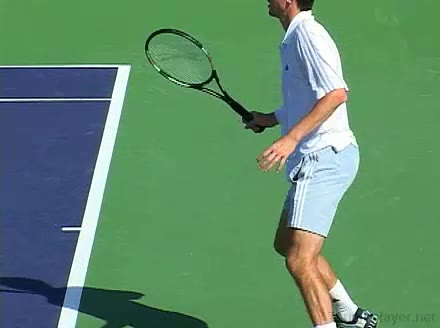
BH Slice · Arm-action · Side #1
Tim Henman’s backhand slice from the side, filmed from a side angle. His hips stay relatively closed with a pronounced knee bend on the front leg, giving a low, stable base as he drives laterally through the shot.
|
|
3.6s |

BH Slice · Arm-action · Side #2
Tim Henman's backhand slice from a central baseline position, filmed from the side. He sets up in a neutral stance with a small adjustment step before contact, keeping his weight moving slightly forward through the shot.
|
|
2s |
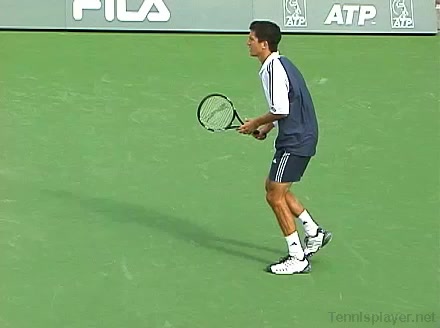
BH Slice Center · Side
Tim Henman's backhand slice from center court, filmed from the side. His knees stay softly flexed with a pronounced hip hinge as he moves into the shot, with the back leg trailing and the hips remaining relatively closed through contact.
|
|
3s |
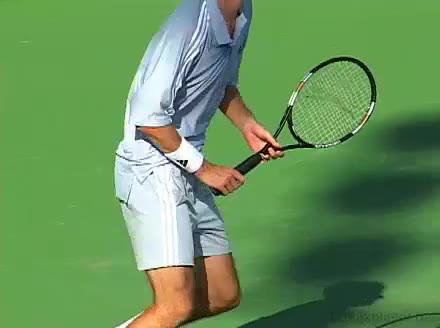
BH Slice Short · Arm-action · Side
Tim Henman's backhand slice from a neutral court position, filmed from the side. His hips stay relatively closed with a pronounced knee bend on the loading leg, and he drives slightly forward off his back leg as the slicing arm swings through.
|
|
2.8s |