
How To Build A Beautiful Serve:
Part 4
By Chris Lewit
In Part 3 of the Winning Pretty series on the serve (click here), I went over the lower and upper body check points, as well a 5 stage method for serving the Winning Pretty way. In Part 4, we will conclude by going over the finish as well as the "Three Stop" model for serving. 10 more drills are provided to help develop your serve.
5. Finish
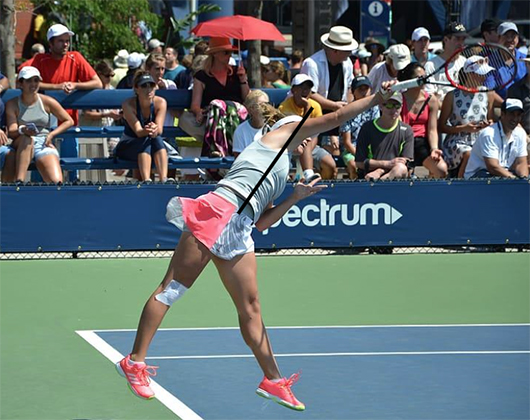
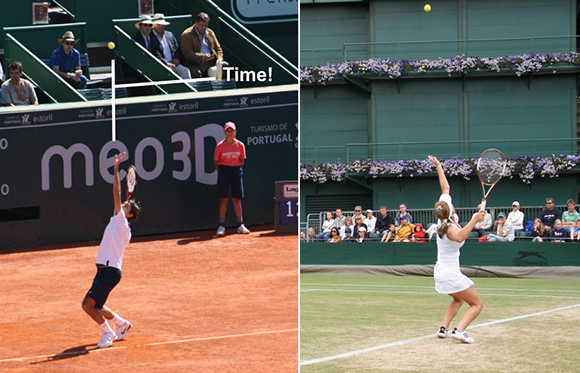
I spend a lot of time on the finishing details trying to help the player feel the correct amount of body lean forward into the court, the scorpion move kickback, and following-through near to the left pocket area. Research shows the upper body lean forward is about 45 degrees to horizontal in elite servers (1). In my experience, holding the scorpion pose for a few seconds as an exaggeration is a great way to work on balance, stability and athleticism.
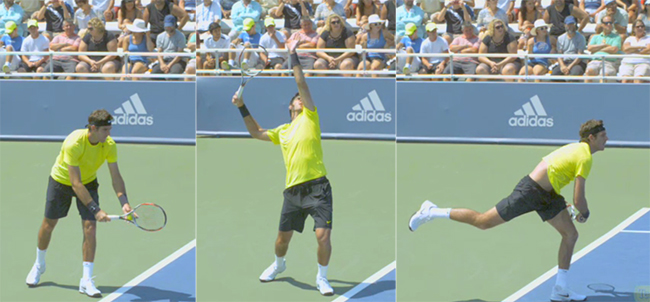
The Three Stops
The three stop method has helped my students tremendously over the years and can assist the player in correctly synchronizing the racquet drop with the leg drive. The first stop is the start position. The second stop is the power position or L-shape. The third stop is the finish. I have found that people reinforcing the first stop creates a calm, organized start. Focusing on the second stop can help prevent the racquet from dropping behind the back too early. The third stop reinforces balance and stability on landing after the explosion.
Tossing Higher Is Better When Learning the Serve
While tossing lower can be beneficial for disguise, efficiency, and fluidity for advanced servers, in my experience, tossing very high can help a player by giving him more time to execute the critical stages of the serve technique. Tossing higher allows the player time to work on the second stop, which is storing energy in the power position.
Jumping is Important
For many years, leading coaches and teaching organizations discouraged teaching jumping. I believe "jumping" is a simple and helpful term and skill to use with players. I like to teach jumping by loading the back leg and coiling the trunk—then exploding up to the impact. I also like to train the stable landing mechanics after the jump so players can lock in the technical check points on the landing.
Practice Drills
Create Fluidity
Once the three stops are mastered and the details in the stages look good, the entire motion can be enhanced with better rhythm and flow, if desired. I use two drills called the windmill and figure eight to work on flow. Fluidity helps to make a pretty serve!
The Windmill
The windmill is one of my favorite, classic drills for developing a fluid serve motion. The windmill teaches students rhythm, fluidity, and continuous motion. It elegantly brings all the technical elements together into one cohesive working motion. I like players to practice the Windmill just before and during serve practice. I have my players do dozens of repetitions until the arm and related shoulder musculature are very tired. There are many variations. For example, start with 10 shadow repetitions, then hit one serve. As the player grows stronger and more coordinated, titrate down to 5 repetitions, 3 repetitions and finally only 1 shadow repetition before the serve with the ball.
Try to keep all the technical elements in check during this drill while keeping the motion smooth, flowing, and continuous. There is no use practicing this motion without hitting all the checkpoints.
Scorpion Pose
Practicing the scorpion finish on the serve can help develop strength and stability in the back, core, and front leg, hip mobility, and proprioception about where the various elements of the body should be after contact. Get that balanced landing for a pretty finish!
This concludes Part 4. Stay tuned for the conclusion of the The Beautiful Biomechanics of the Power Server where Chris, "The Serve Doctor", answers the questions he most frequently gets asked by parents and students!